Sendapp Cloud User Guide
Designed for small and medium-sized companies,
to revolutionize communication with customers.
Instructions for use SendApp
Creazione dell’account Sendapp Cloud
-Choose the plan that best suits your needs or opt for the free trial period.
-Access the interface of Sendapp Cloud to start setting up your account.
Aggiunta dell’account WhatsApp
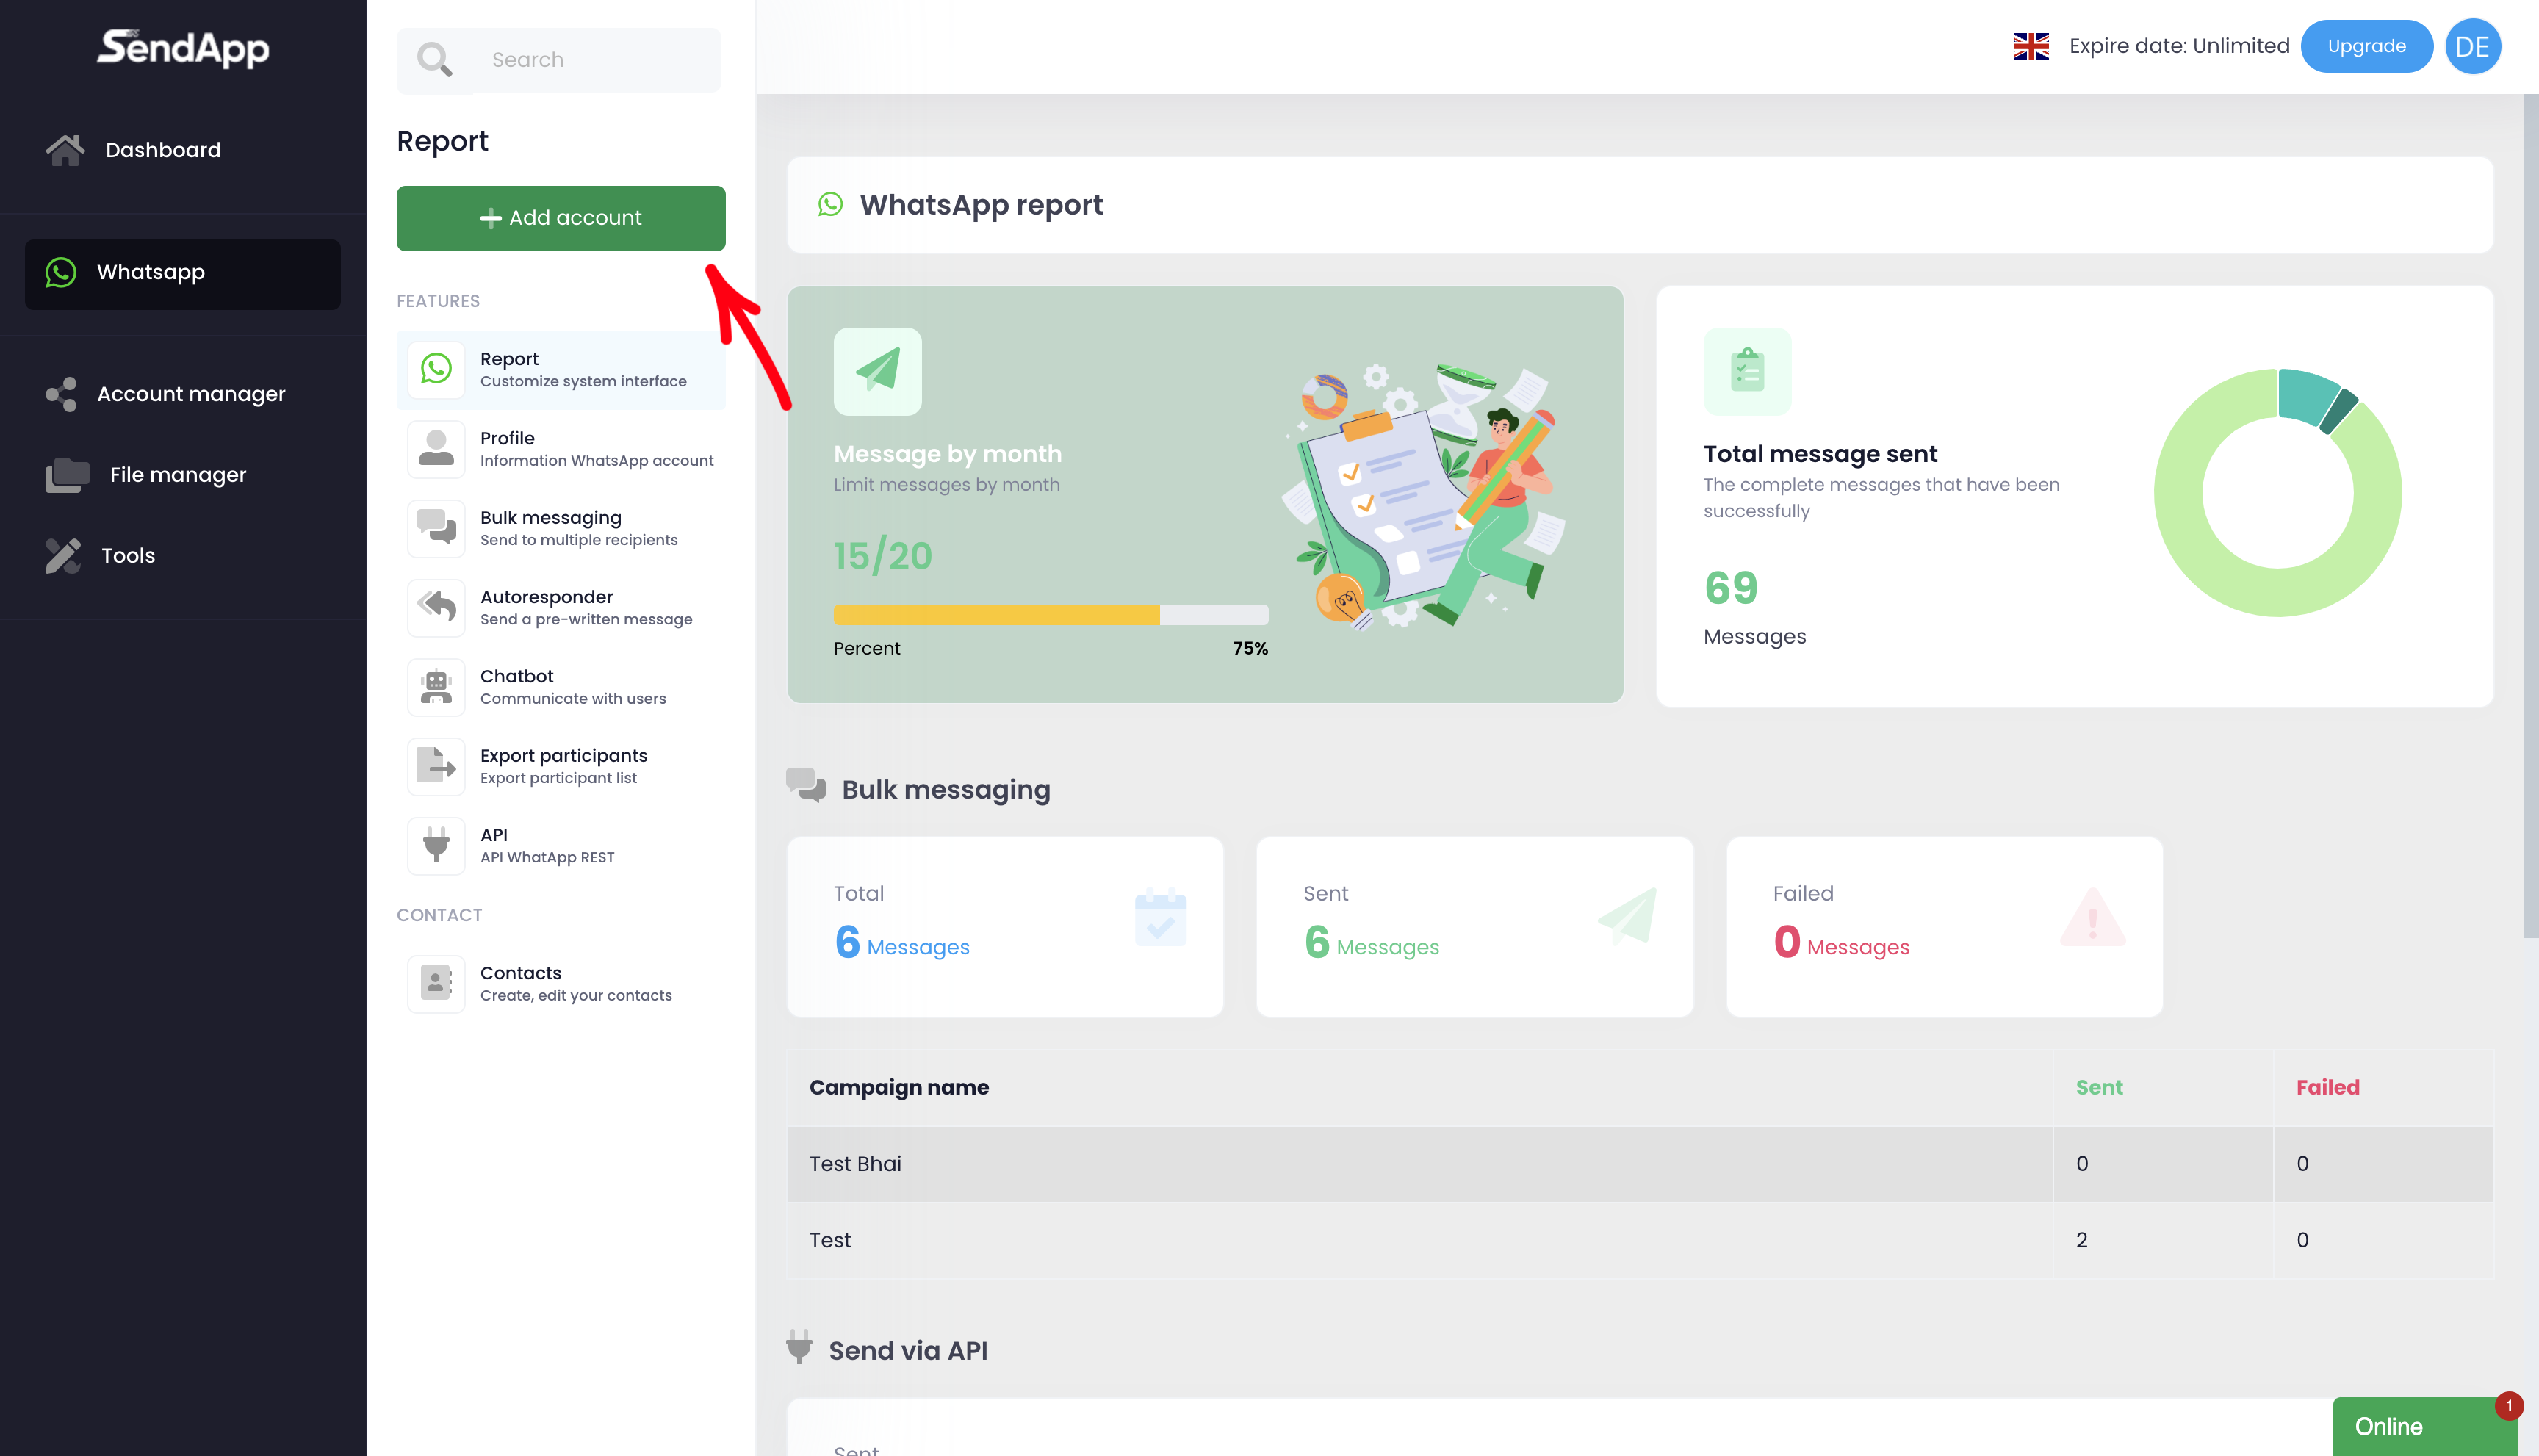
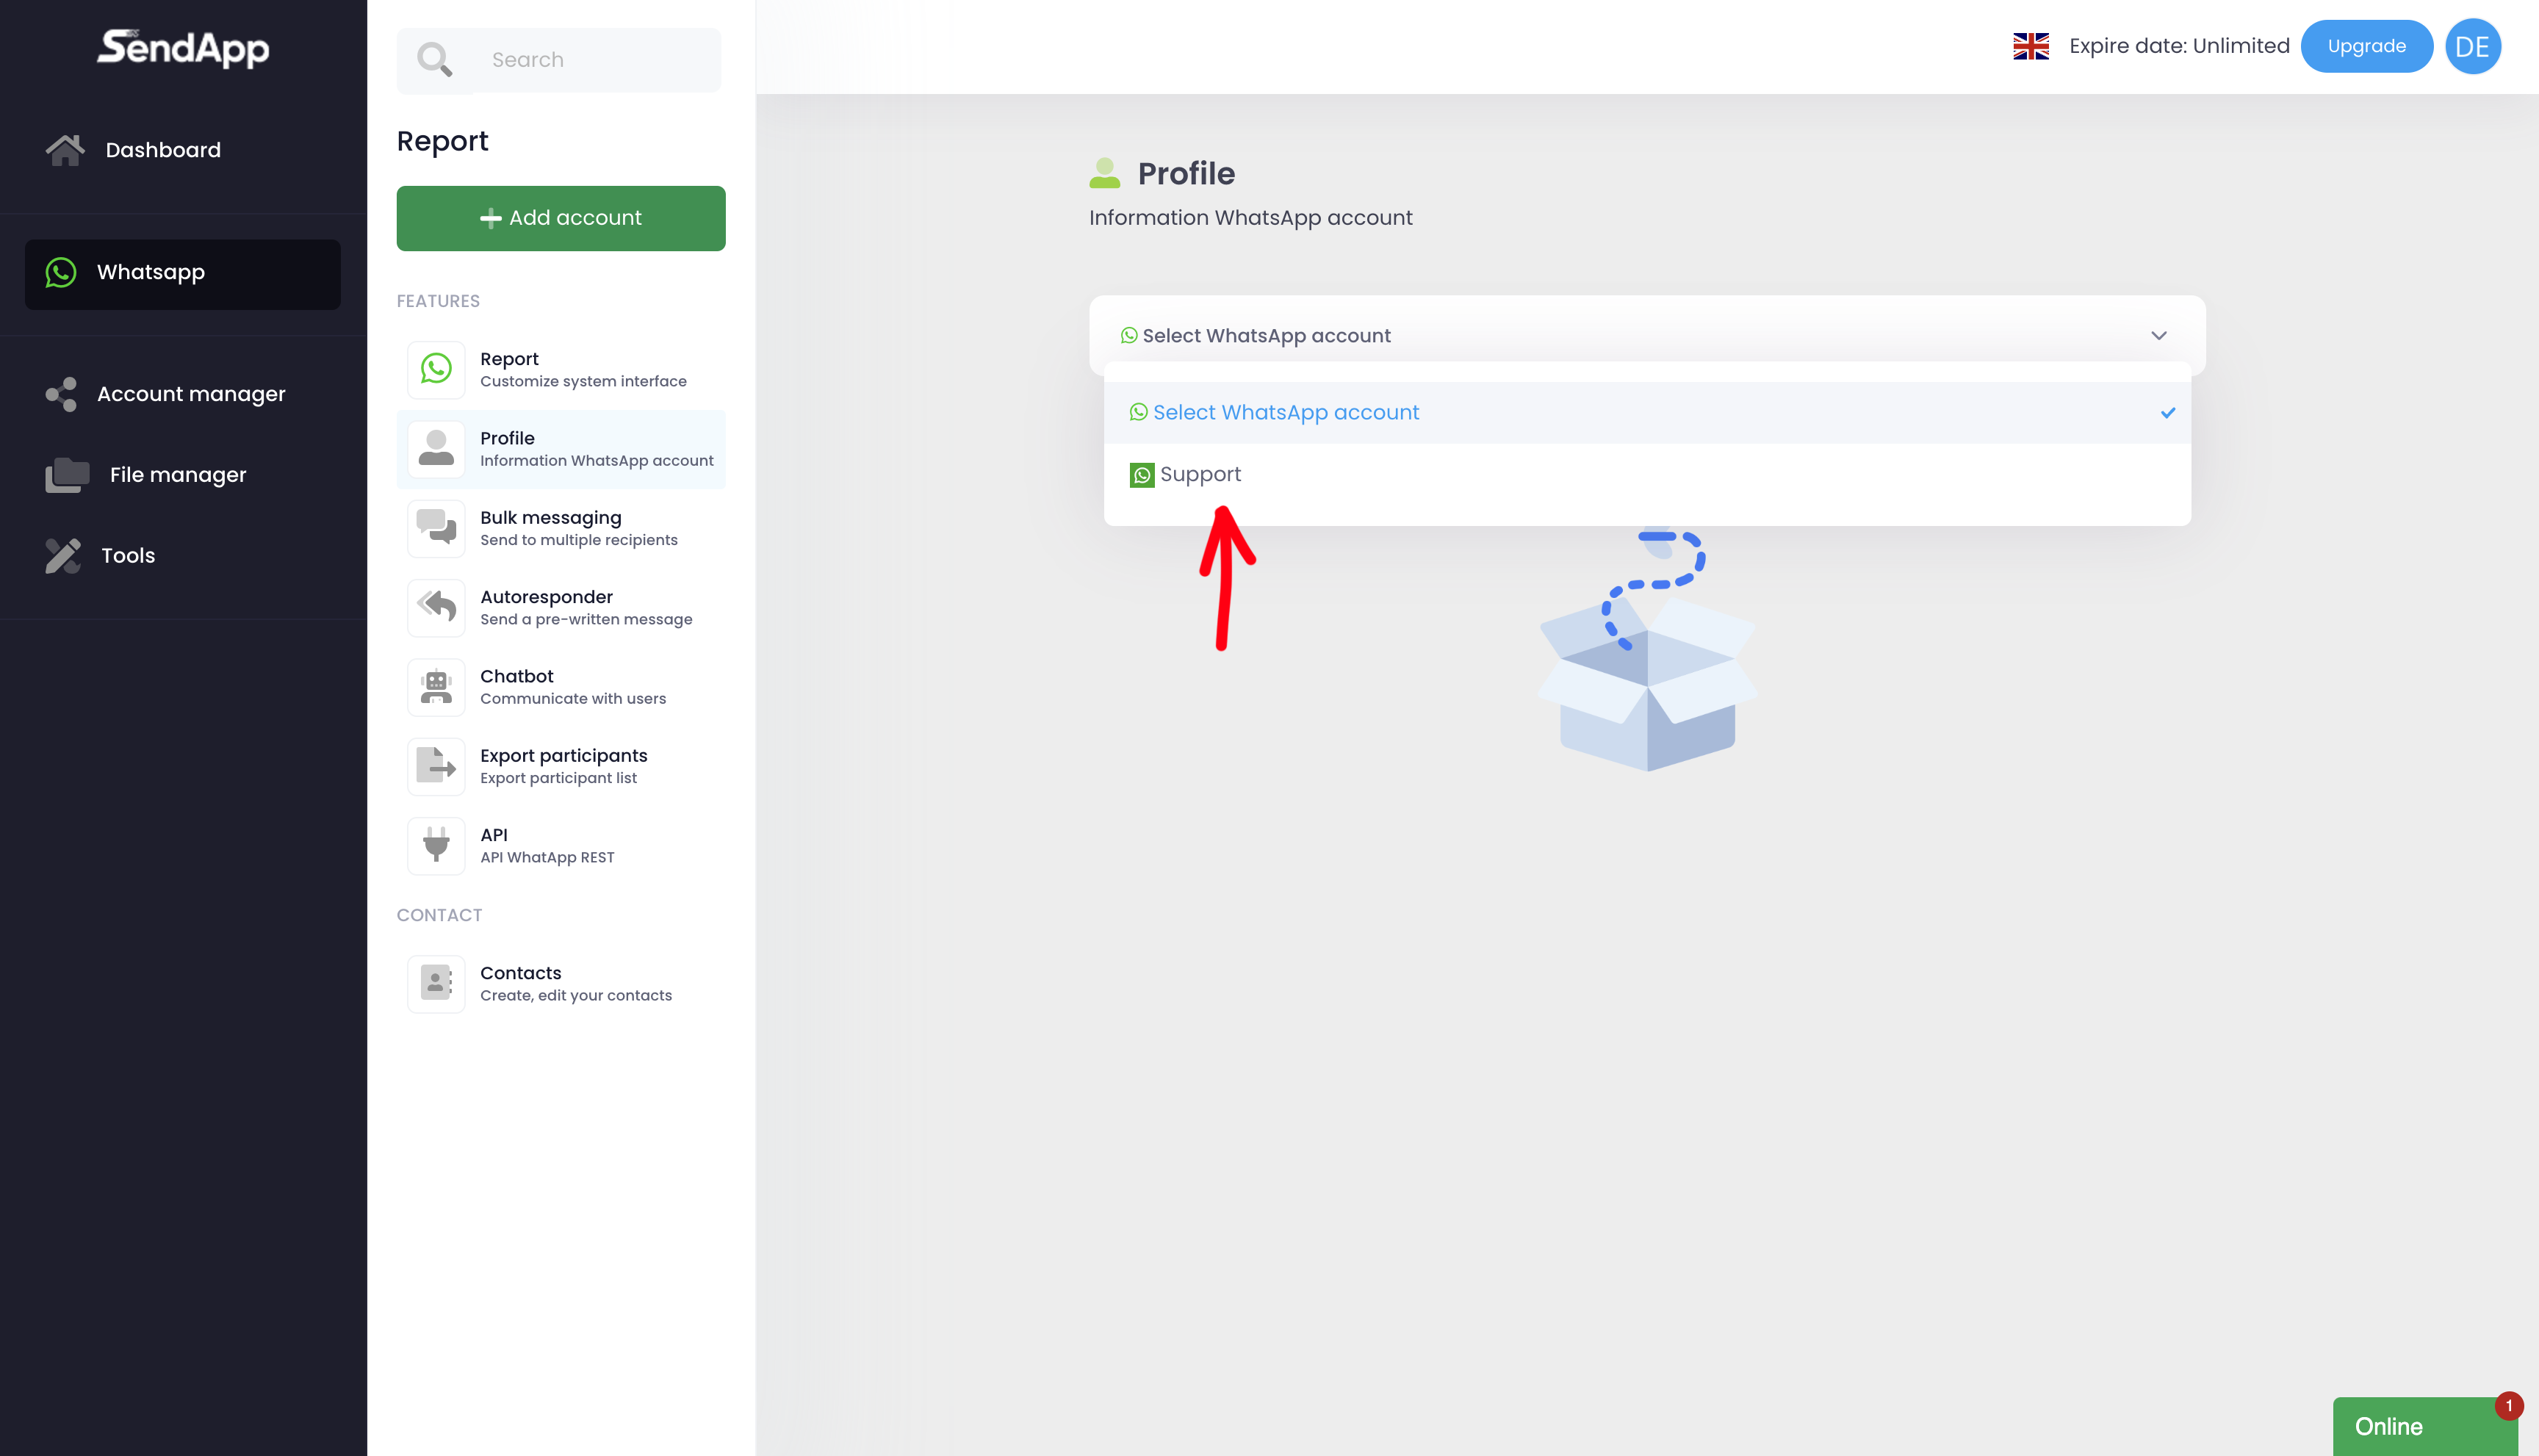
-Go to the section Whatsapp and click on Add Account.
-Scan the QR-Code generated with the WhatsApp app on your phone.
-Once the scan is complete, the WhatsApp account will be displayed on Sendapp Cloud.
-Select the account Just added as main to start using it.
Creazione della rubrica contatti
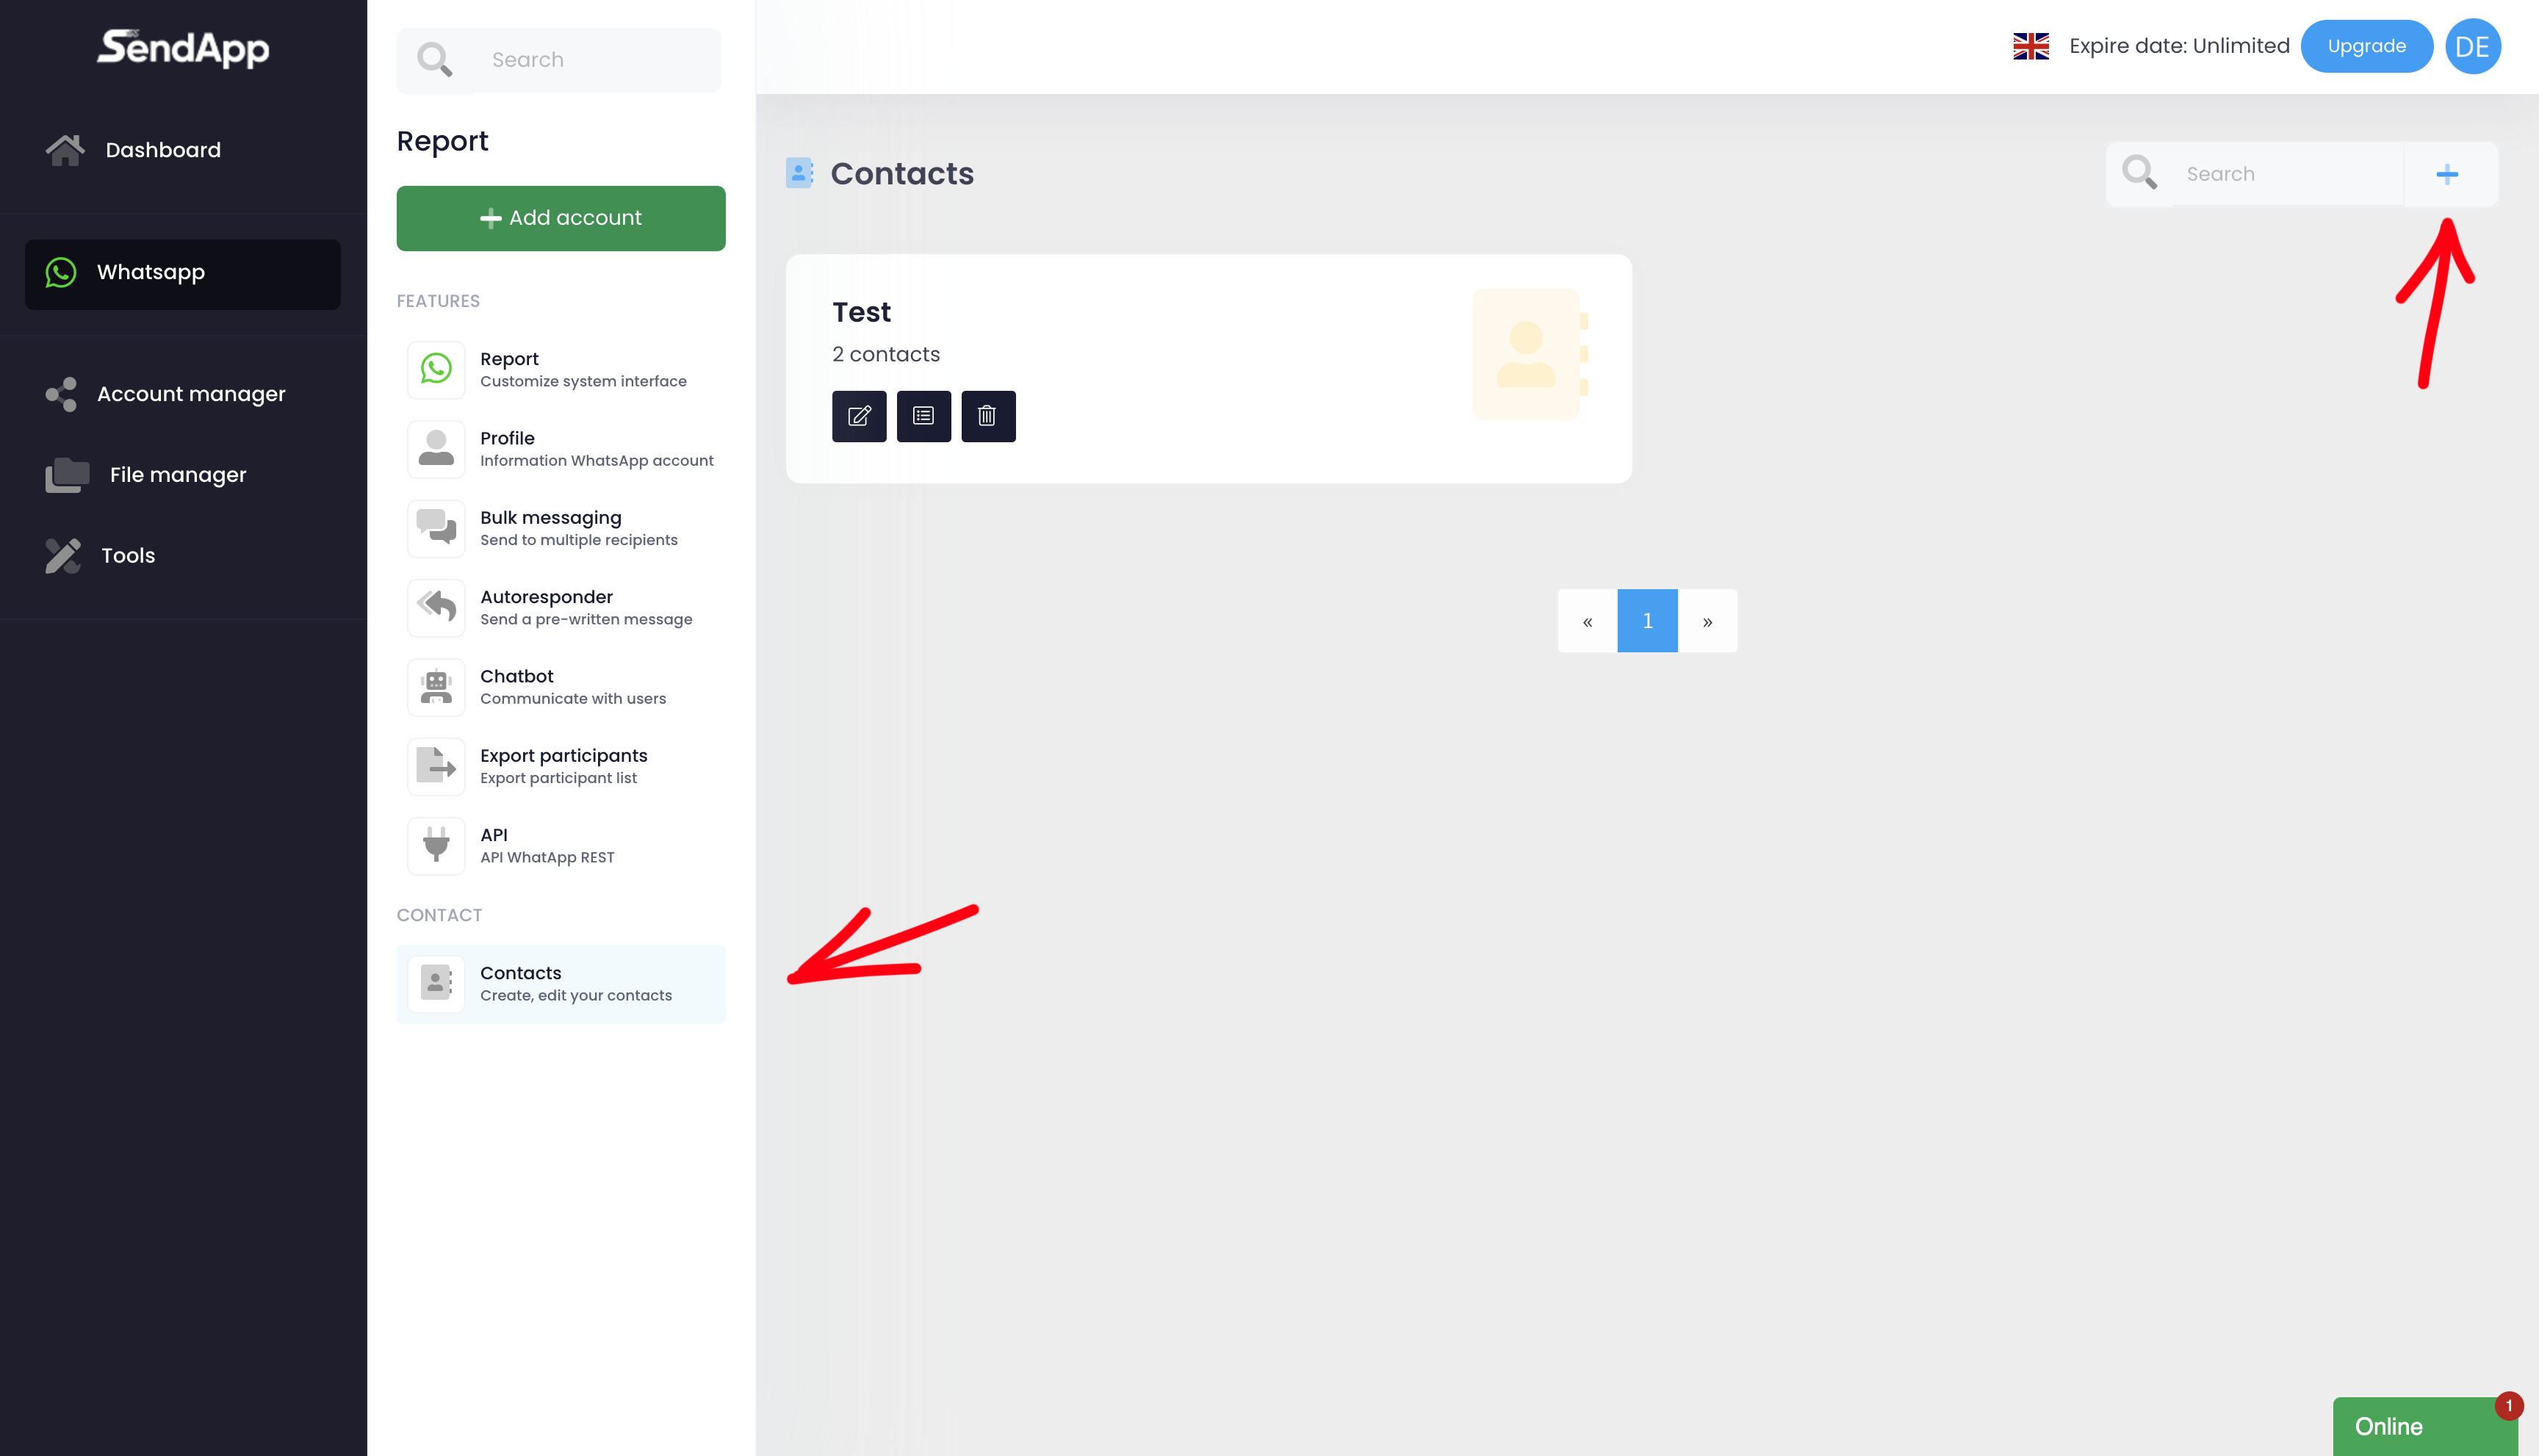
-Log in to the section Reports and click on Contacts.
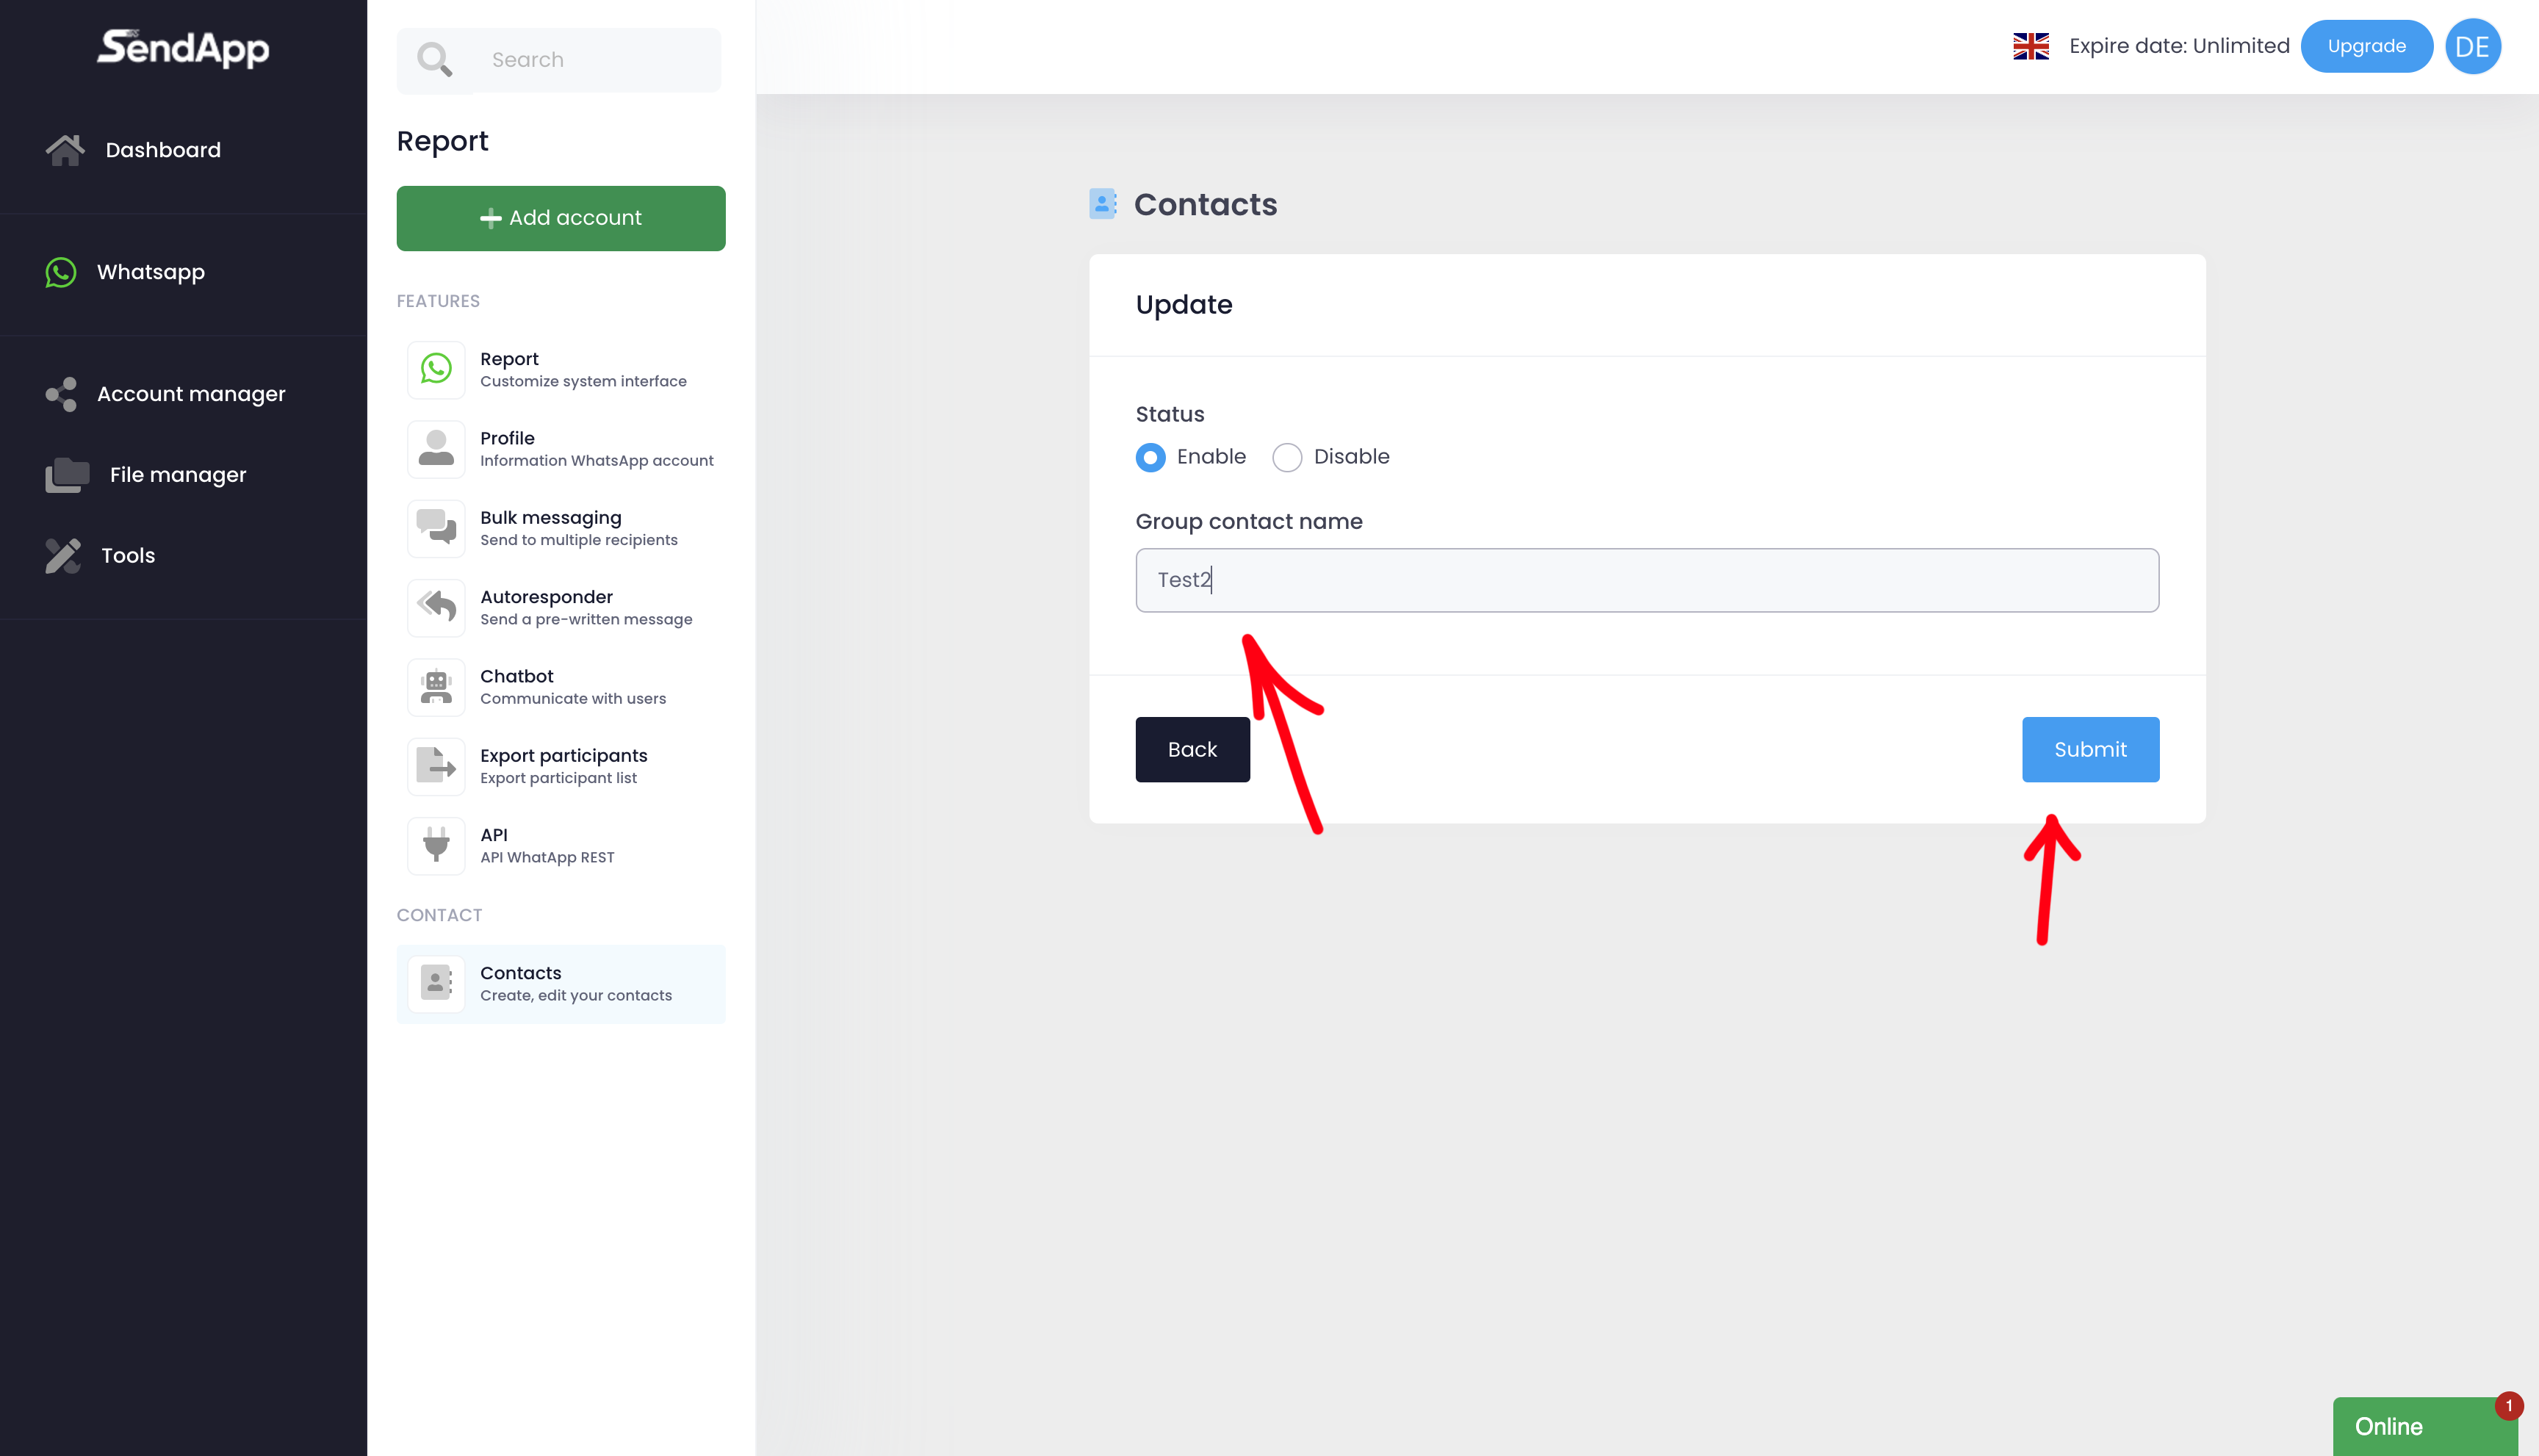
-Premiums on Add New, assign a name to the rubric (e.g., "Test2") and click on Save.
-The newly created address book will be visible in the contact list.
Popolamento della rubrica
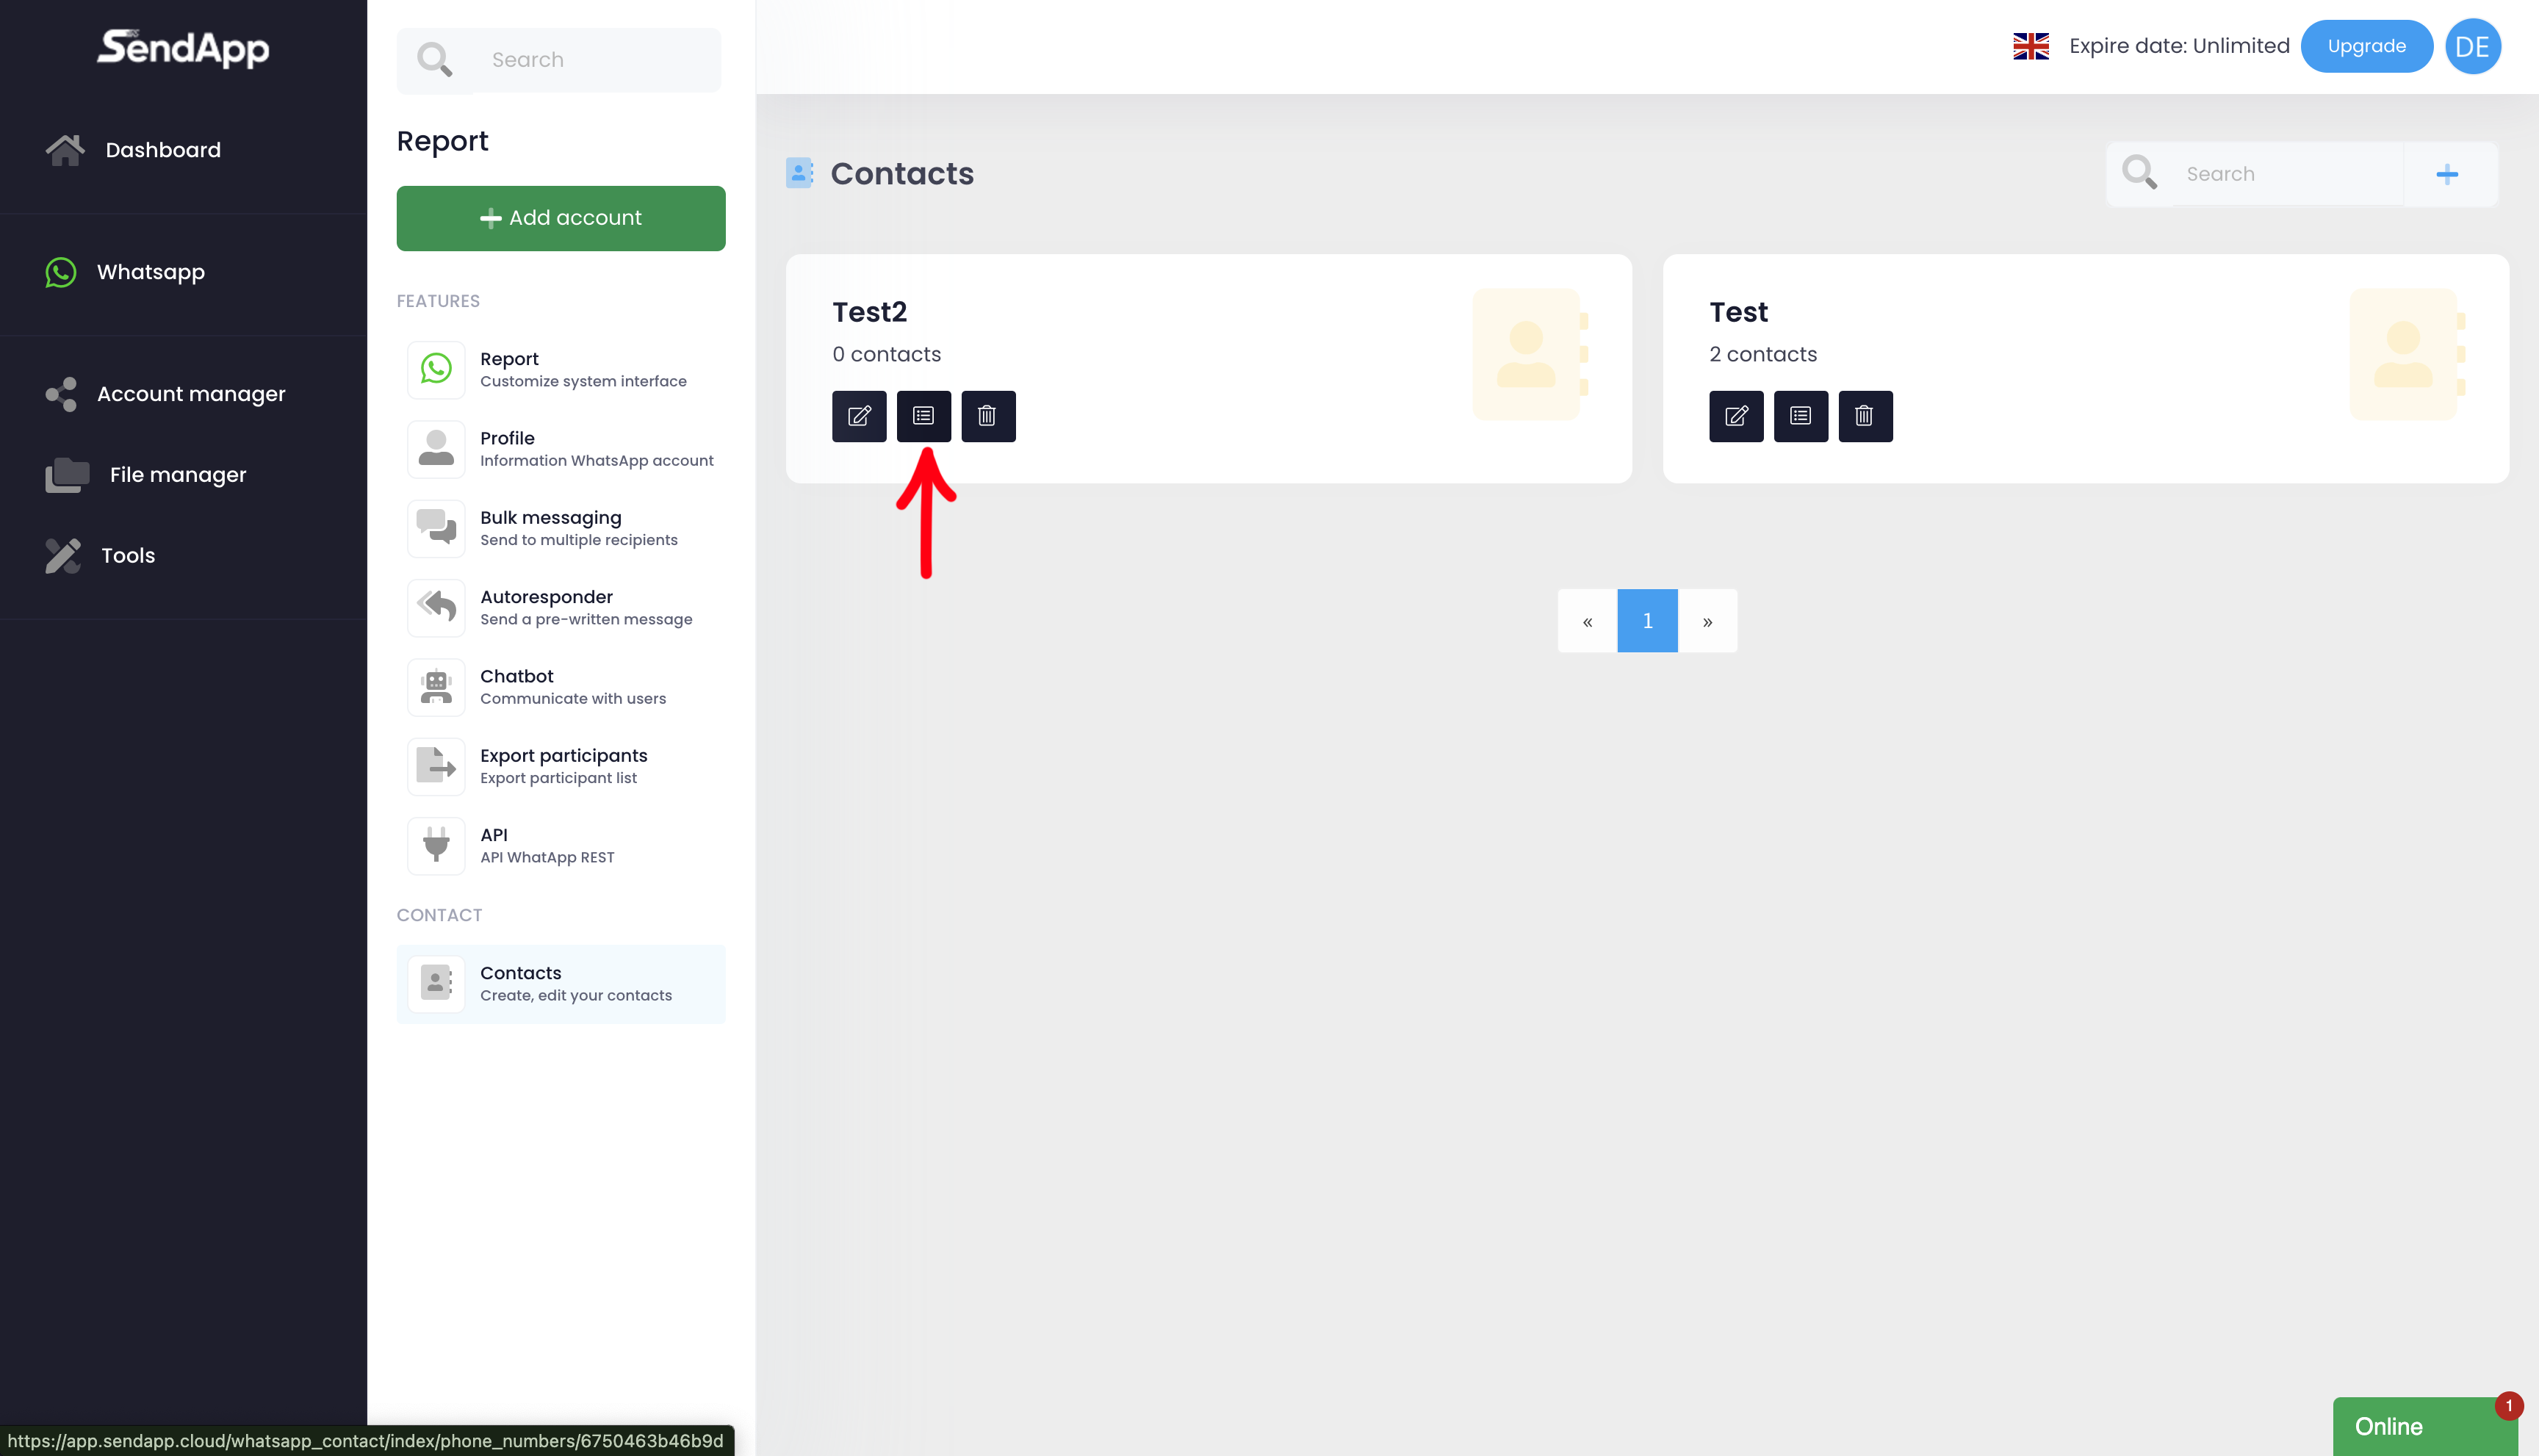
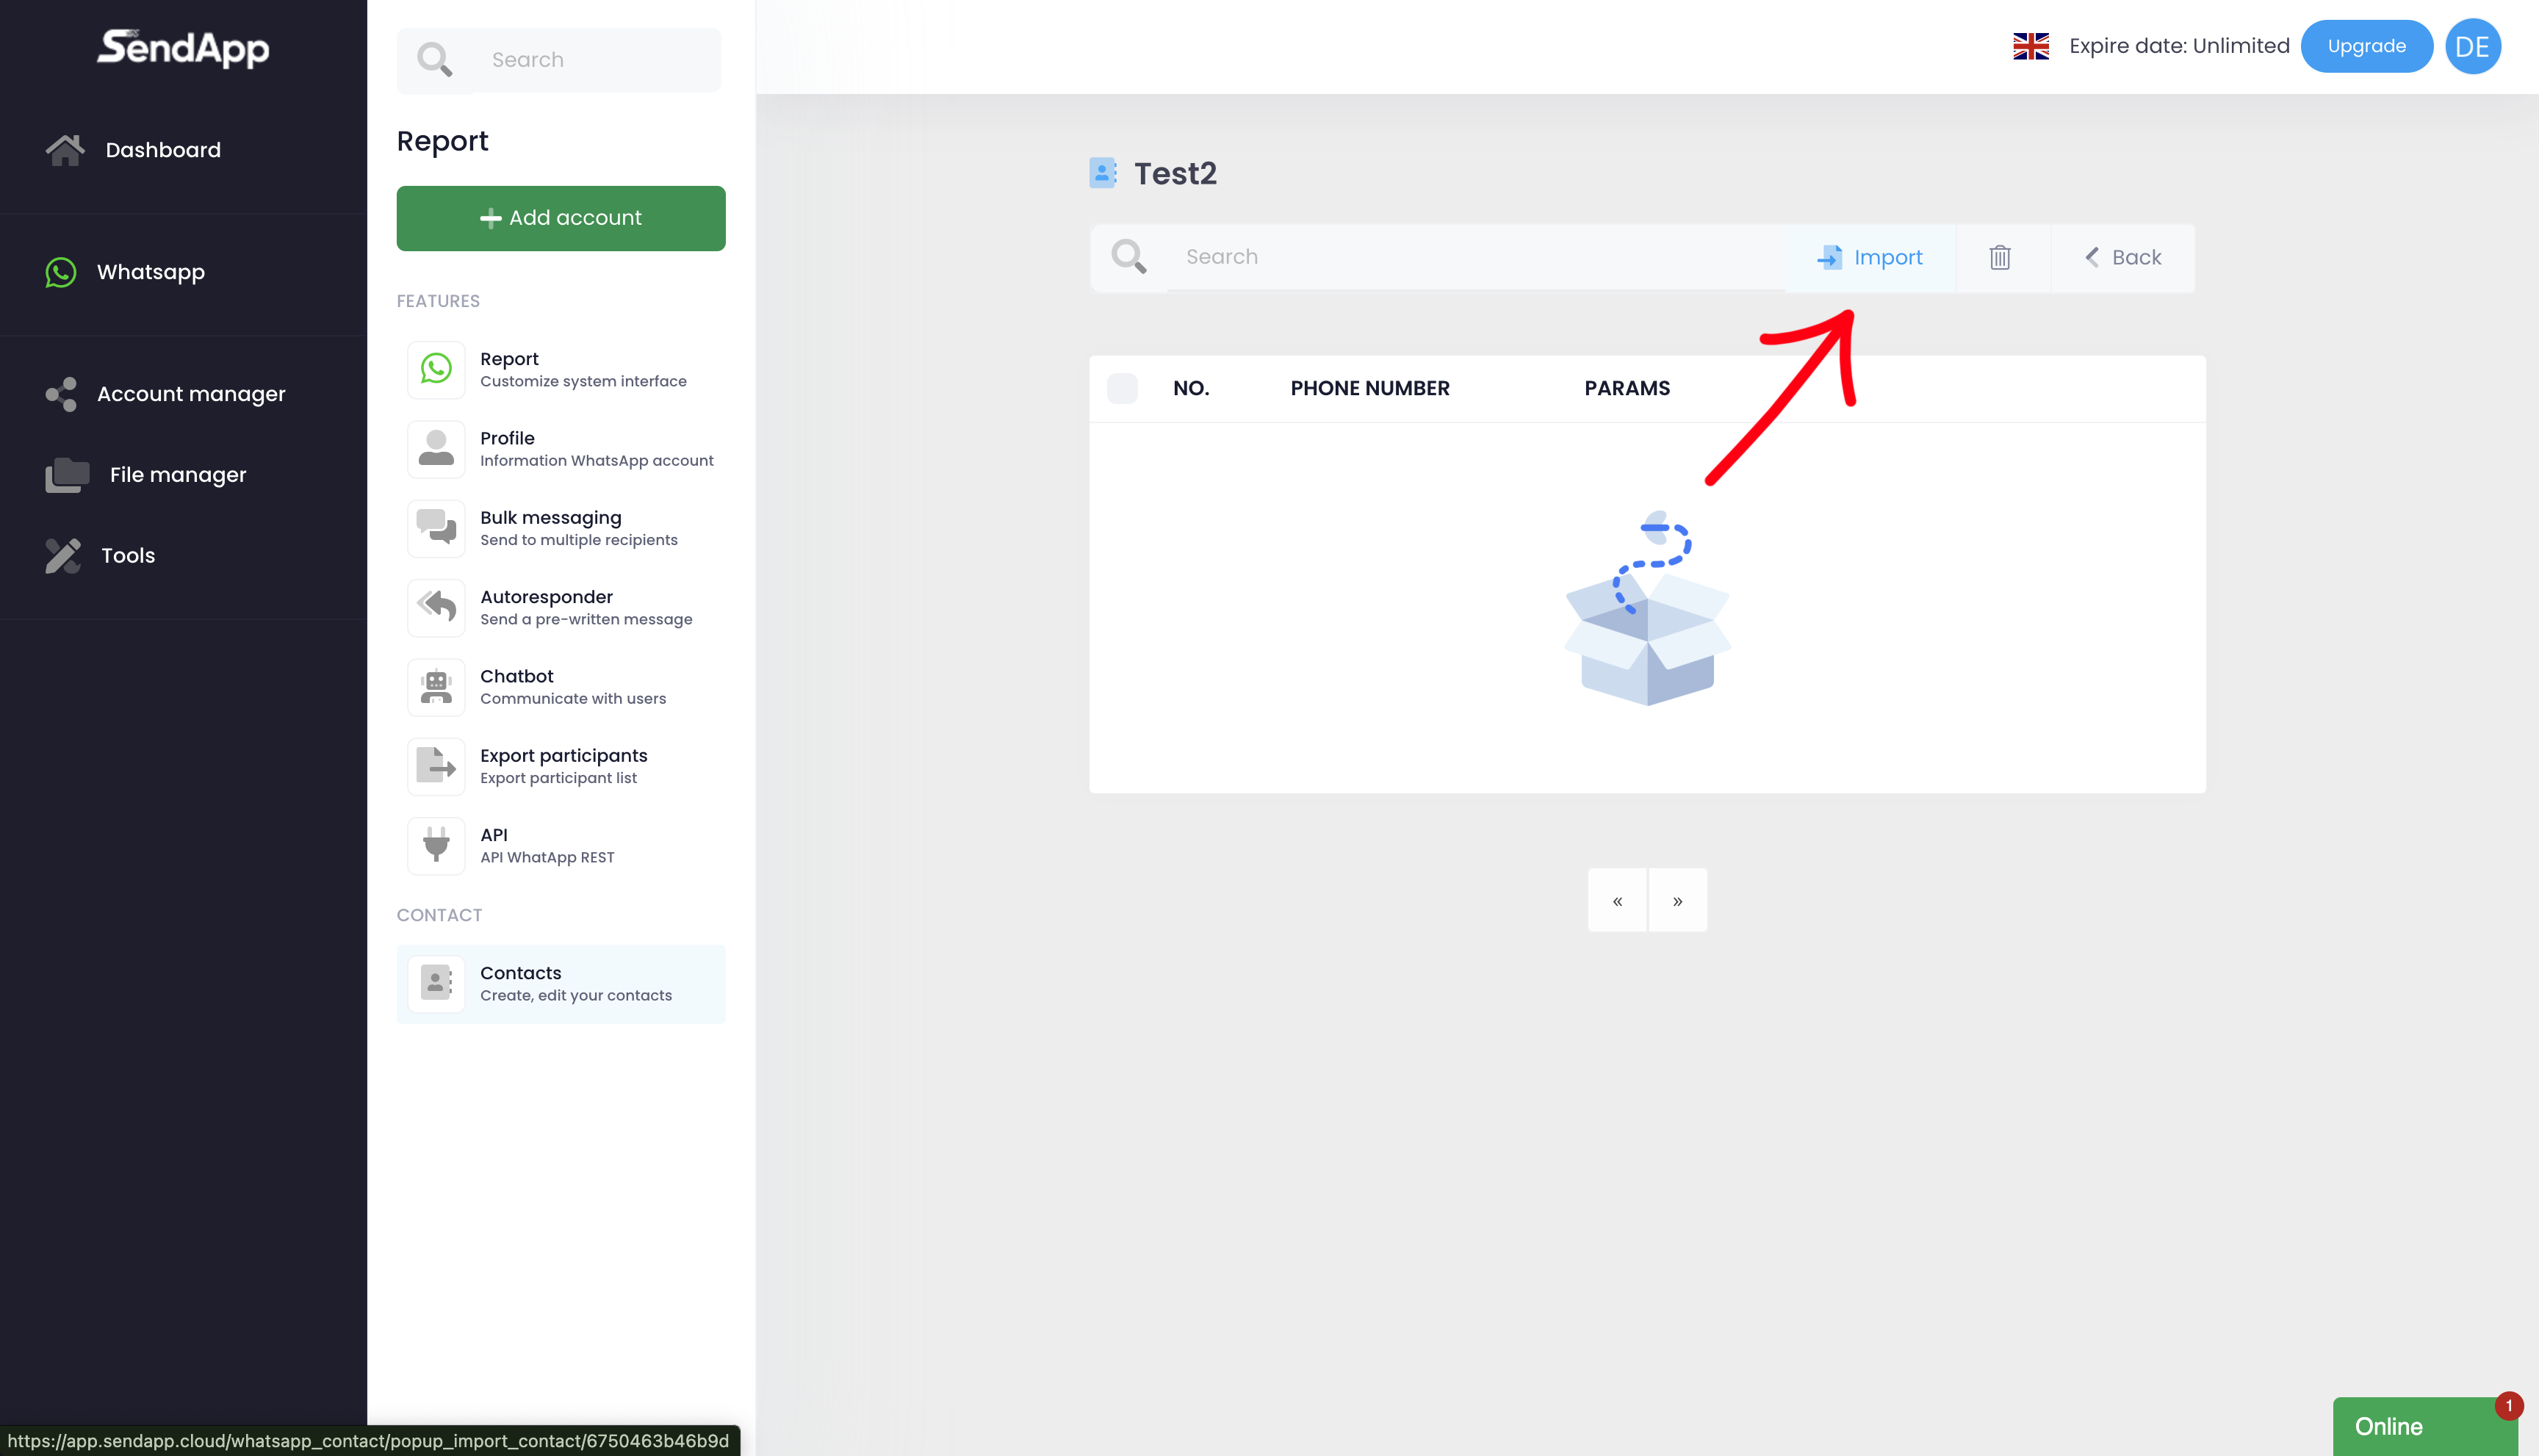
-In the created address book, click on the middle button next to the name of the address book (e.g., "Test2").
-Select option Import:
-Manual input: Fill in the fields directly from the form.
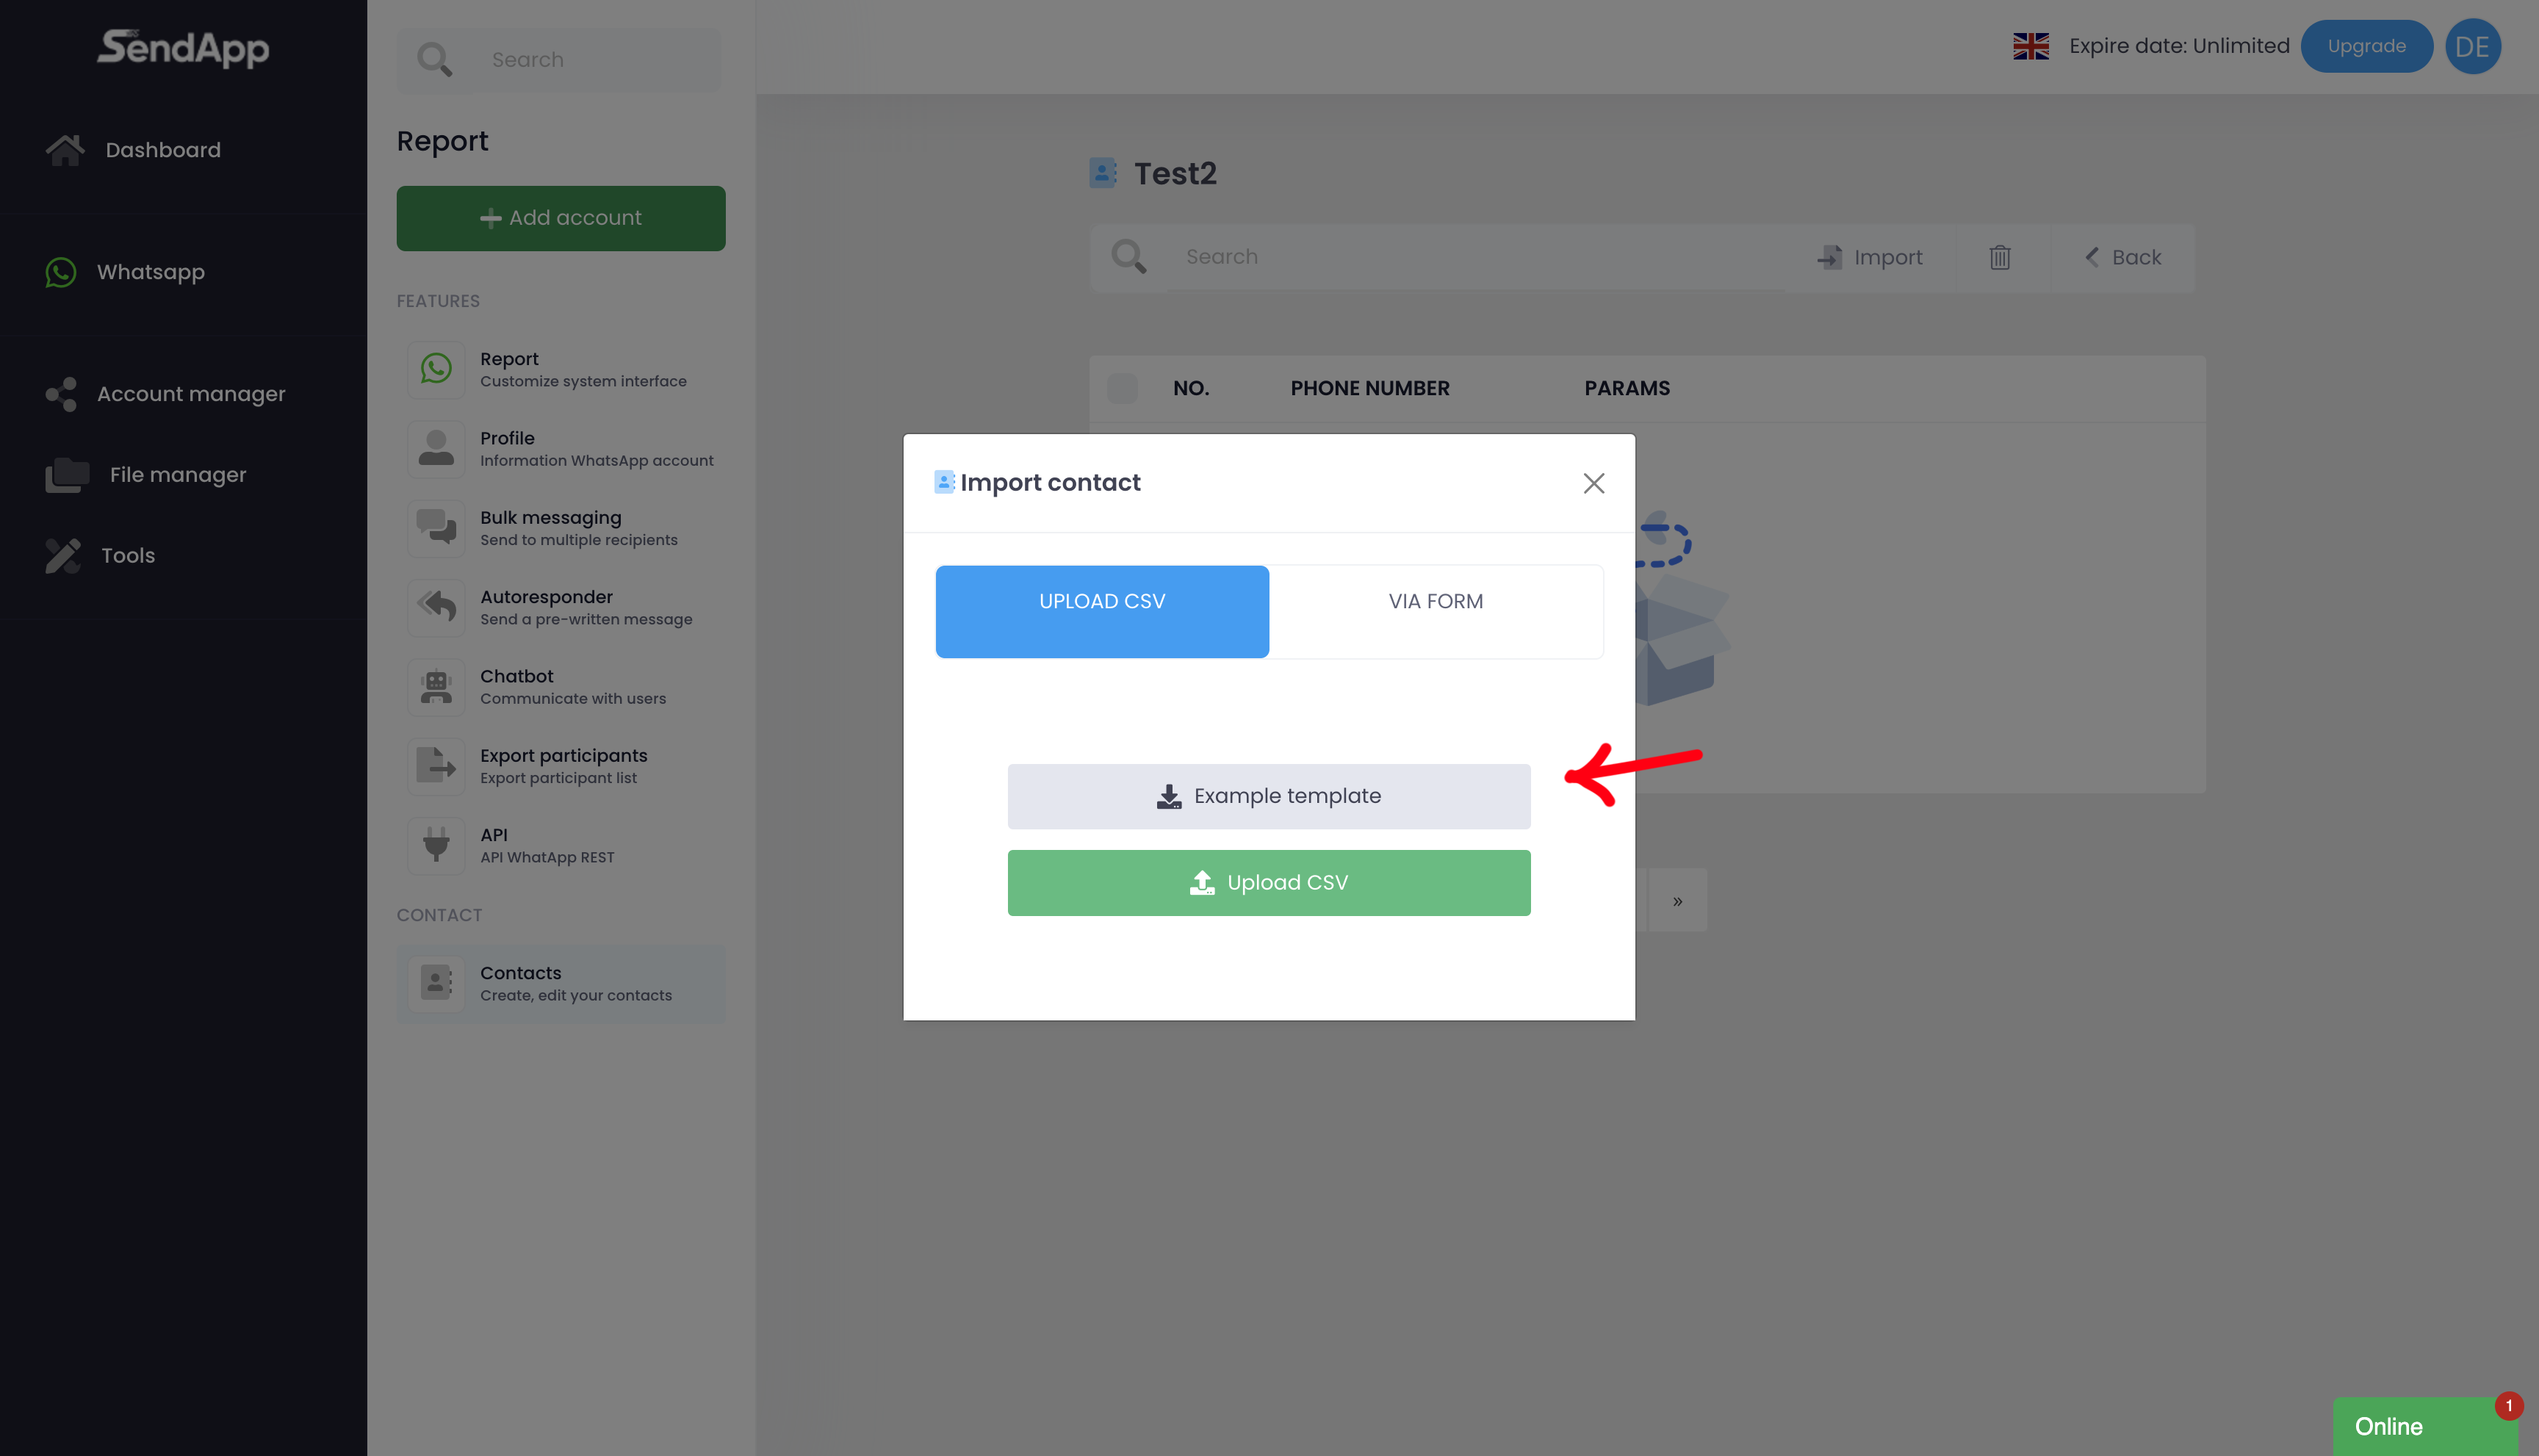
Using a CSV template:
1.Download the example template provided.
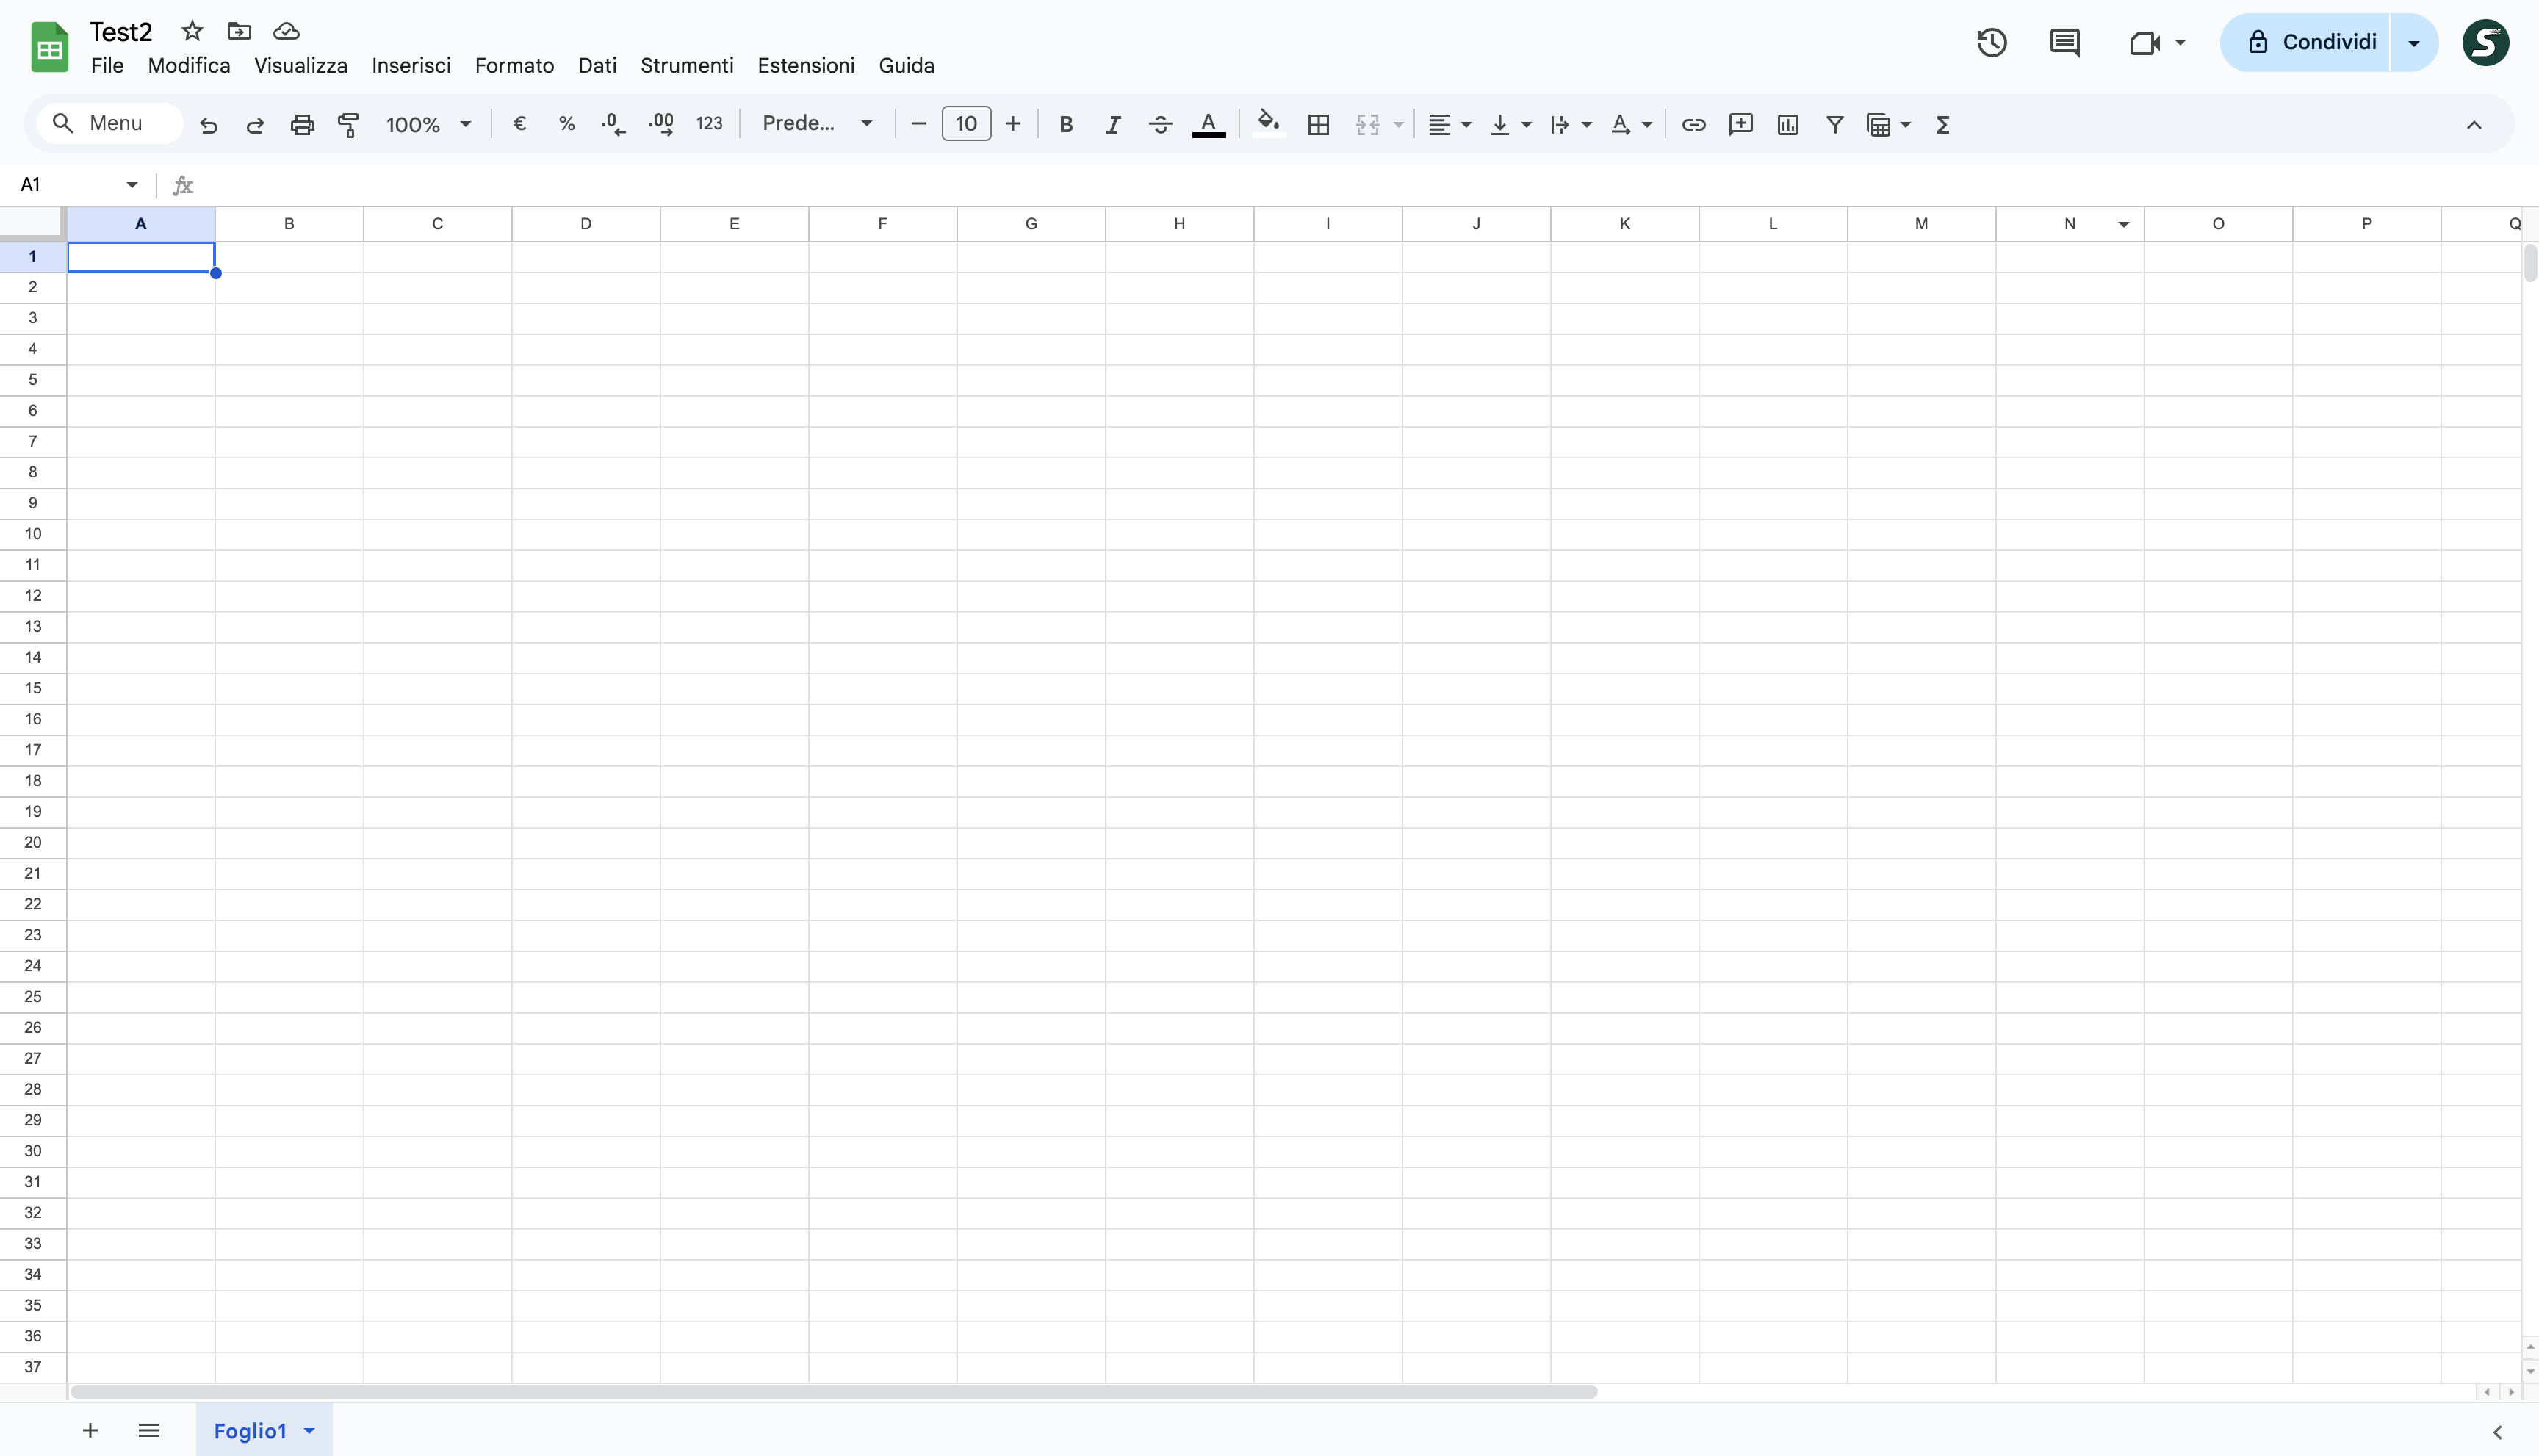
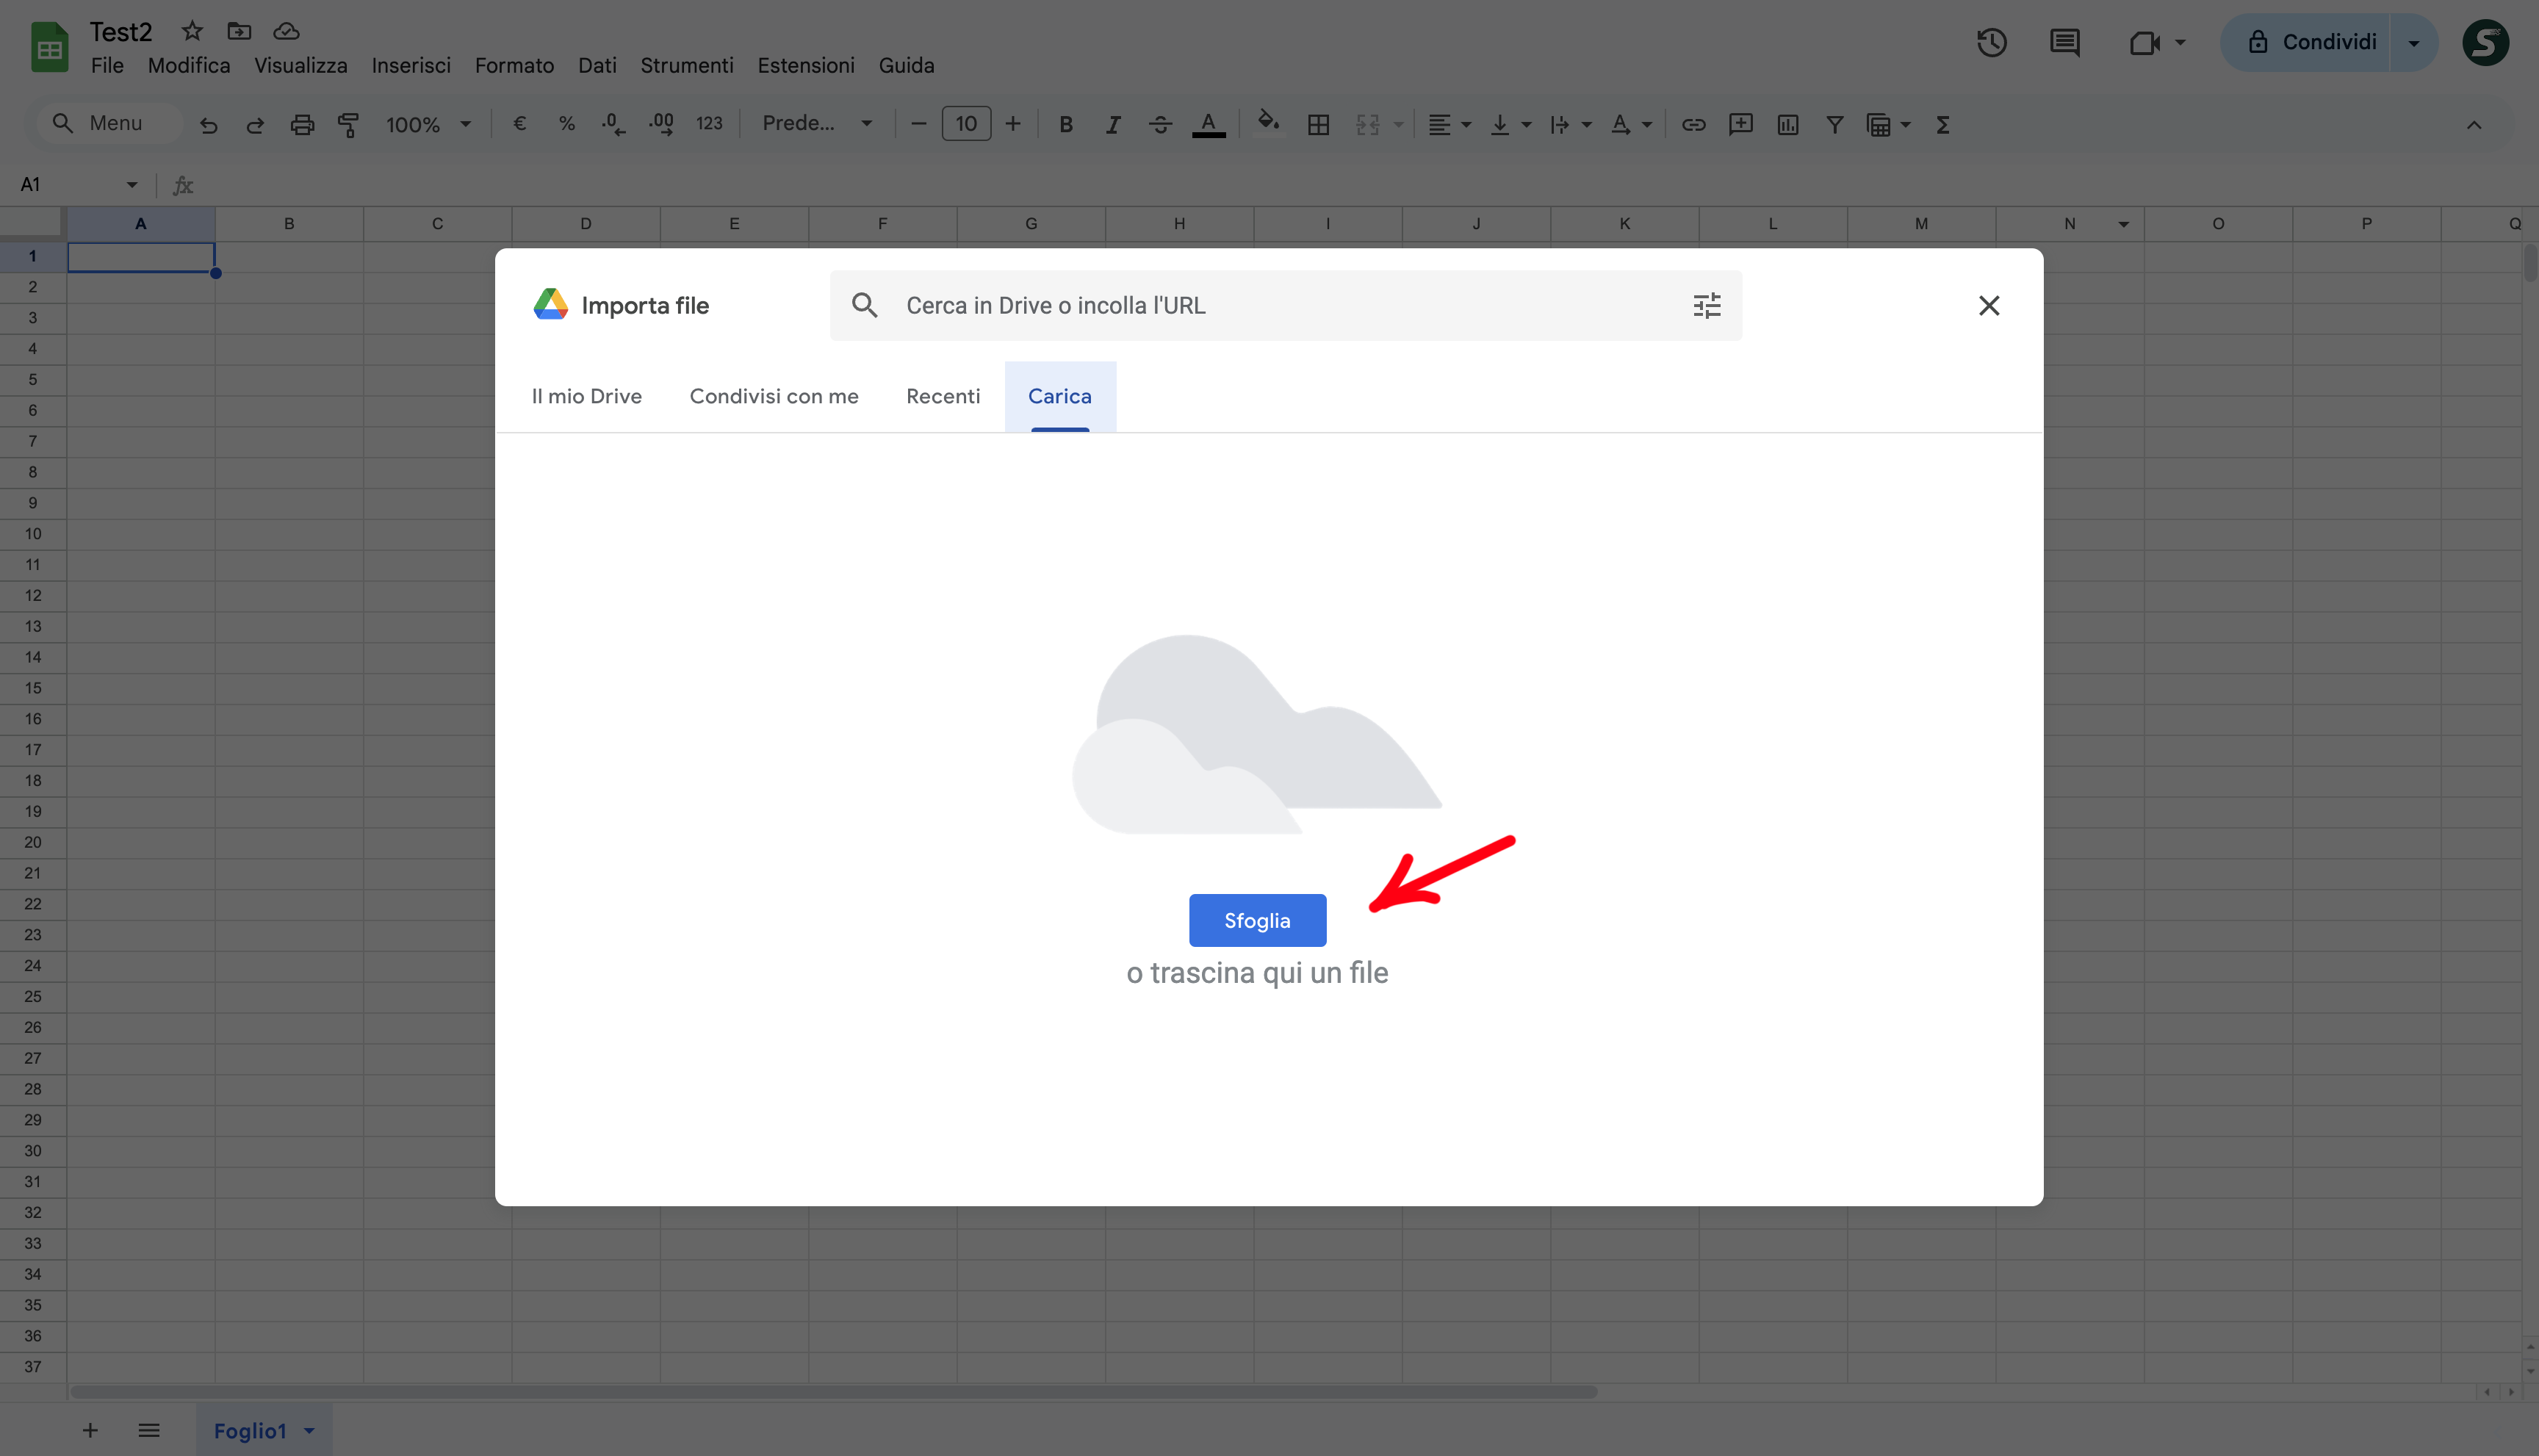
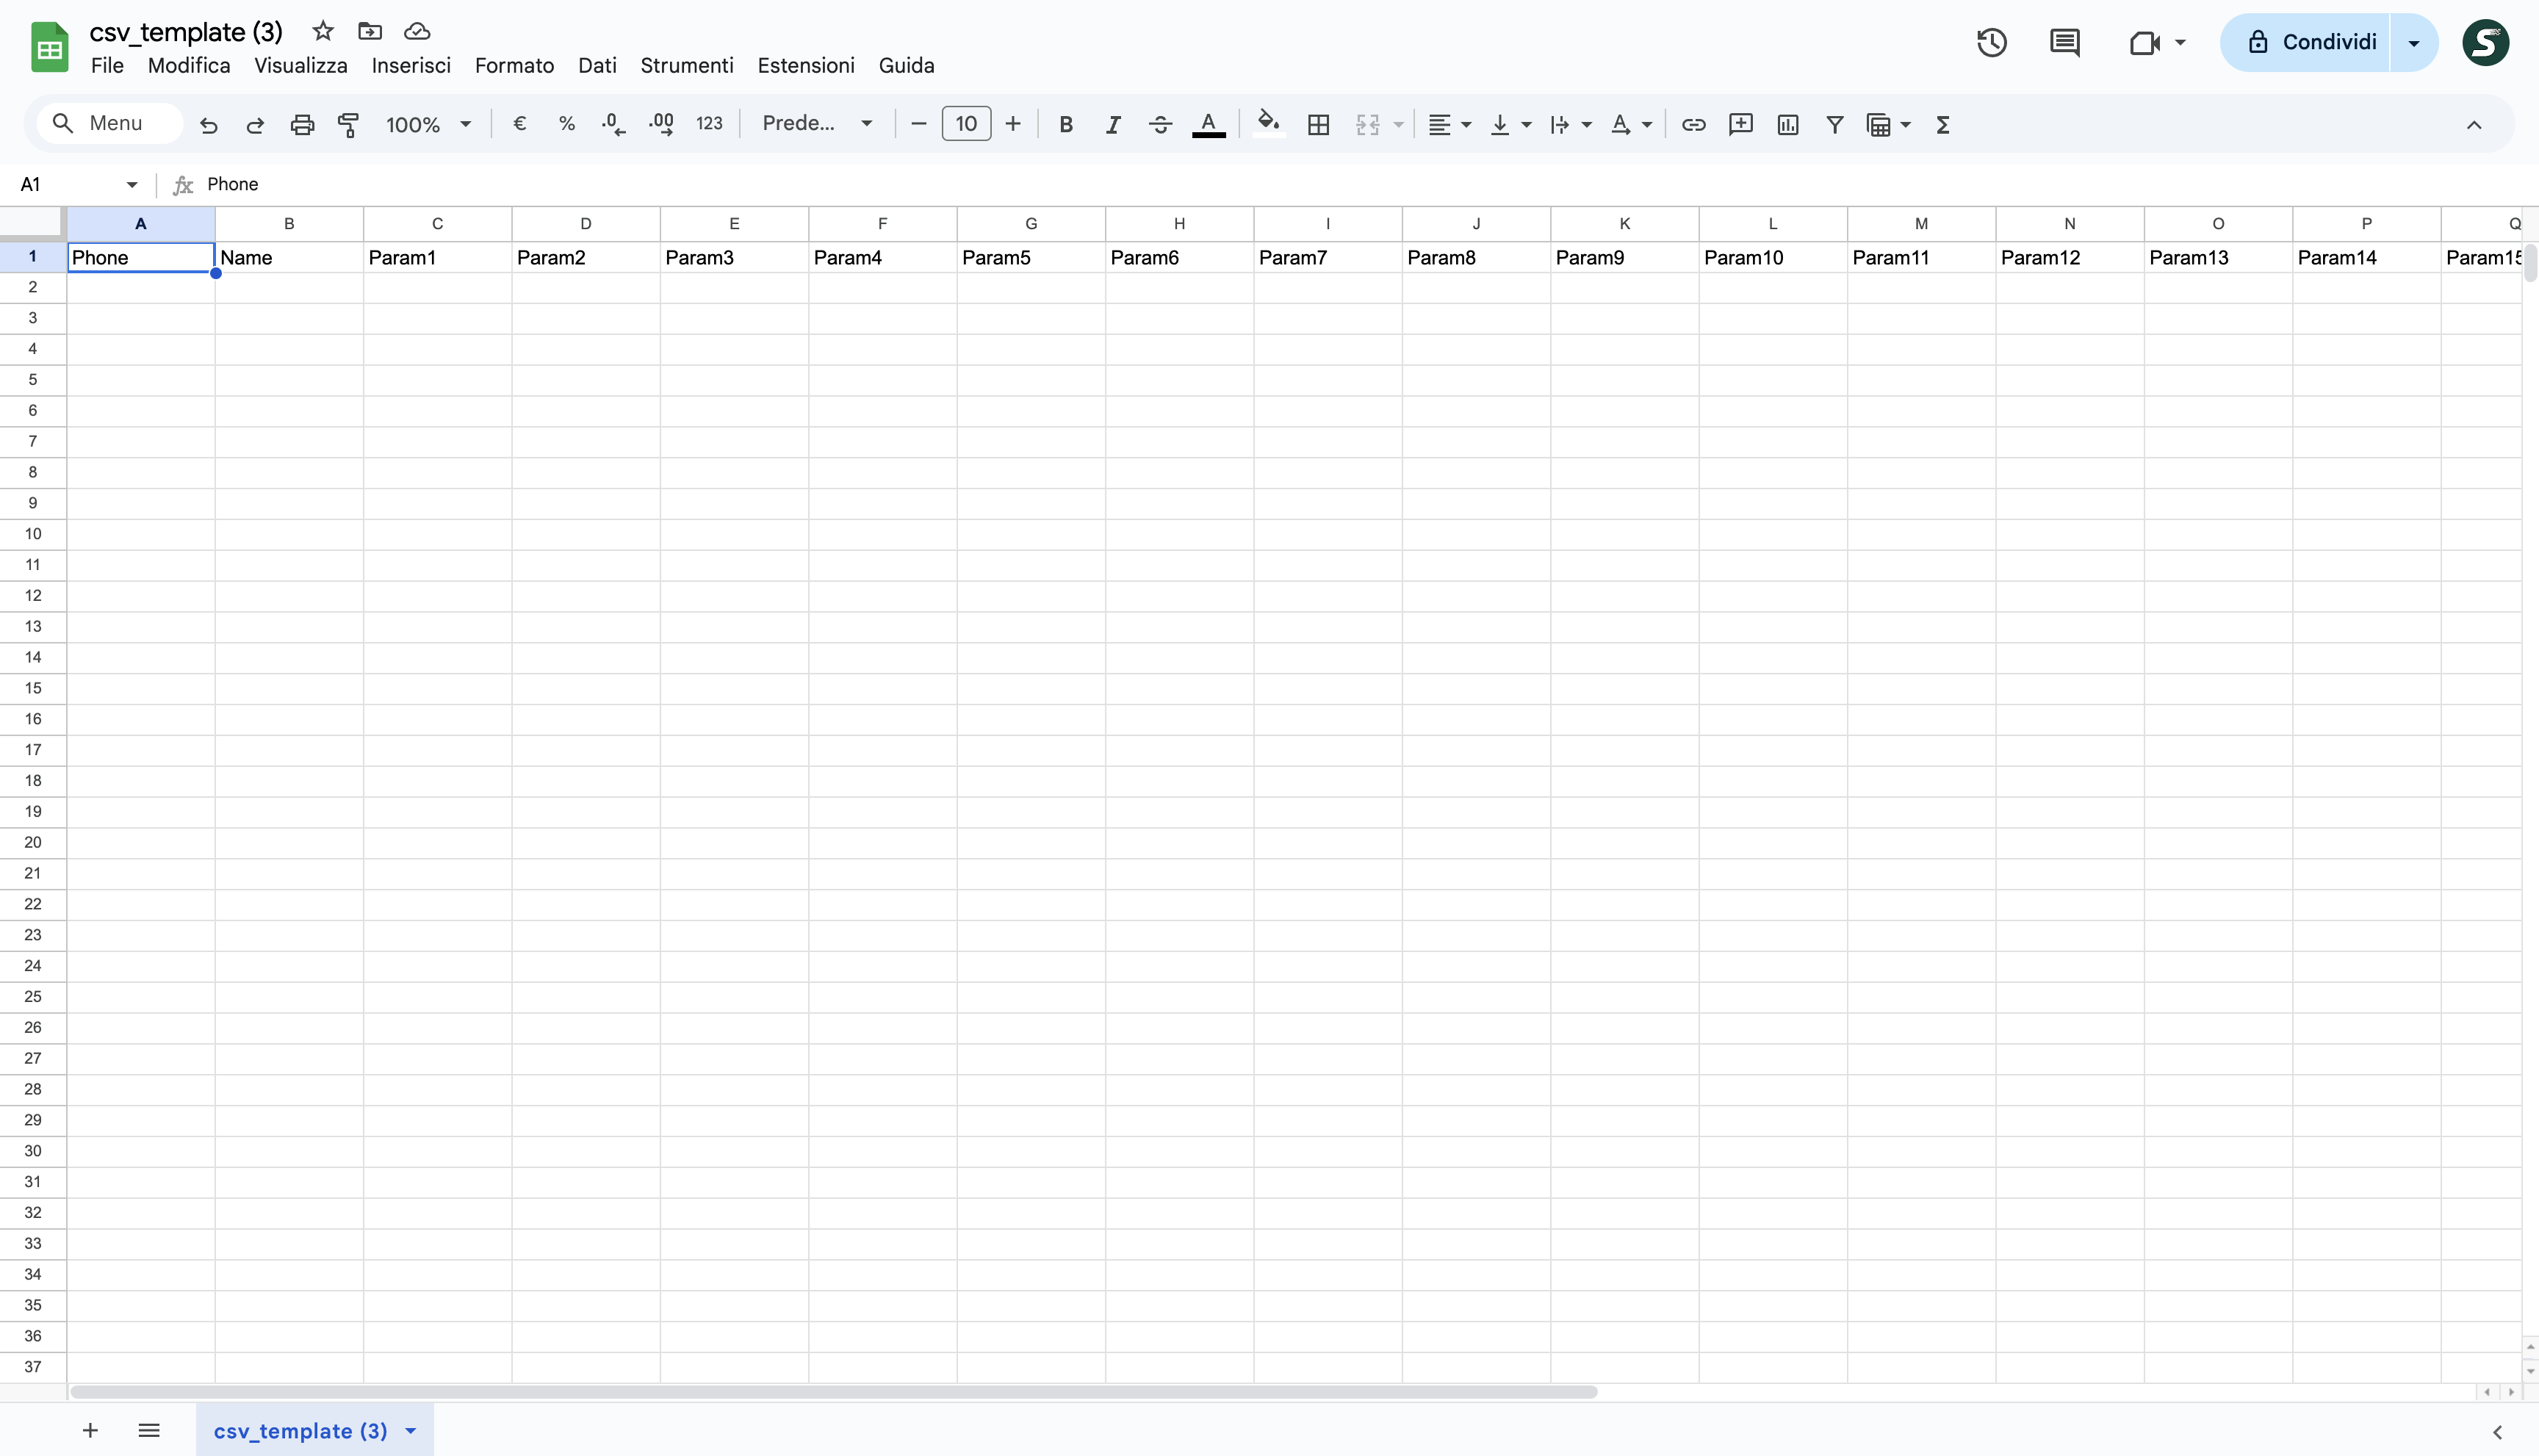
2.Open the template in Google Sheets.
3.Enter phone numbers with country code and contact details (e.g., name).
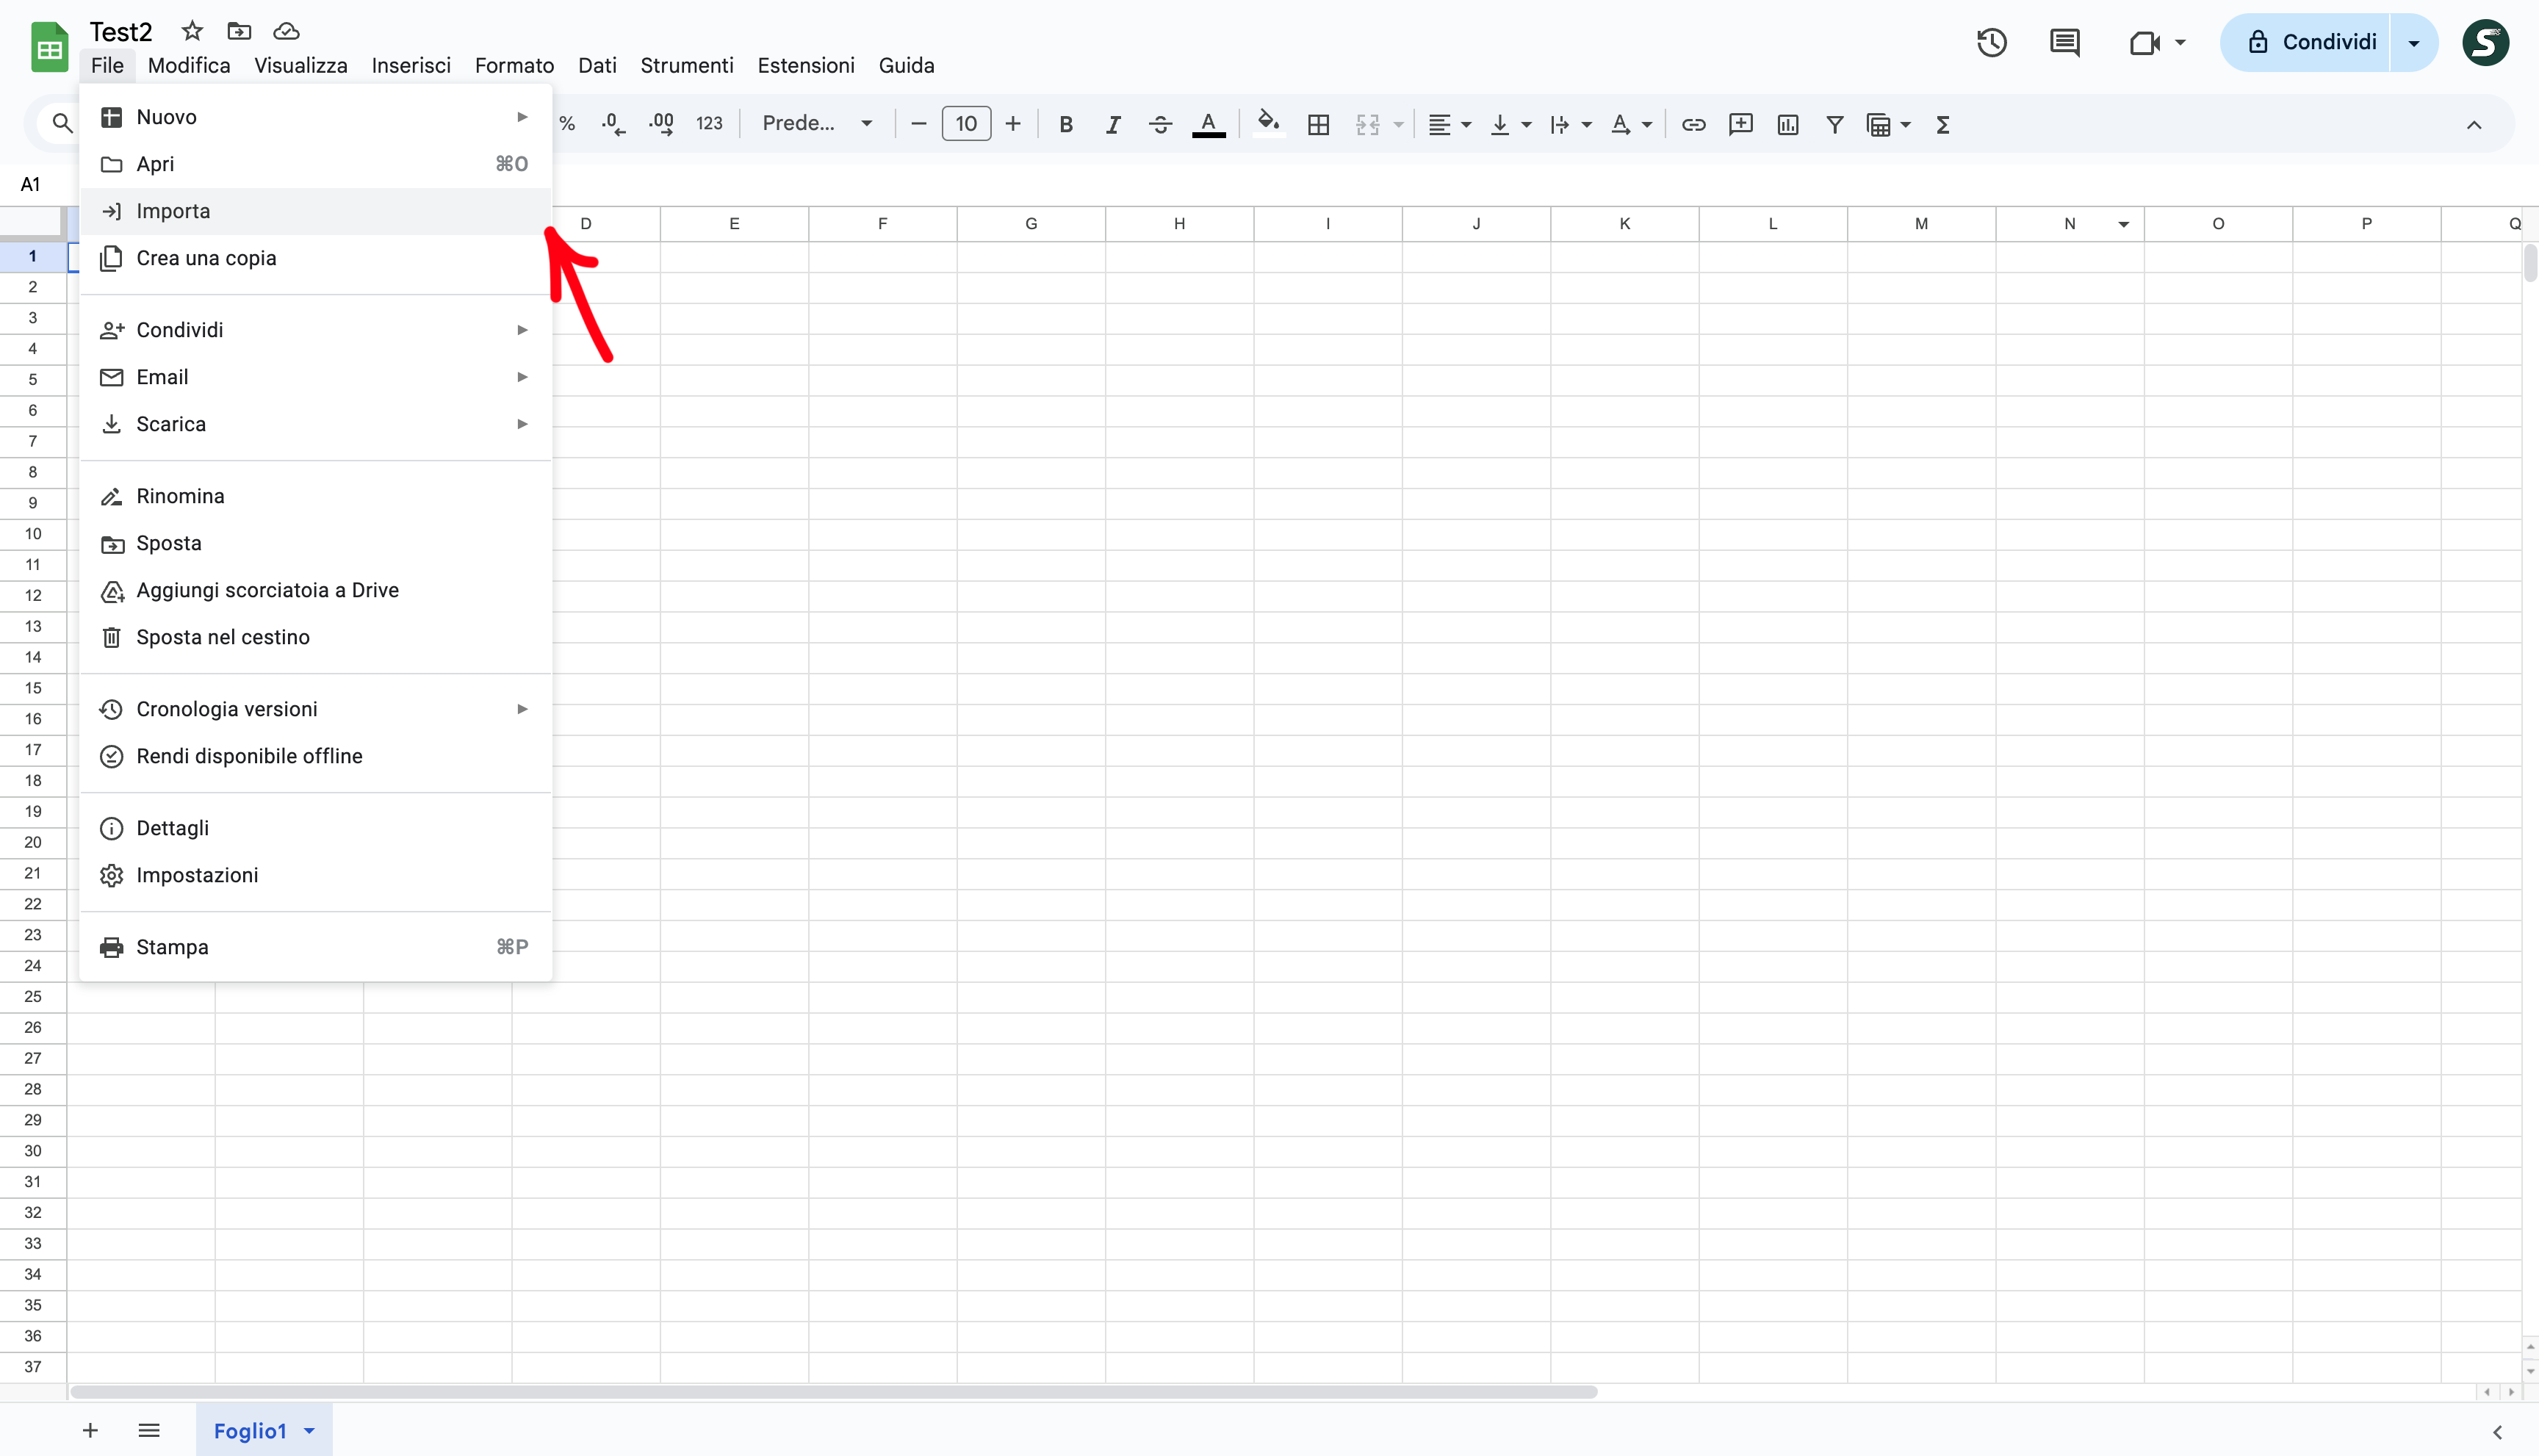
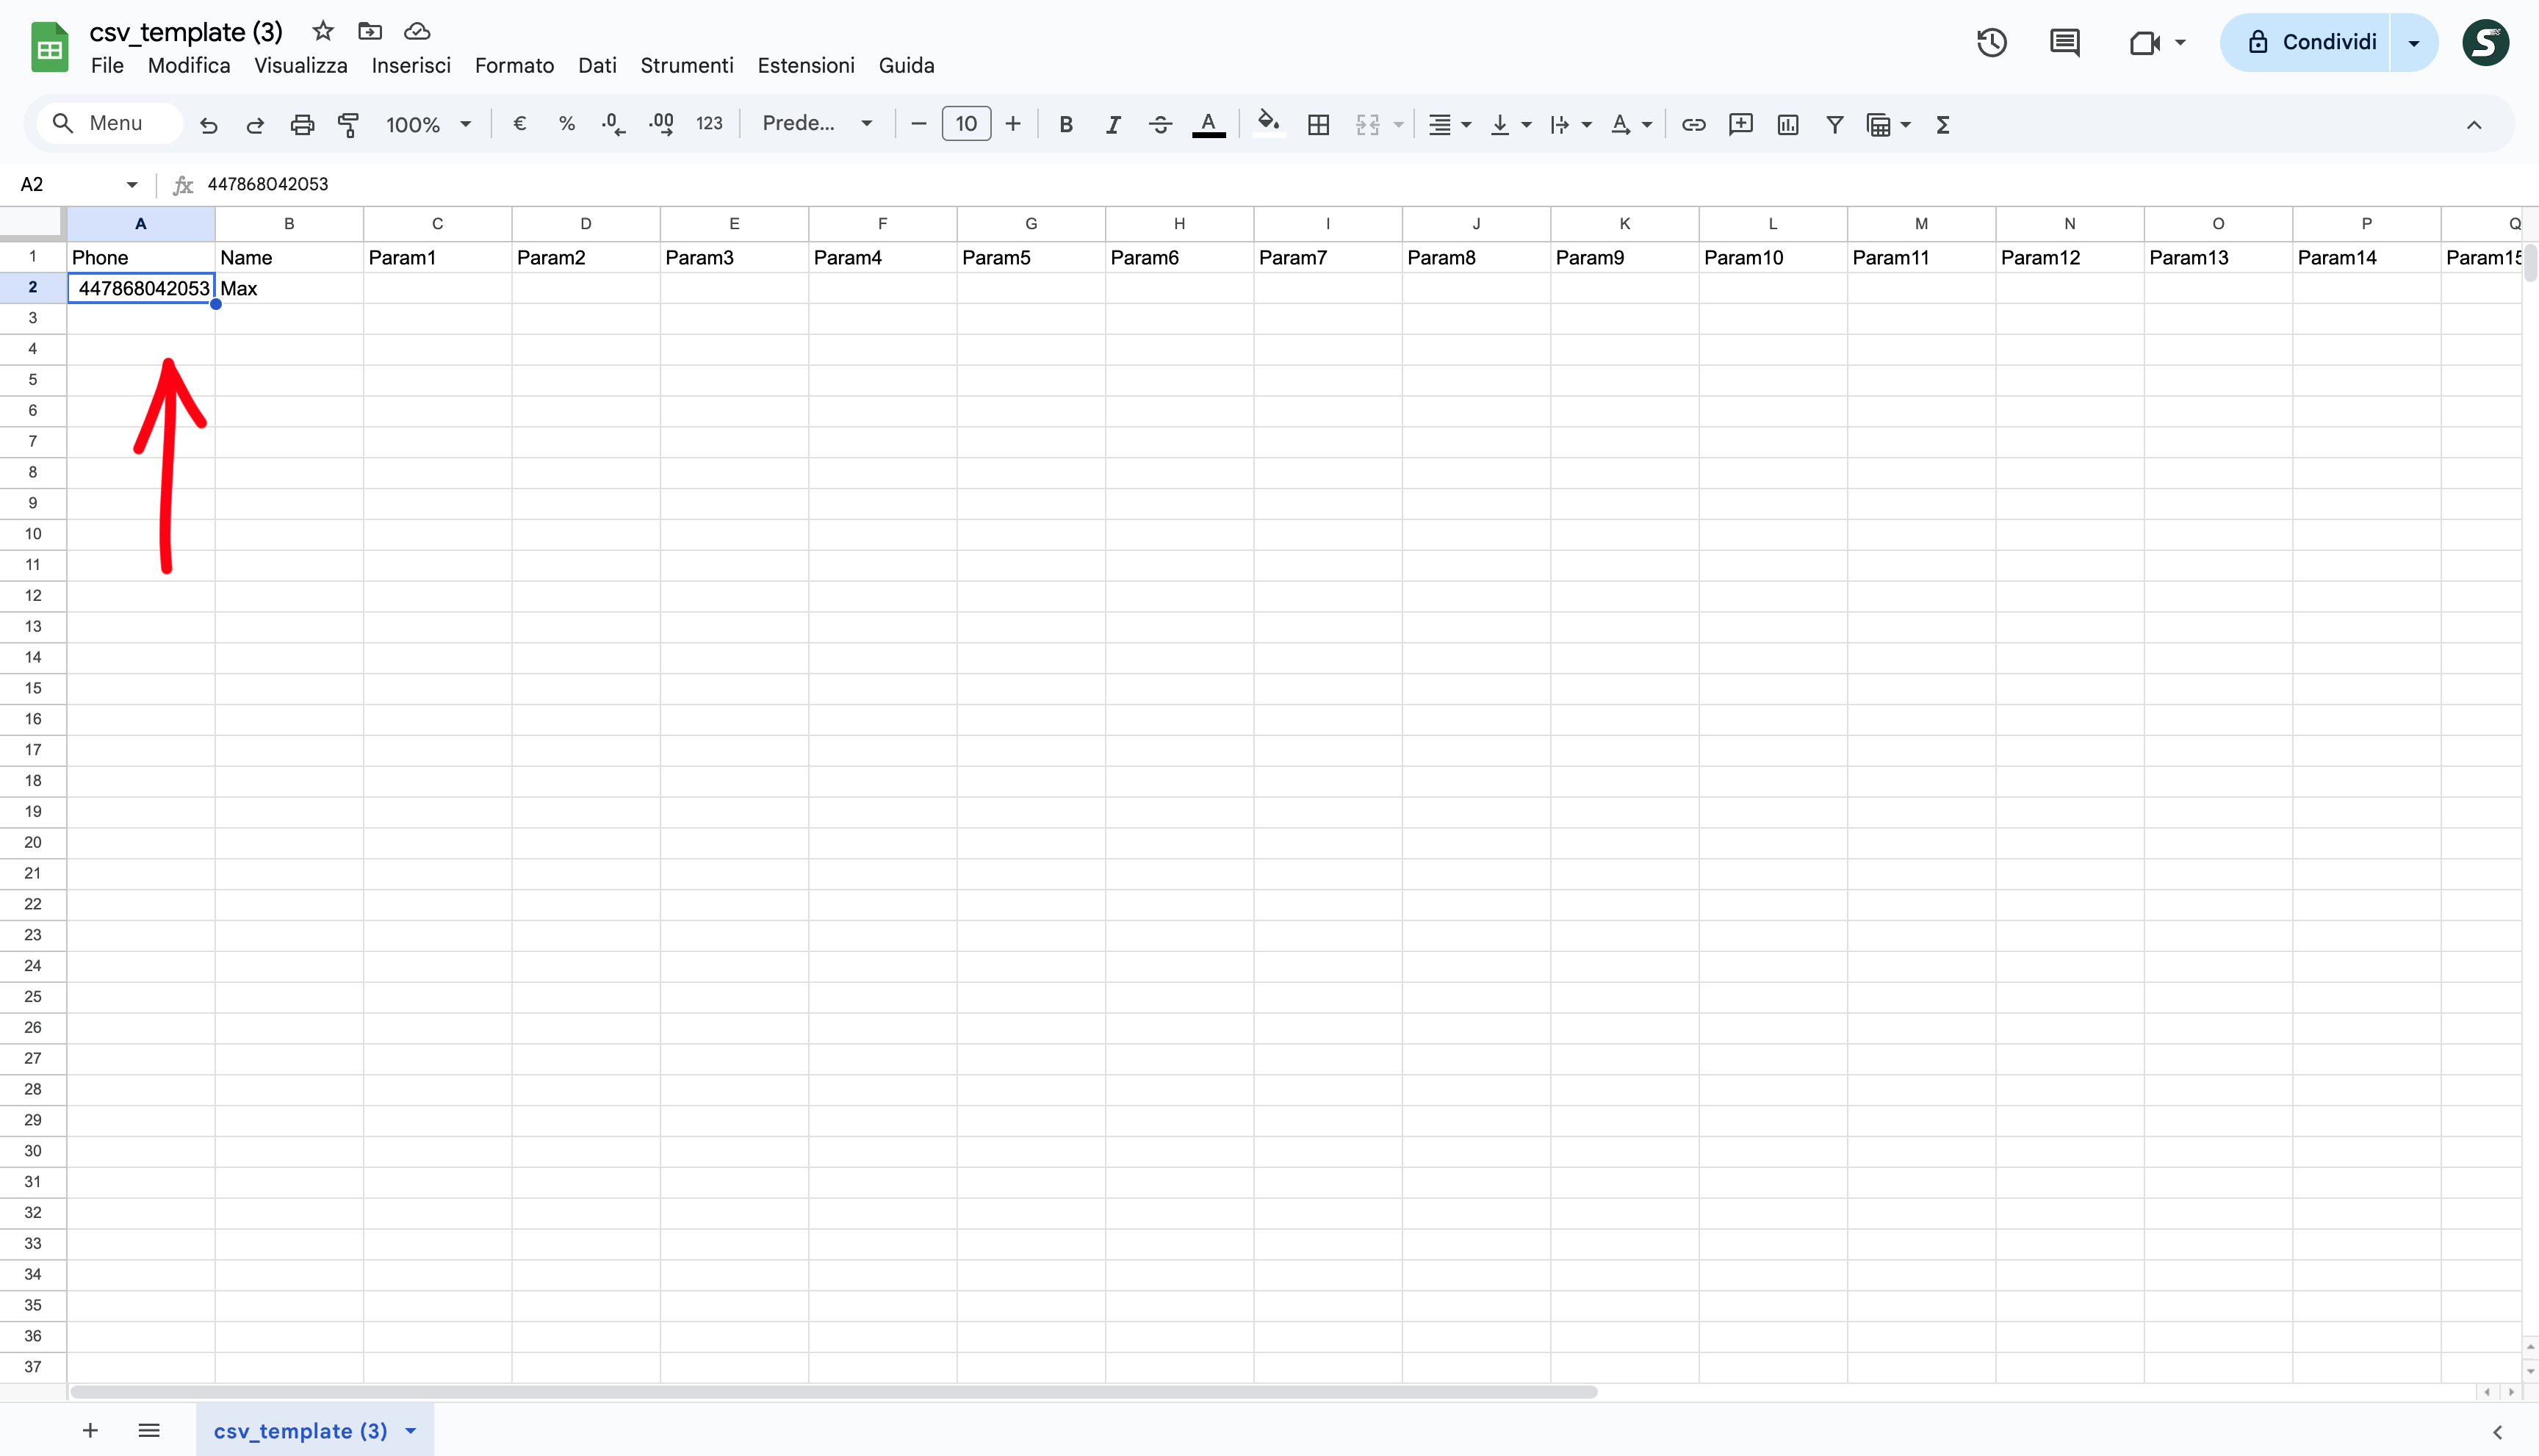
4.Download the completed file in Comma Separated Values (.csv) by selecting Files > Downloads > CSV.
Caricamento del file CSV su Sendapp Cloud
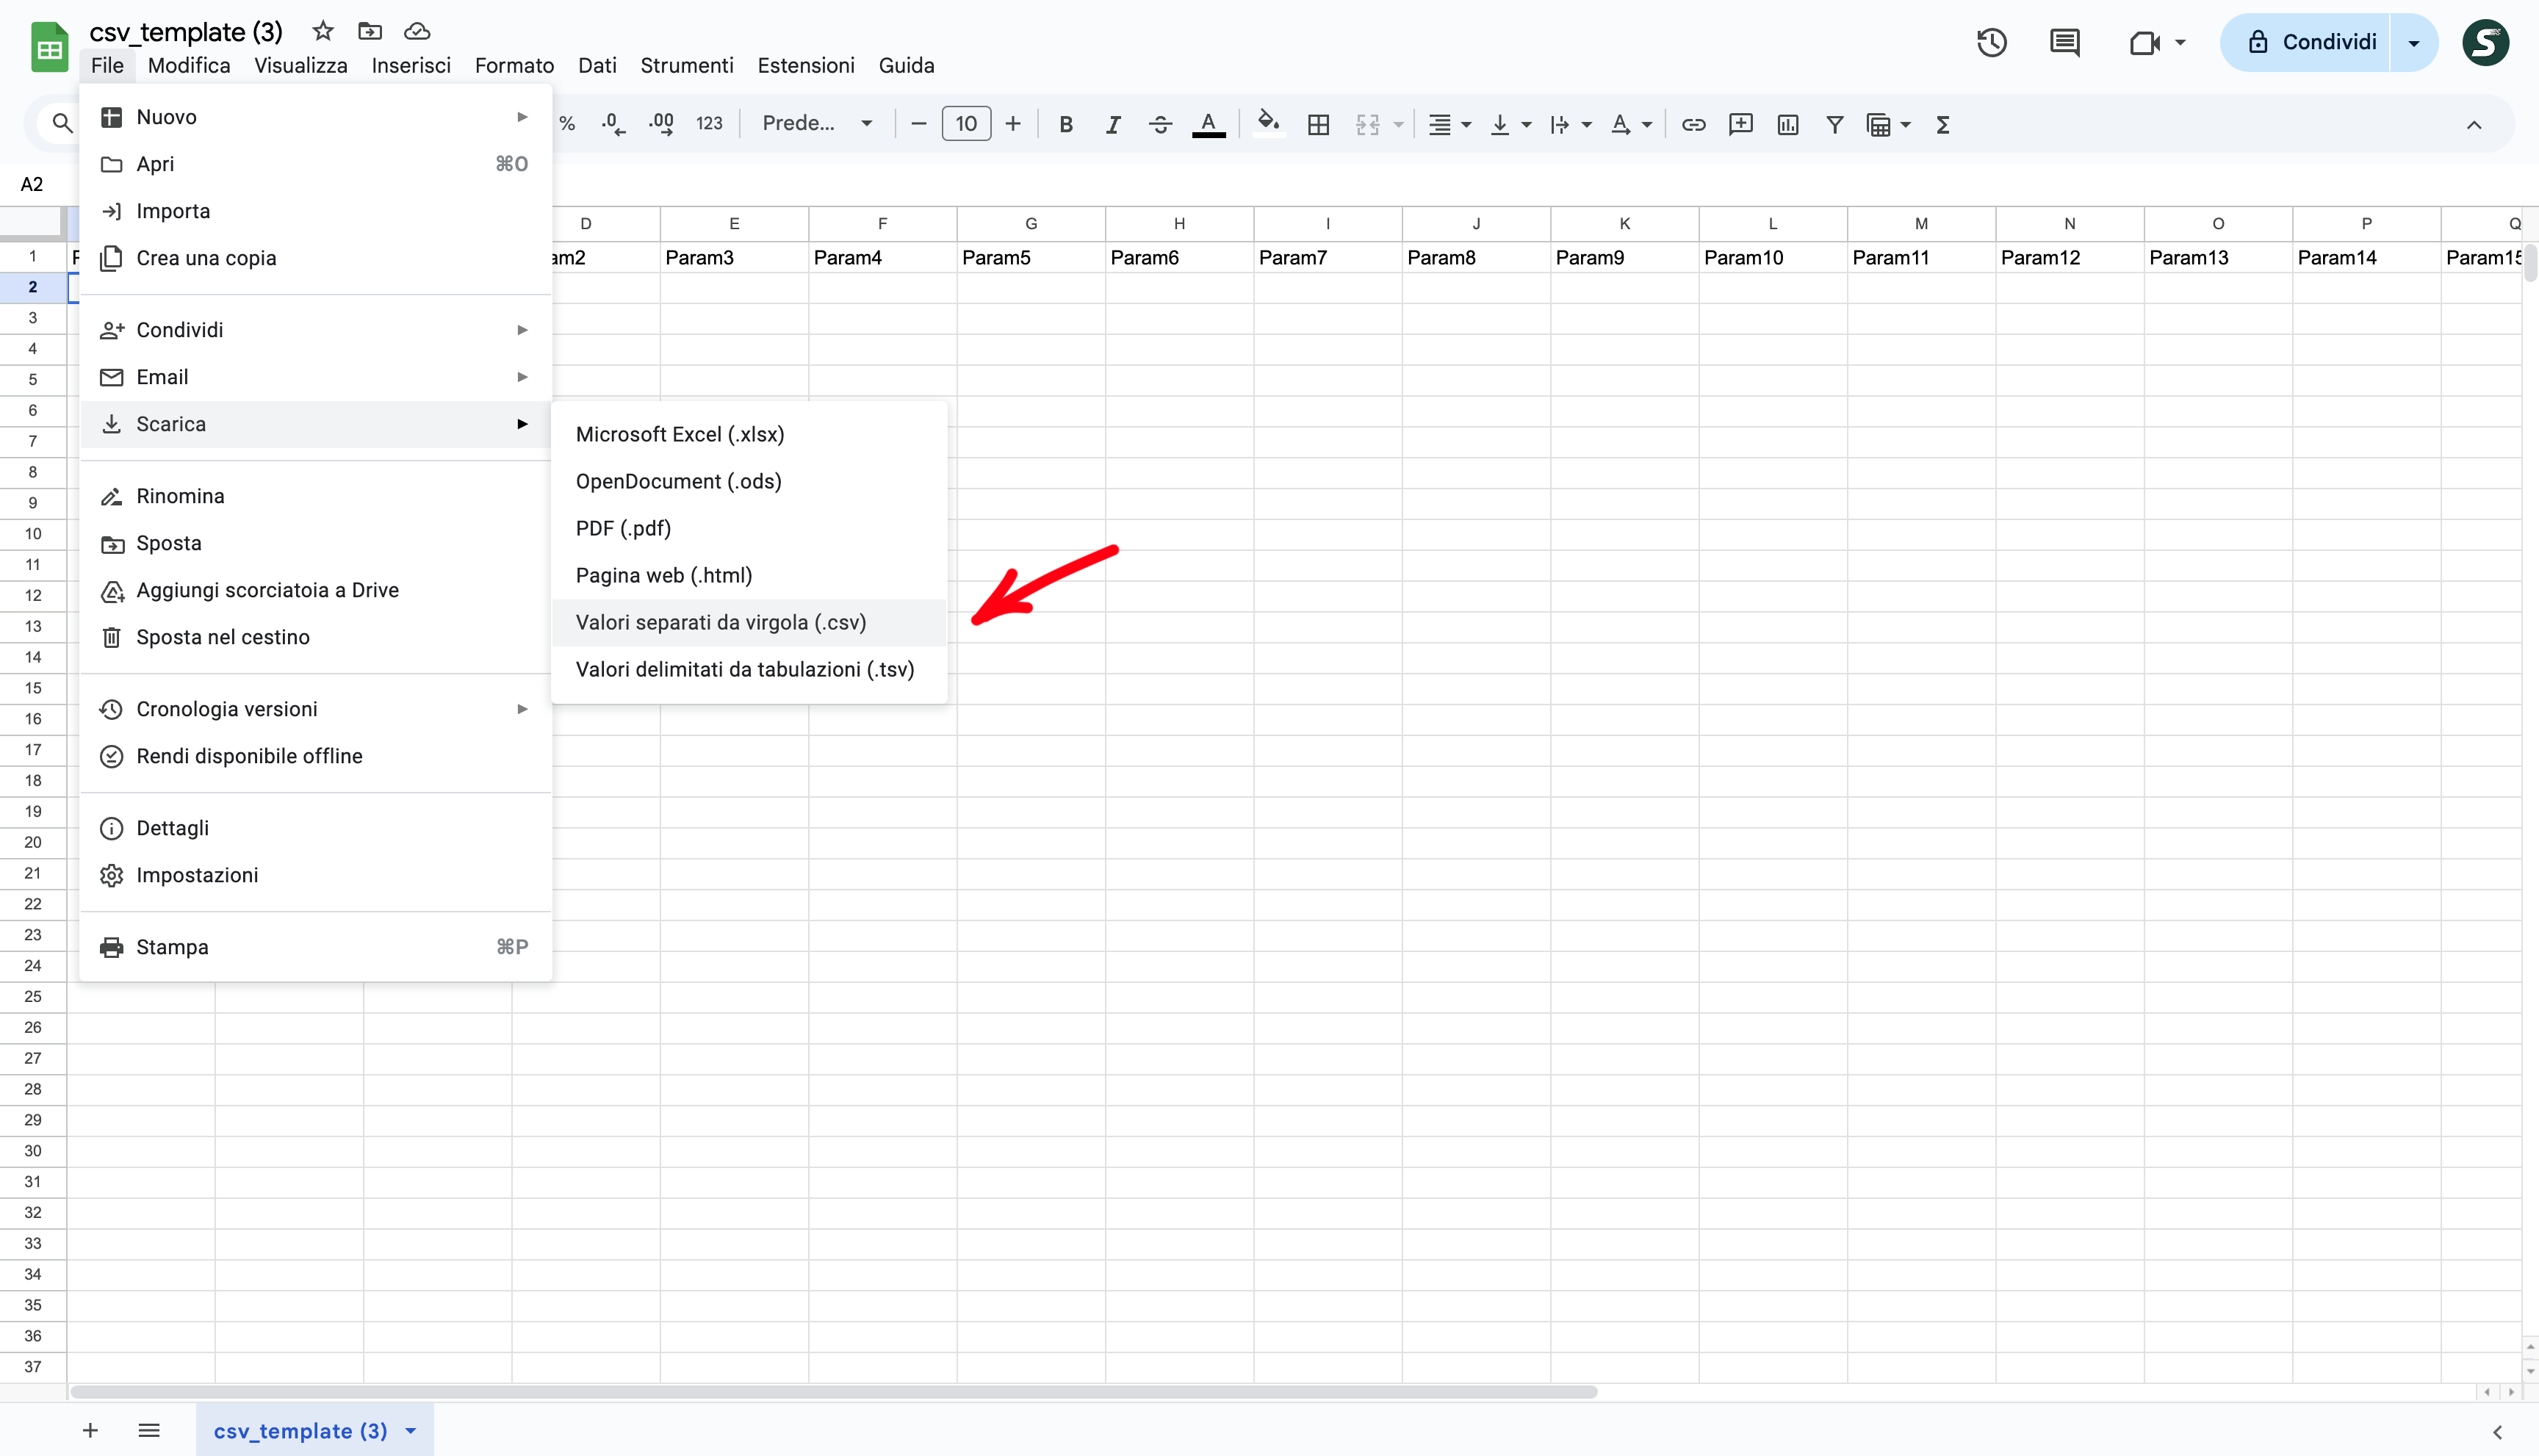
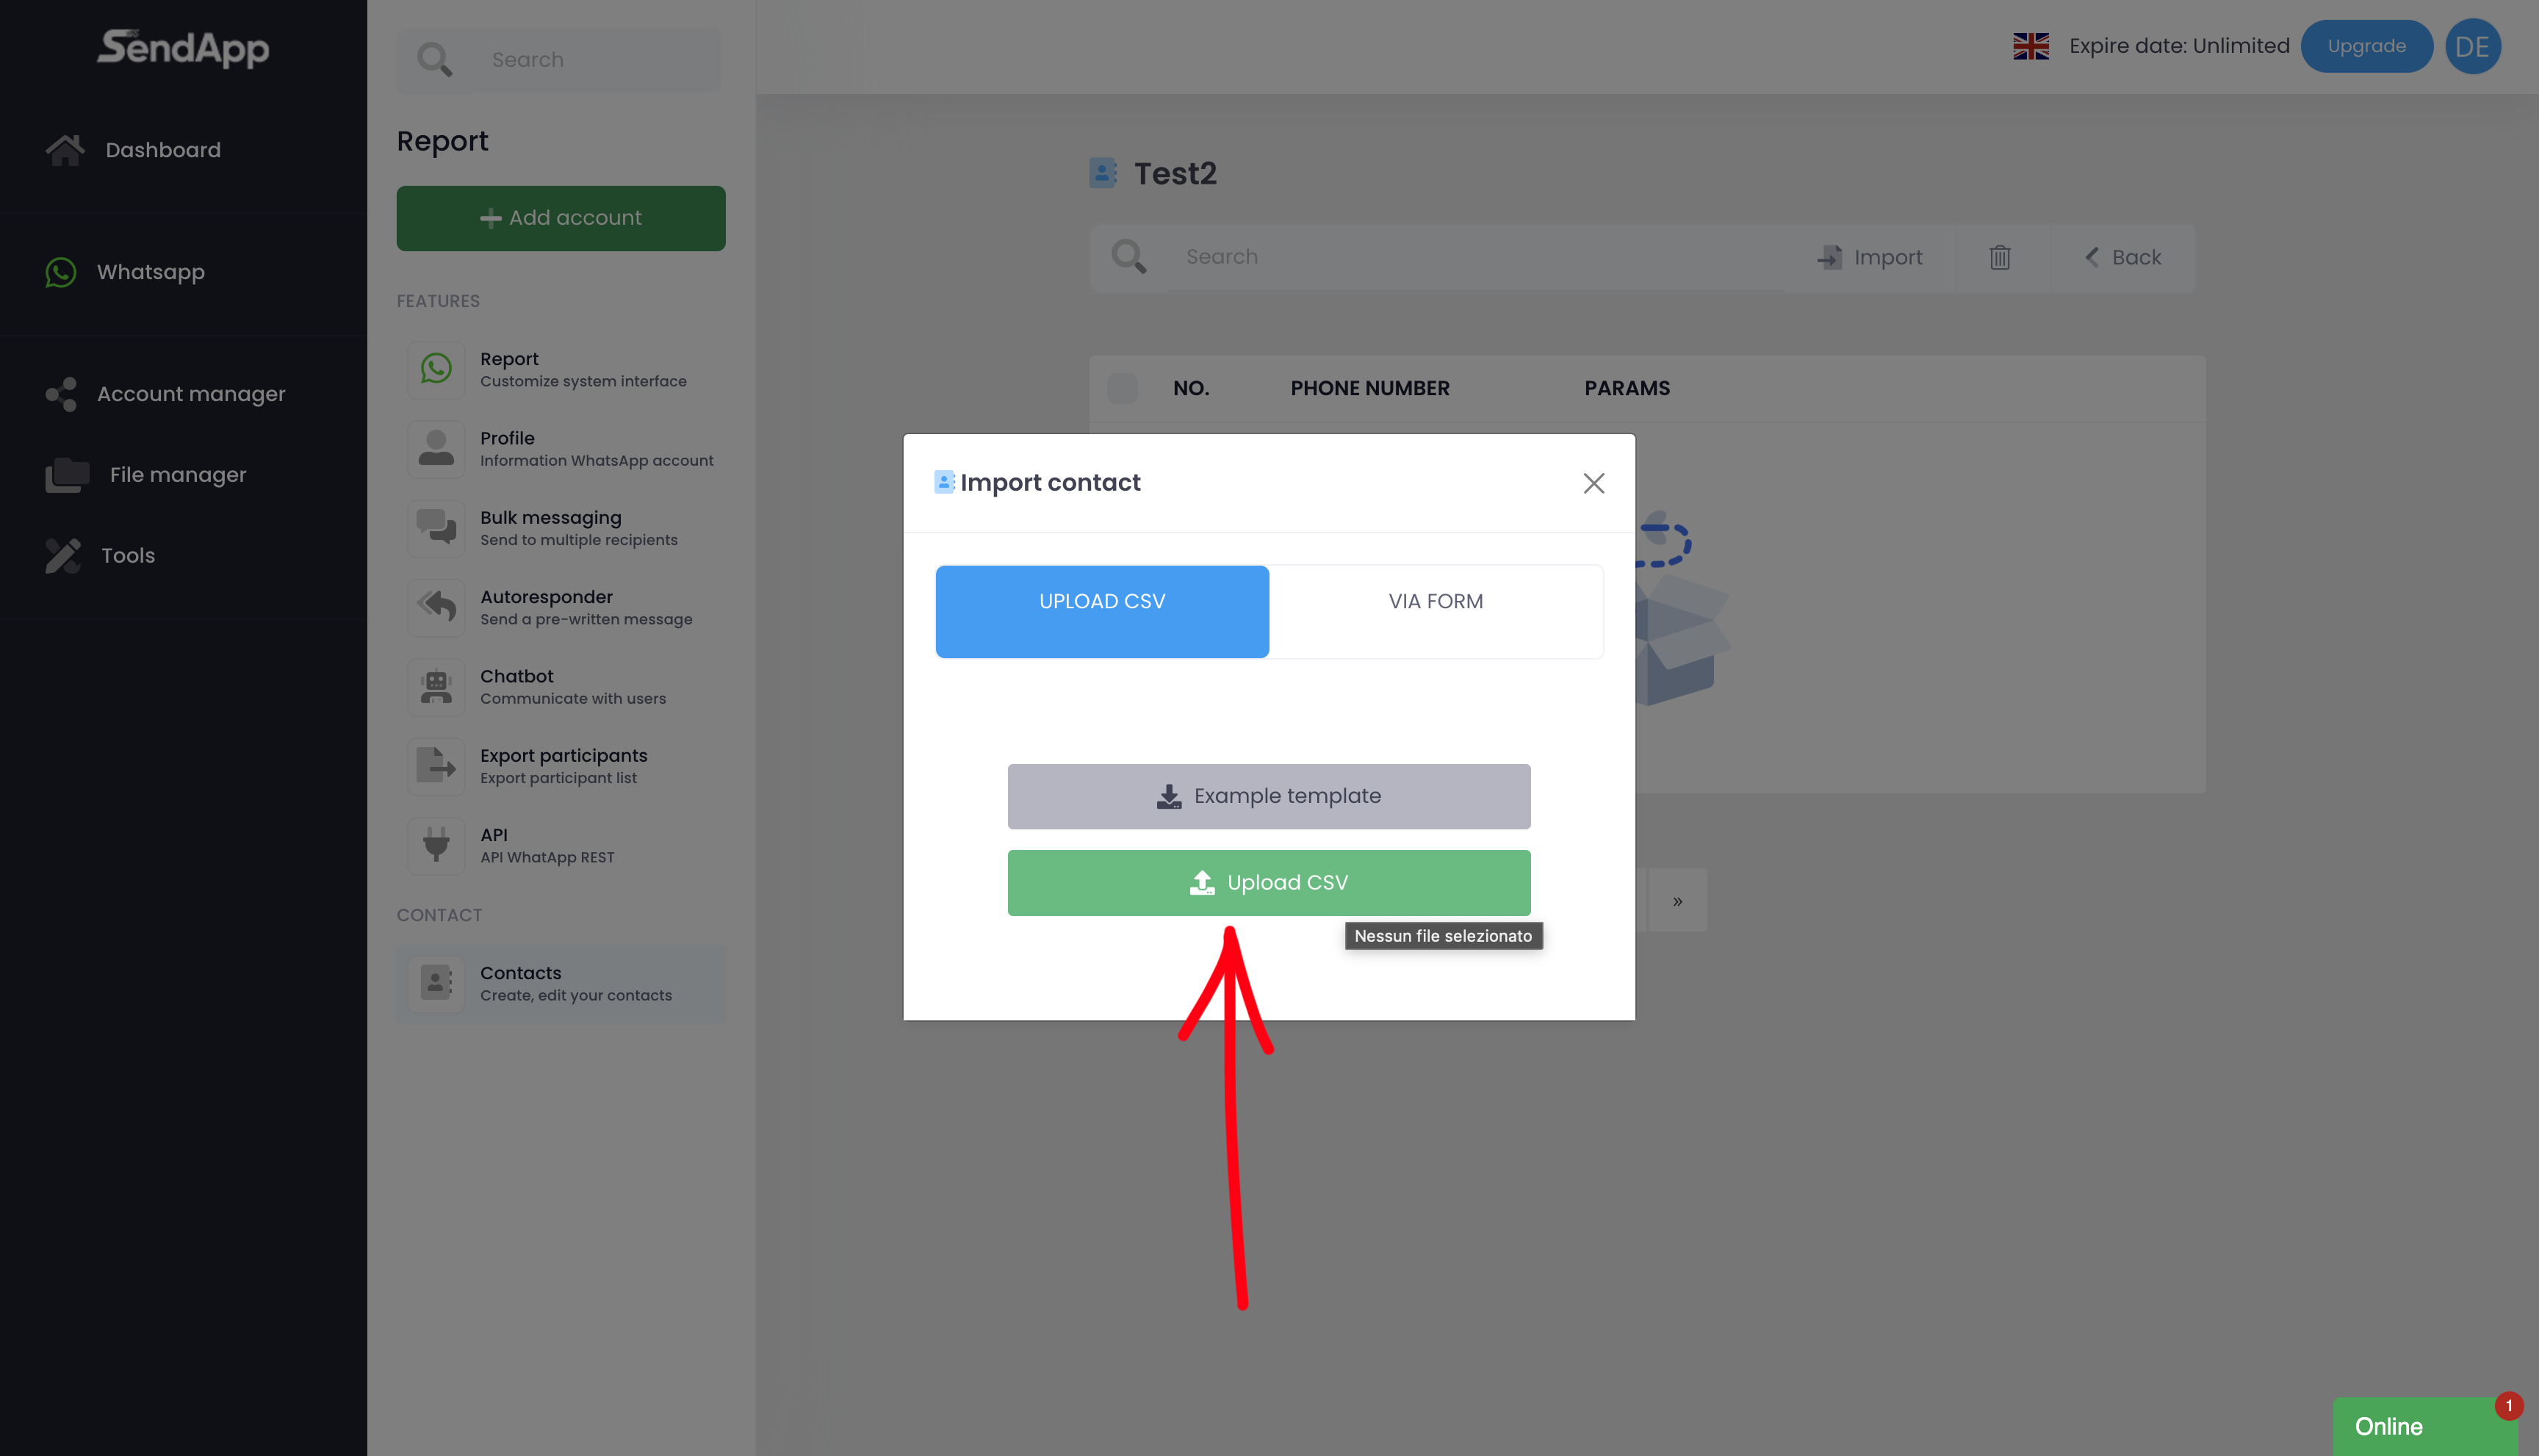
-Back to top Sendapp Cloud, go to the rubric and click on CSV Upload.
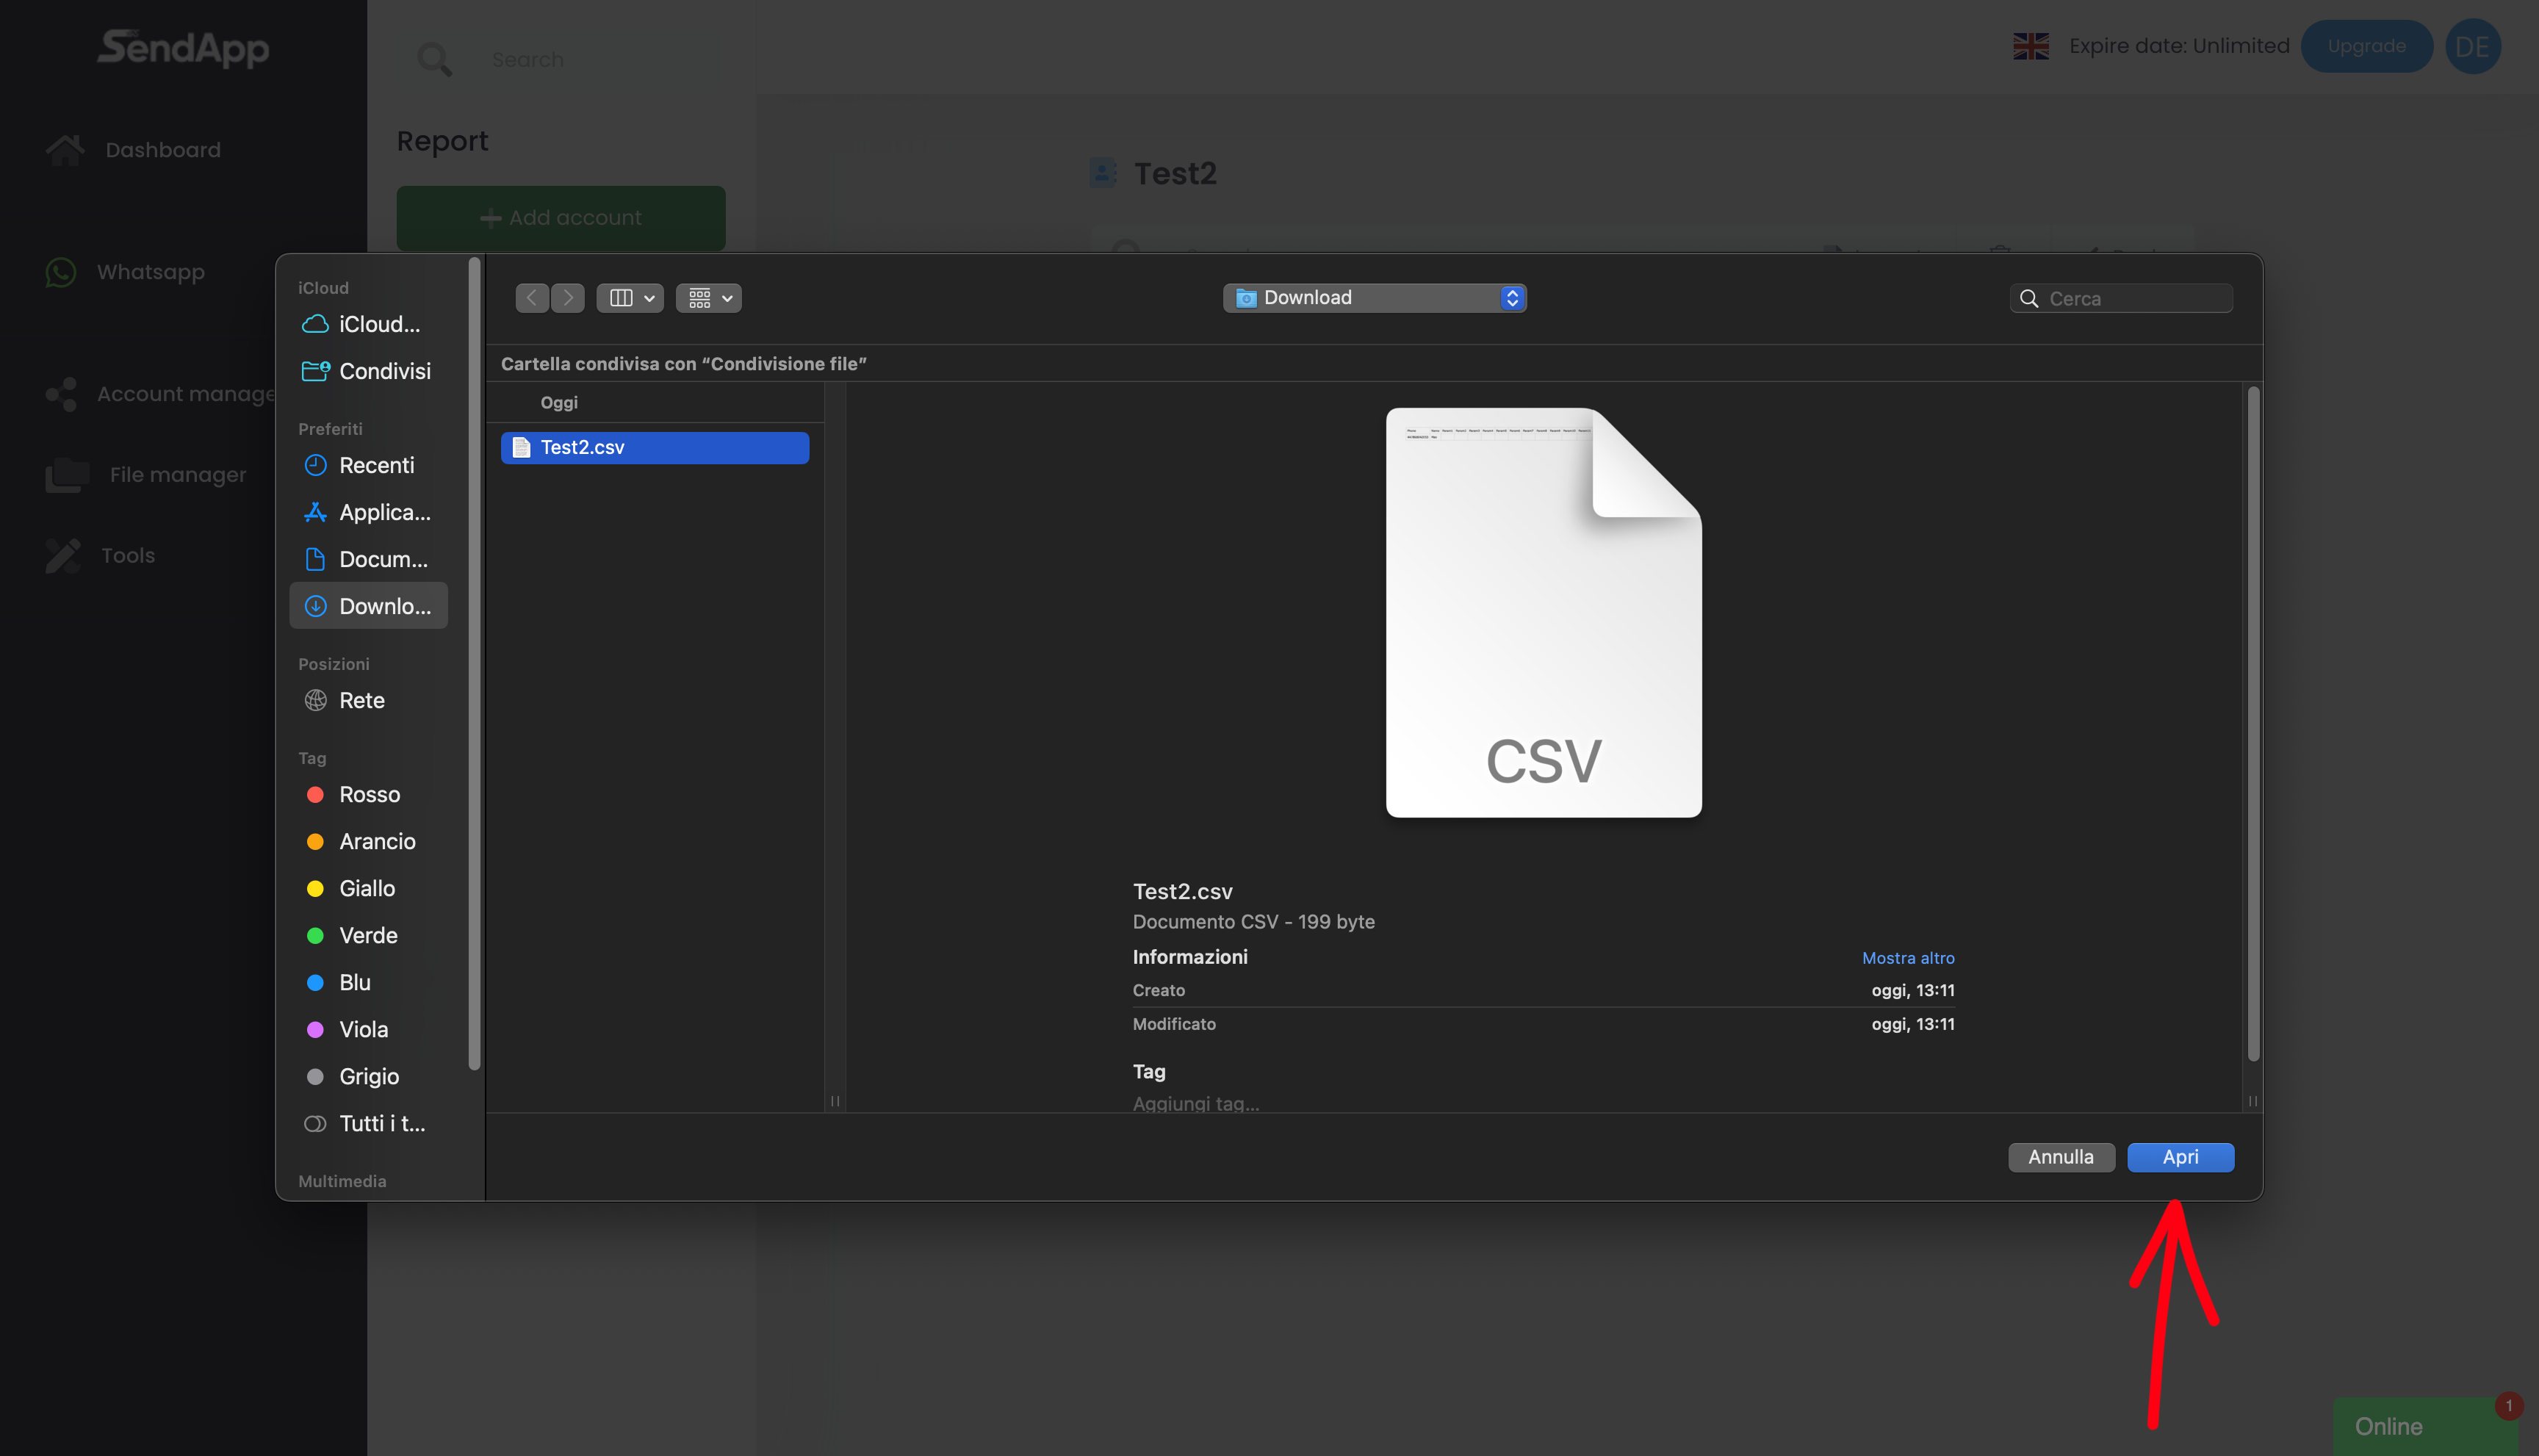
-Select the CSV file created and uploaded by Google Sheets.
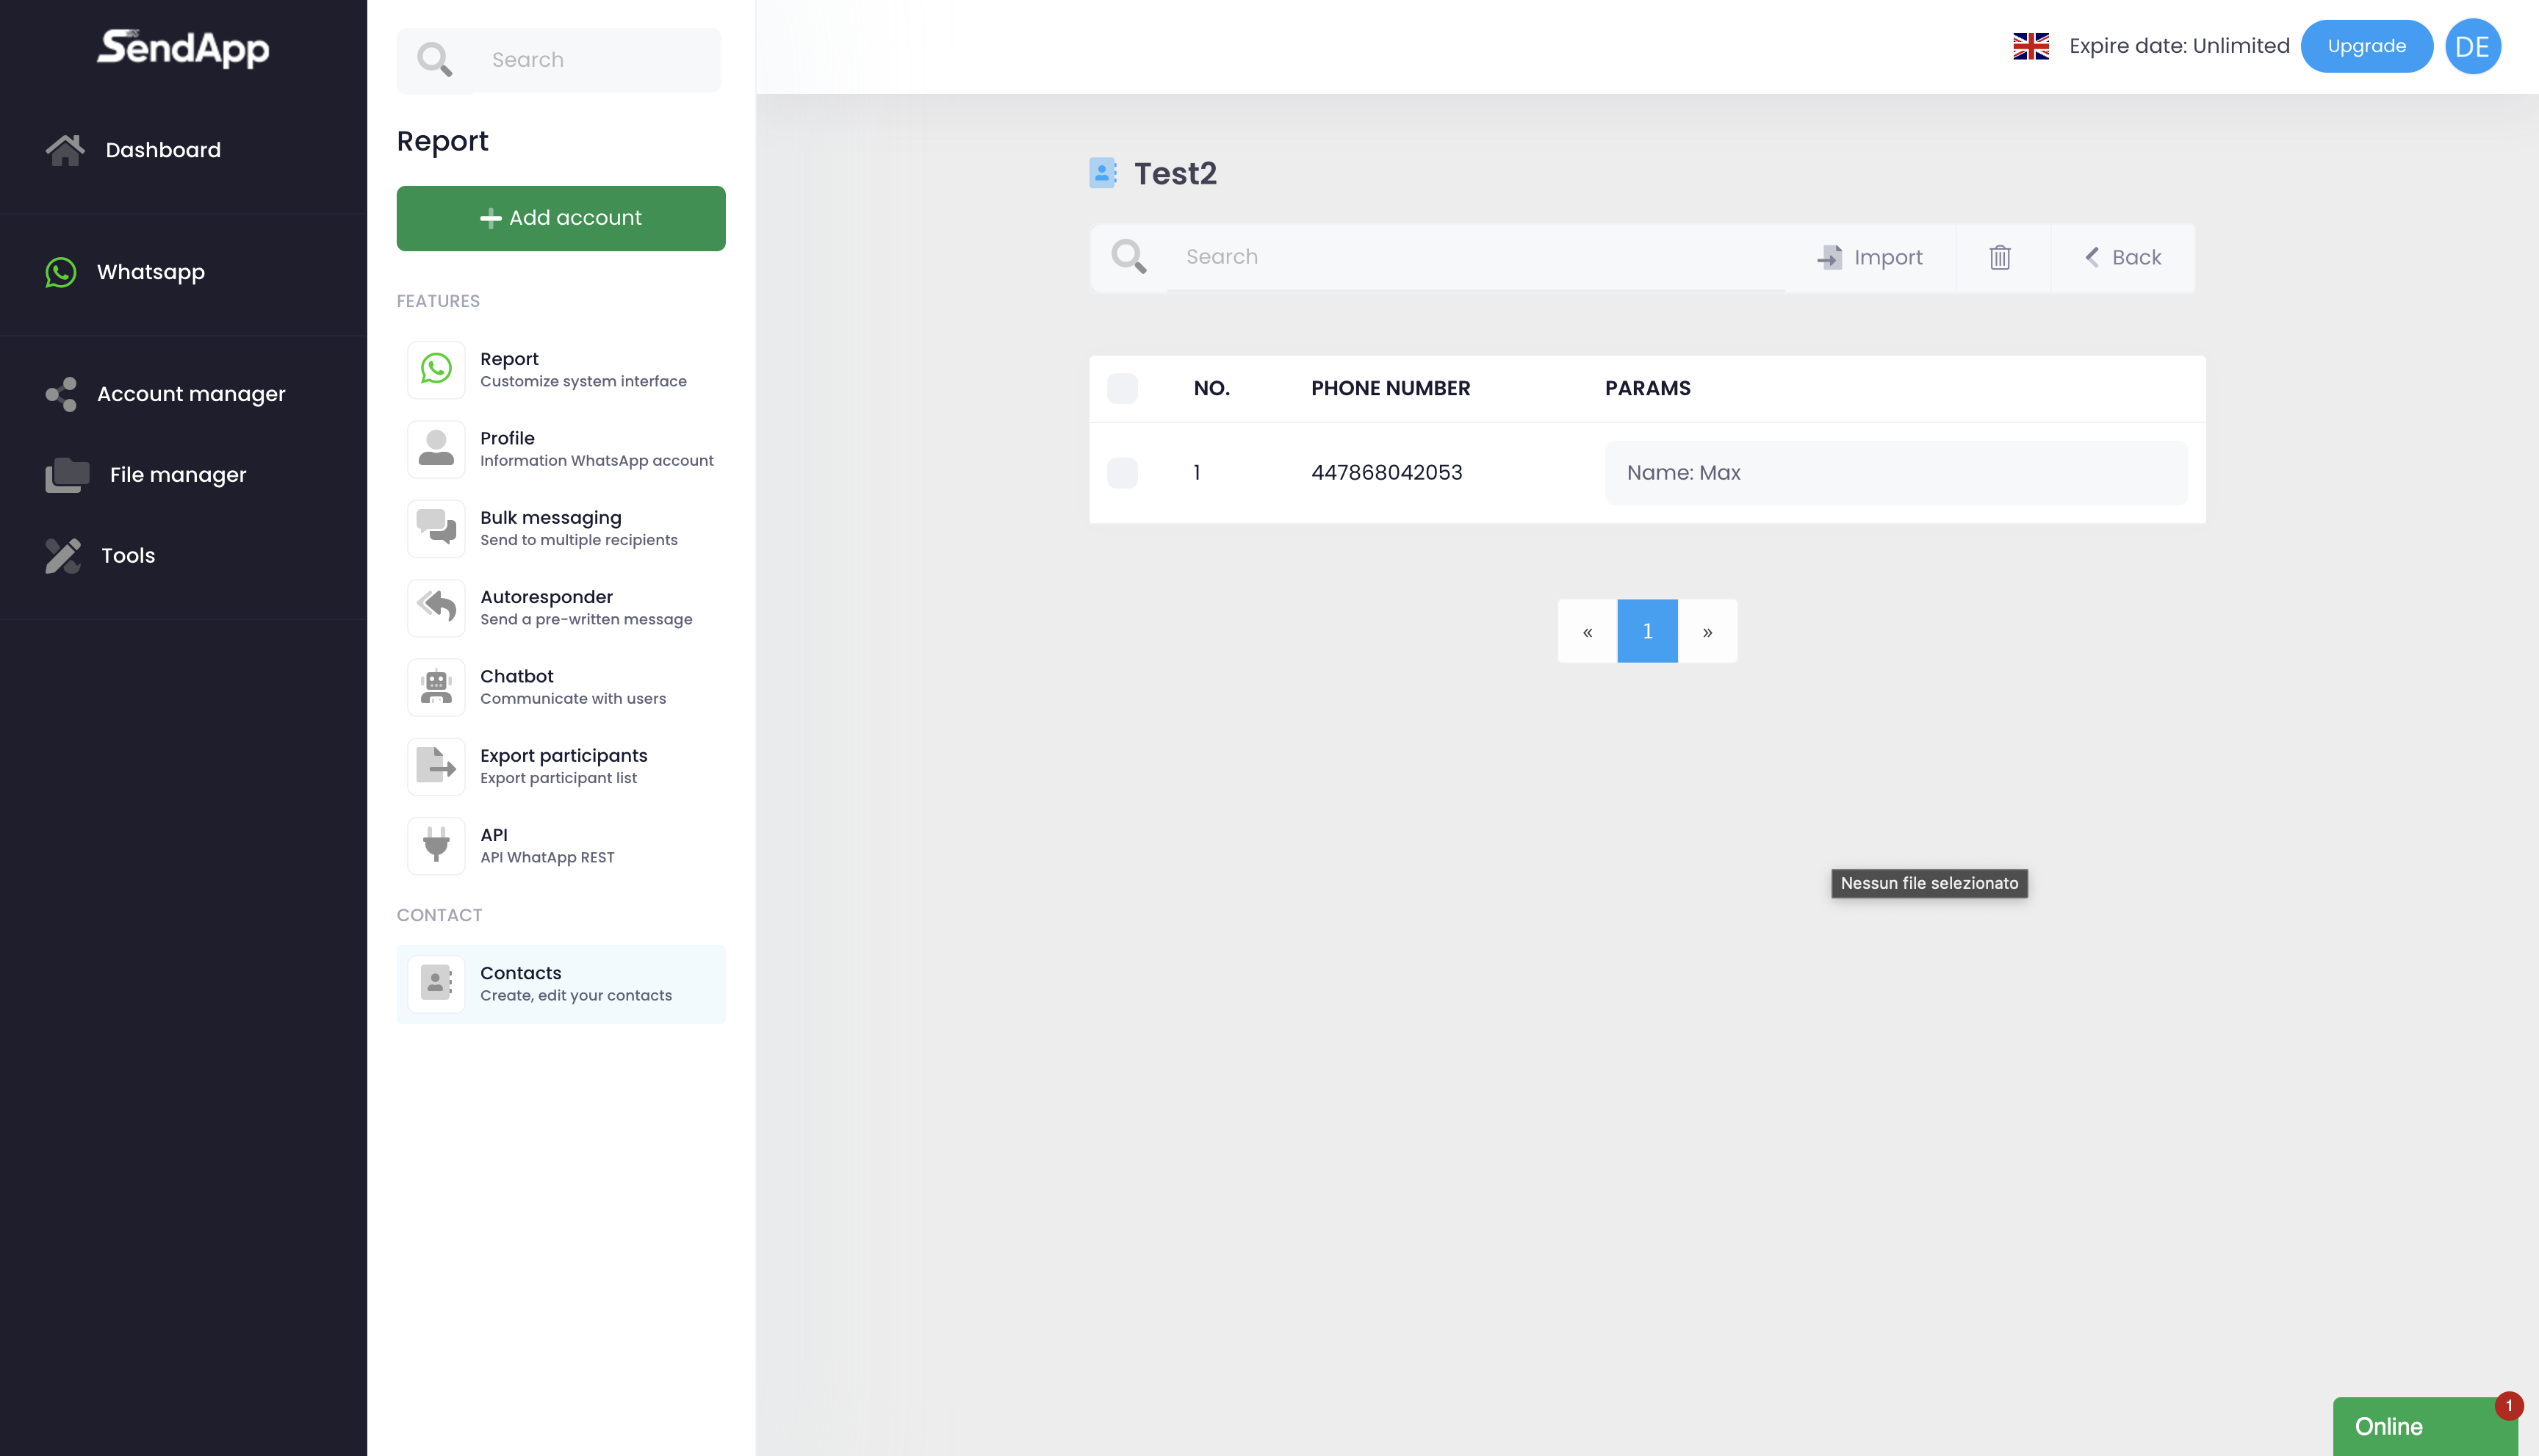
-The address book will be automatically organized and ready to use.
Come creare e gestire campagne massive su Sendapp Cloud
Accesso alla funzionalità Bulk Messaging
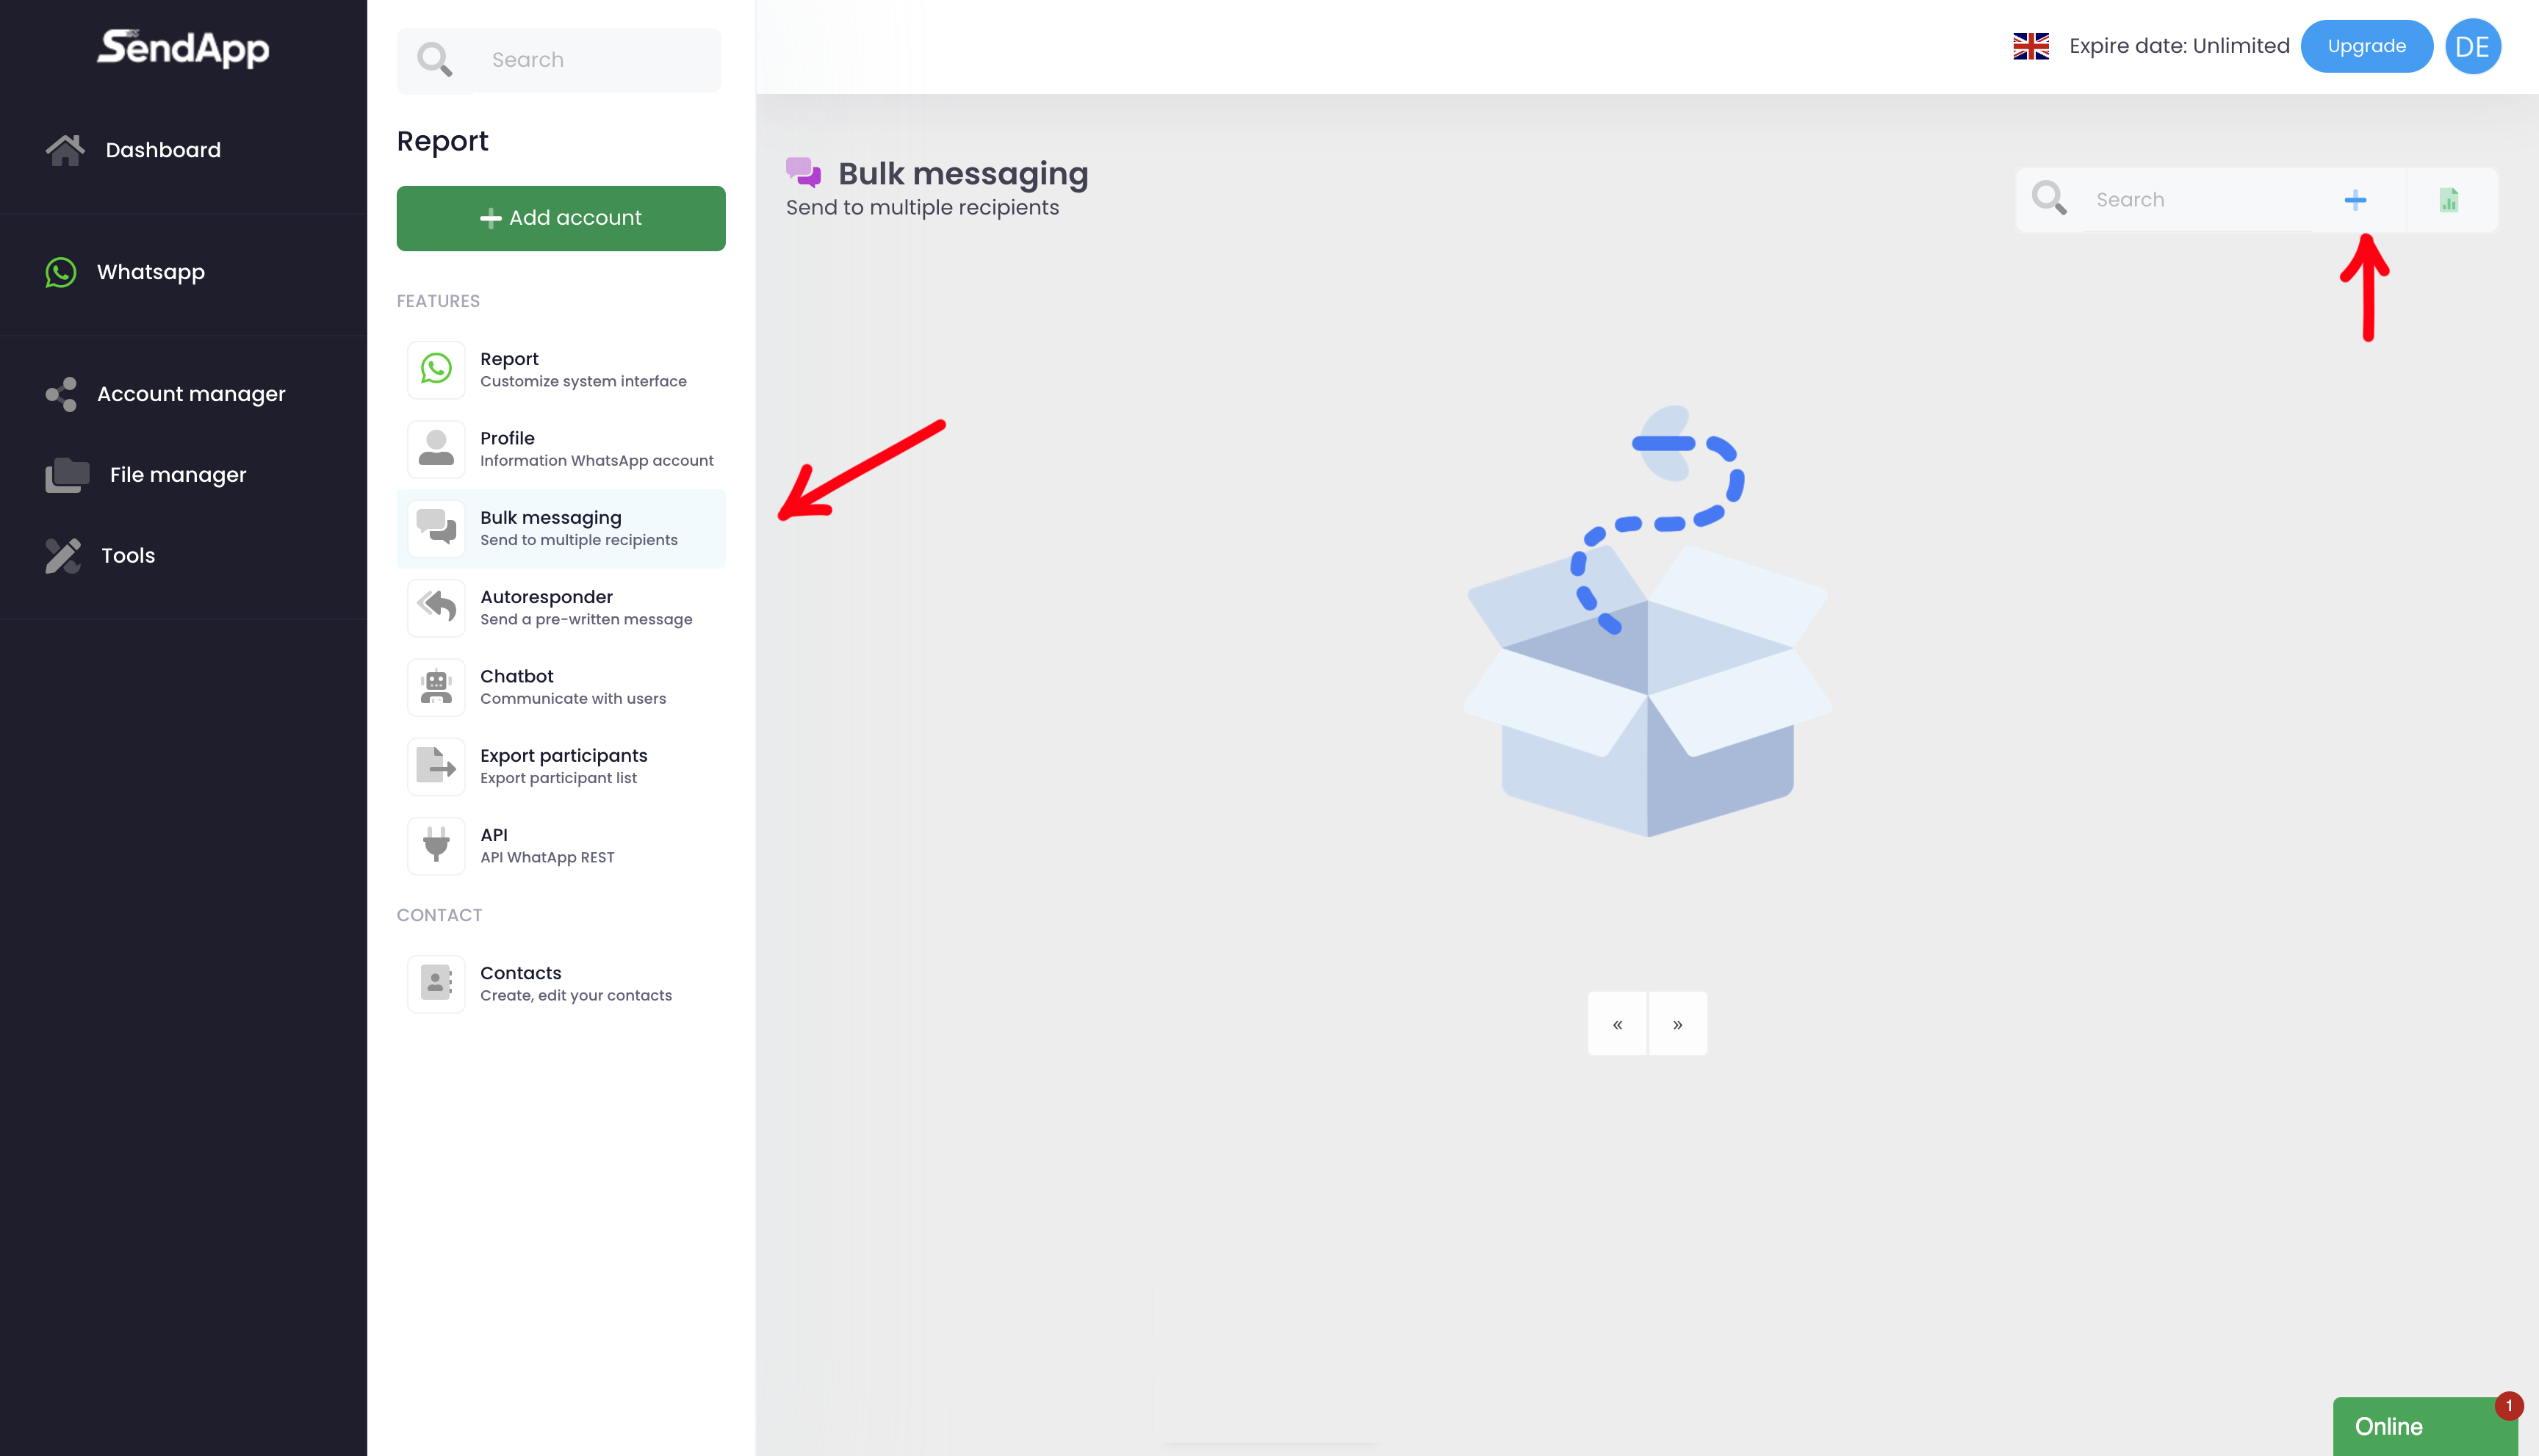
-Go to the section Bulk Messaging From the main menu.
-Click on Add New Campaign To start creating a new campaign.
Creazione della campagna
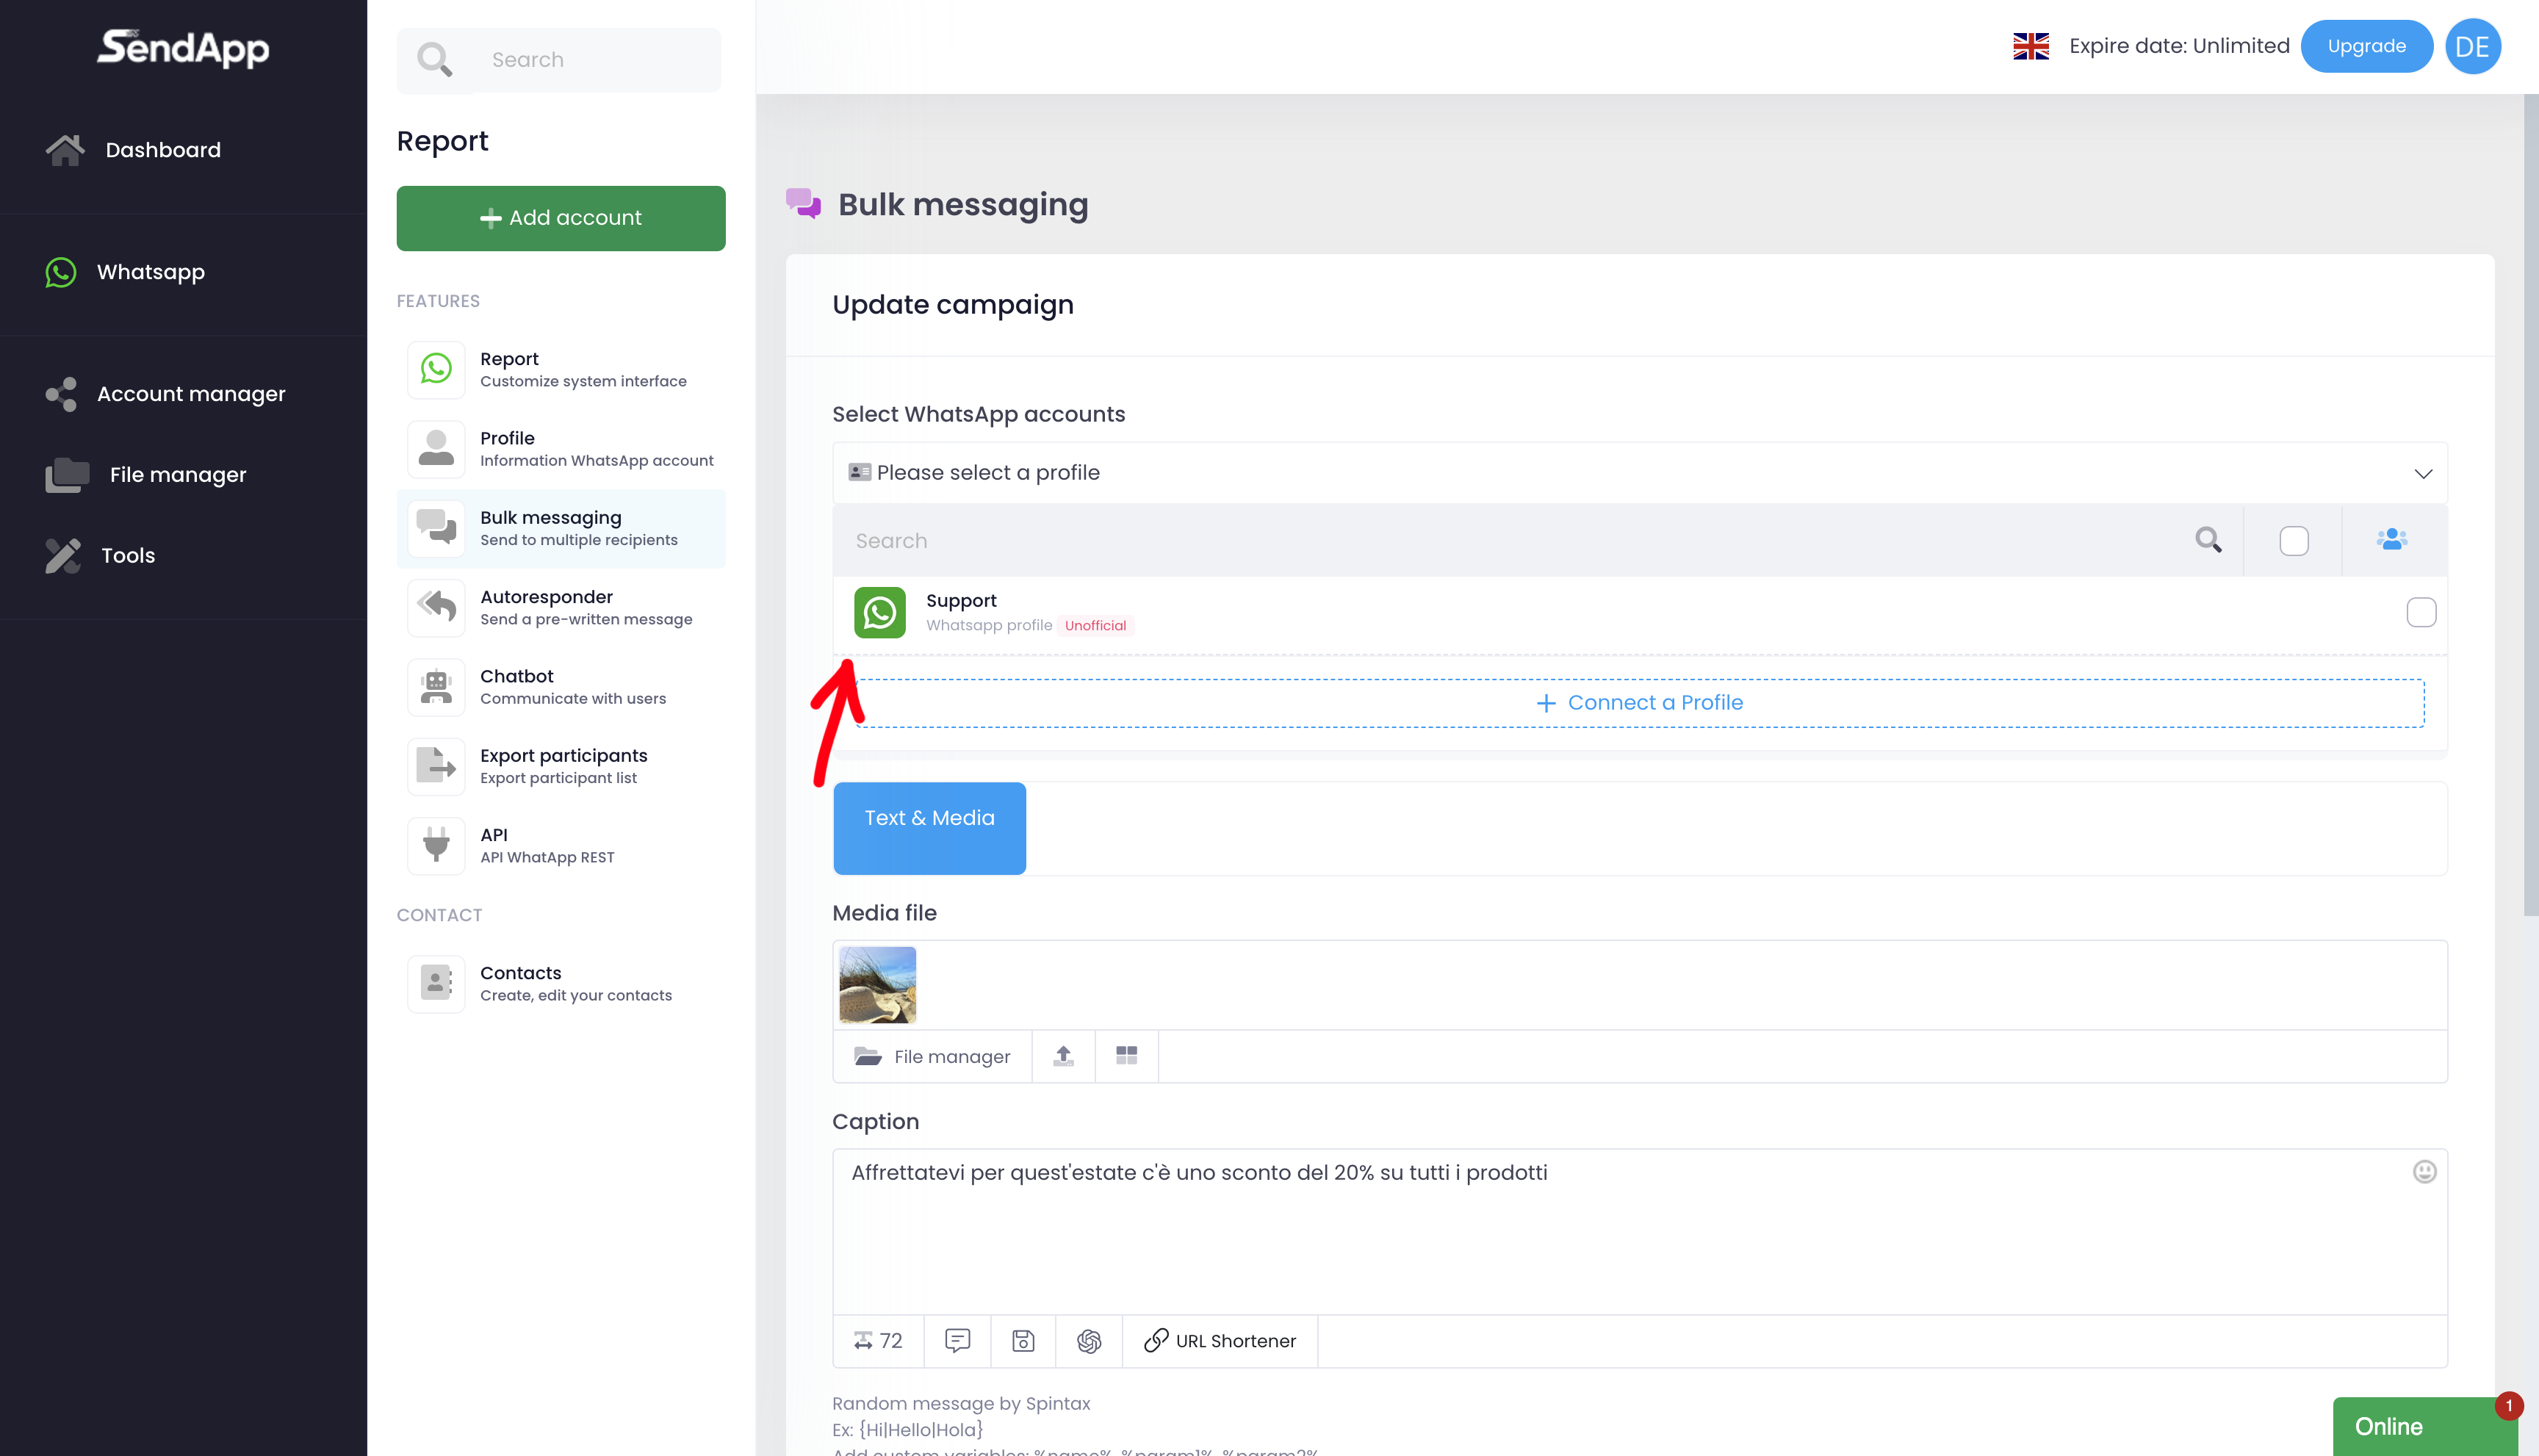
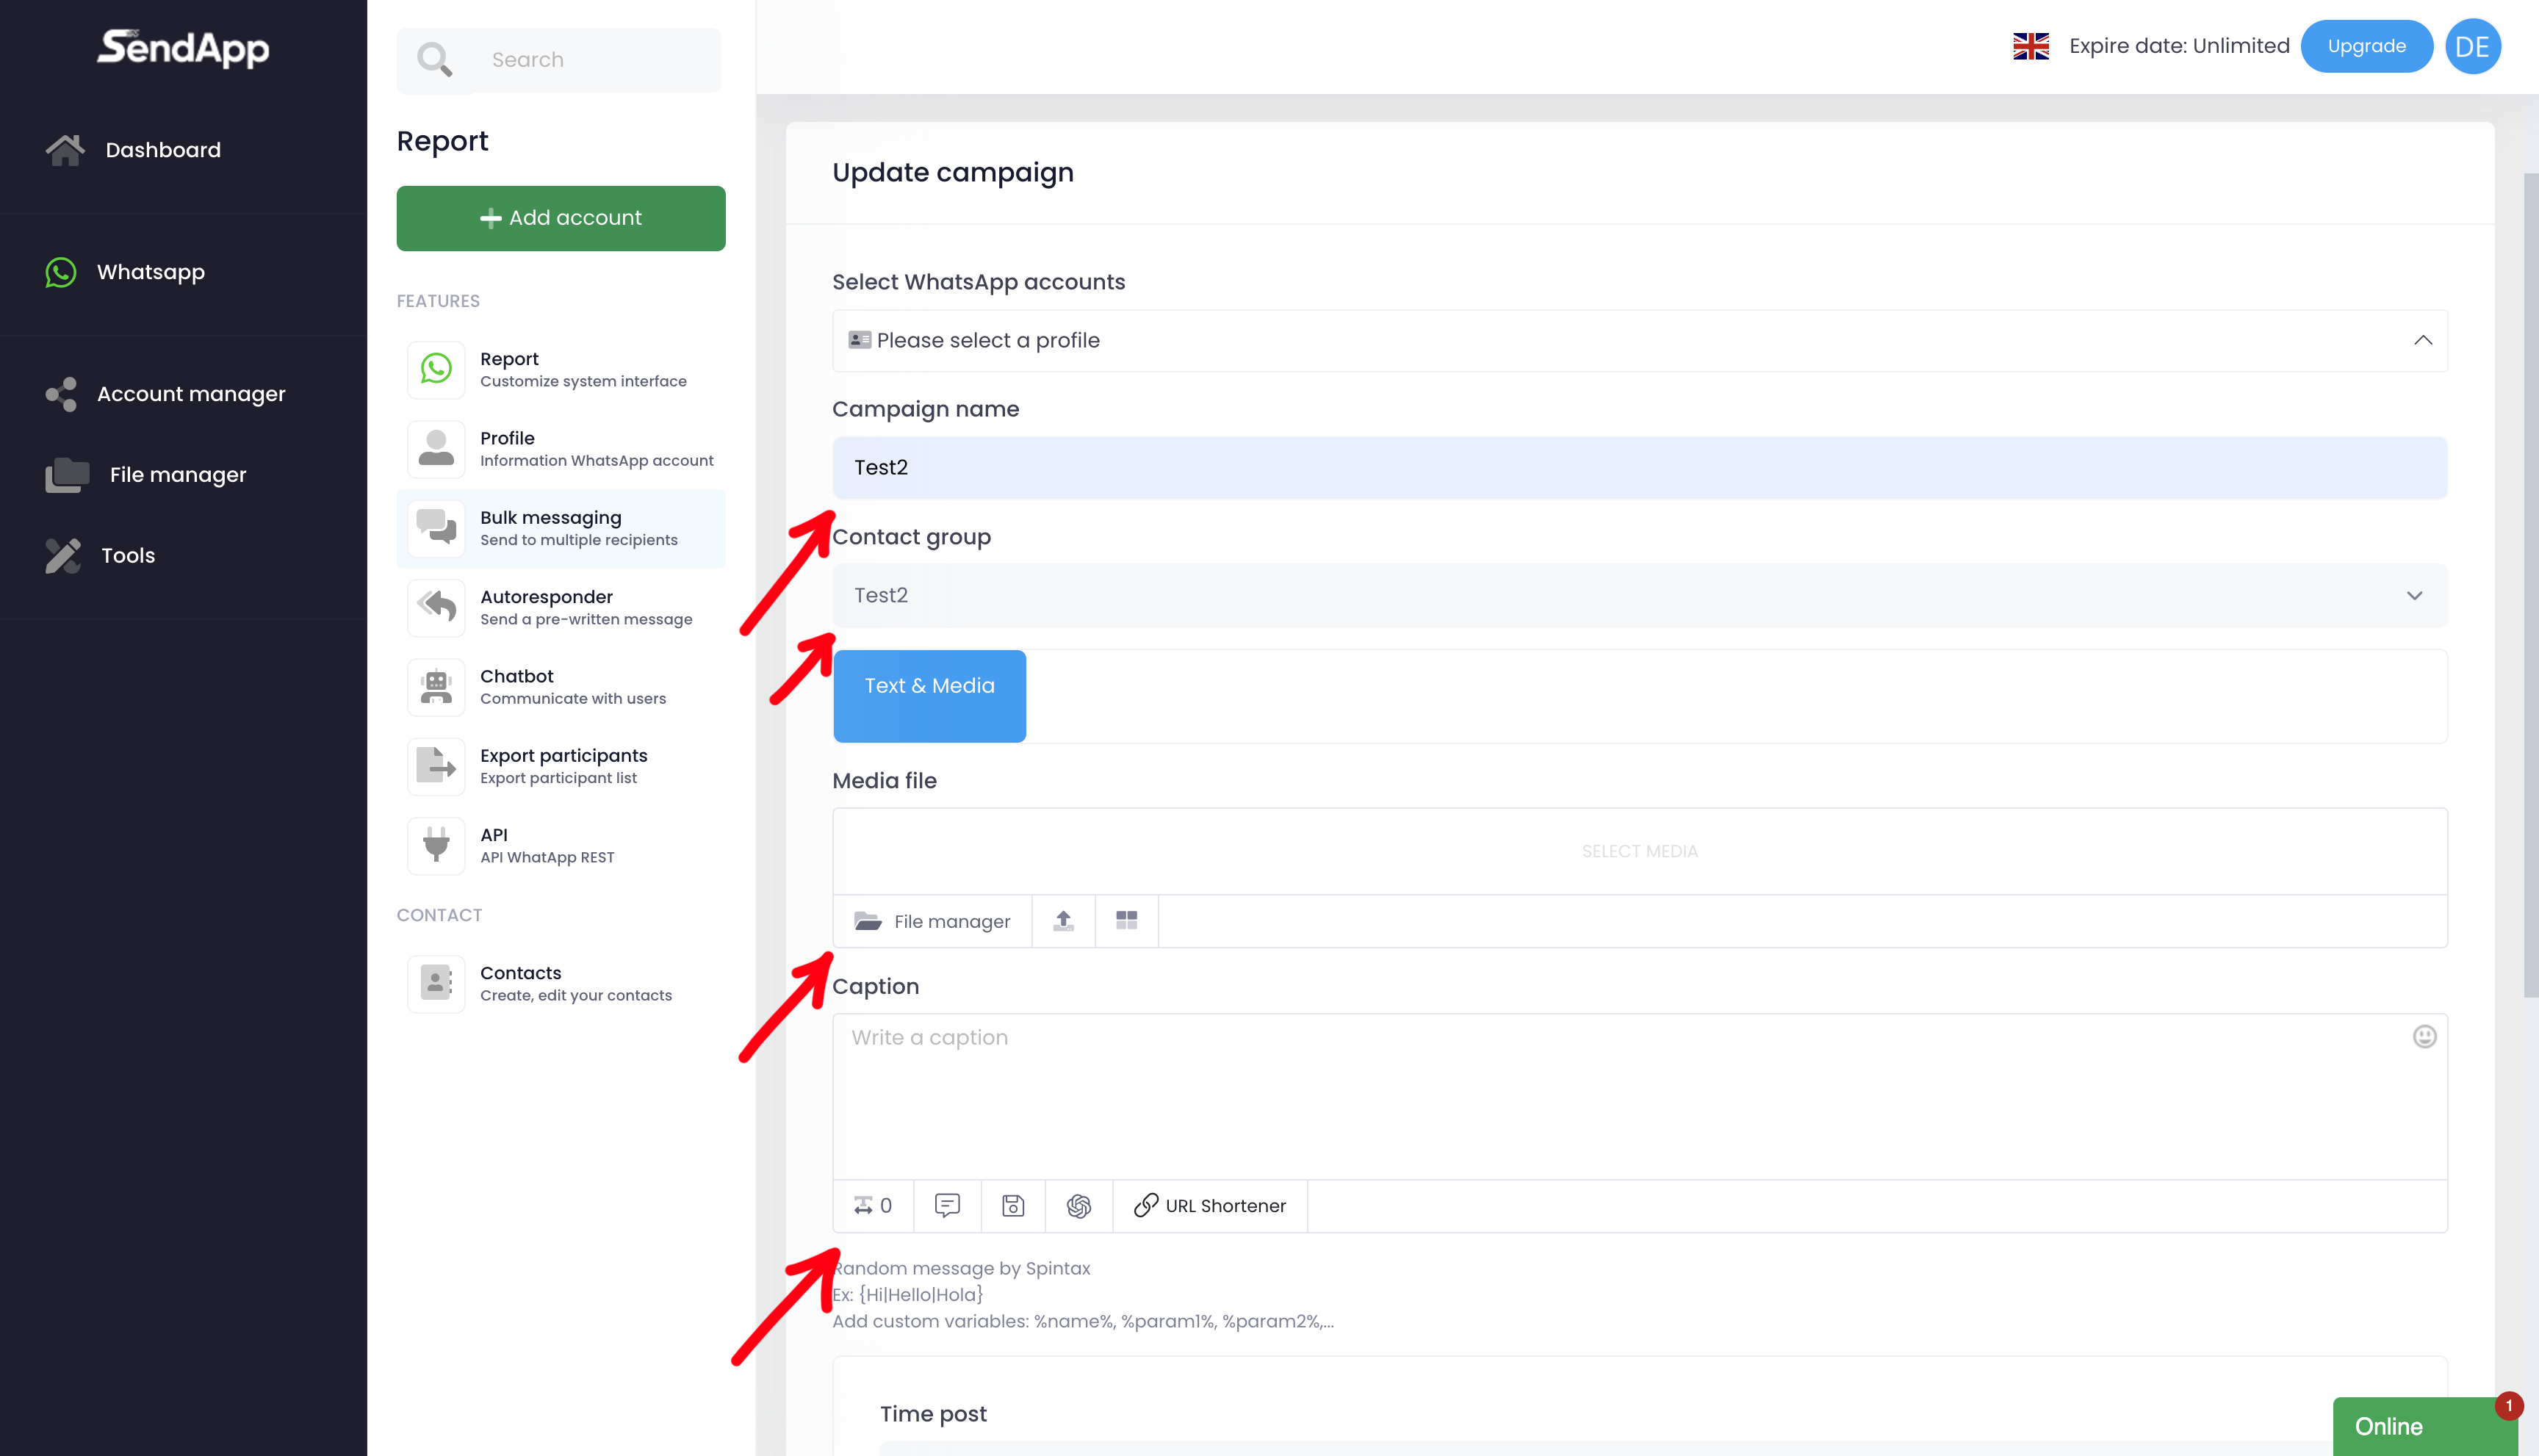
-Campaign name: Assigns a descriptive name to the campaign to easily identify it.
-Account selection: Choose the WhatsApp account to use for sending messages.
-Reference Rubric: selects the address book of contacts (e.g., "Test2") created earlier.
- Aggiunta di file multimediali
-If you wish to send a message with multimedia content, click on Add Media.
-Upload the media file from your desktop or from your file manager.
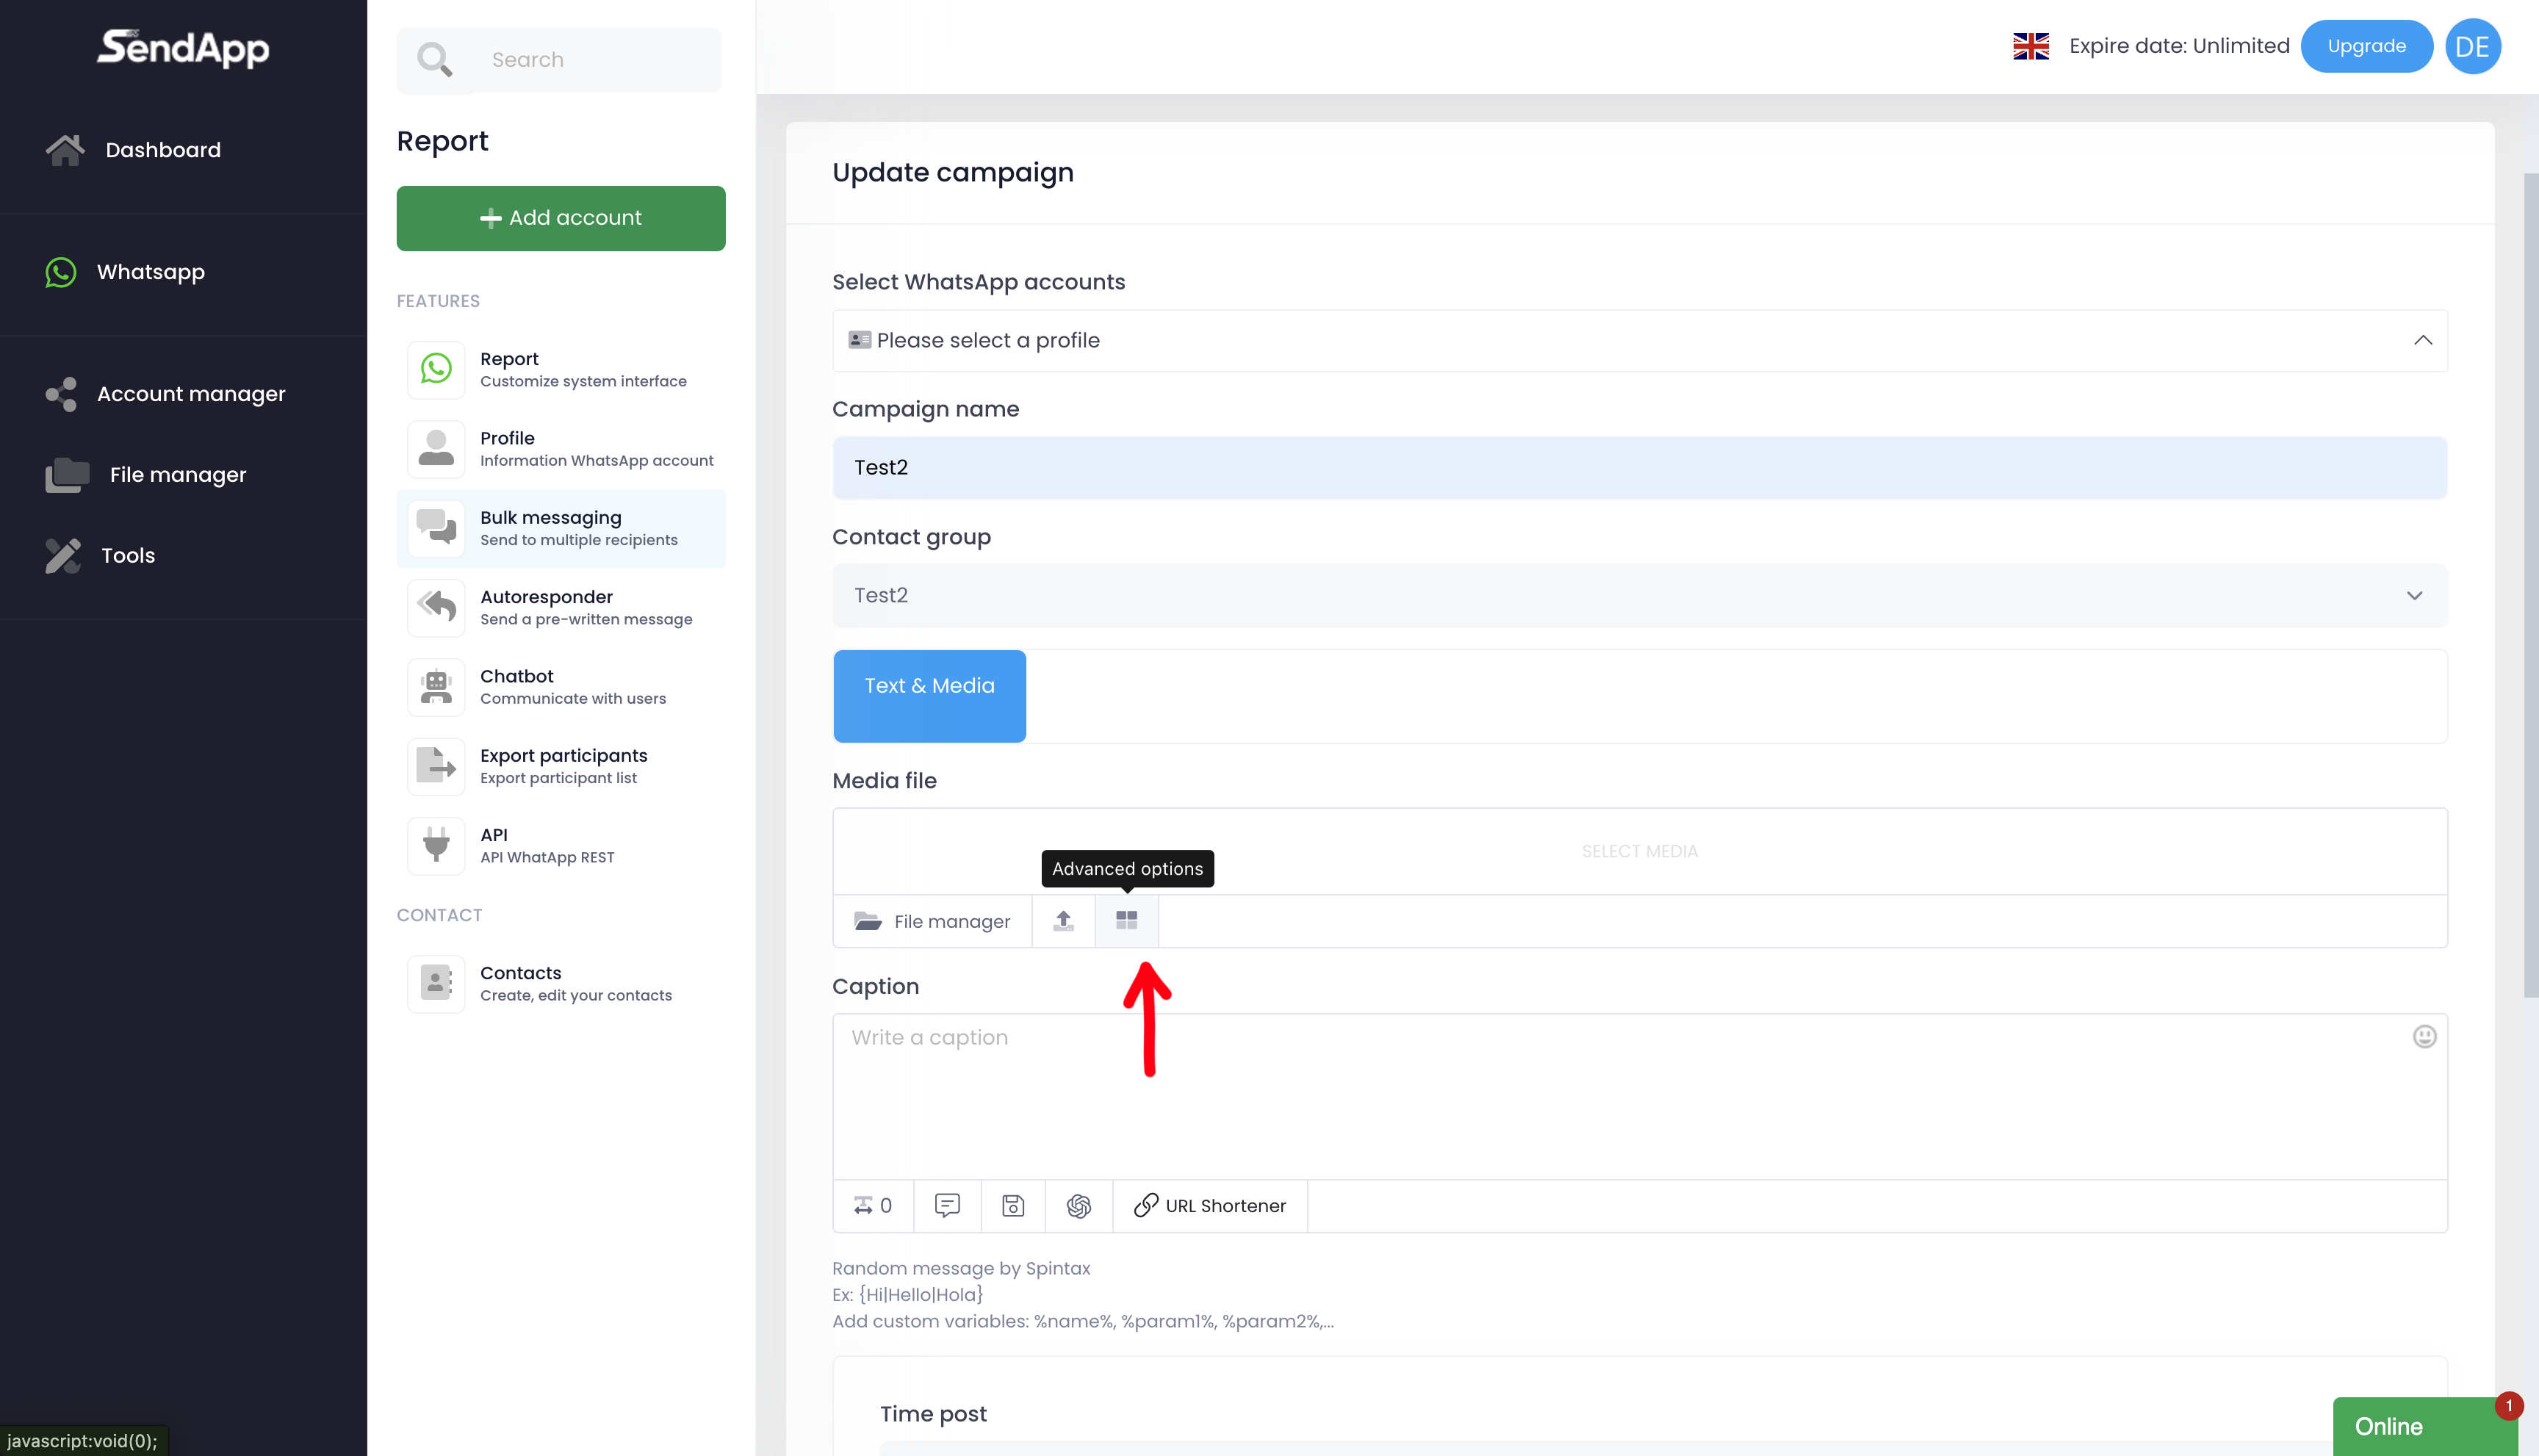
- Utilizzo delle opzioni avanzate (Advanced Option)
-Click on the icon Advanced Option located on the right.
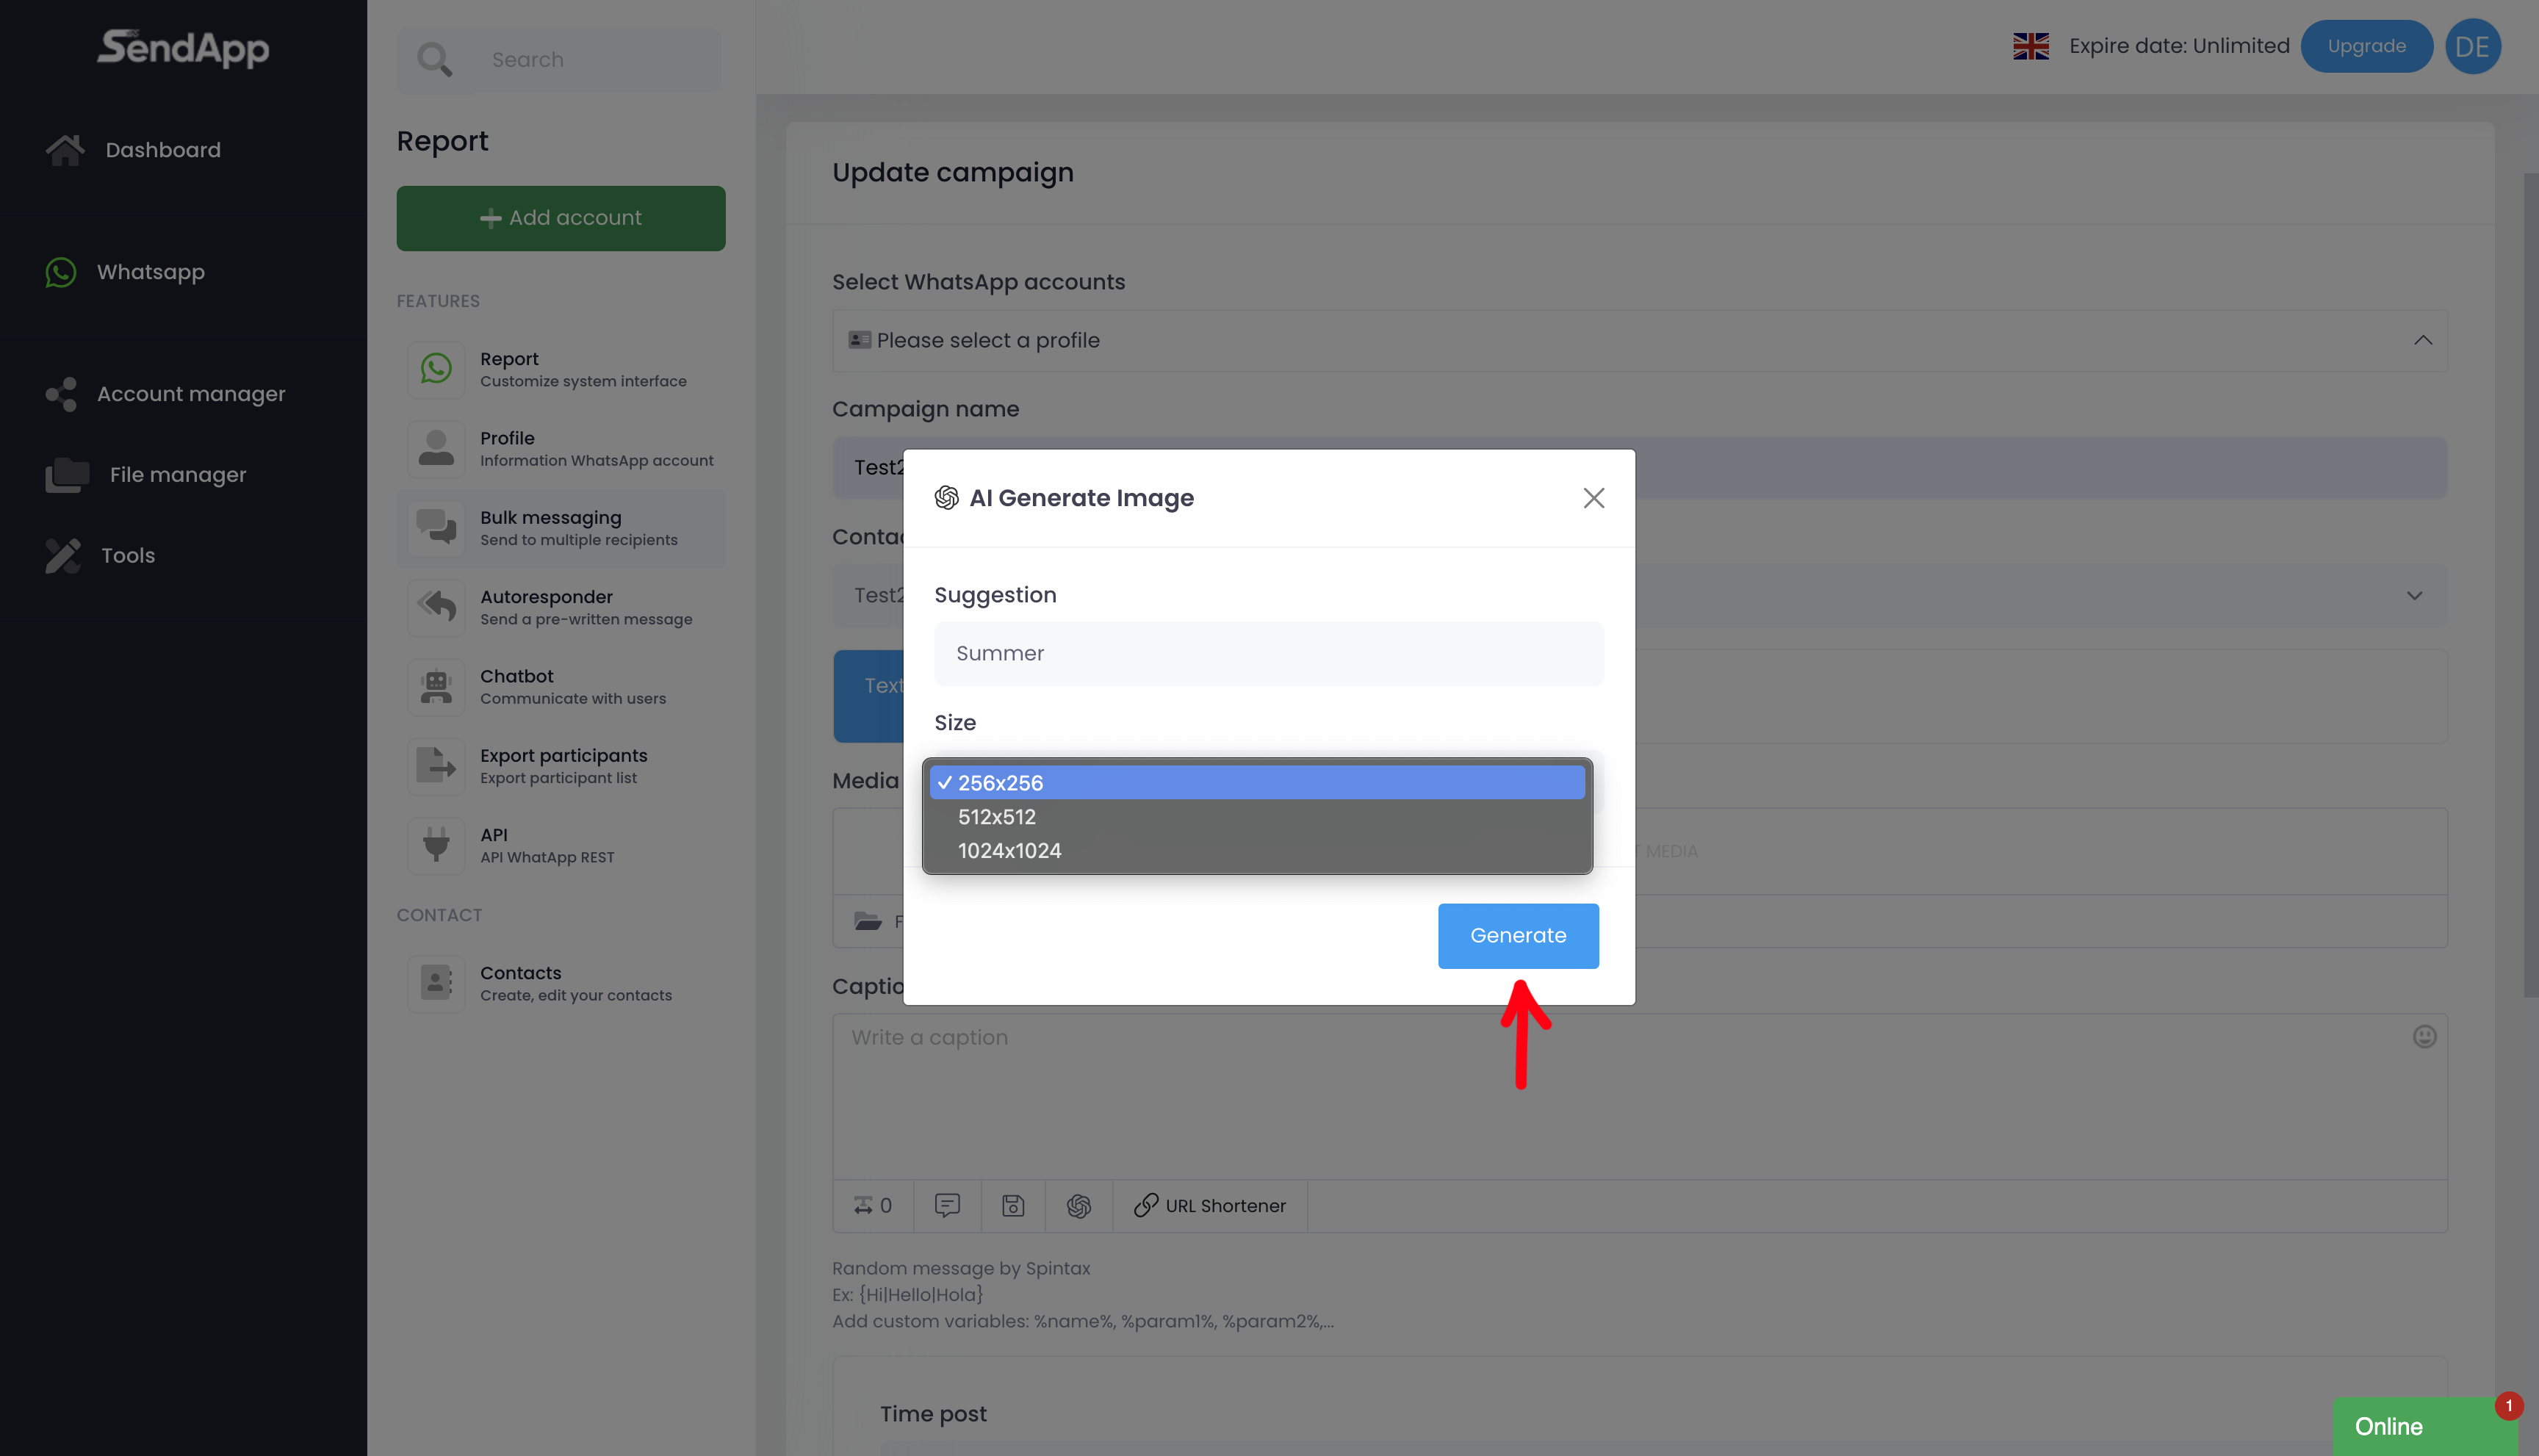
-With the help of theartificial intelligence (AI):
-Insert a keyword To generate a custom image.
-Define the size in pixels Of the image.
-The AI will generate the image, which you can add to the message.
Scrittura del messaggio
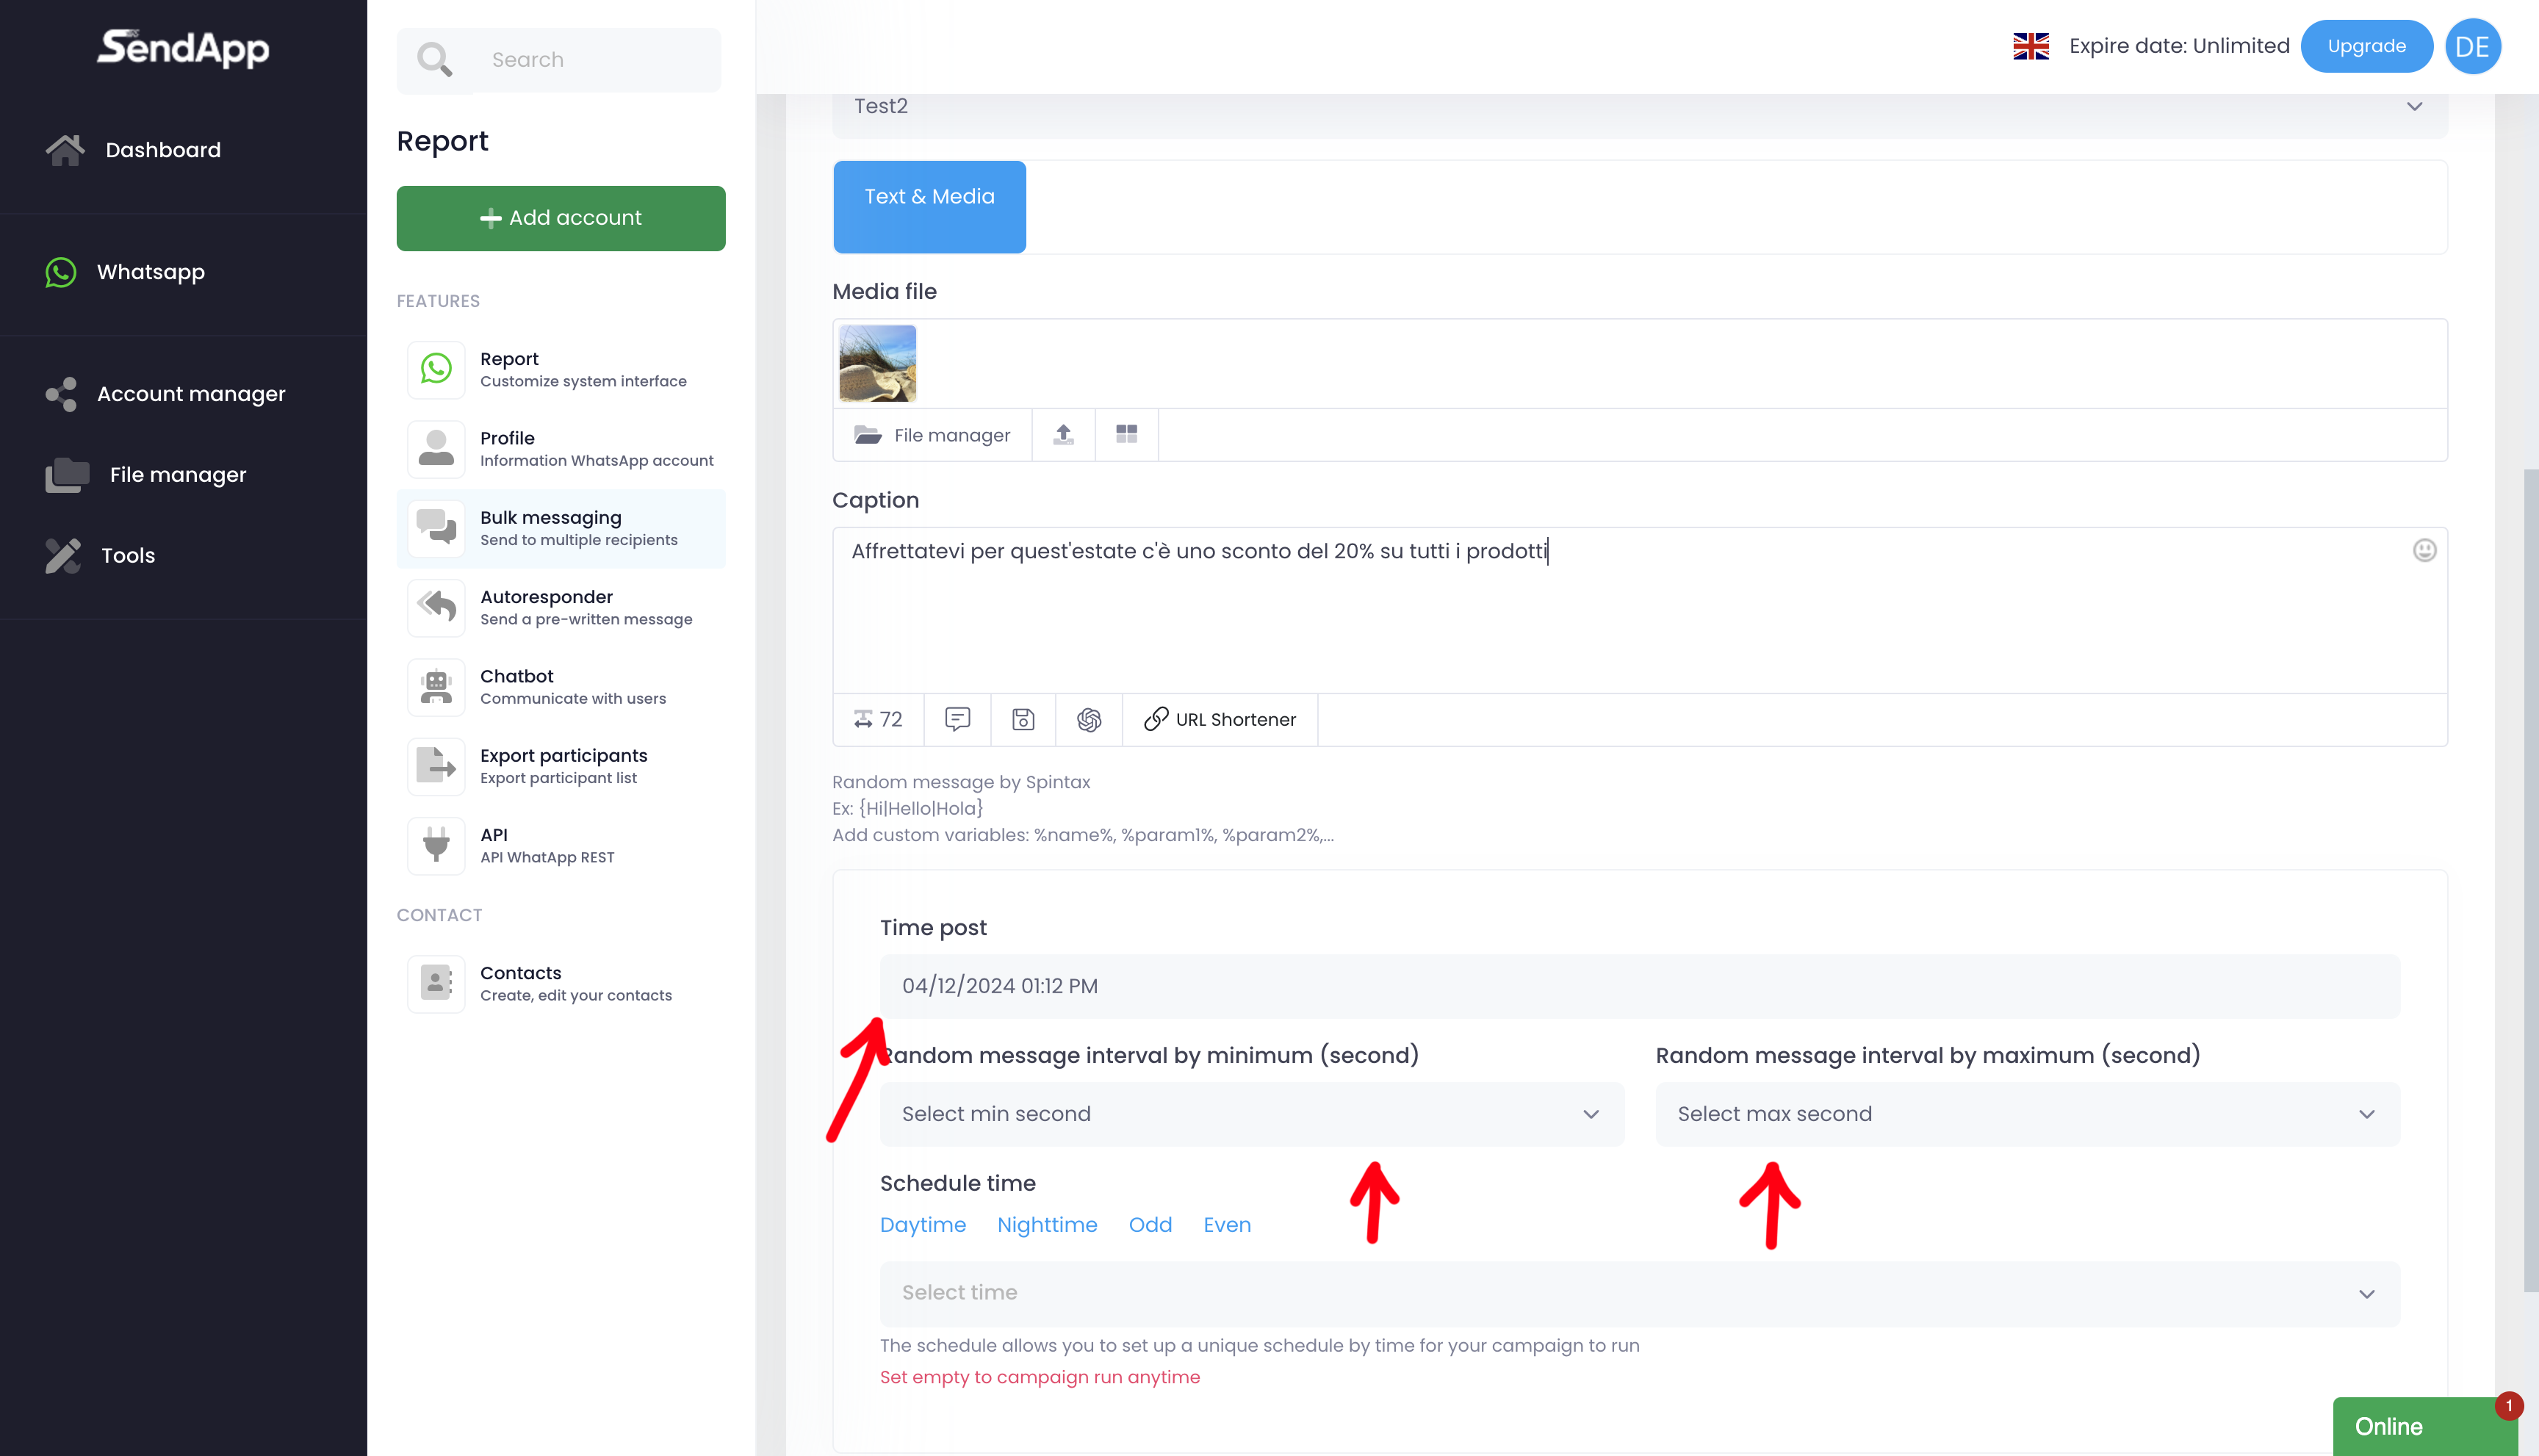
-In the field Caption, enter the message you wish to send to your contacts.
Programmazione della campagna
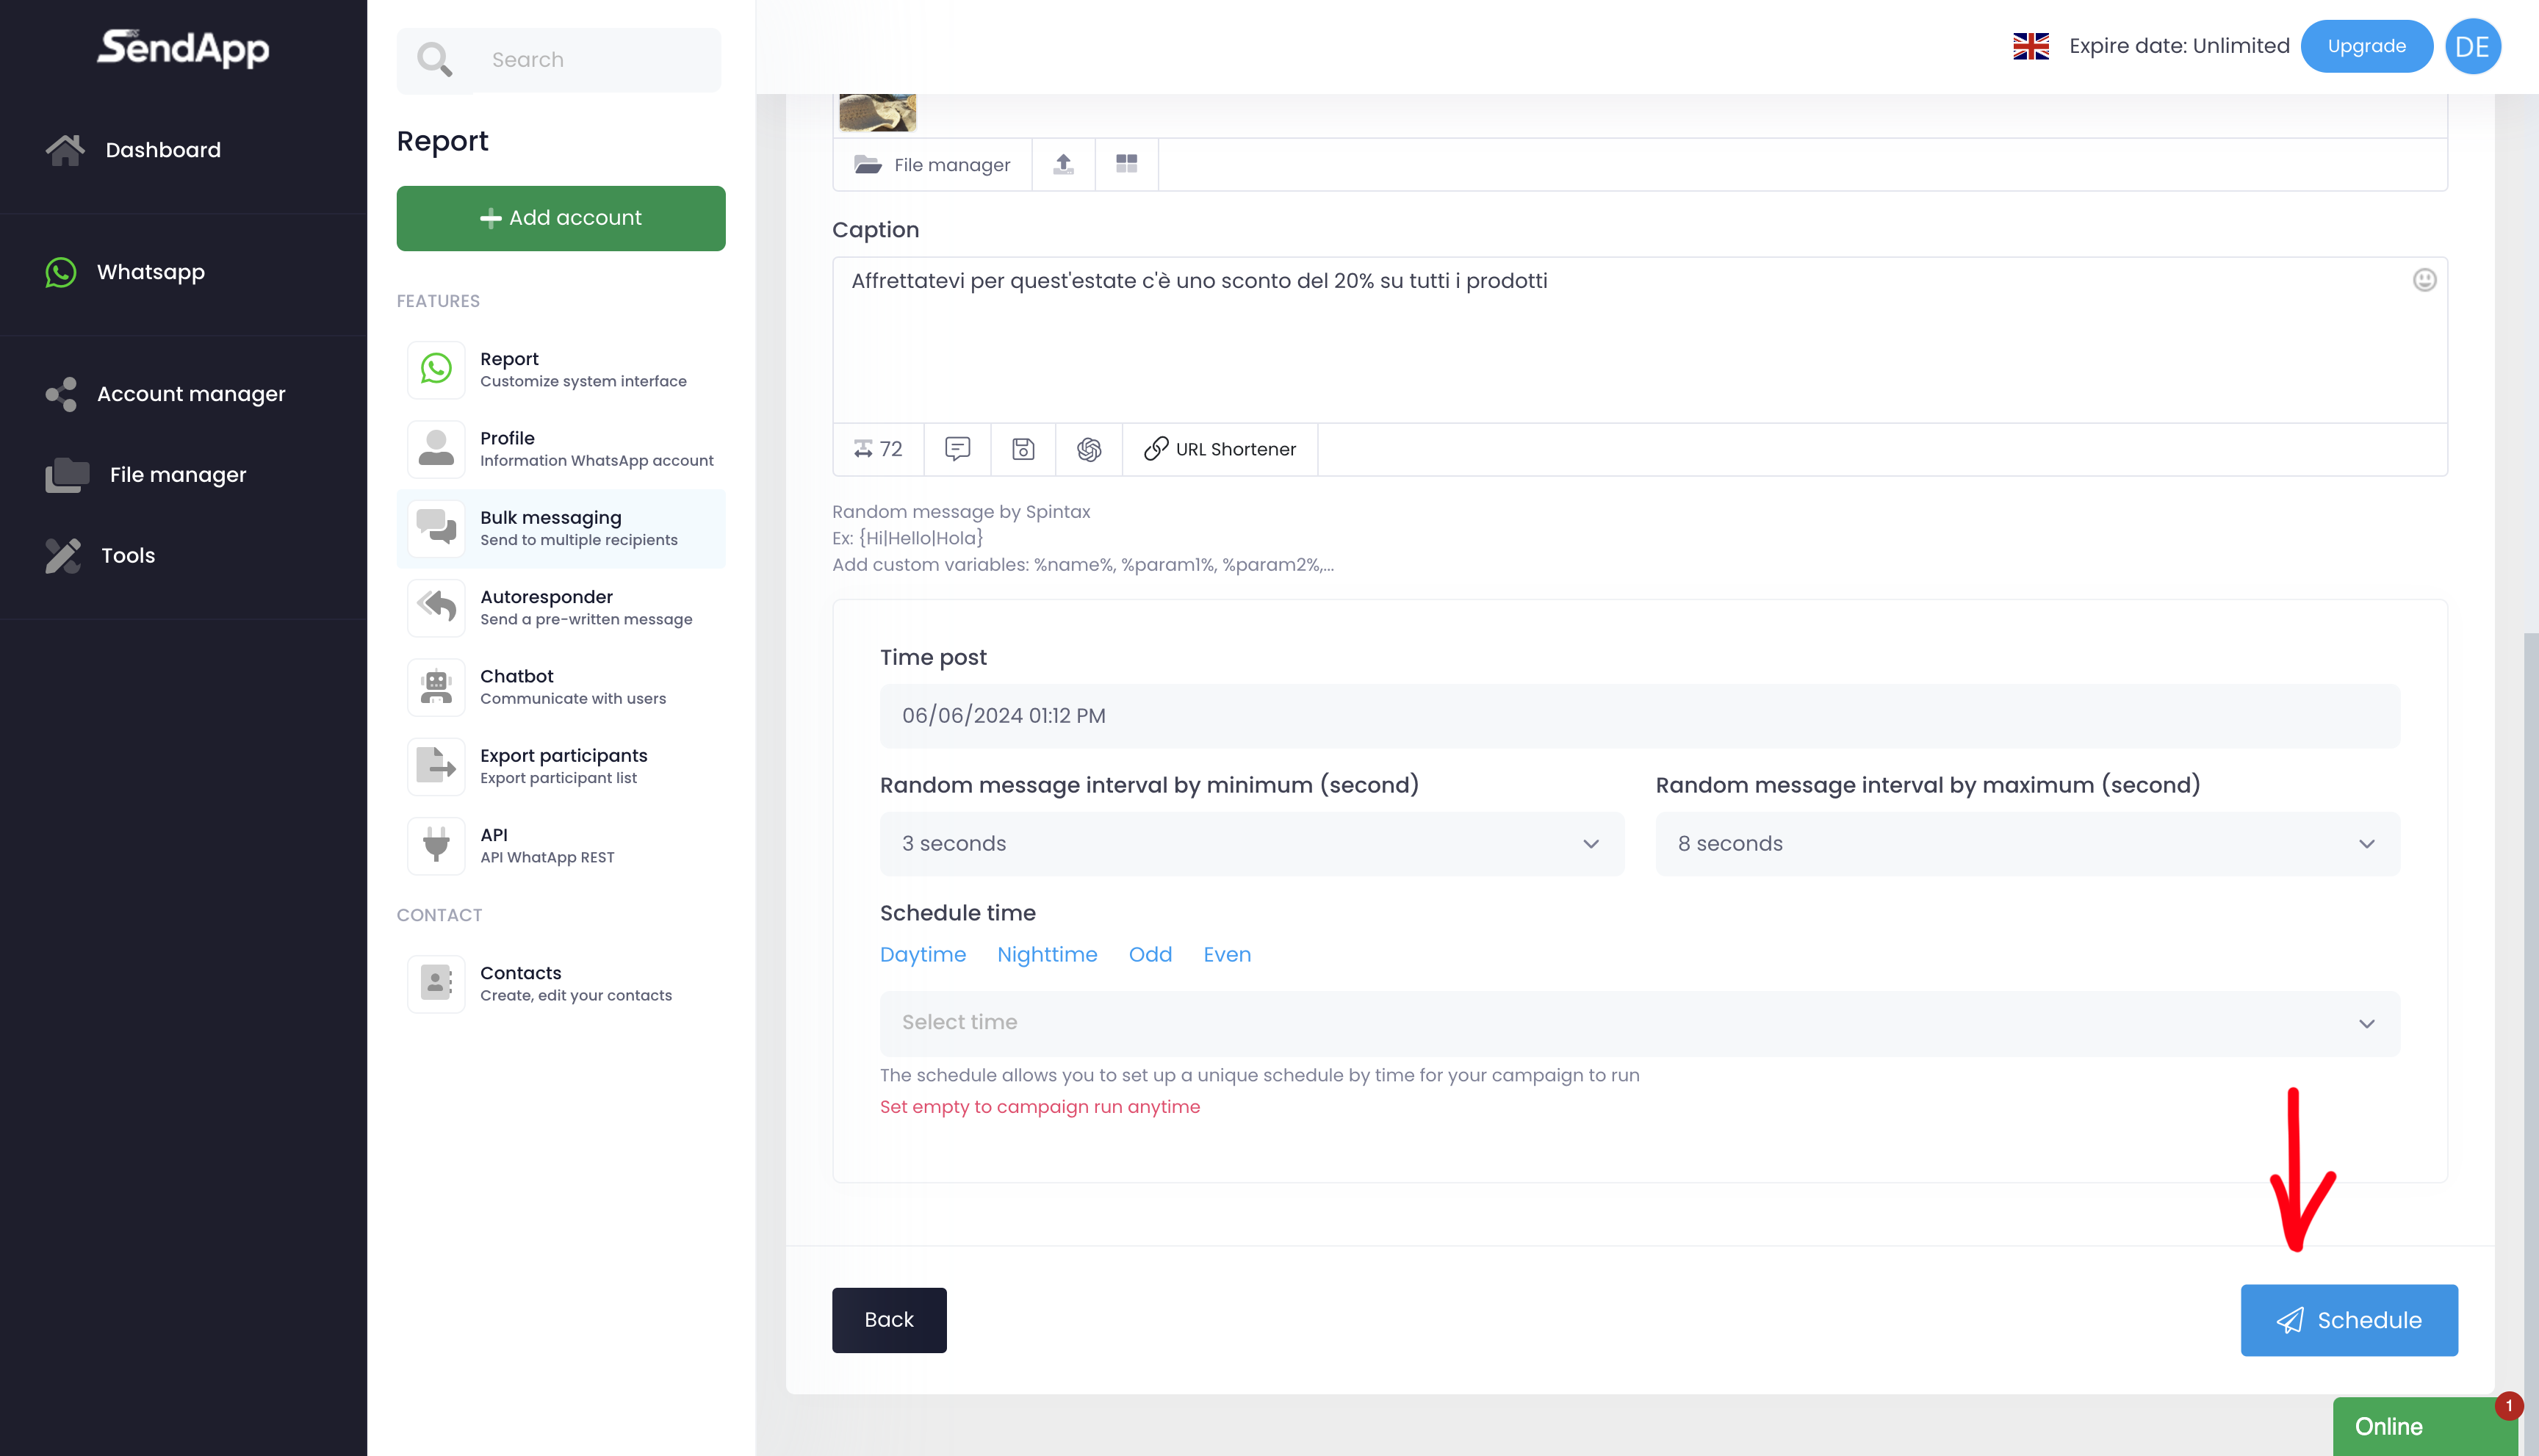
-Select the sending date and theinterval between messages (recommended: minimum 3 seconds, maximum 8 seconds).
-Click on Schedule To save and plan the campaign.
Tips
-Make sure the phonebook is up-to-date and contains phone numbers with the correct international area code.
-Use AI to create unique and eye-catching images, increasing the effectiveness of the message.
-Check the time zone of your account; it must be that of your country.
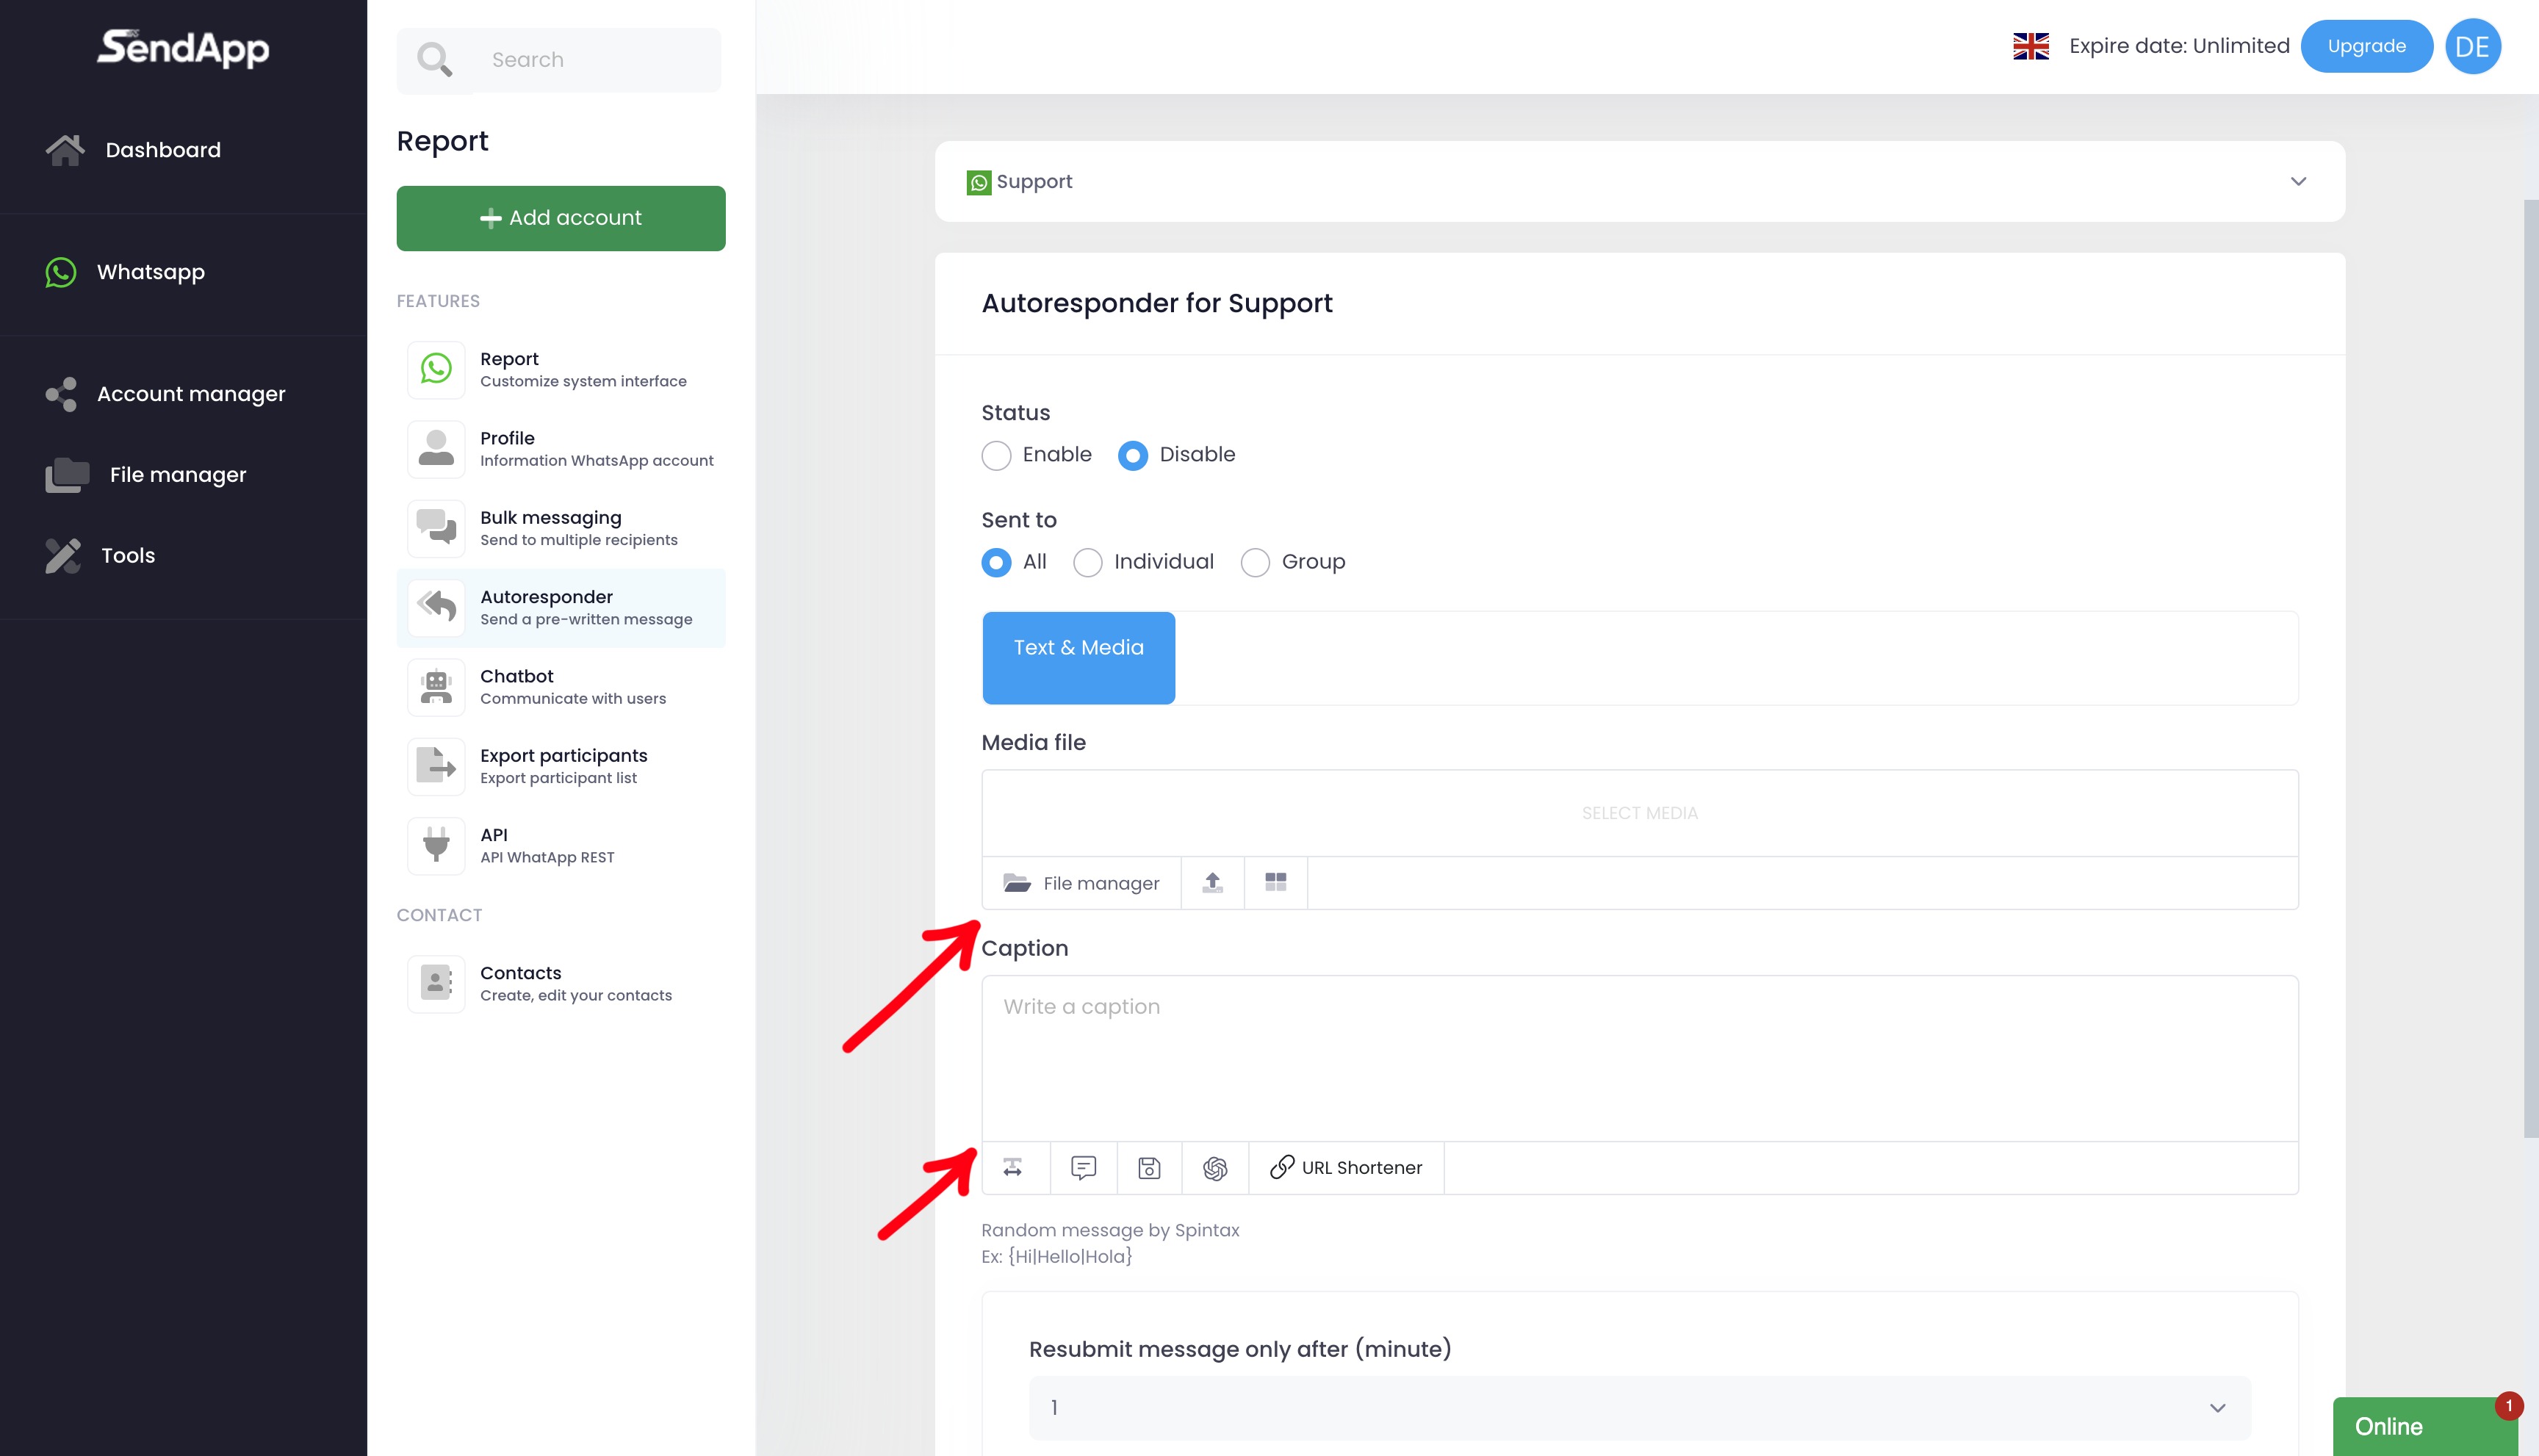
Auto reply
Autoresponder (Risposta Automatica)
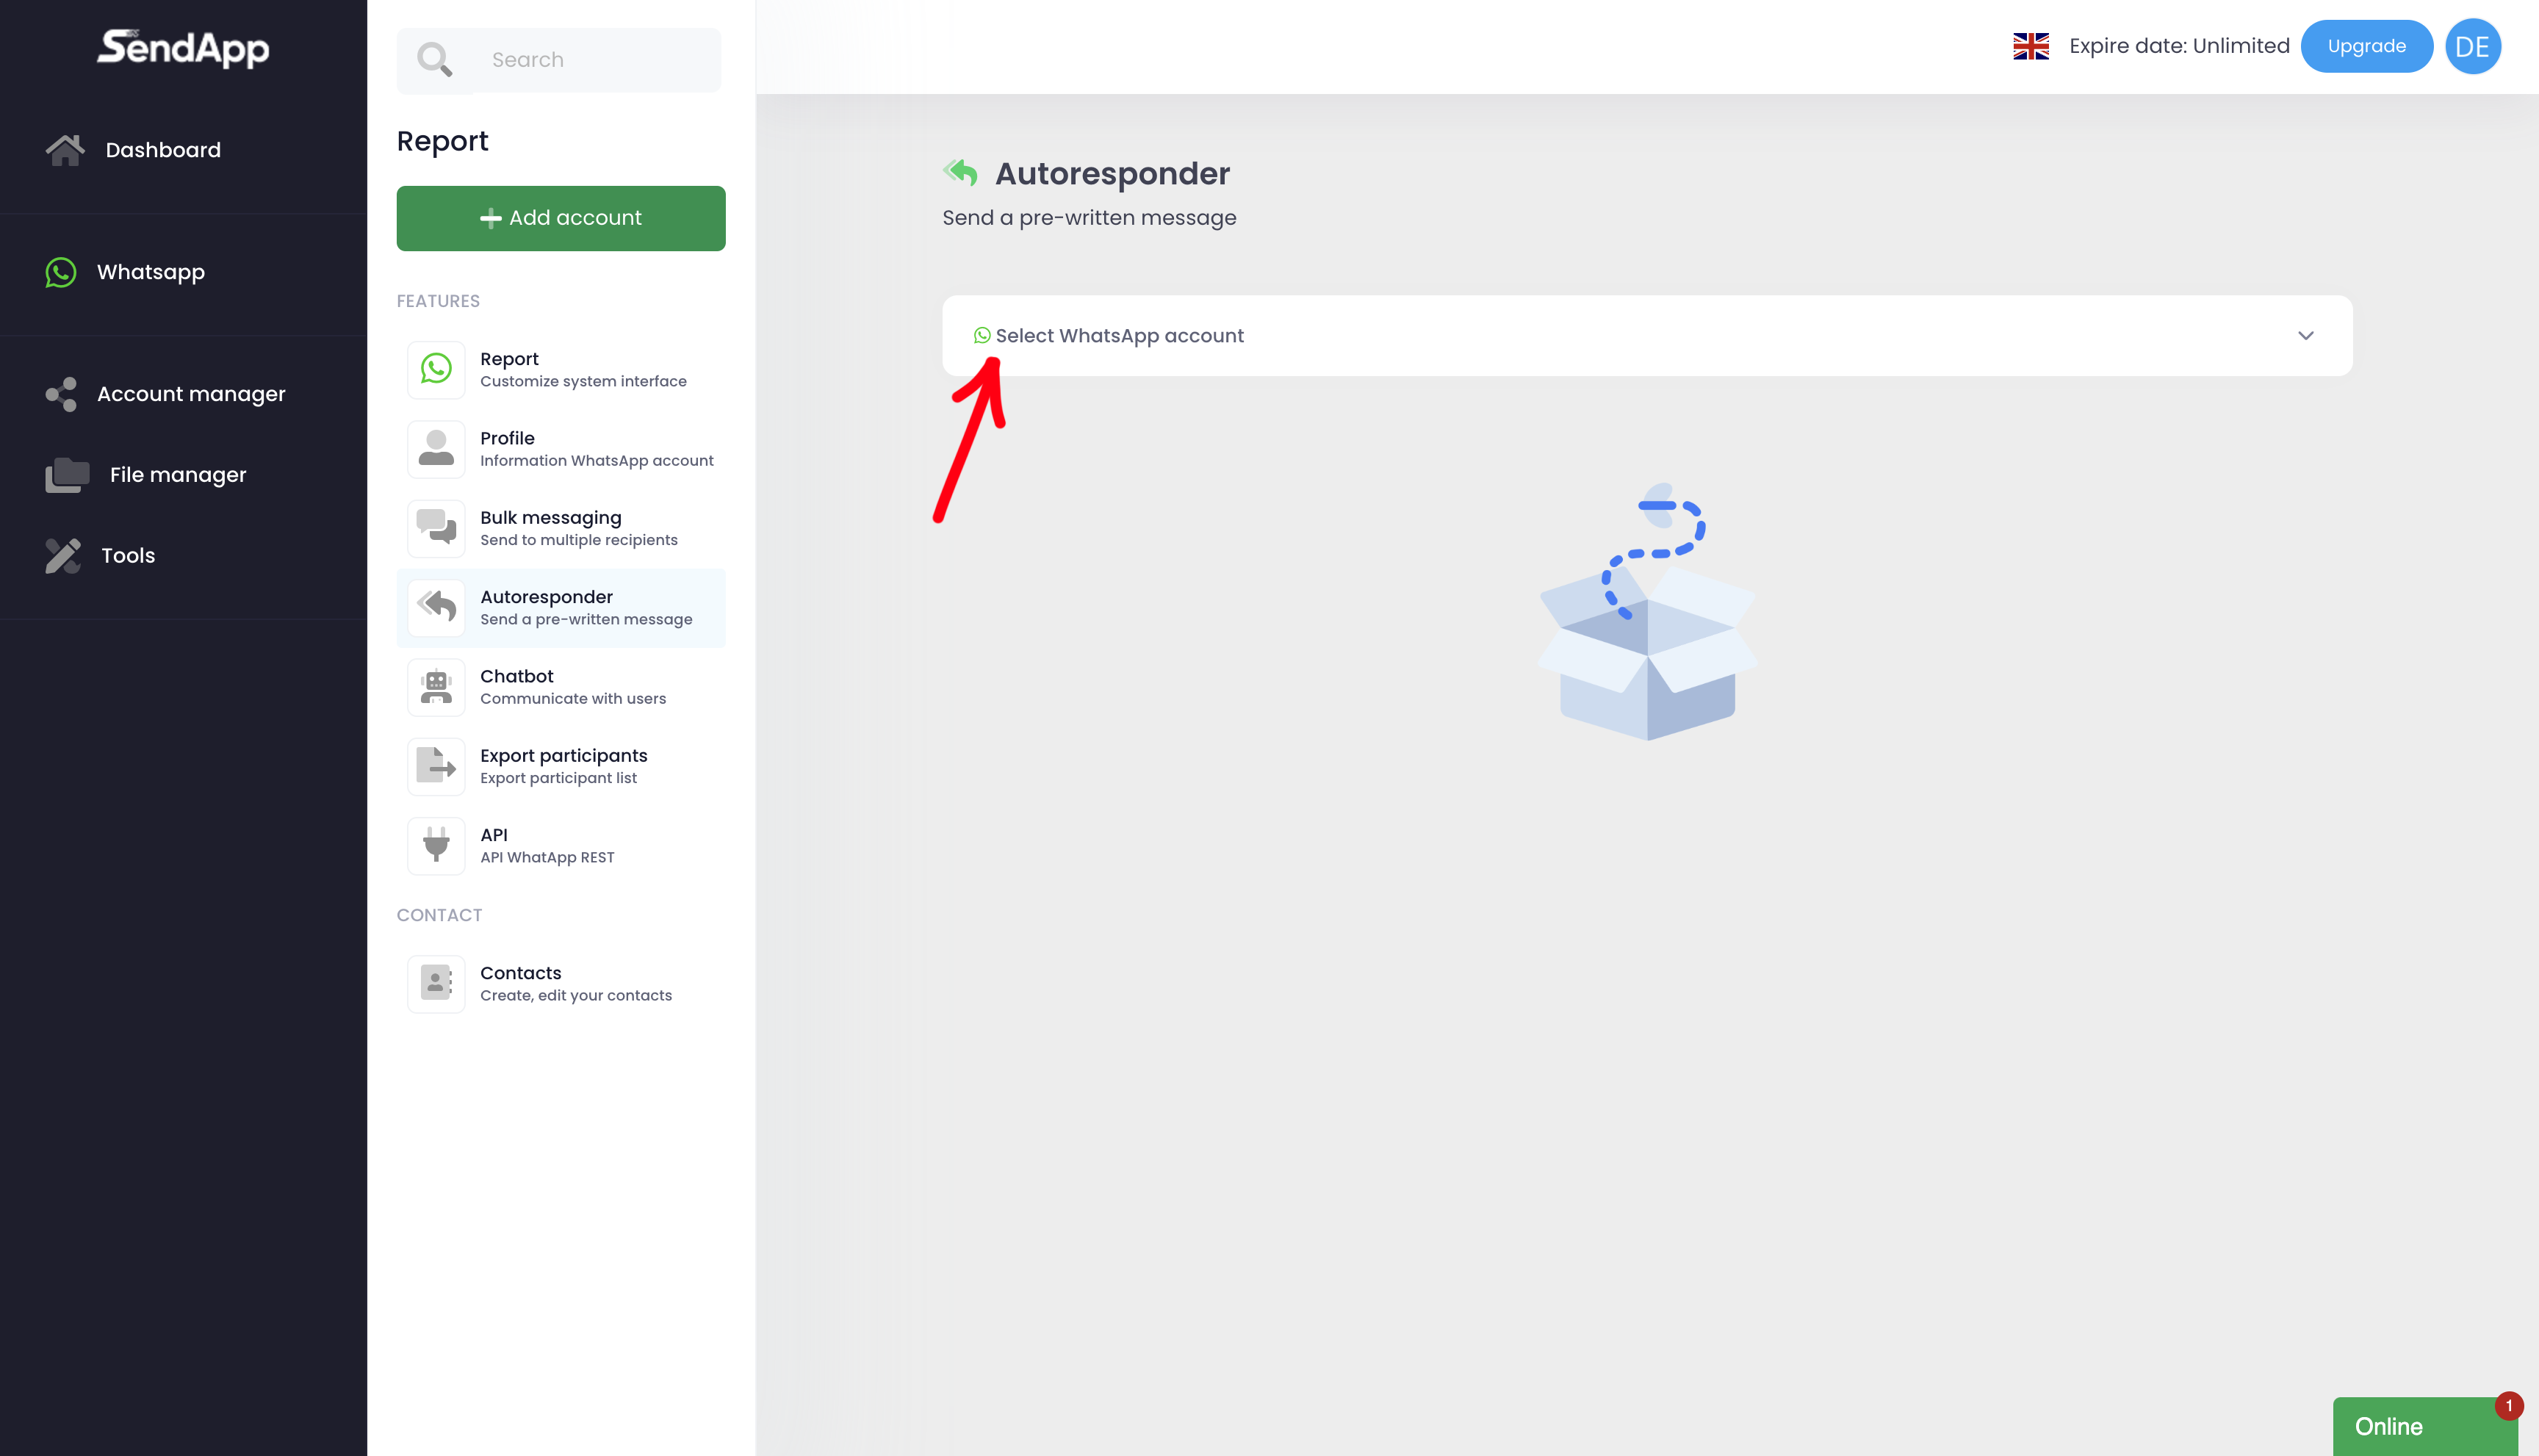
With the Autoresponder, you can set up custom automatic responses for your contacts. Here's how:
Autoresponder Configuration:
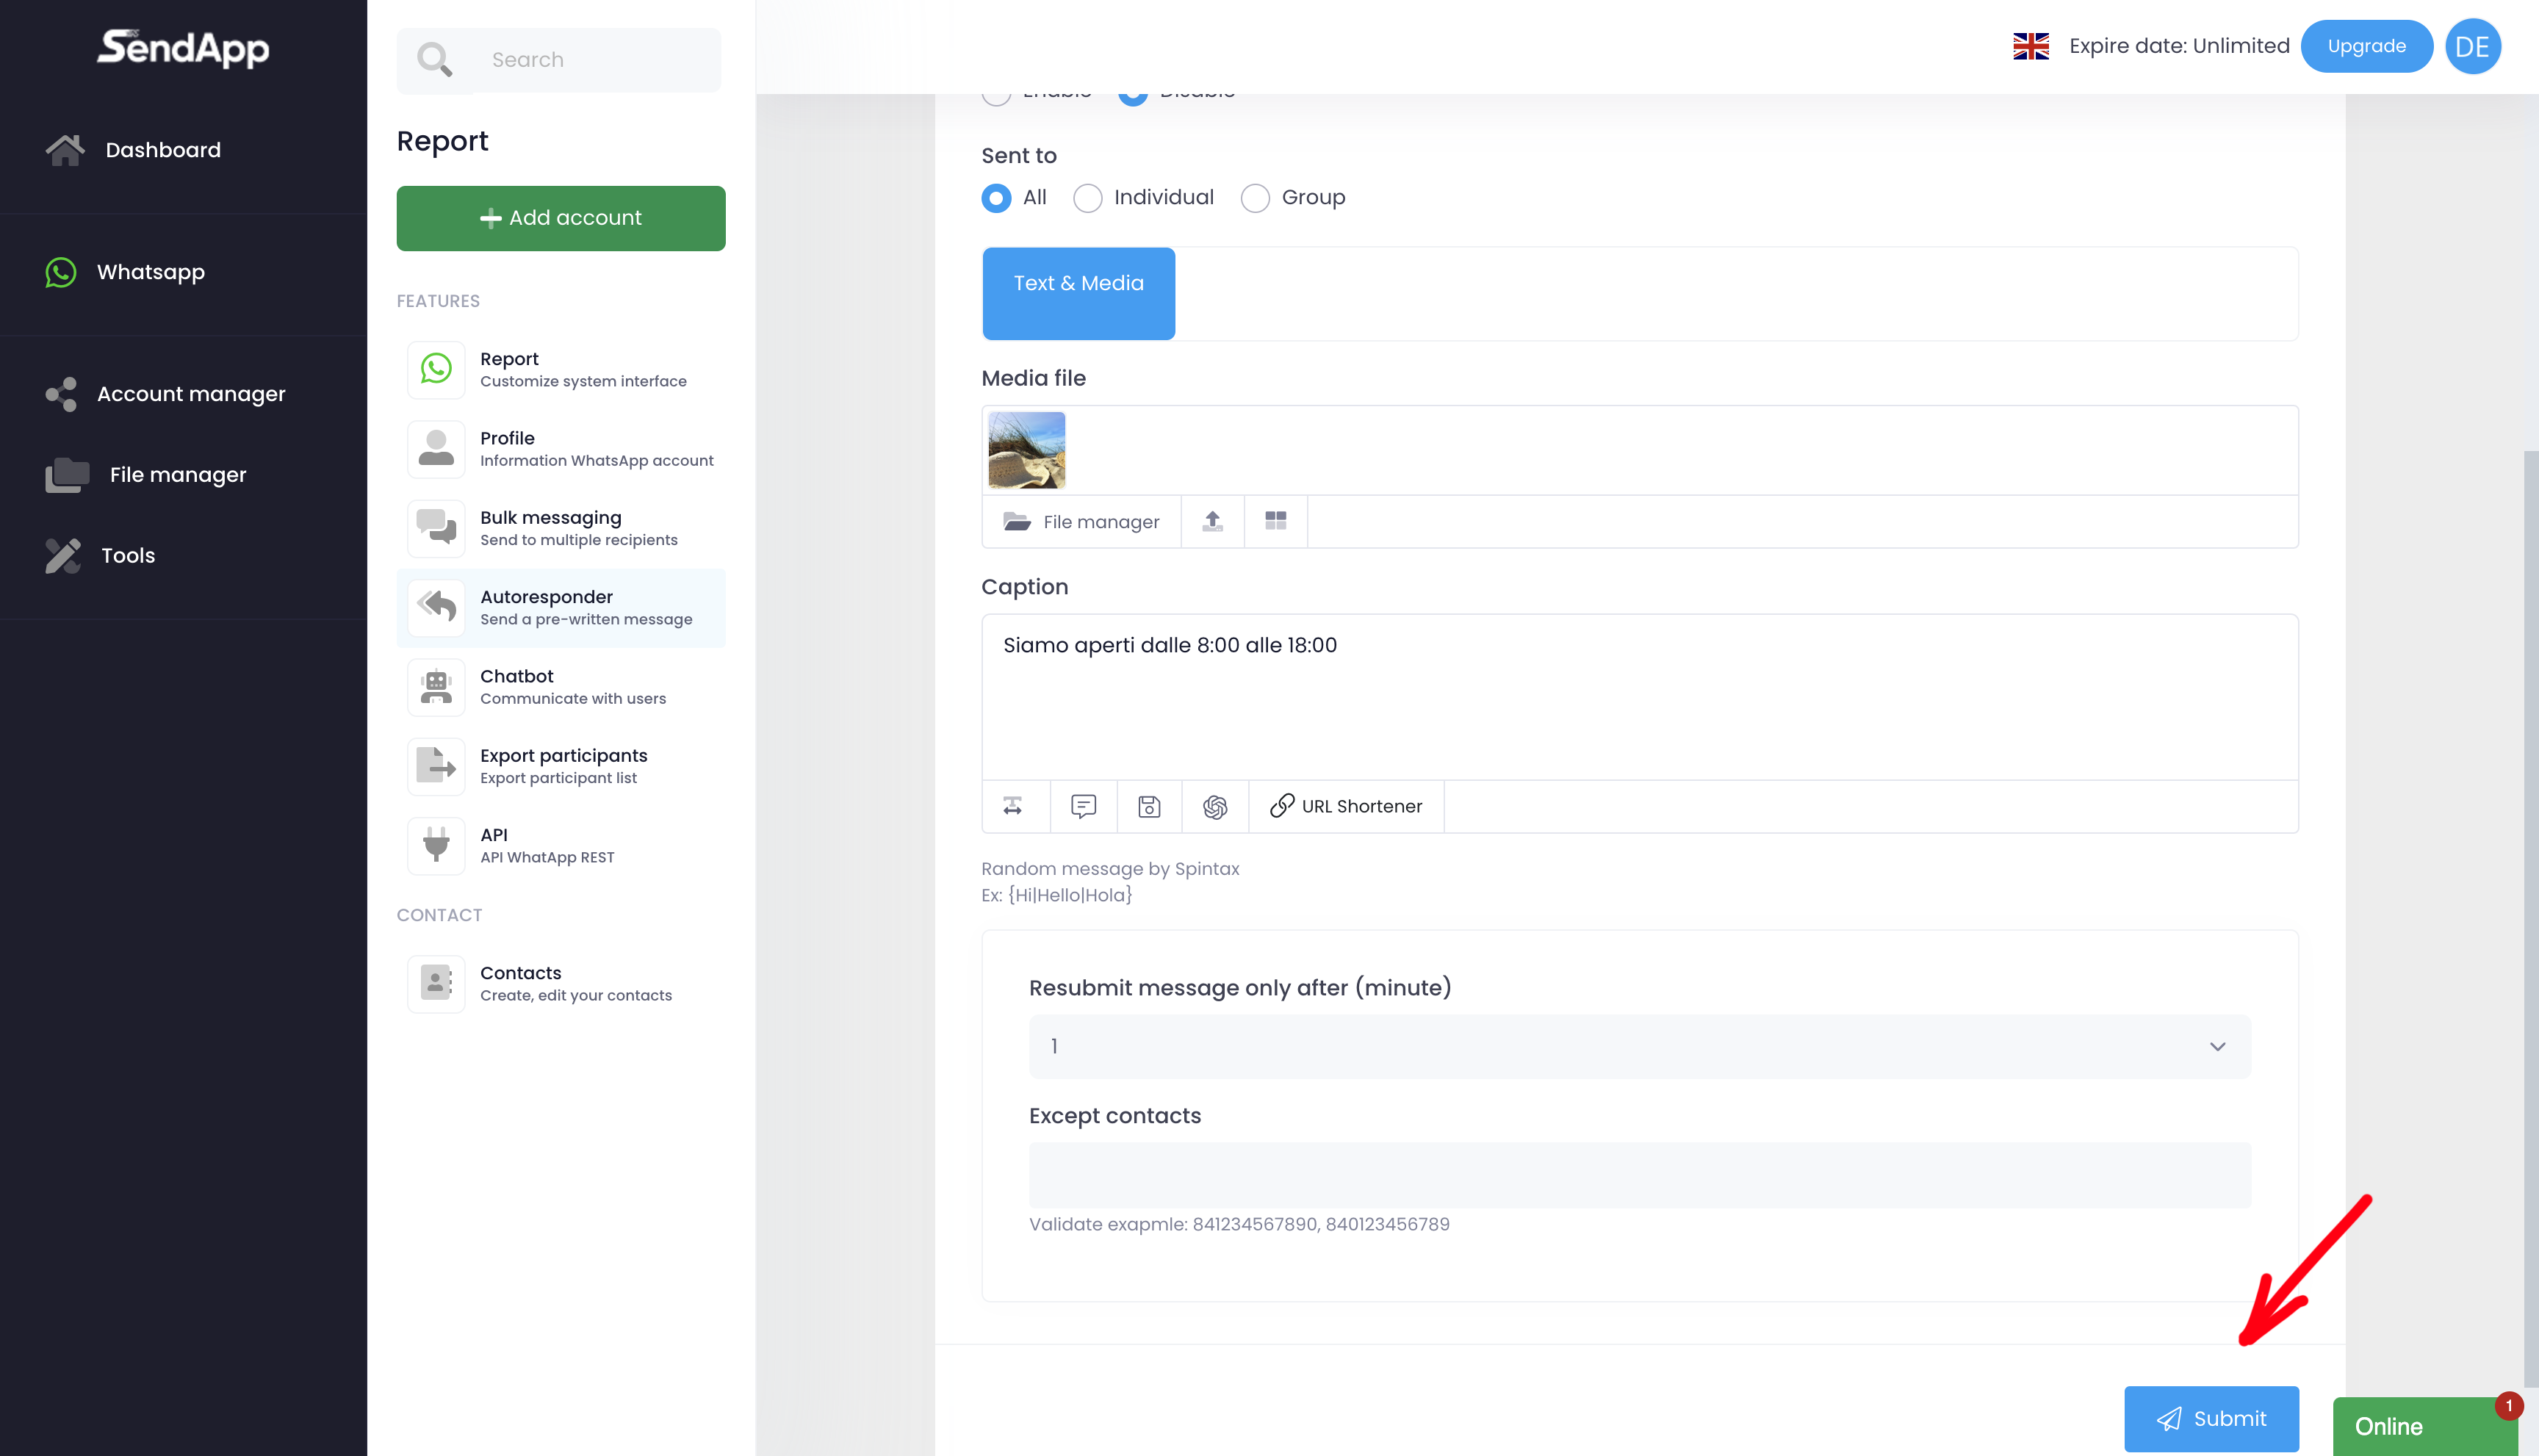
1.Select reference account For which you want to enable Autoresponder.
2.Choose from Text or Average:
-Text: Post a message in the Caption.
-Media: Upload a media file from your device and add a description or message in the Caption.
3.Save the settings to enable Autoresponder and automatically respond to your contacts.
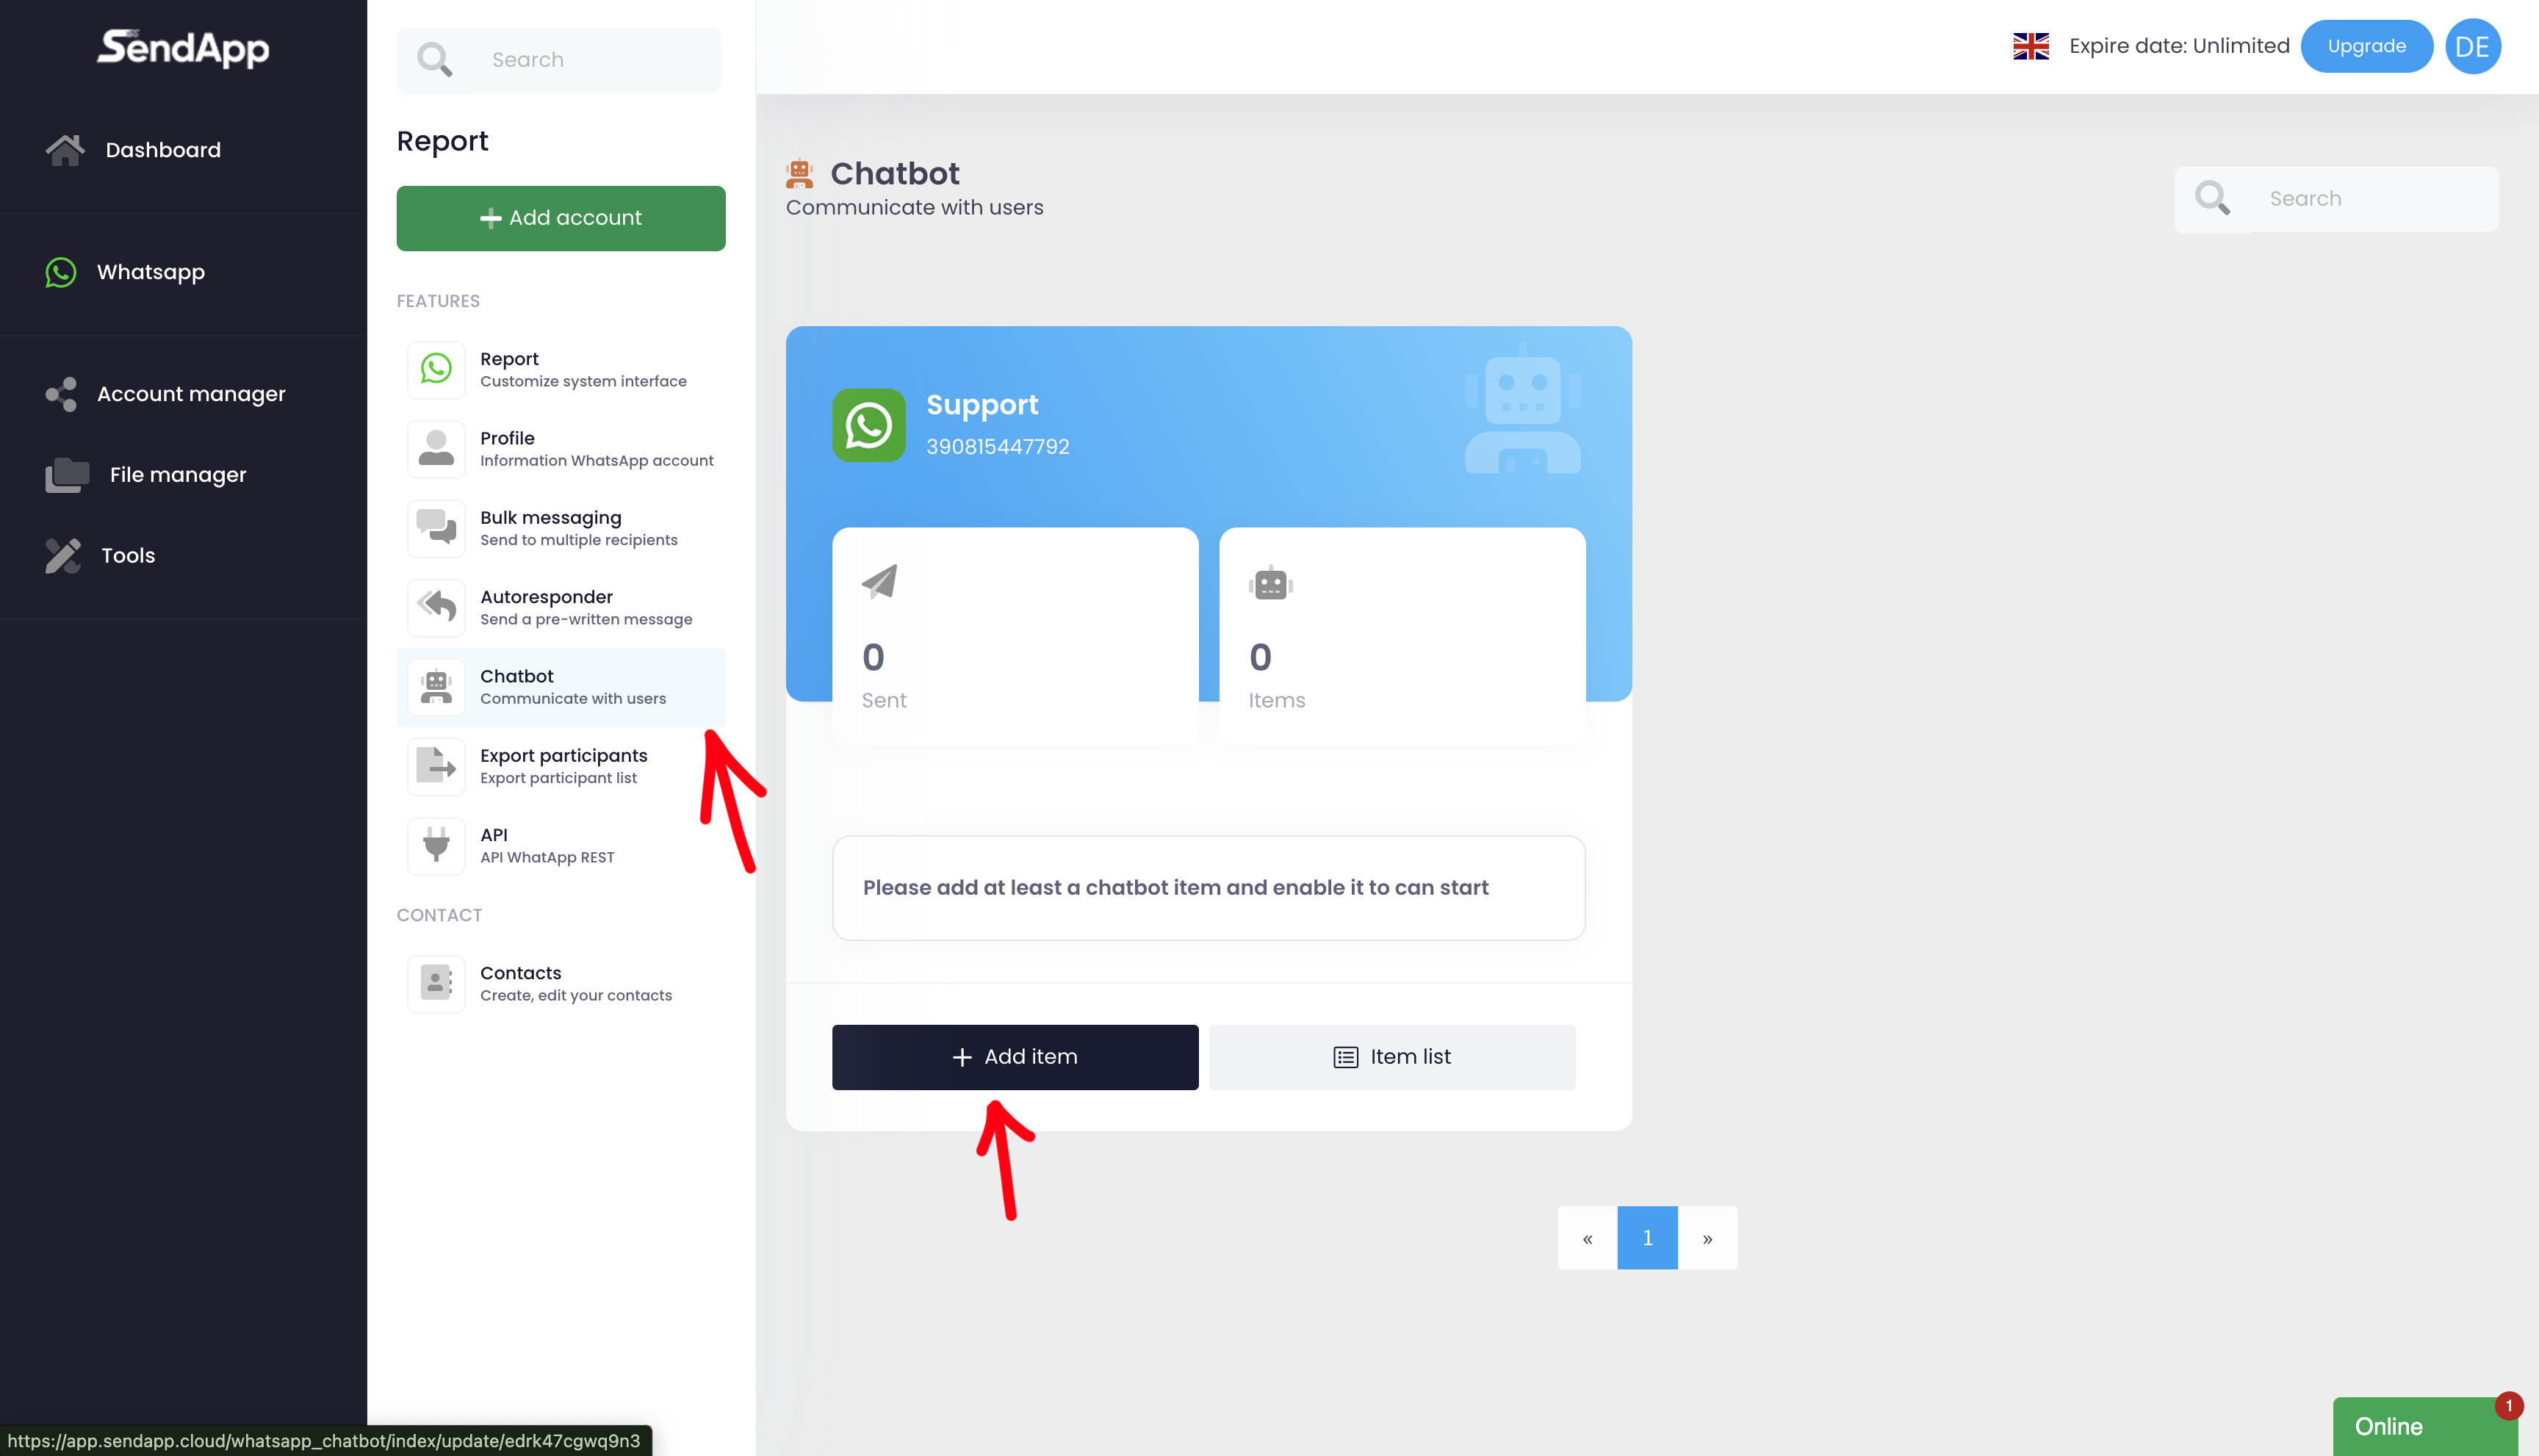
ChatBot
The Chat-Bot allows you to automate keyword-based responses, improving interaction with your customers.
Chat-Bot configuration:
1.Access the Chat-Bot feature: click on the icon Chat-Bot.
2.Click on Add Item To create a new configuration.
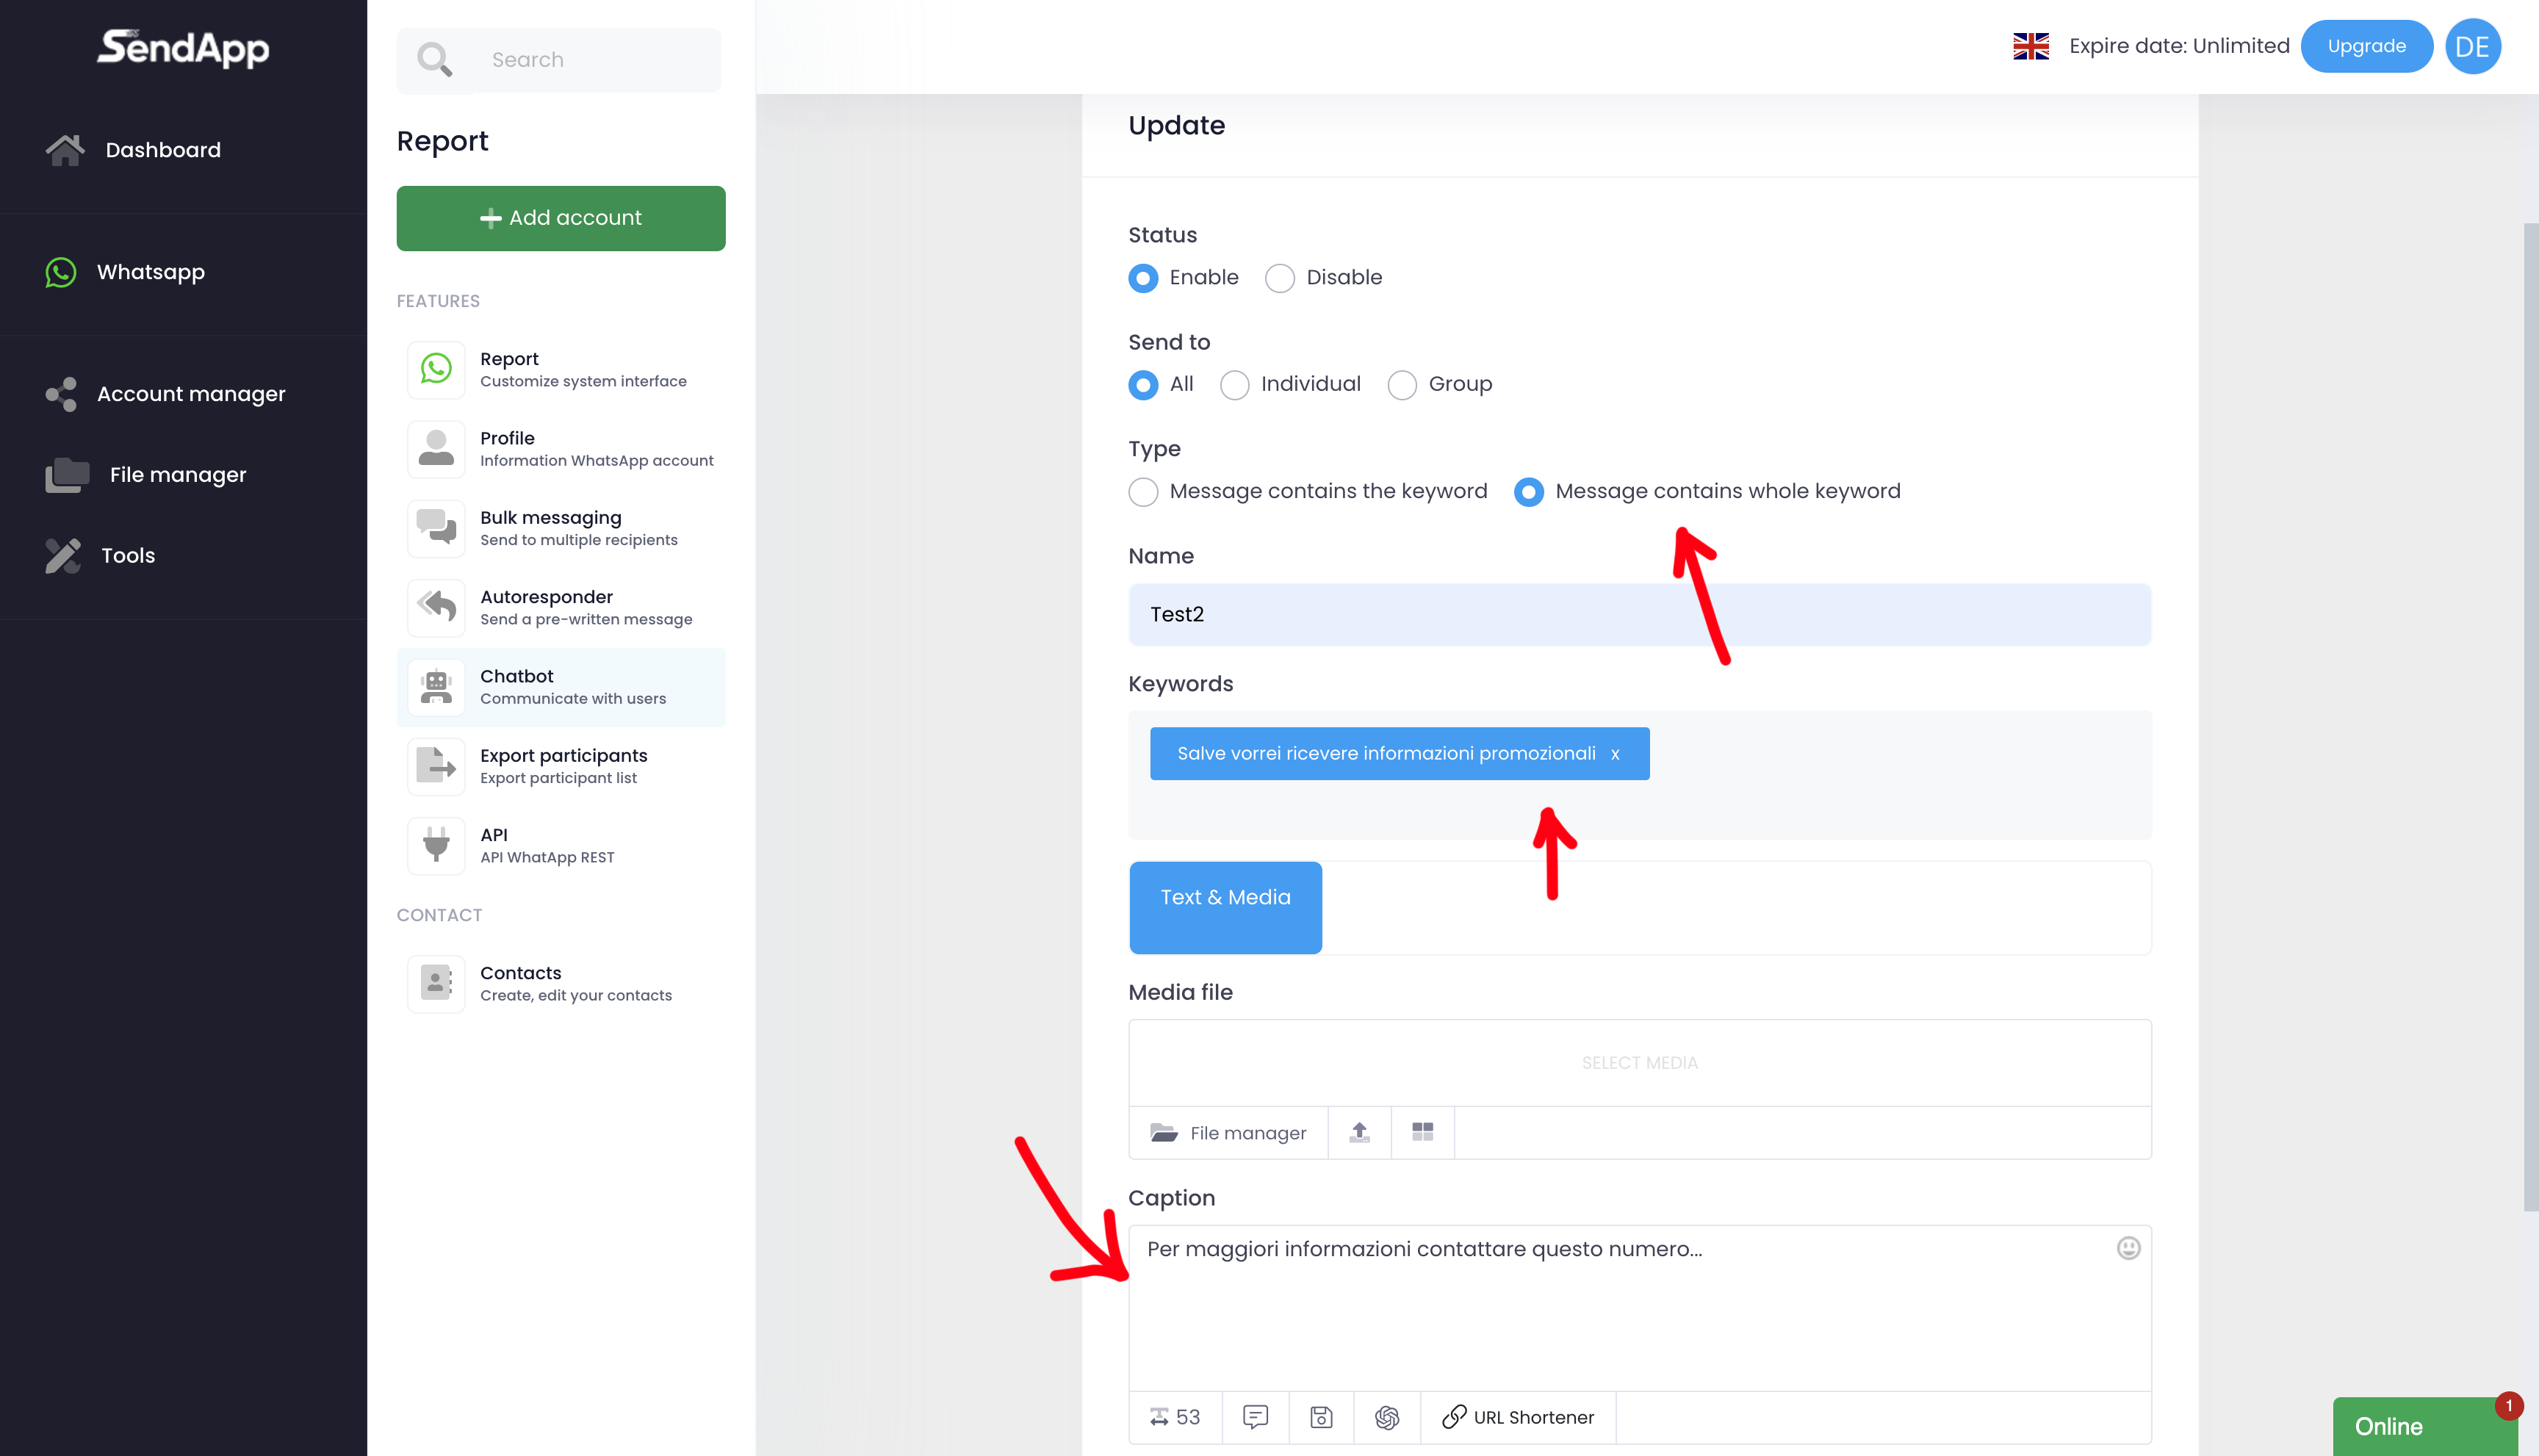
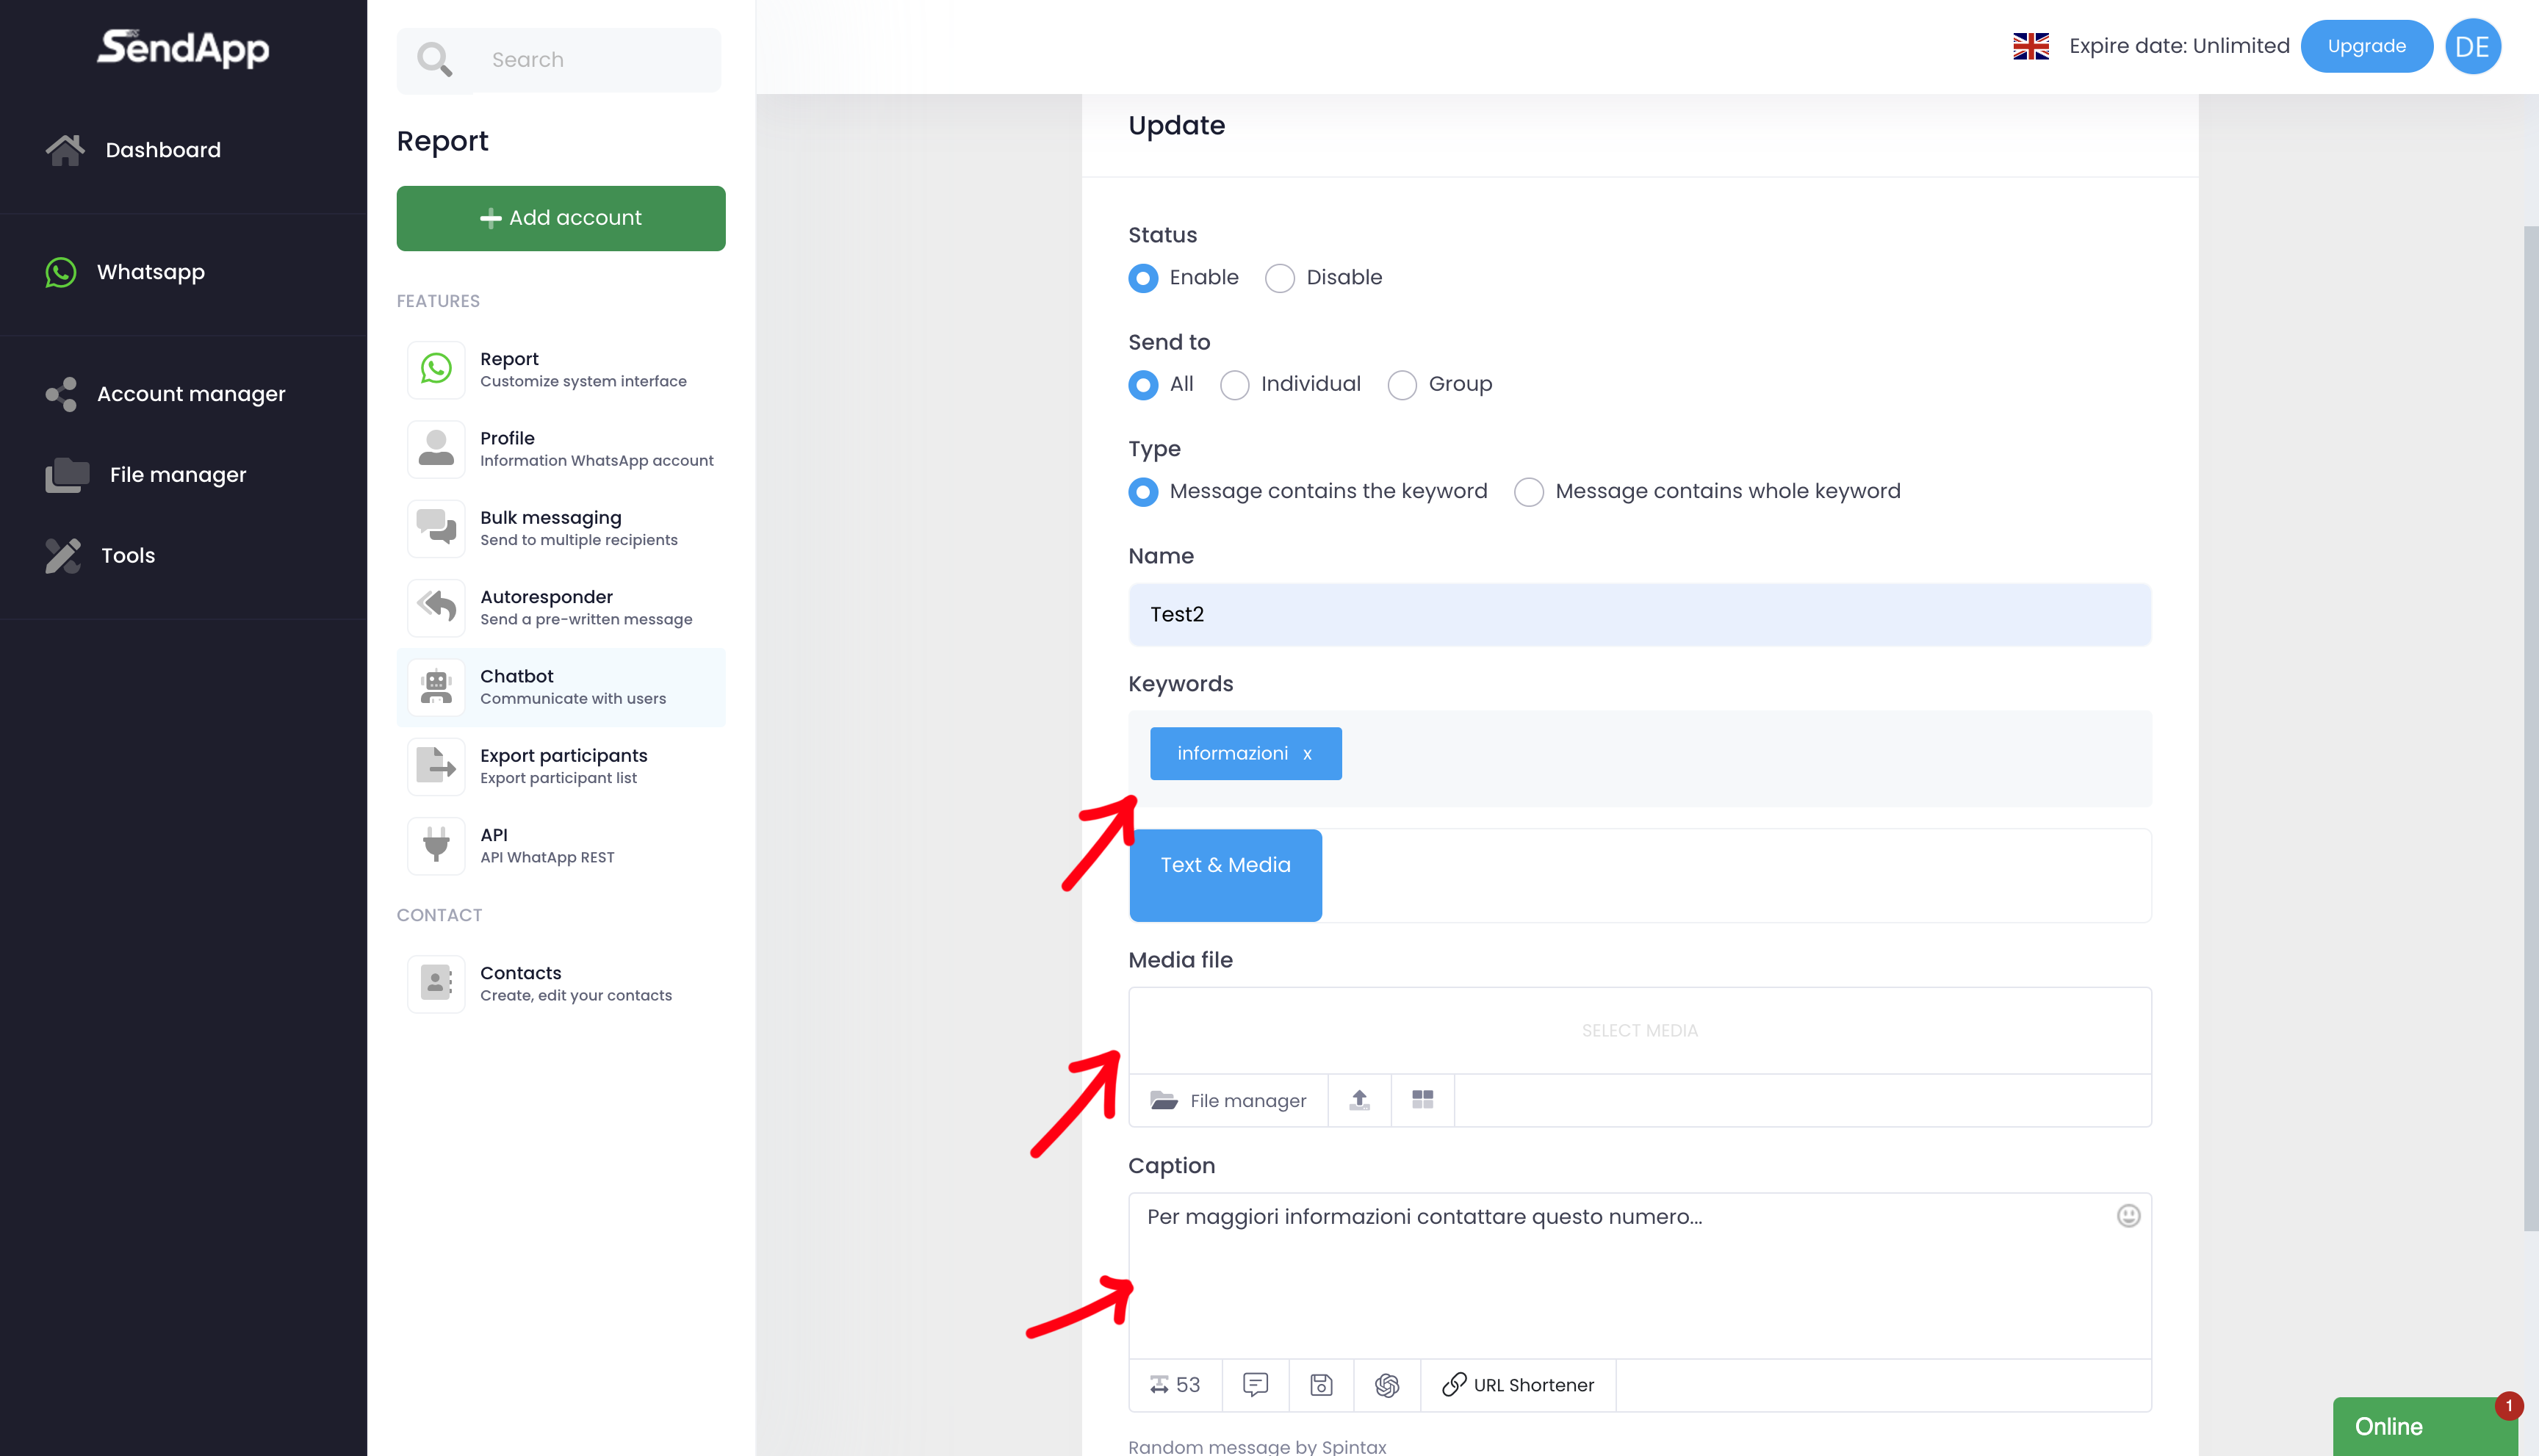
3.Choose the type of message:
-Message contains the keyword: the chatbot will respond if the message contains the keyword (even partially).
-Message contains whole keyword: the chatbot will respond only if the message contains the exact keyword.
Configure the Chat-Bot:
-Assigns a first name to the Chat-Bot.
-Insert the keyword (or phrase) that will activate the bot.
-Add a media file (optional).
-Fill in the Caption with the message that will be sent in response.
5.Save to activate the Chat-Bot.
API di Sendapp Cloud
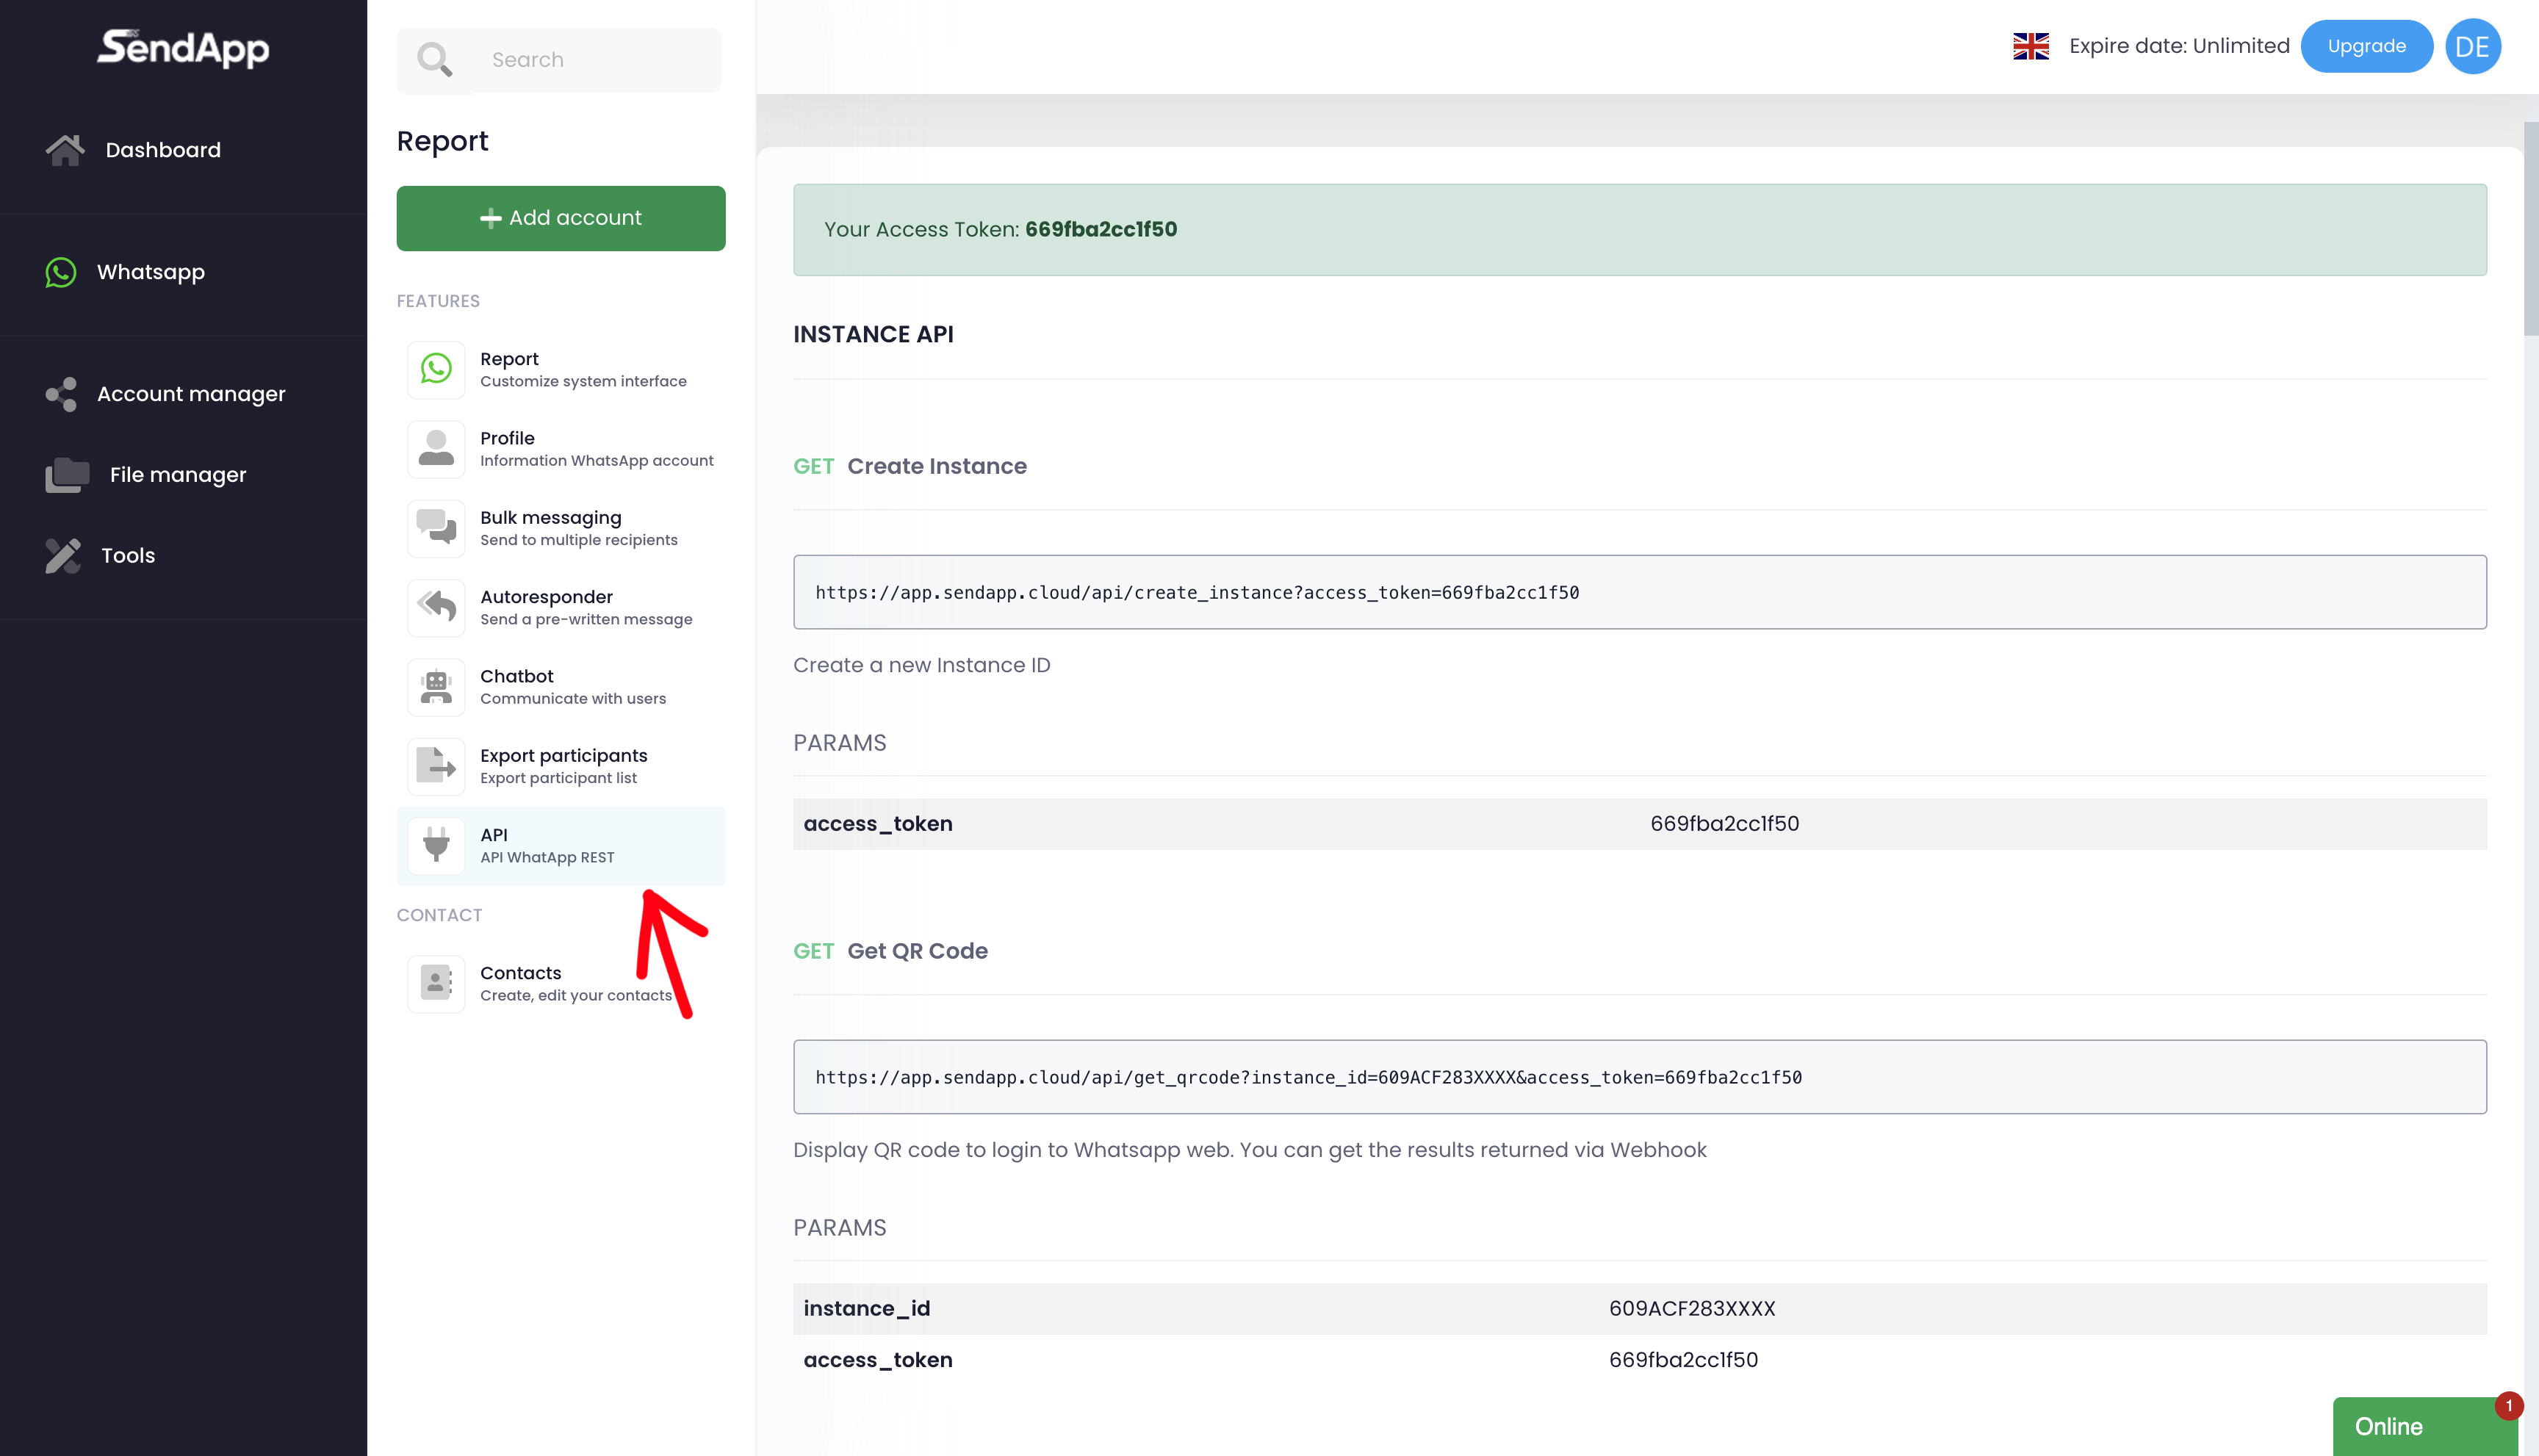
How to retrieve the API:
1.Go to the section API From the main menu.
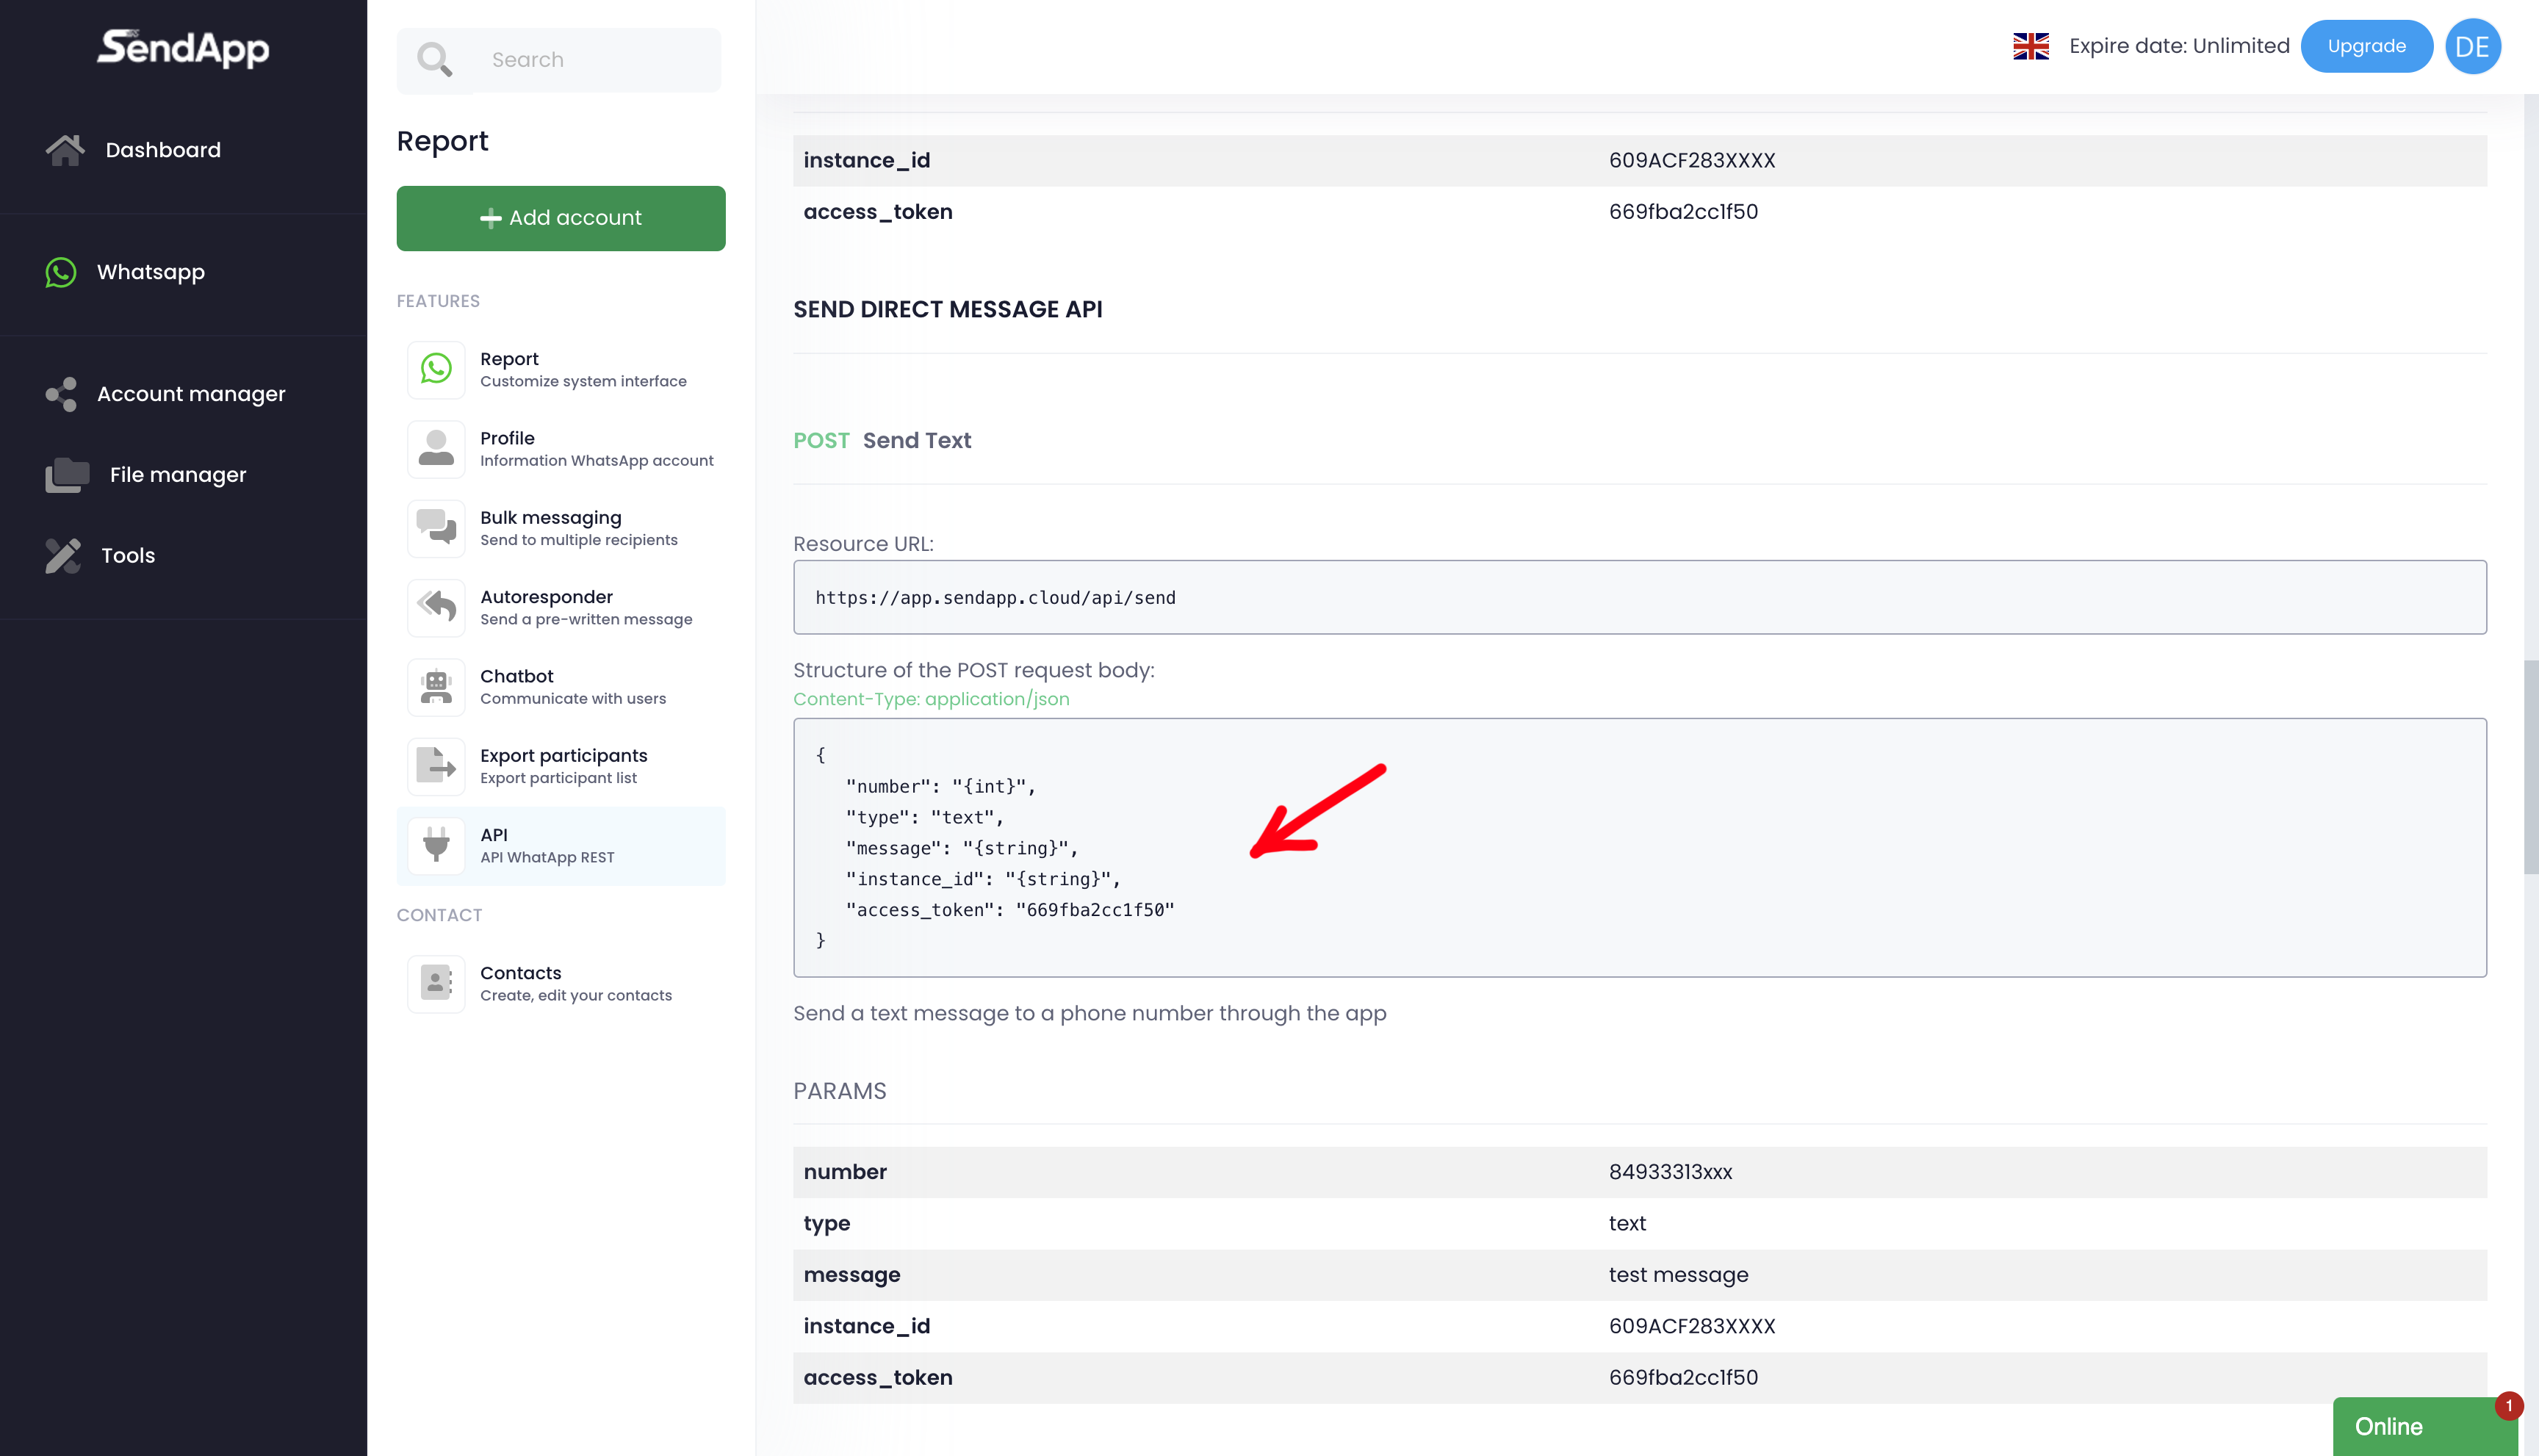
2.At the bottom of the page you will find the full API script ready-made.
3.Use the script to implement integration with your systems.
The API of Sendapp Cloud allow you to integrate the platform with other systems and applications. You can use them for:
-Automating the sending of messages.
-Managing address books.
-Monitoring campaigns.
Creazione Caption in Sendapp Cloud
Creazione di una Caption prestrutturata
Prestructured Captions are useful for simplifying and speeding up the creation of massive campaigns.
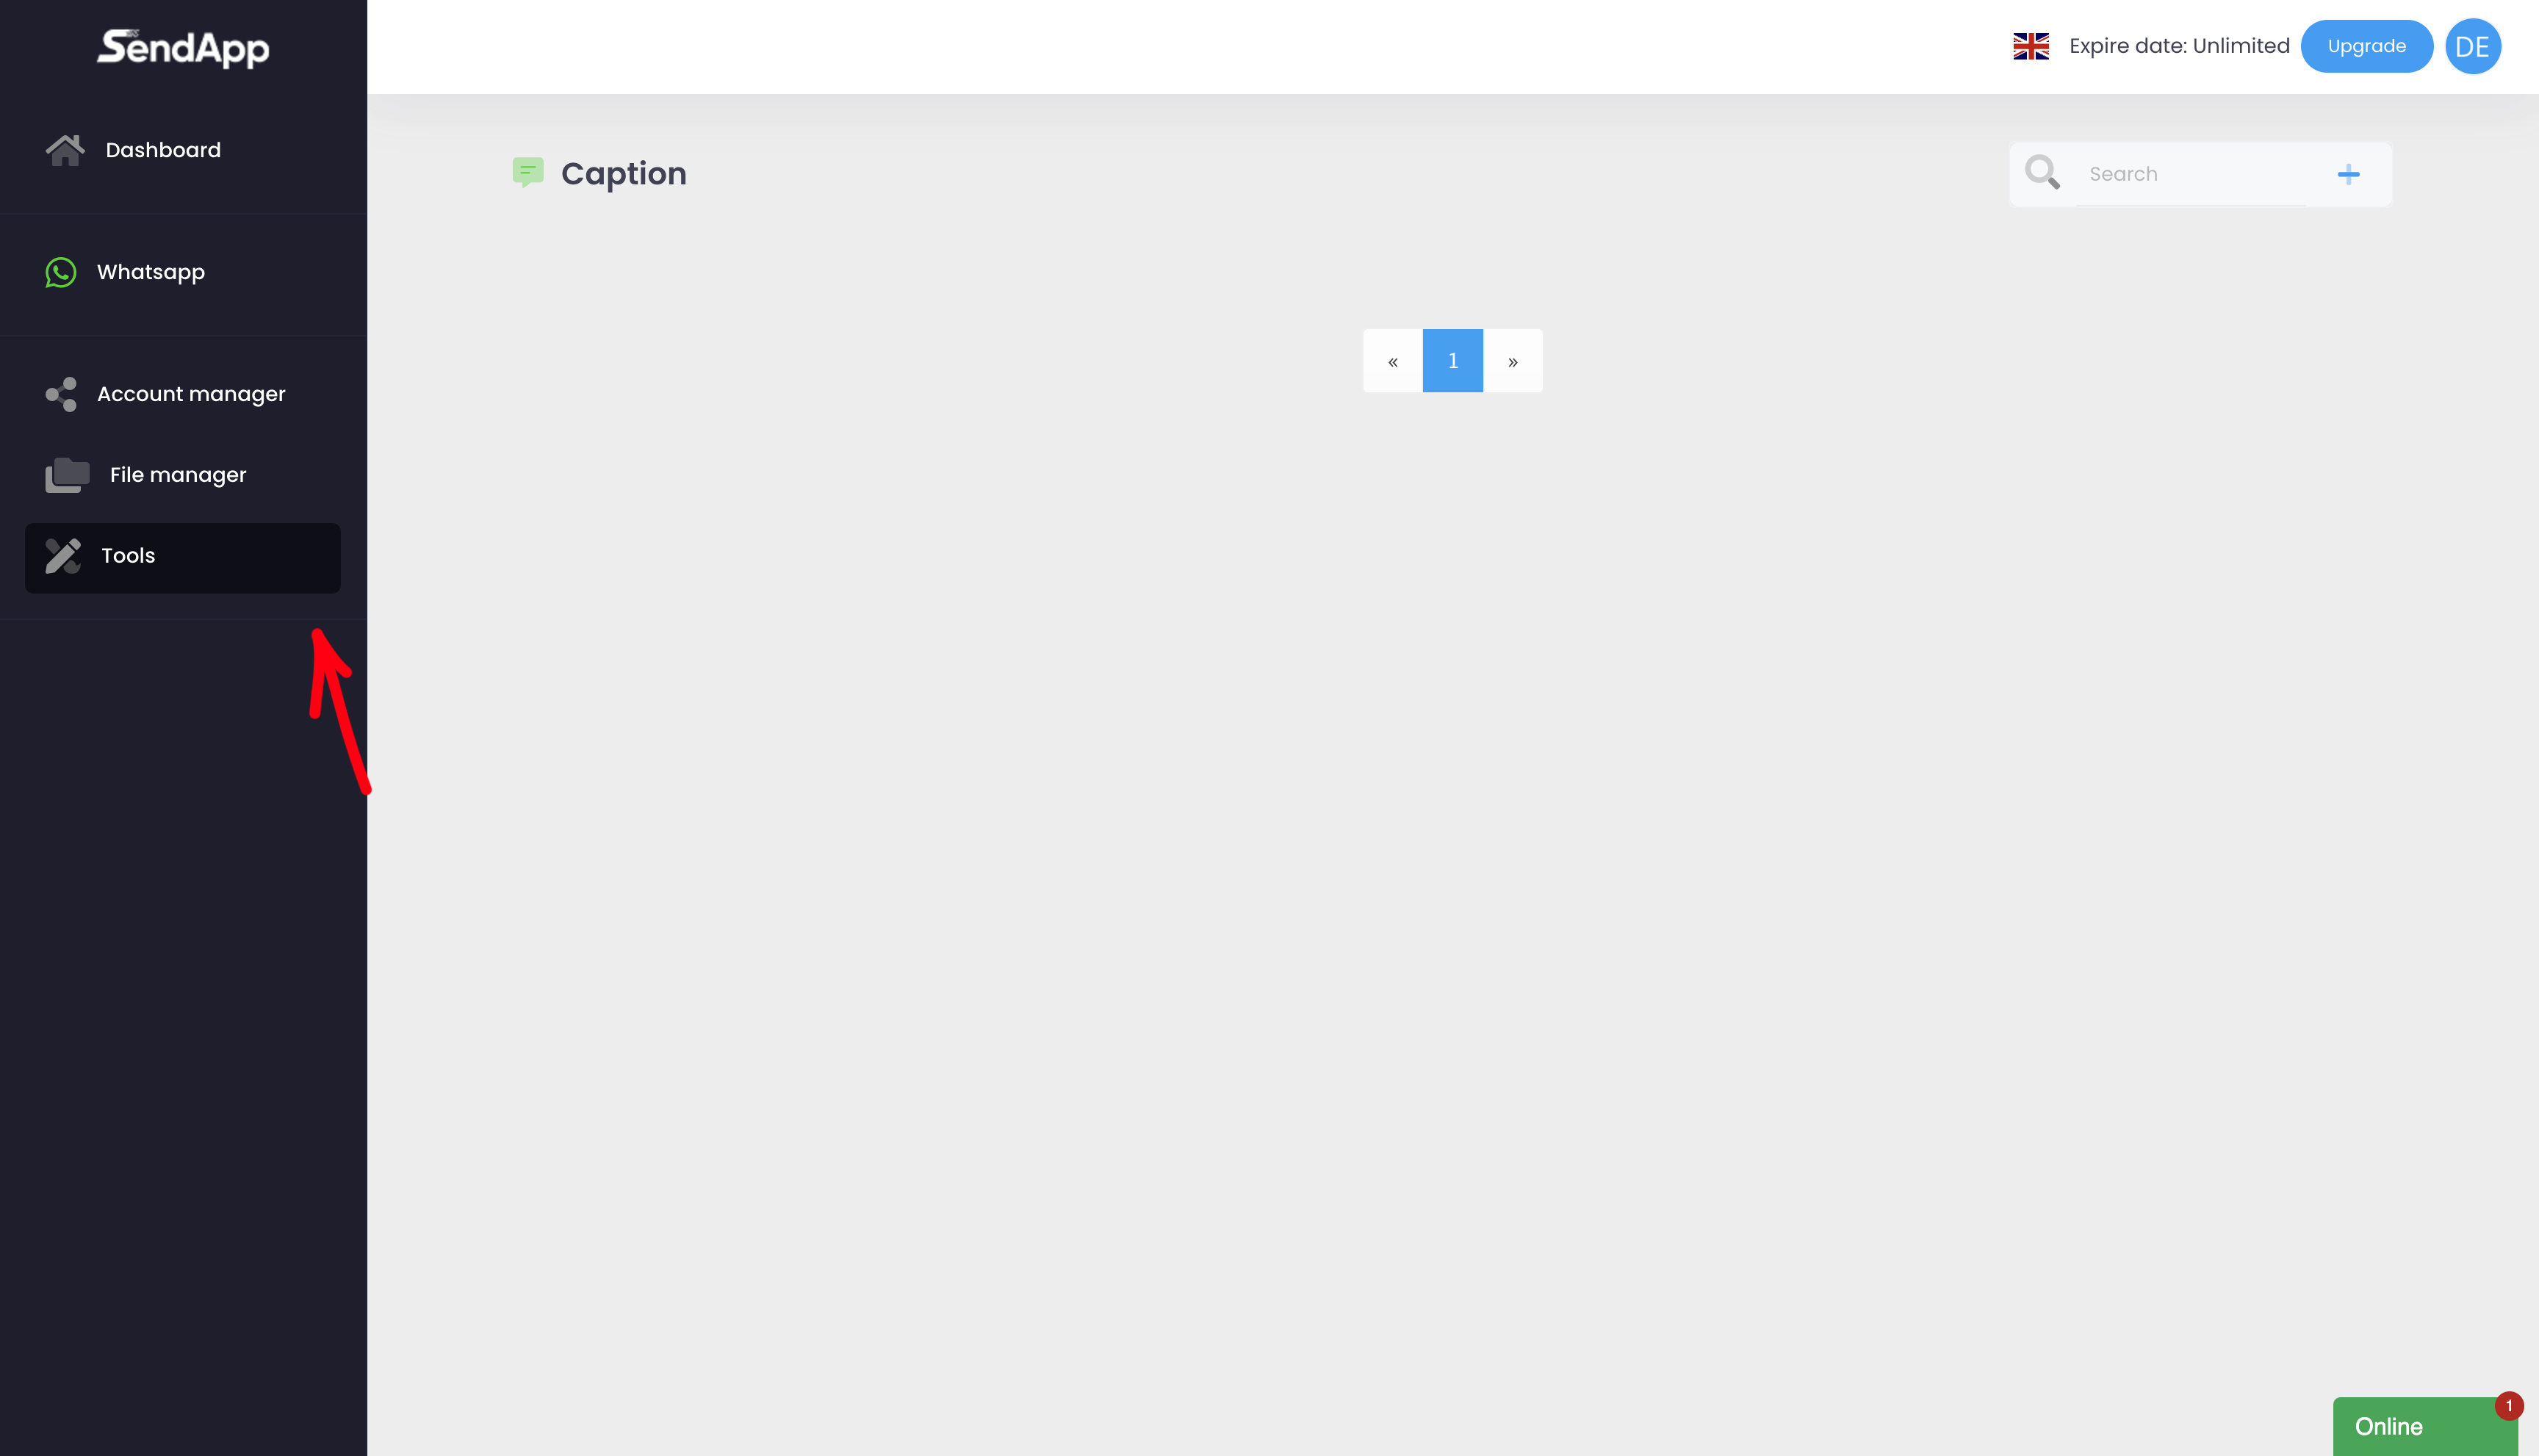
How to create a pre-structured Caption:
1.Access the section Tools From the main menu.
2.Click on Add New Caption.
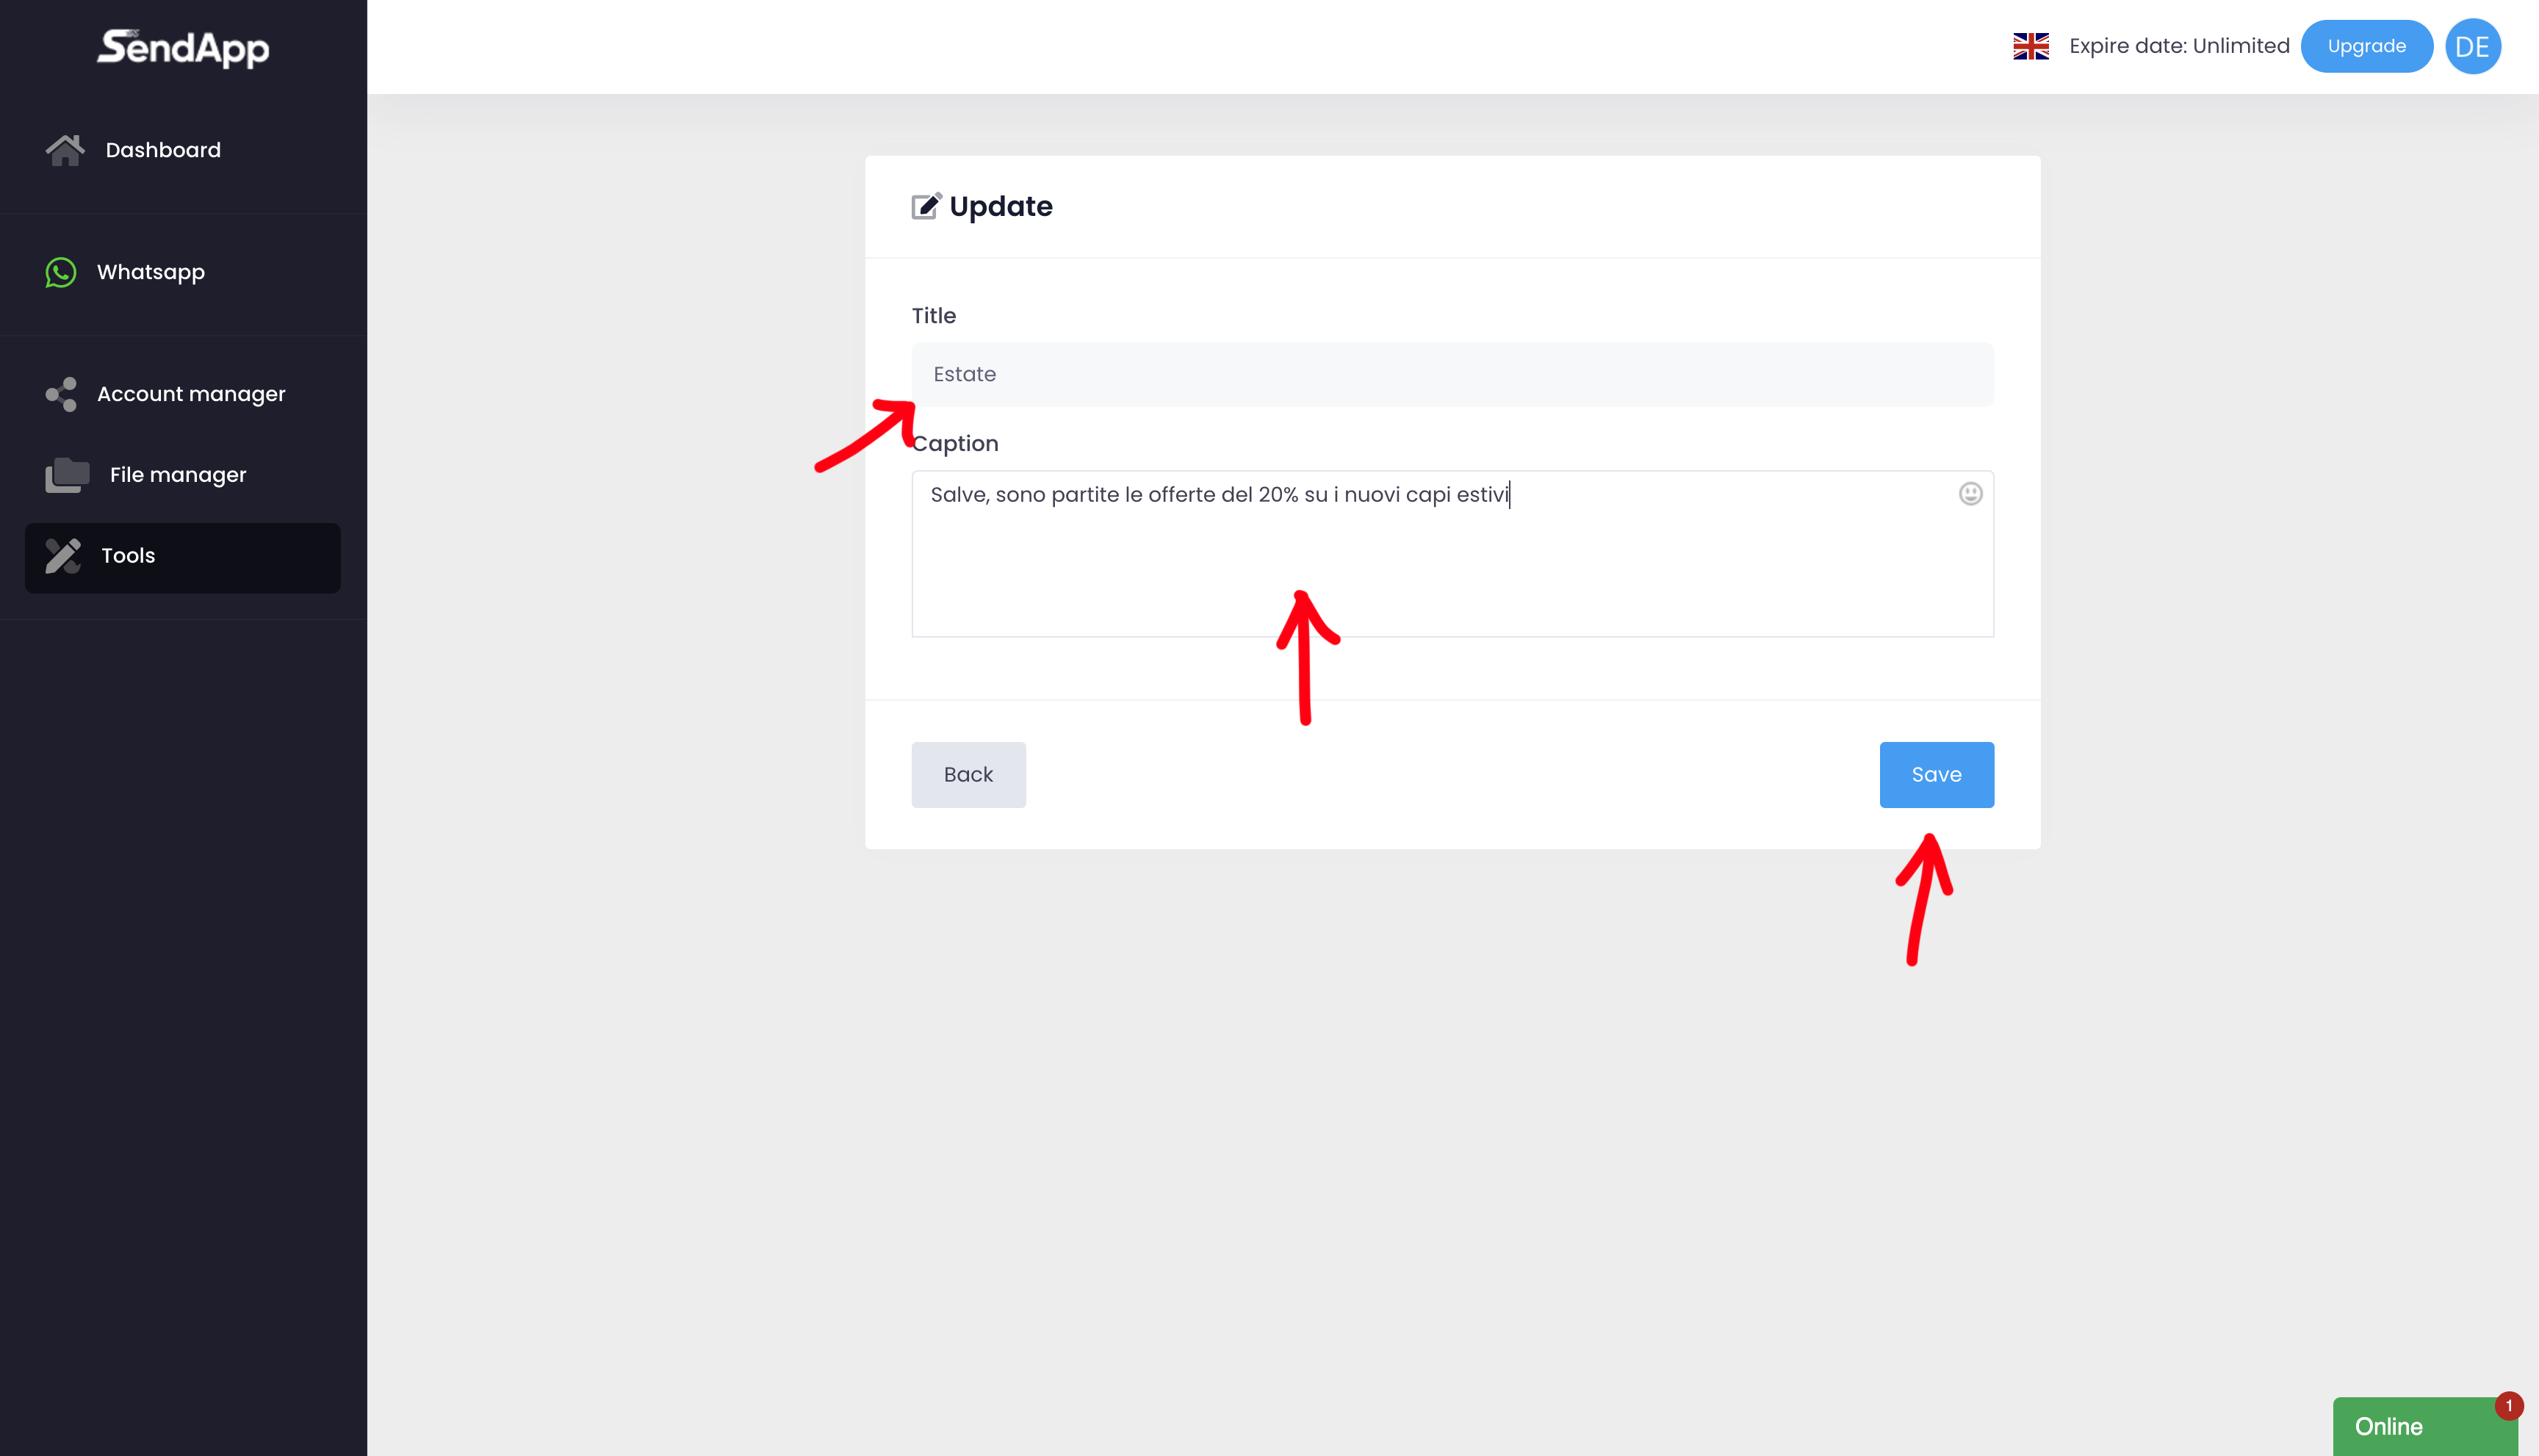
3.Insert:
-Title: An identifying name for the Caption.
-Caption: the message you wish to save.
4.Save the Caption to make it available for future campaigns.
Utilizzo di Caption prestrutturate nelle campagne massive
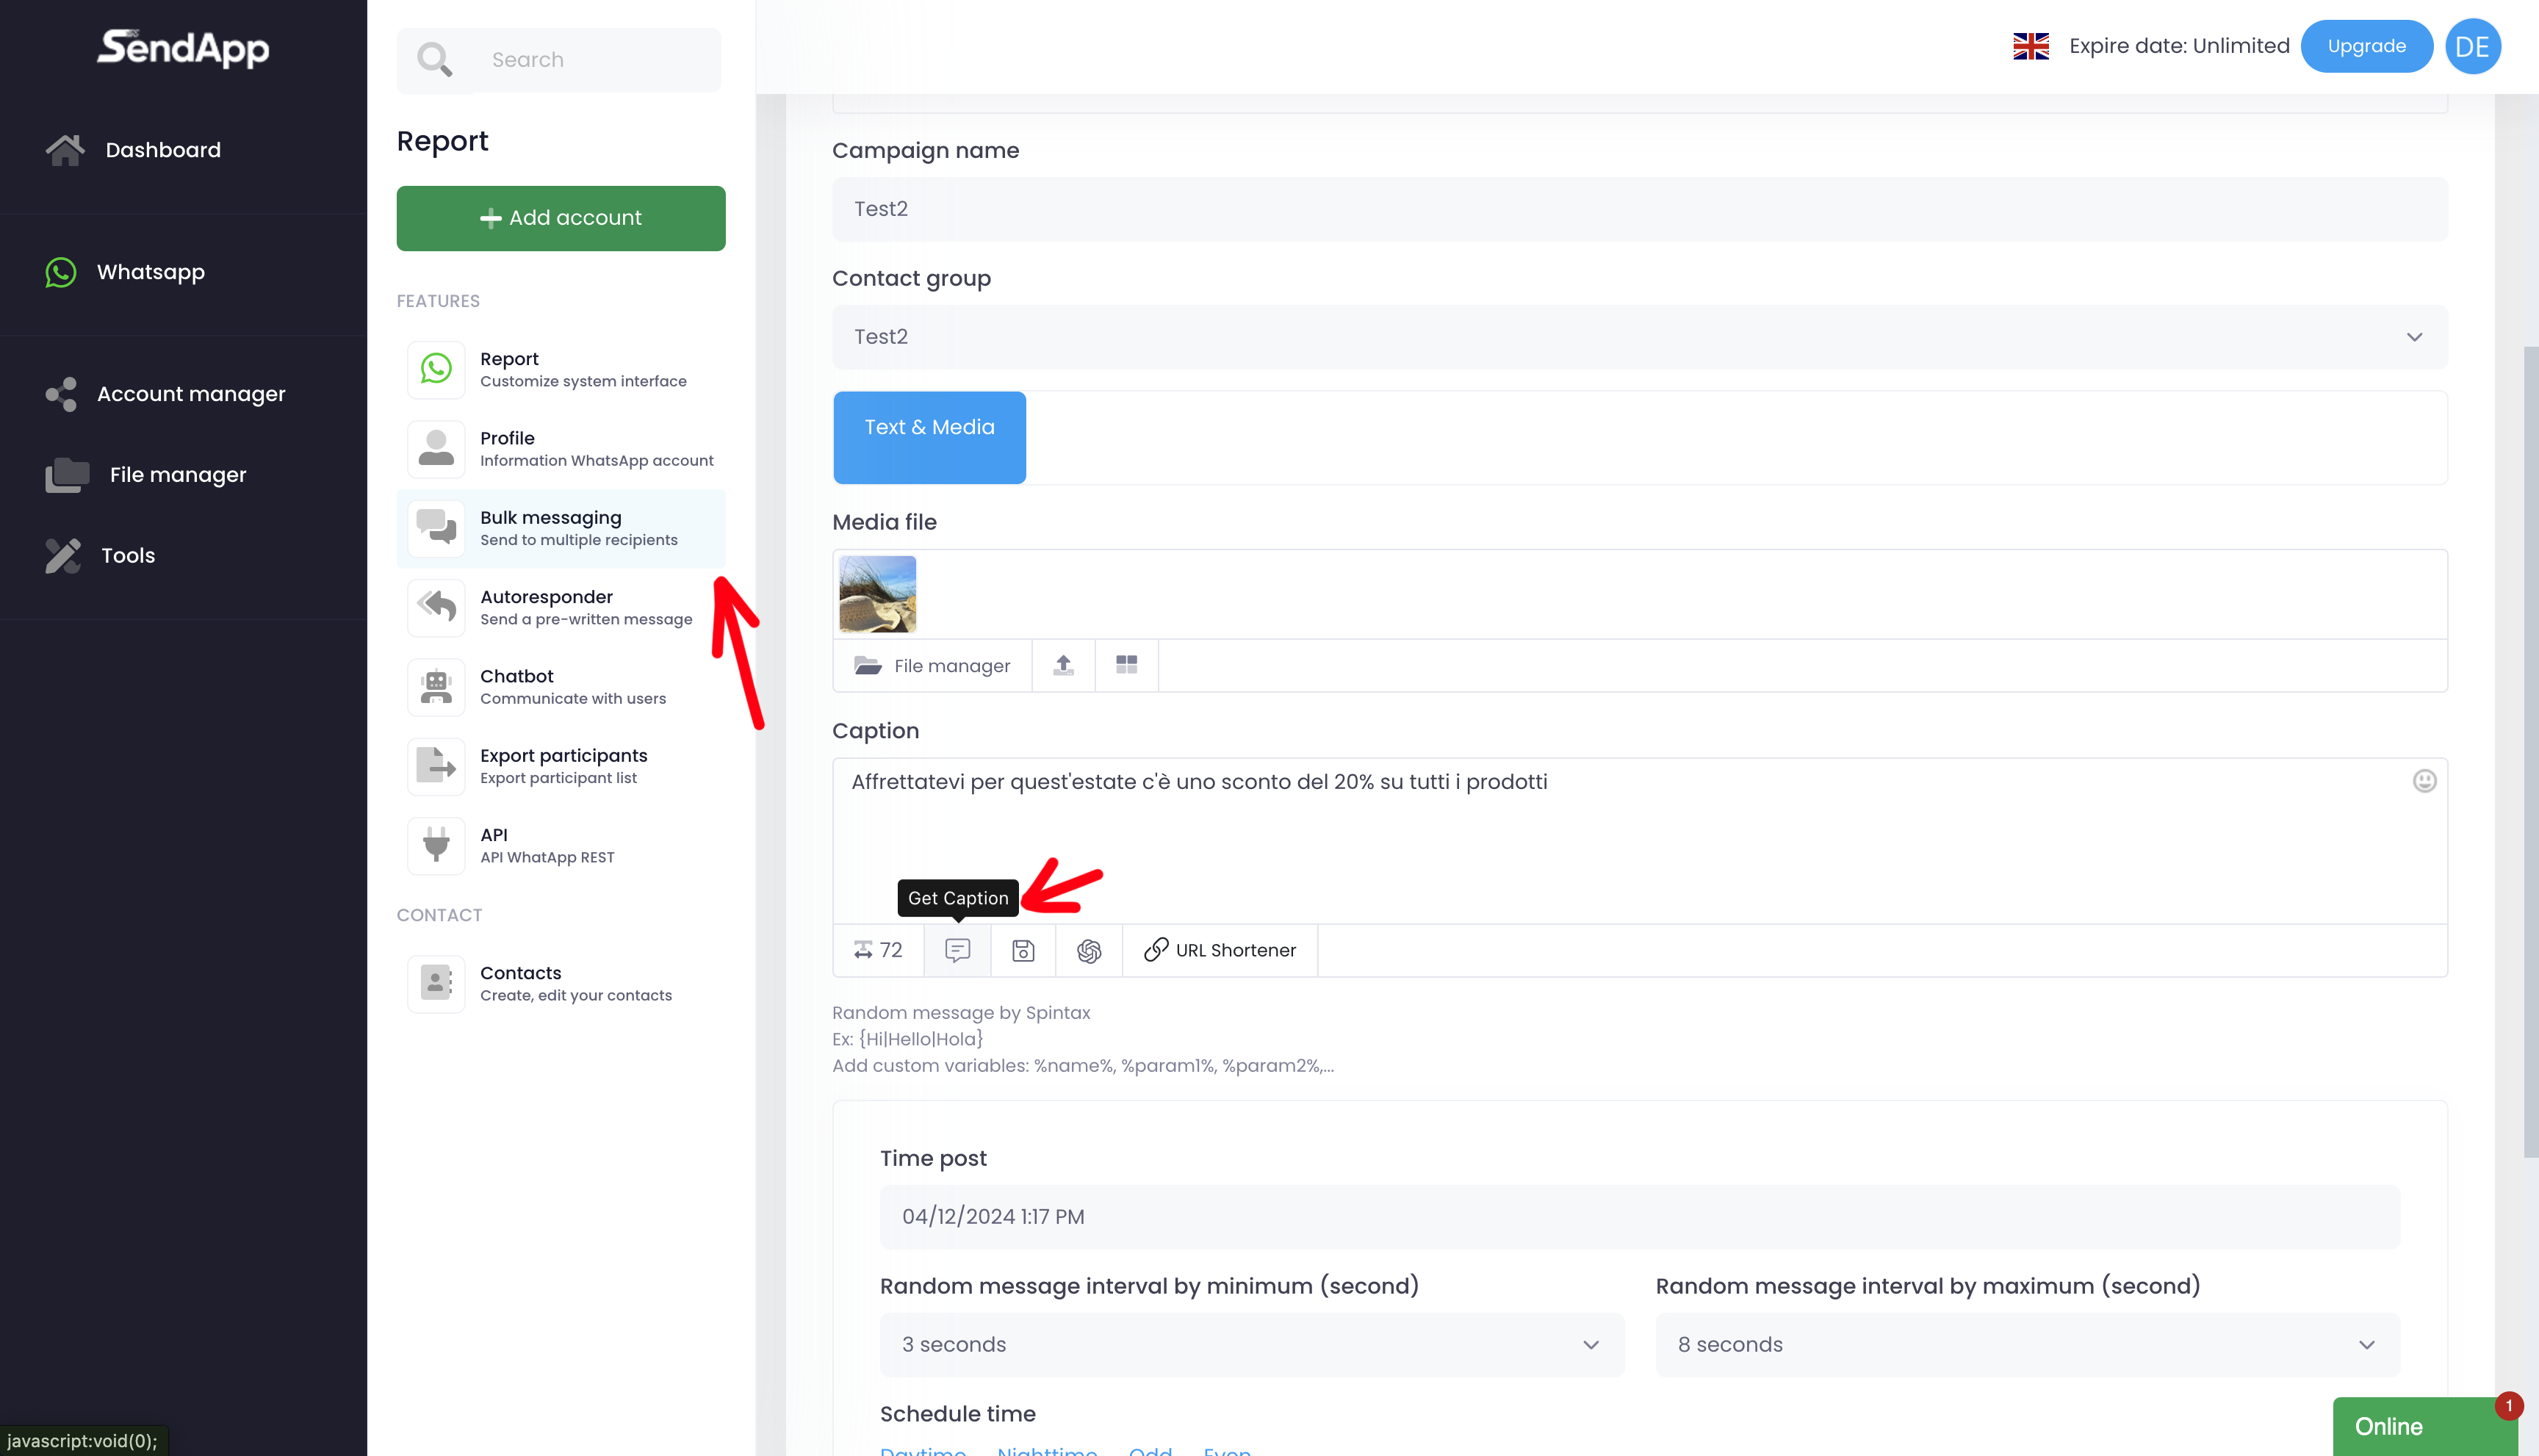
Once you have created a Caption, you can use it directly in the Bulk Messaging.
How to use a pre-structured Caption:
1.Go to the section Bulk Messaging And start setting up a new campaign.
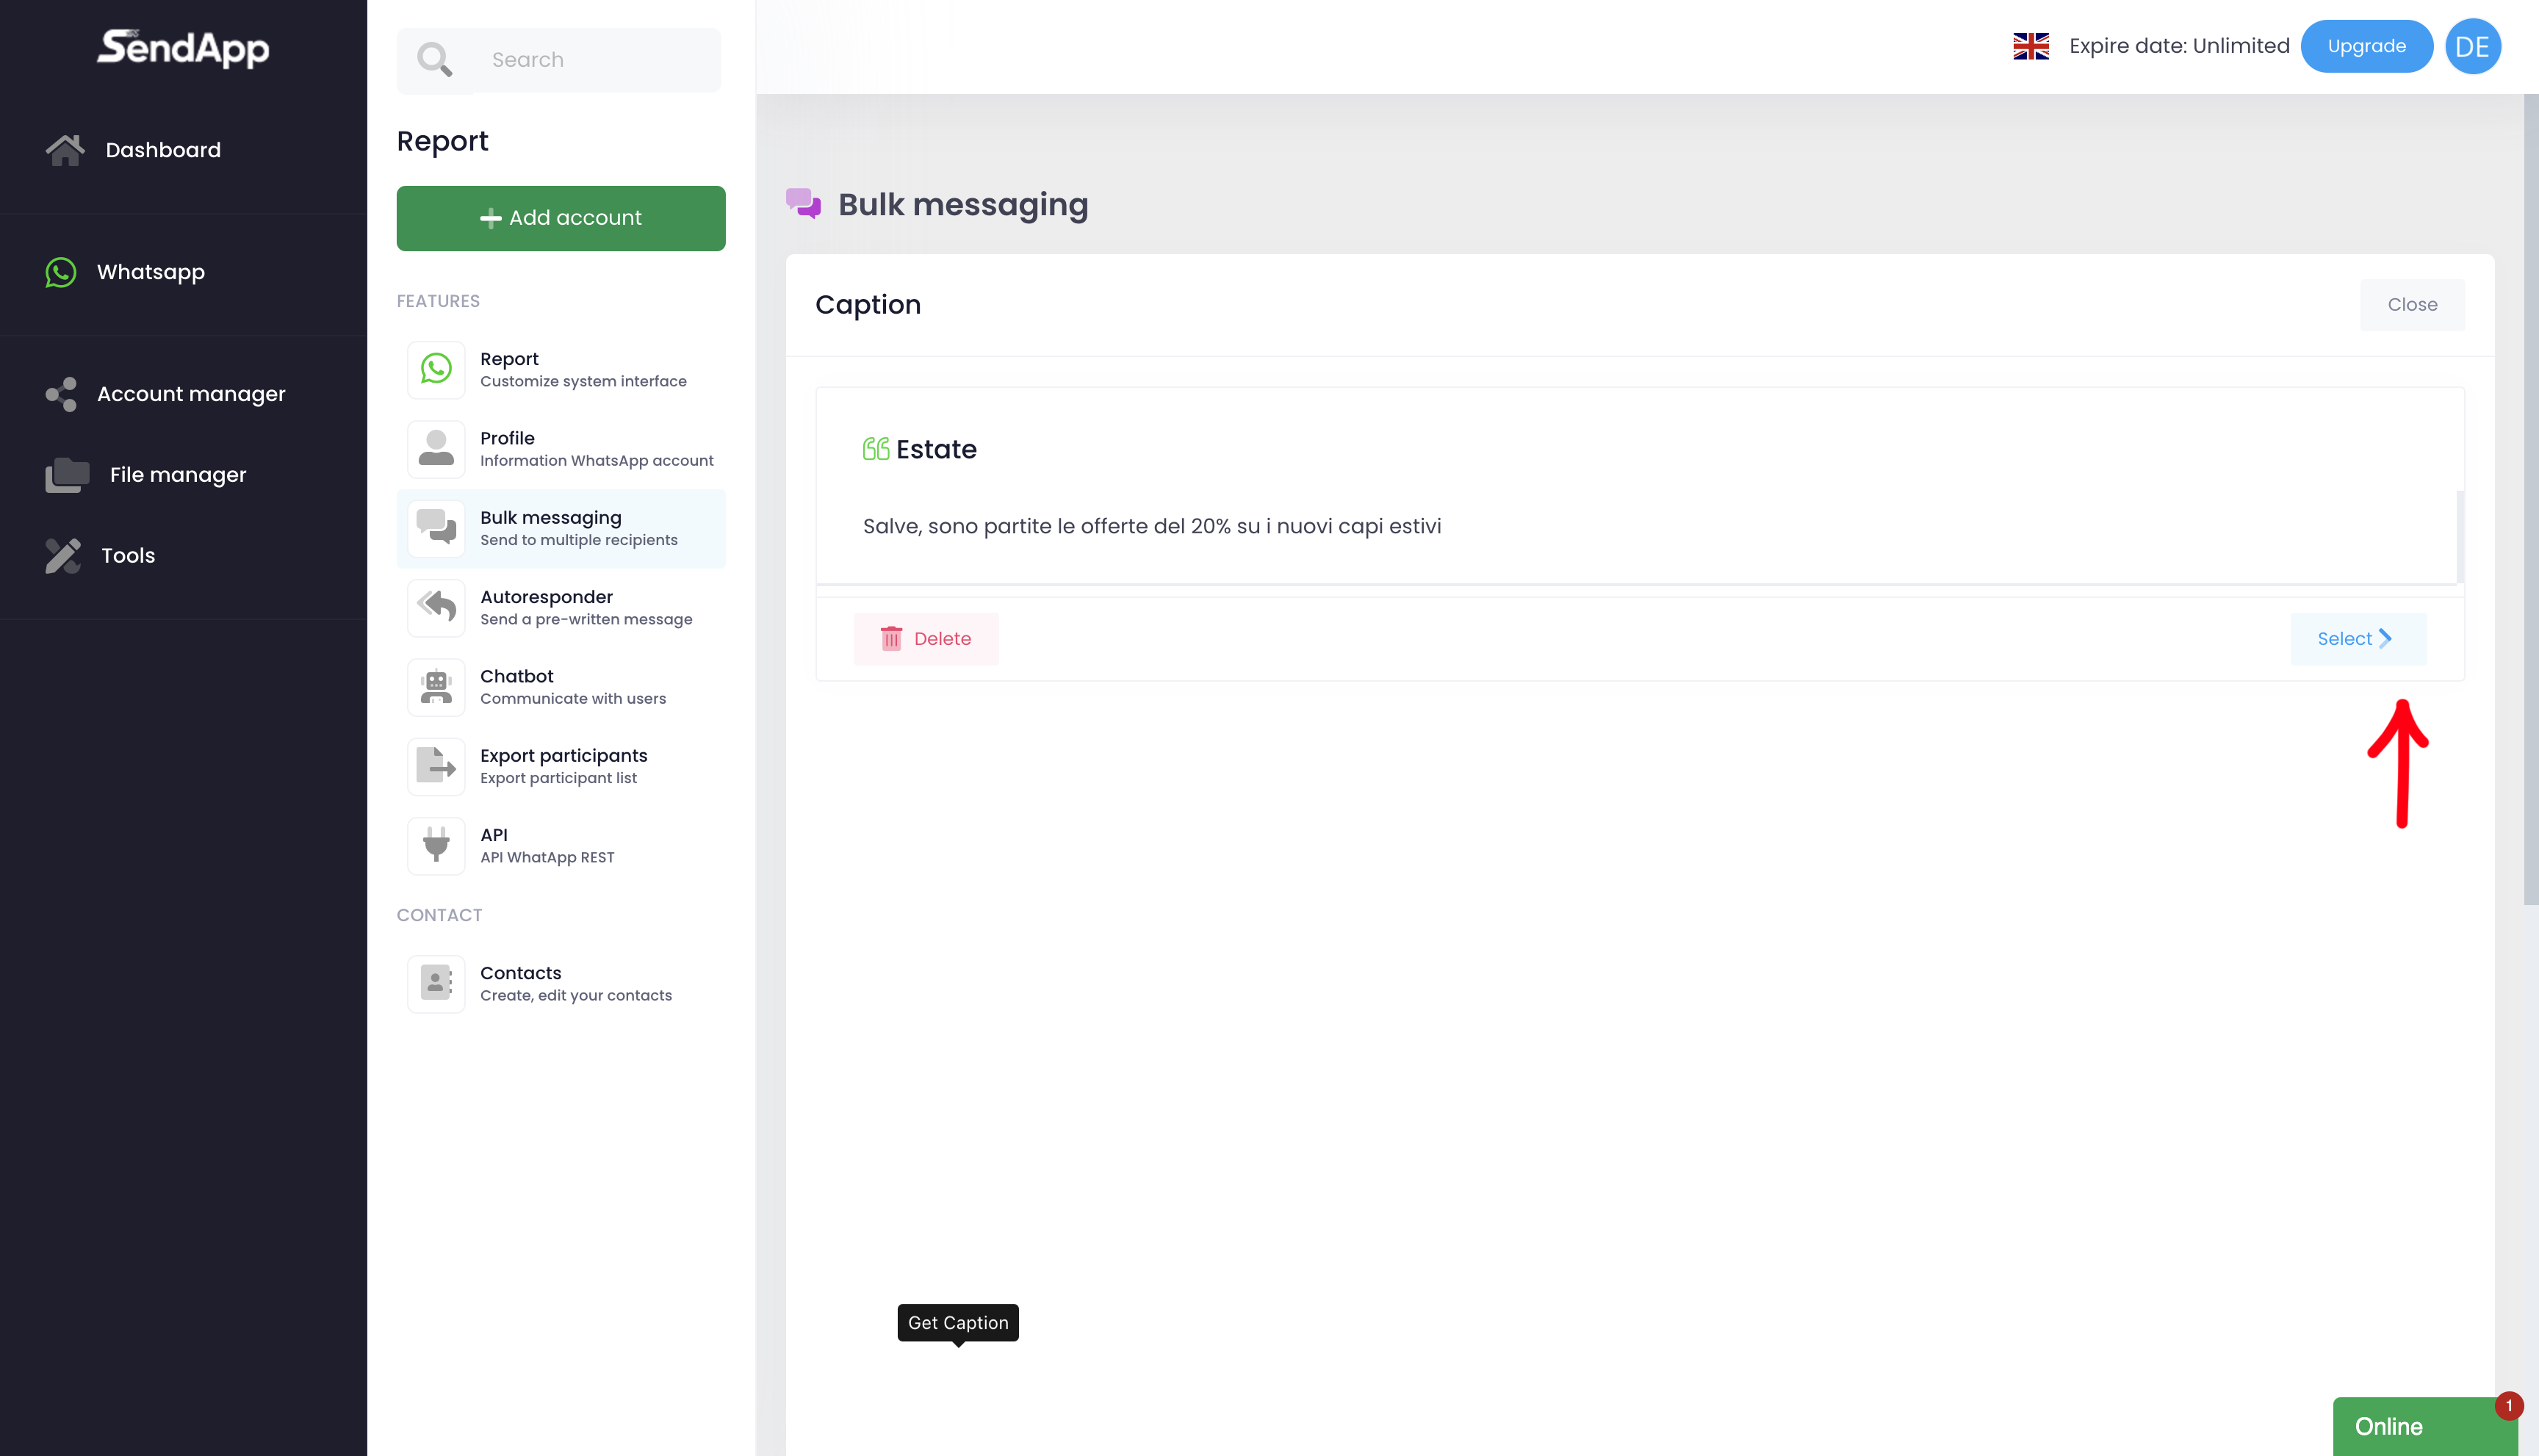
2.In the section Caption, click on the icon Get Caption.
3.Select from the list the pre-structured Caption you wish to send.
4.Complete the campaign configuration (such as adding media files or setting the sending interval).
