
Automatic Disenrollment Guide
of WhatsApp with SendApp Agent
Thanks to the function of Automatic Disenrollment on SendApp Agent, your customers can easily unsubscribe from your campaigns. Here's how to best configure and use this feature to manage unsubscribes.
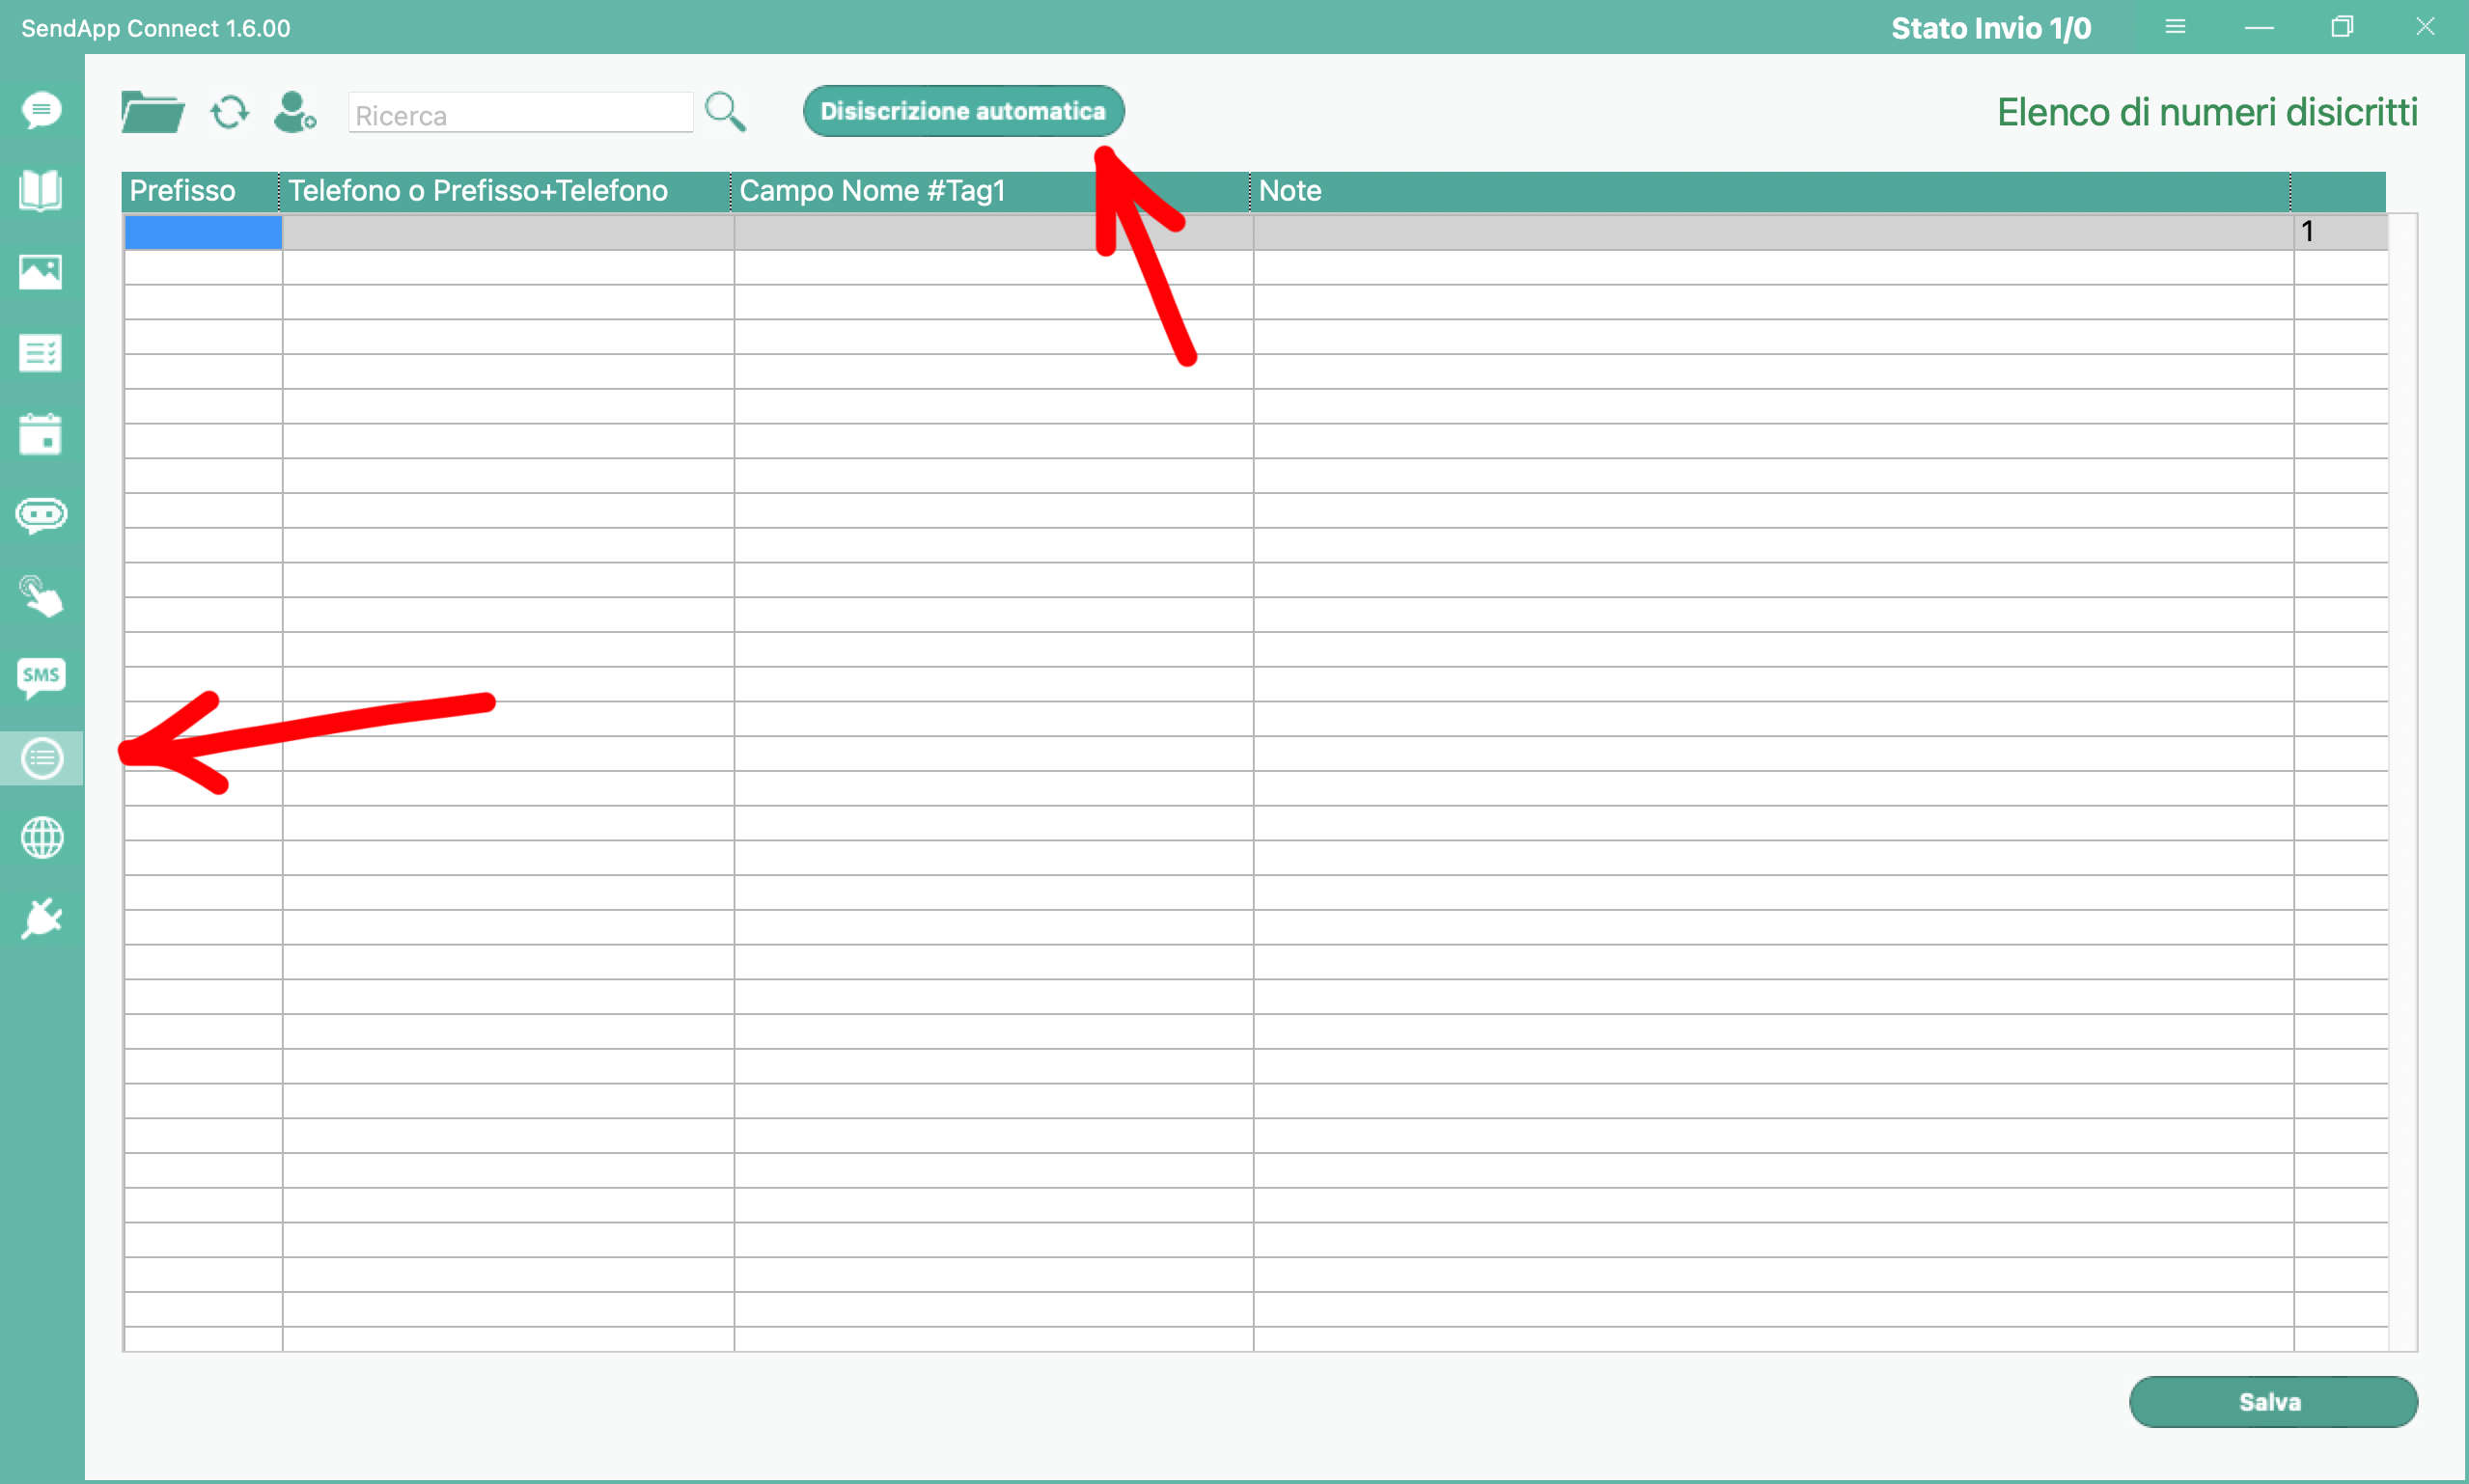
1. Enable Automatic Disenrollment.
To get started, log on to SendApp Agent. Next, find the ninth icon from above (Unsubscribe) and click it. At this point, you will see the Automatic Disenrollment to the right of the search field. Finally, clicking on it will open a window with two fields to fill in.
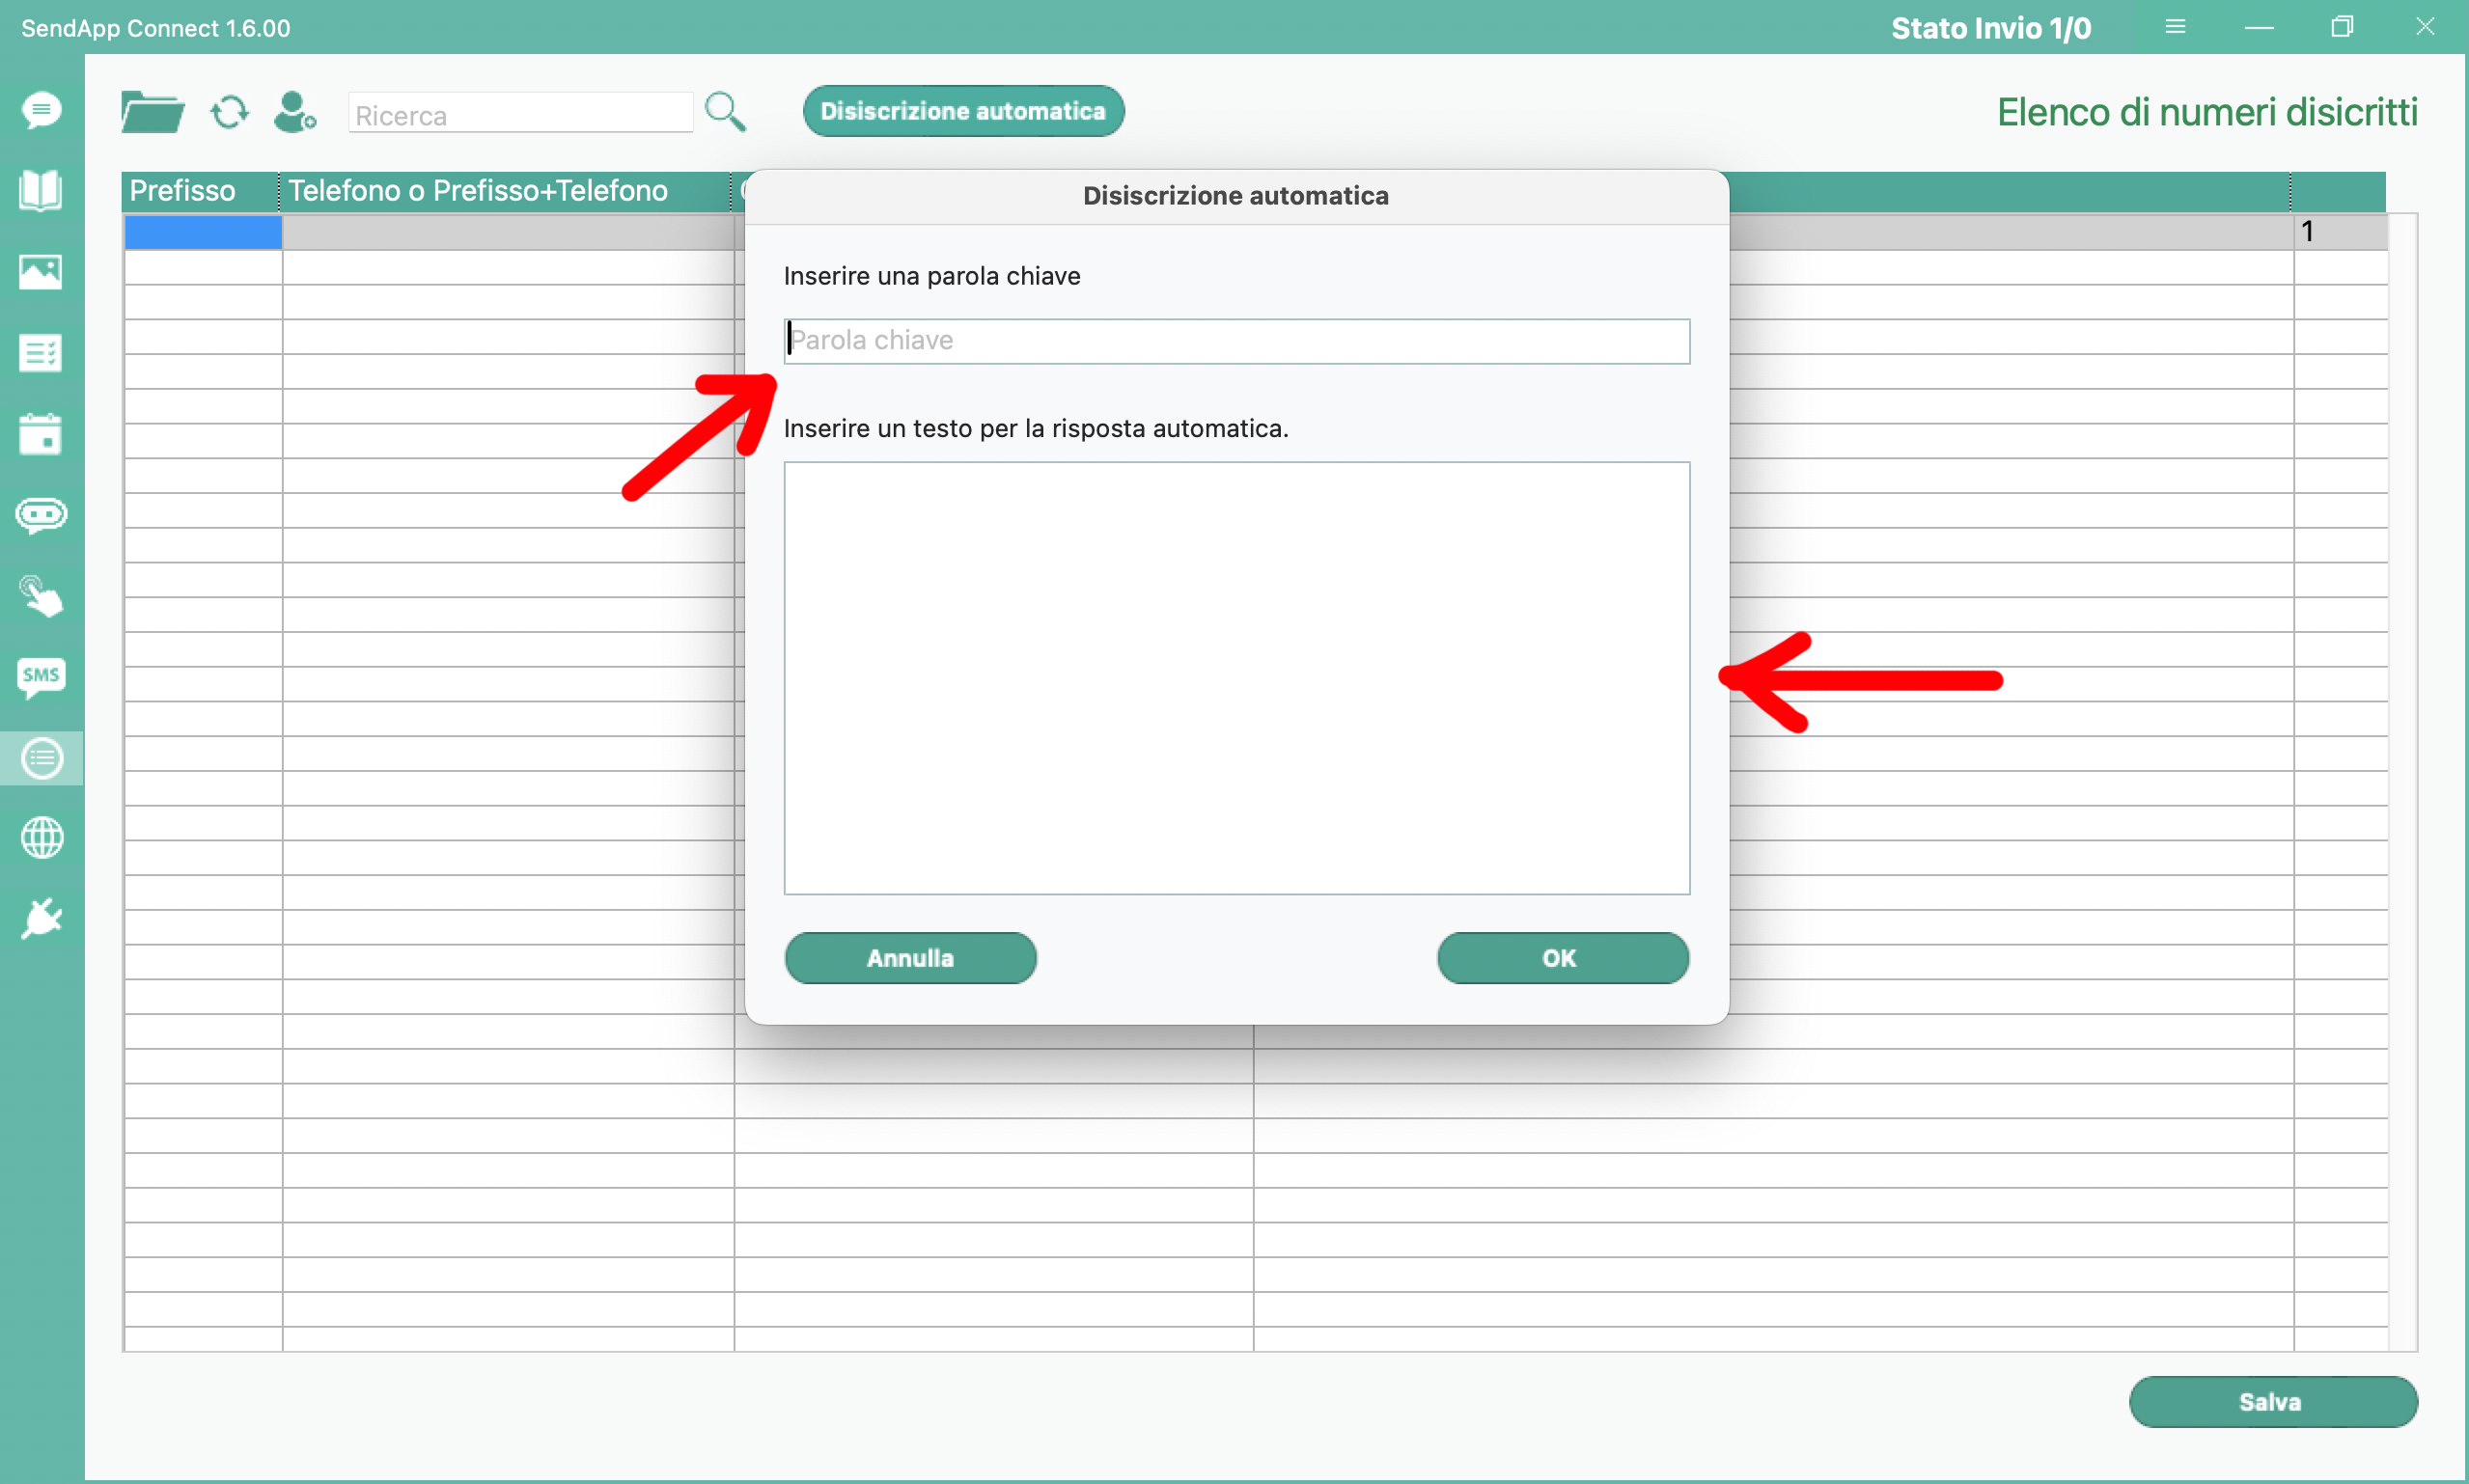
2. Configure Unsubscribe Messages
First, in the field keyword, write the term that customers will use to unsubscribe. For example: unsubscribe me.
Later, in the field Auto reply, enter the message that will confirm the disenrollment to the client.
Example: The disenrollment was successful.

3. Advice for Use in Campaigns.
To comply with GDPR, we suggest that you add an unsubscribe notice to the end of your posts. For example:
If you do not wish to receive more messages, write "unsubscribe me".
4. Managing Unsubscribed Contacts
When someone uses the keyword, the system automatically removes them from the address book of active campaigns. As a result, you will be able to manage contacts in an orderly and compliant manner.
There Automatic Disenrollment of SendApp Agent thus ensures a professional relationship with customers. As a result, it improves both their experience and trust in your service.
Start using this feature now for more transparent service!
Ready to get started with SendApp Agent?
Start your free trial: WhatsApp, AI and automations in one dashboard.
Try for free