Instructions for use SendApp Plugin WordPress Woocommerce

How to add the tracking number of the shipment in the message template

A shipment tracking number can be added to the message template with a simple method described in the linked post below. We will also show you how to create a shipping tracking number placeholder for two major WooCommerce plugins, the tracking shipments of WooCommerce and the monitoring of orders Yith WooCommerce , so using this method you can create your own placeholder for any plug-ins out there without any developer knowledge or coding.

We also recommend that you read the article linked below or have at least a look at it before proceeding with one, so that you can have a better understanding of what we are doing.

Shipment tracking via WooCommerce

According to the WooCommerce document https://docs.woocommerce.com/document/shipment-tracking/ the shipping tracking number of your order is saved under meta order (postmeta table) with the key _wc_shipment_tracking_items , but since they are saving tracking number as an array, you will also need to mention their array key in our placeholder for it to work properly.

So for order data, the format for the placeholder starts with {{order-  after this, you have to mention your meta-key, which just in case Shipping tracking for WooCommerce is _wc_shipment_tracking_items and since they are saving the details in an array and an array key for the shipping number according to their document is TRACKING_NUMBER so we will have to add this to the placeholder with a colon (:) like : tracking_number . So the final placeholder will look like the following.

{{order-_wc_shipment_tracking_items: TRACKING_NUMBER}}

And using this method you can create placeholders for any value or plug-in that uses an array to store data in the database. If you are not sure what your meta-key and matrix is, you can contact the developer of that respective plugin to find out about it, or you can also try searching for your database yourself and finding it.

You can also use the following placeholders that will work for this plugin

Tracking number: {{order _wc_shipment_tracking_items: TRACKING_NUMBER}}
Tracking Provider: {{order _wc_shipment_tracking_items: tracking_provider}}
Date Shipped: {{order _wc_shipment_tracking_items: date_shipped}}
Custom Tracking Provider: {{order _wc_shipment_tracking_items: custom_tracking_provider}}
Customized Tracking Link: {{order-_wc_shipment_tracking_items: custom_tracking_link}}

We have also created integration with the Shipment Tracking plug-in so that you can even render the tracking links for this

Tracking link: {{Wc-tracking-link}}

Please note that the codes short above will only work with the WooCommerce shipment tracking plugin . But you can create placeholders for any plug-in that stores data in an array format using the same method.

Advanced tracking of shipments for WooCommerce

The advanced shipping tracking data for WooCommerce is stored in the WordPress postmeta table, so the placeholder will start with {{Post as a prefix and the tracking data will be stored in an array.

Tracking number: {{post-_wc_shipment_tracking_items: TRACKING_NUMBER}}
Tracking Provider: {{post-_wc_shipment_tracking_items: tracking_provider}}
Date Shipped: {{post-_wc_shipment_tracking_items: date_shipped}}
Custom Tracking Provider: {{post-_wc_shipment_tracking_items: custom_tracking_provider}}
Customized Tracking Link: {{post-_wc_shipment_tracking_items: custom_tracking_link}}

We have also created integration with the Shipment Tracking plug-in so that you can even render the tracking links for this

Tracking link: {{Wc-tracking-link}}

Note that the short codes shown above only work for advanced shipment tracking for Zorem's WooCommerce . But you can create placeholders for any plug-in that stores data in an array format using the same method.

AfterShip - WooCommerce monitoring

AfterShip - WooCommerce Tracking data is stored in the WordPress postmeta table, so the placeholder will start with {{Post as a prefix and their tracking data will be stored in meta-key.

Tracking number: {{}} Post-_aftership_tracking_number
First name Courier service : {{}} Post-_aftership_tracking_provider_name
Date of shipment: {{}} Post-_aftership_tracking_shipdate
Traceability code: {{Post-_aftership_tracking_postal}
Destination Country: {} {Postco

Note that the above feature codes will only work with AfterShip - WooCommerce Tracking . But you can create placeholders for any plug-in that stores data in meta-key format using the same method.

Yith WooCommerce order tracking

Since yith doesn't save their tracking data in array format like the plugin above, so it's much easier to create and understand the placeholder and most plugins don't save their data to an array, so this process will be the same for most plugins.

Yith's data is stored in the WordPress postmeta table, so the placeholder will start with {{Post as prefix and their tracking data are stored with meta ywot_tracking_code, so the tracking code for this plugin will be

{{}} Post-ywot_tracking_code

Since there is no array used in this data, we will not use the array identifier in this placeholder.

Using this method you can create placeholders for any plug-in or tracking tracking out there if they don't store their data in an array, if an array is used, use the shipping tracking method via WooCommerce. If you are not sure what your meta-key is, you can contact the developer of the respective plug-in to find out about it, or you can also try to search for your database yourself and find out.

You can also use the following placeholders that will work for this plugin

Tracking code: {{}} Post-ywot_tracking_code
Operator name: {{}} Post-ywot_carrier_name
Date of withdrawal : {{}} Post-ywot_pick_up_date

Premium version

Operator name: {{}} Post-ywot_carrier_id

Note that the function codes shown above will only work with the Yith WooCommerce order tracking . But you can create placeholders for any plug-ins using the same method.
How to create custom placeholders

We support custom placeholders, which means you can create your own placeholder for any value in your database and you are not limited by the placeholders we provide at all. Just follow the placeholder format below and insert it into the template for use, no code changes, nothing.

For order details {{order- meta_key}}

For user details {{user- meta_key}}

By post goal {{post- meta_key}}

For multi-vendor / marketplace plug-ins {{vendor- meta_key}}

In the formats above simply replace the meta_key text with the real meta key. 

If you don't know where the data is stored in, you can contact the respective plugin developer to find out. 


If the data in meta is saved in an array in meta or during the sending of SMS the "Array" of return in the message, to use the values of array you can use the following format

{{order- meta_key: arraykey}}

{{user- meta_key: arraykey}}

{{post- meta_key: arraykey}}

{{vendor- meta_key: arraykey}}

In previous formats just replace the text meta_key and arraykey with the real meta key. 

If you don't know in which array key the data is stored, you can contact the respective plugin developer to find out. 

How to know if the data is saved in the array?

The easiest way to verify this is to ask the plug-in developer.

Install and activate the Sendapp plugin

There are two different ways to install a Sendapp plug-in.

From the WordPress admin dashboard (/ wp-admin)

  1. Download the ".zip file" - from the "Download" tab
  2. Do not unzip the downloaded .zip file
  3. Log in to your WordPress admin panel.
  4. Select the plugins, then Add new.
  5. Select Upload Plug-in.
  6. Browse the computer to select the "sendapp-wp.zip" file.
  7. Click Install Now and WordPress will do its magic and install the Plugin.
  8. After the installation is complete, activate the plug-in.


Via FTP

We recommend that only experienced users use the FTP method.

  1. Download the ".zip file" - from the "Download" tab
  2. Before trying to load your theme you must unzip the downloaded file "sendapp-wp.zip"
  3. Open your FTP client and open your plugin folder  (wp-content / plugins /)
  4. Move unzipped files (Sendapp-wp.zip) in the plug-ins folder. Now go to the WordPress admin dashboard => Plugins => Plugins installed and then Activate the Sendapp plug-in from there.

Placeholders by message model

Below is the list of placeholders that you can use in the message template. The short codes are grouped below, so they are easy to read and find.

General

{{site name}}Name of the site
{{Number}}-ToiletOrder number
{{Toilet-order-id}}Order ID / Post ID
{{Toilet-end-date}}Order's date
{{Toilet-checking the order status}}The status of the order
{{-Payment-wc method}}Payment method
{{Toilet-transaction-id}}Payment transaction ID
{{Toilet-shipping-method}}shipping method

WordPress profile details

{{Name}}-wp-firstFirst name
{{Wp-last-name}}Surname
{{Username}}-WpUsername
{{Wp-nickname}}nickname
{{Wp-display-name}}Display name
Wp {{Email}}E-mail
{{Wp-user-website}}User website
{{Wp-user-bio}}User biography

Details of the WooCommerce order

{{Wc-product-name}}All the names of articles / products in order
{{Toilet-product-name-count}}First object name then item counter
{{WC-total-products}}Total number of products in order
{{WC-total-items}}Total number of items in order
{{Wc-order-items}}Names of all products in order with item counter
{{Toilet-order-amount}}Total amount (VAT included)
{{}} Toilet-offTotal amount of the discount
{{Toilet Tax}}Total amount of taxes
{{Toilet-order-quantity-ex-imposed}}Total amount (excl. VAT)
{{Toilet-shipping-cost}}Shipping fees
{{Toilet-refund-amount}}Amount refunded
{{Toilet-refund-reason}}Reason for refund
{{Wc-order-notes}}Order notes provided when ordering
https://yoursiteurl.com/checkout/order-received/{{wc-order}}/?key={{post-_order_key}}WC order confirmation link
https://yoursiteurl.com/checkout/order-pay/{{wc-order}}/?pay_for_order=true&key={{post-_order_key}}Link to the Pending Payment page

WooCommerce billing details

{{Toilet-billing-first-name}}Billing name
{{Toilet-billing-last-name}}Billing surname
{{Toilet-billing-company}}Billing company
{{Toilet-billing-address-line-1}}Billing address line 1
{{Toilet-billing-address-line-2}}Billing address line 2
{{Toilet-billing-city}}Billing city
{{Toilet-billing-Cap}}Billing postcode / postcode
{{Toilet-billing-state}}Billing state / county
{{Toilet-billing-country}}Billing country
{{Toilet-invoicing Email}}Billing email
{{Toilet-billing-phone}}Billing phone

Shipping details of WooCommerce

{{Toilet-shipping-first-name}}Shipping name
{{Toilet-shipping-last-name}}Shipping surname
{{Toilet-shipping-company}}Shipping company
{{Toilet-shipping-address-line-1}}Shipping address line 1
{{Toilet-shipping-address-line-2}}Shipping address line 2
{{Toilet-shipping-city}}Shipping city
{{Toilet-shipping-Cap}}Shipping postcode / postcode
{{Toilet-shipping-state}}Shipping status
{{Toilet-shipping-country}}Country of dispatch

Stock exchange notifications

{{product name}}Product name
{{Product-quantity}}Quantity of product

Multi-vendor / marketplace plug-in notifications

{{Vendor-product-name}}Product name
{{Vendor-total-items}}Total number of items in order
{{Vendor-Order-items}}Names of all products in order with item counter
{{Vendor-order-amount}}Total amount (VAT included)

New post

{{post title}}Post title
{{Content}} PostPublish content
{Link} {Post}Insert link
{{}} Post-extractPostal statement
{{Post-author}}Postal author
{{publication date}}Publication date
{{Category}} PostMail category (s)
{{}} Tag postPublish tags

Setting options

Our goal is to provide the maximum possible functionality so that you as a site owner can configure the plug-in in the desired way and all this while keeping the interface easy to understand. But it is always good to know all the options.

The plugin is divided into three main sections

  1. Gateway
  2. Notifications
  3. Send quick SMS

We will discuss each of them and the options they offer.

Gateway card

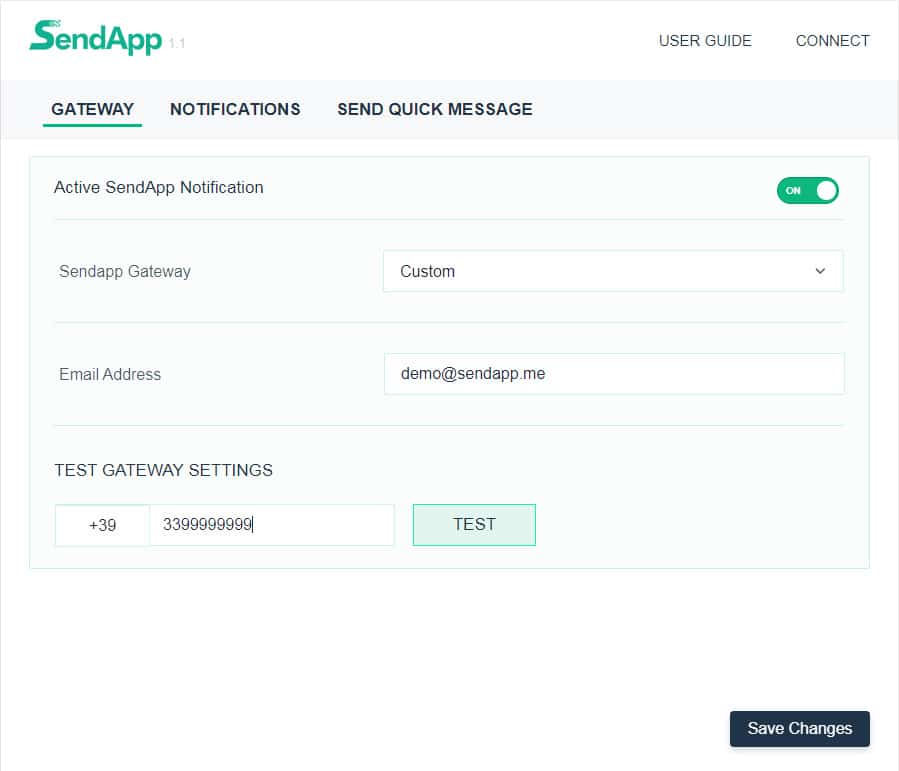
In this way, you will be able to set the sendapp gateway you intend to use for sending WhatsApp messages together with SMS by activating the option from your Sendapp Connect.

Notifications tab

Here you will be able to activate the automatic notification of the order status of WooCommerce, so every time the order status is changed to something, these notifications will be activated if they are activated. You can enable / disable them specifically for customers and administrators.

Note: By default, the status of the new WooCommerce order is set to Processing , so make sure it's always on if you want to send notifications about new orders.

Enable different gateway-based content

This option is available under the Customer notification section, activating this ON you can set up different gateways for different content. For example (use case):

  1. If you only want to send a new order notification to the countries that are set up for Twilio Gateway and for all other countries that you want to send a notification for all order updates, you can set this option by activating this option and selecting the status and their content for each gateway you set up on the Gateway tab.
  2. If you want to send SMS in different languages for the countries configured in the Gateway tab, activating this function on all the gateways set in the Gateway tab will be listed and you can edit the content for each of them.

Send quick SMS

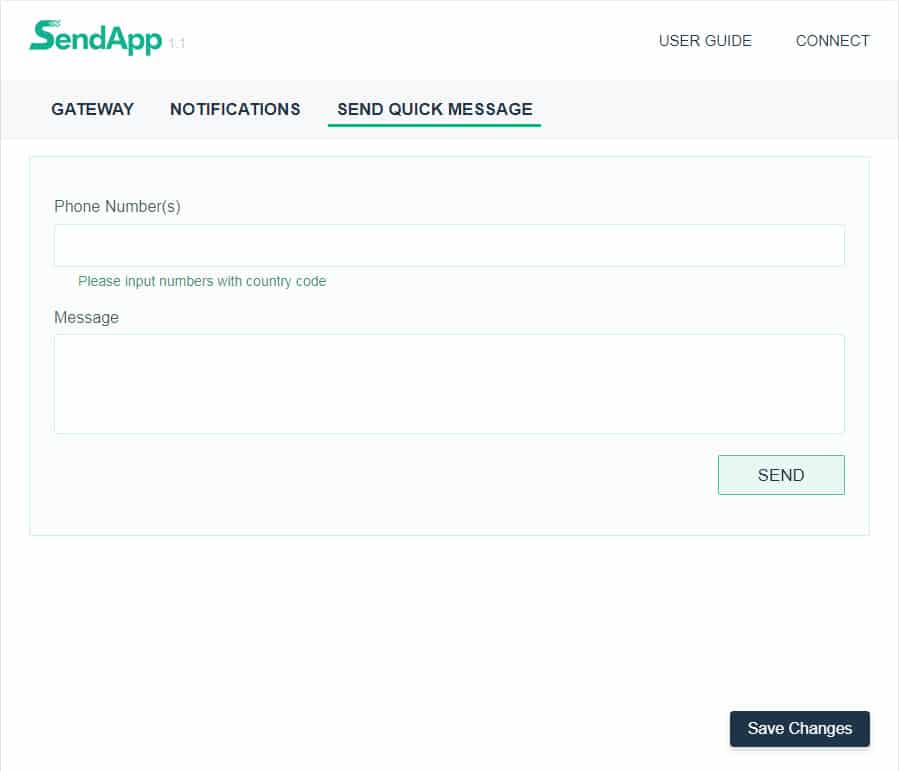
From here you can send quick SMS to any desired number. You can also send SMS to multiple numbers by separating different numbers with a comma ( , ). If different gateways are set for different countries, the message will be routed by the gateway set for that specific country, in case there are multiple numbers from different countries, in this case, the numbers will be routed from the respective gateways.

Select your currency
EUR Euro