SENDAPP OFFICIAL
WhatsApp for your Business
The first conversational marketing solution that integrates the official WhatsApp API. Automate marketing, sales, AI support, and bookings in a single platform.
SENDAPP OFFICIAL
The first conversational marketing solution that integrates the official WhatsApp API. Automate marketing, sales, AI support, and bookings in a single platform.
MAIN FEATURES
SendApp Official integrates the official WhatsApp Meta APIs to give you complete control over communications, marketing, and automation.
Complete overview of chats, contacts and campaigns
Management of incoming and outgoing conversations
CSV/XLSX import and address book management
Bulk sending with Meta-approved templates
Auto-responders, workflows, and AI Assistant
COMPLETE GUIDE
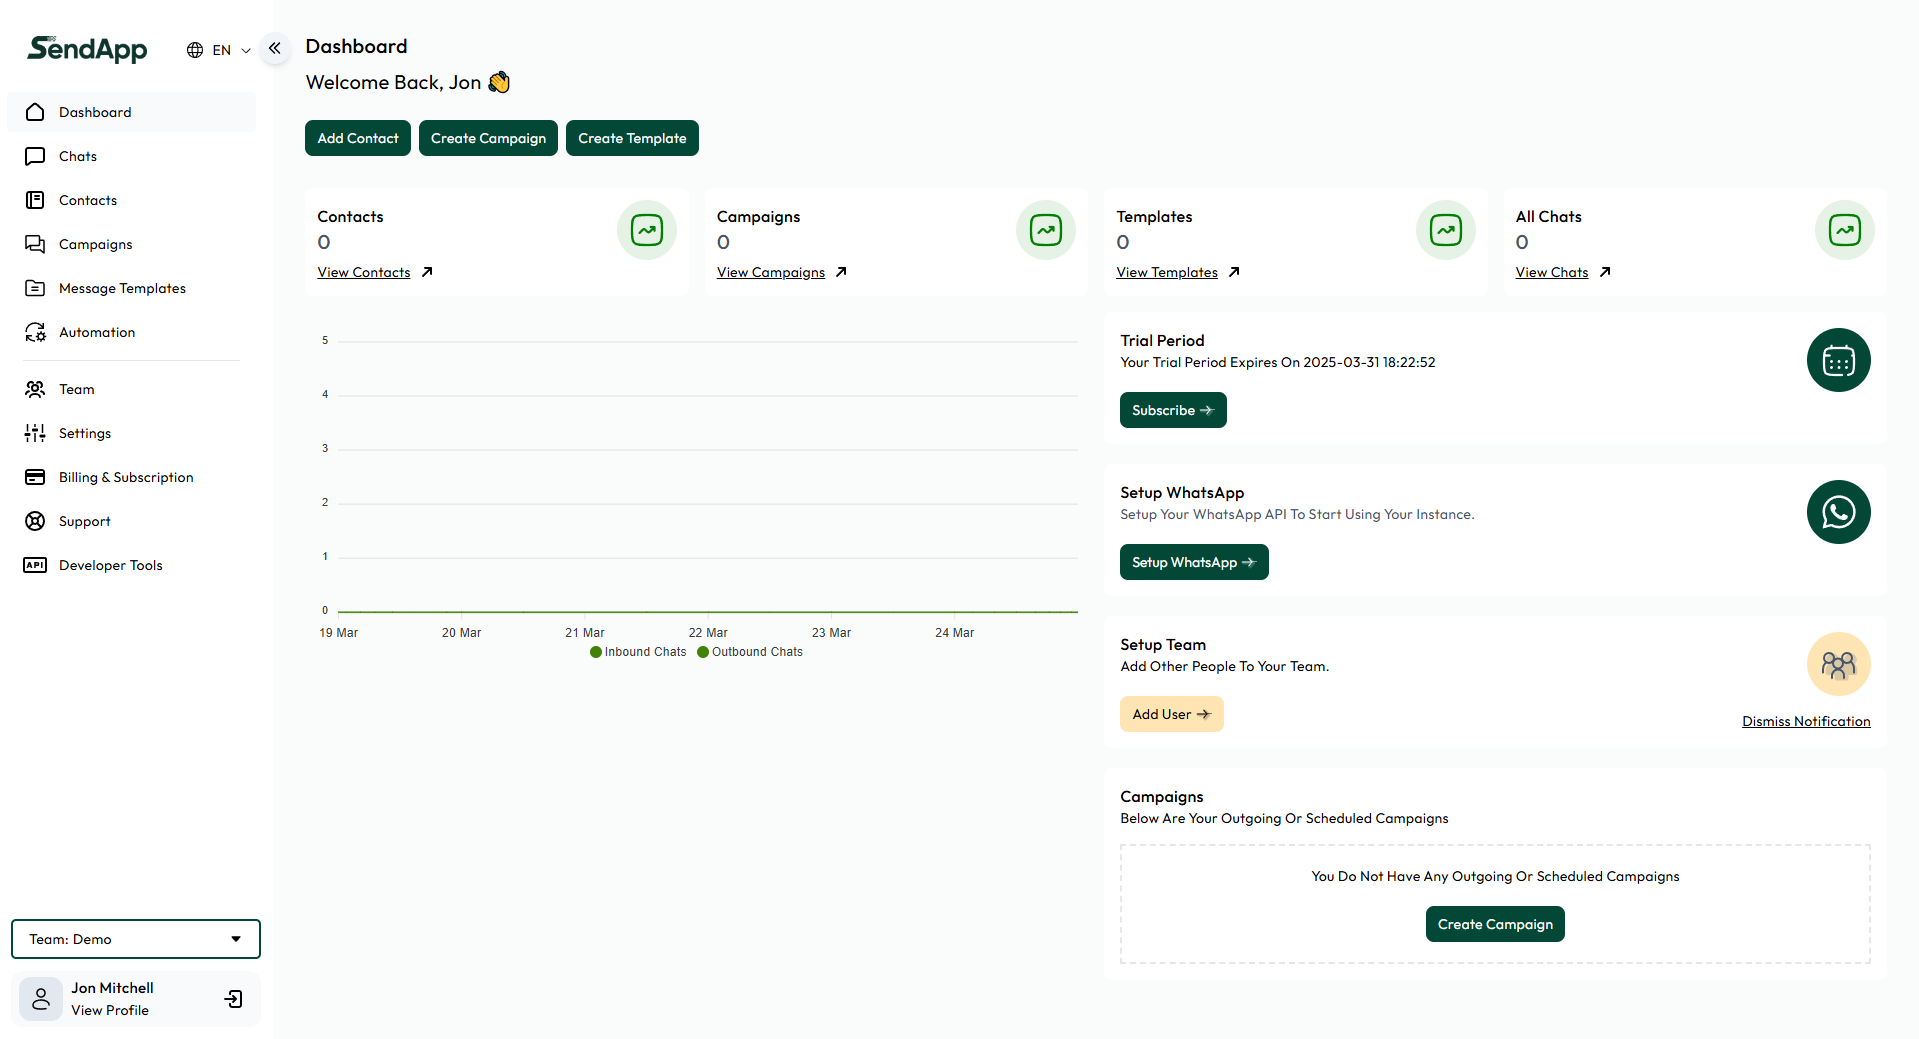
The dashboard is the main screen of SendApp Official. From here you can monitor all your messaging and marketing activities via WhatsApp.
What you'll find in the dashboard:
Welcome — View with username and quick links to add contacts, create campaigns and templates.
Chats — Monitor incoming and outgoing chats with a daily graph.
Contact — Total number of contacts with links to details.
Campaigns — Total number and management of active campaigns.
Templates — Management and creation of new message templates.
Automation — Access automation features for engagement.
Team — Team member management and role assignment.
Settings — API integrations and system preferences.
Billing — Management of subscriptions and invoices.
Developer Tools — Tools to integrate and extend functionality.
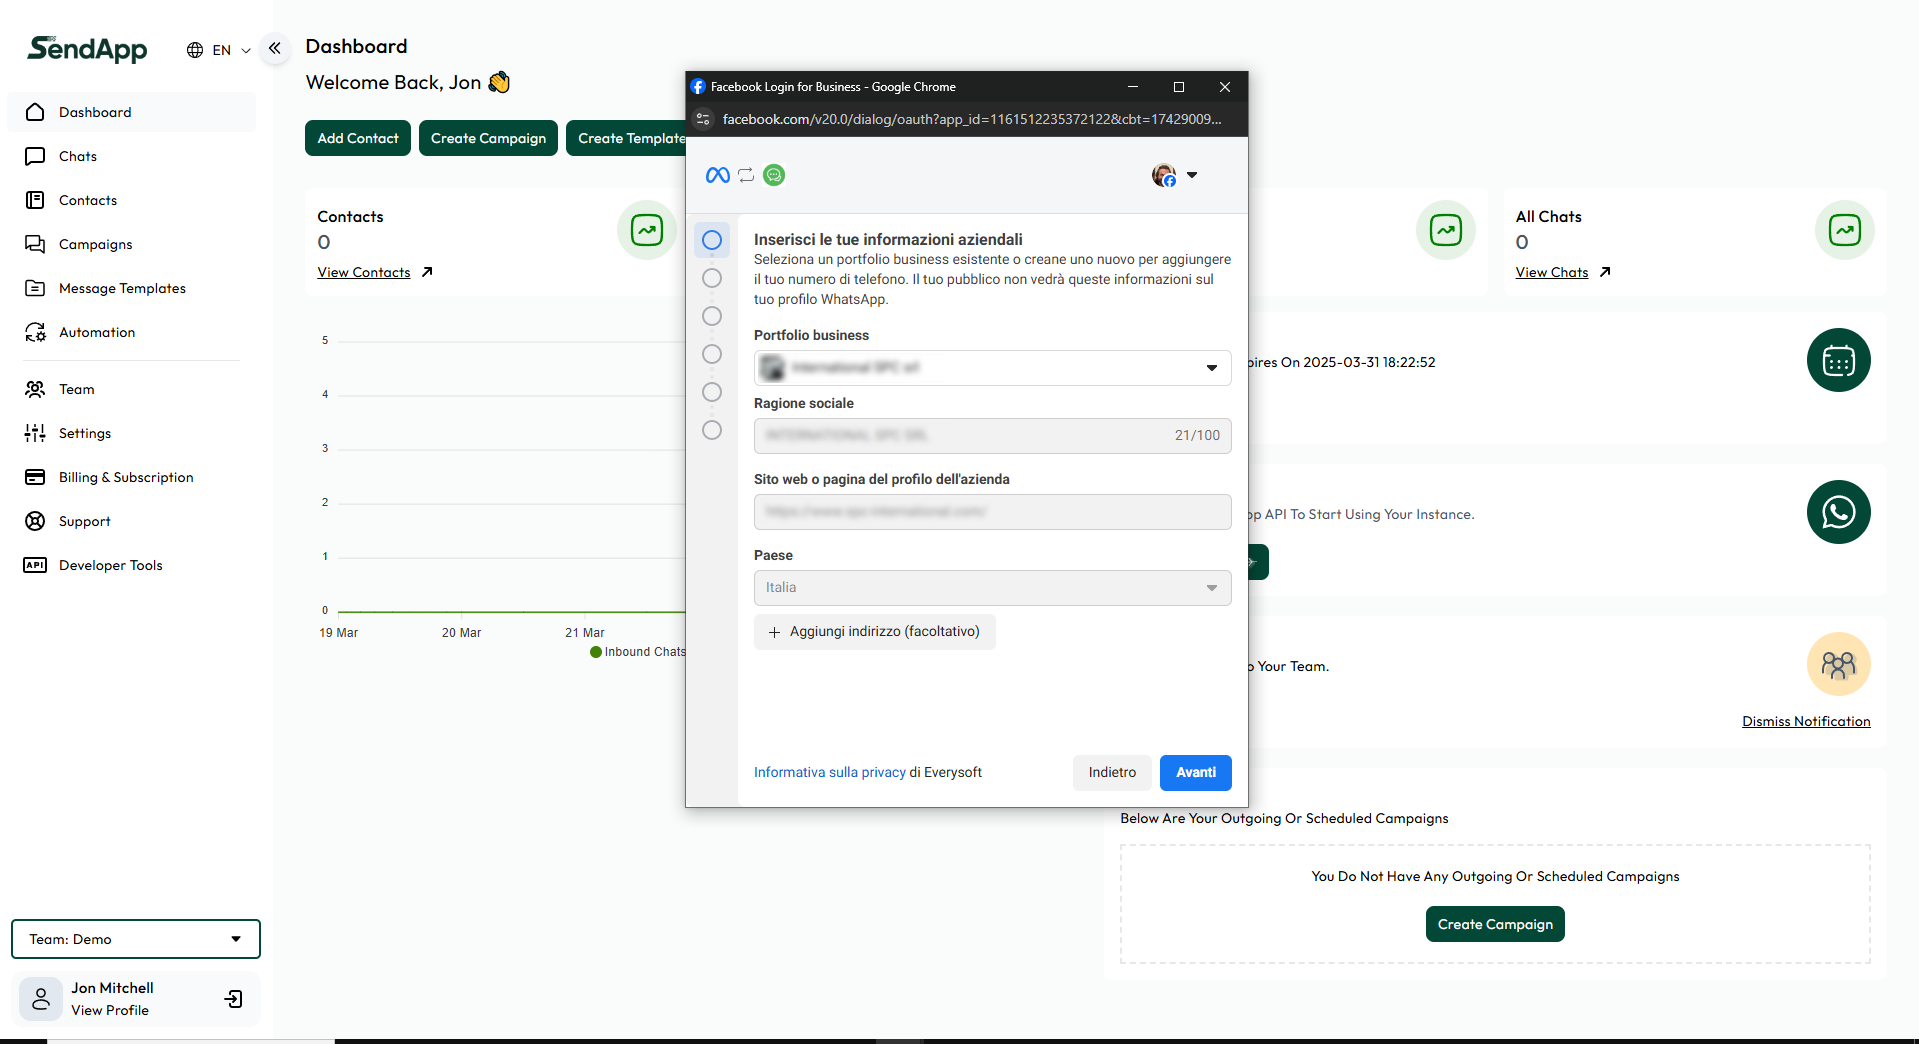
To connect your WhatsApp Business number, follow these steps:
1. Facebook Login — Log in with your Facebook account to securely connect your WhatsApp business profile.
2. Company Information — Select or create a Business Portfolio, enter your business name, website, country, and address (optional).
3. Telephone Number — Provide and verify the number that will be used to send and receive messages on WhatsApp.
4. Payment Method — Add a payment method to cover Meta's WhatsApp API costs.
5. Verification and Activation — Confirm your details, complete number verification, and activate your account.
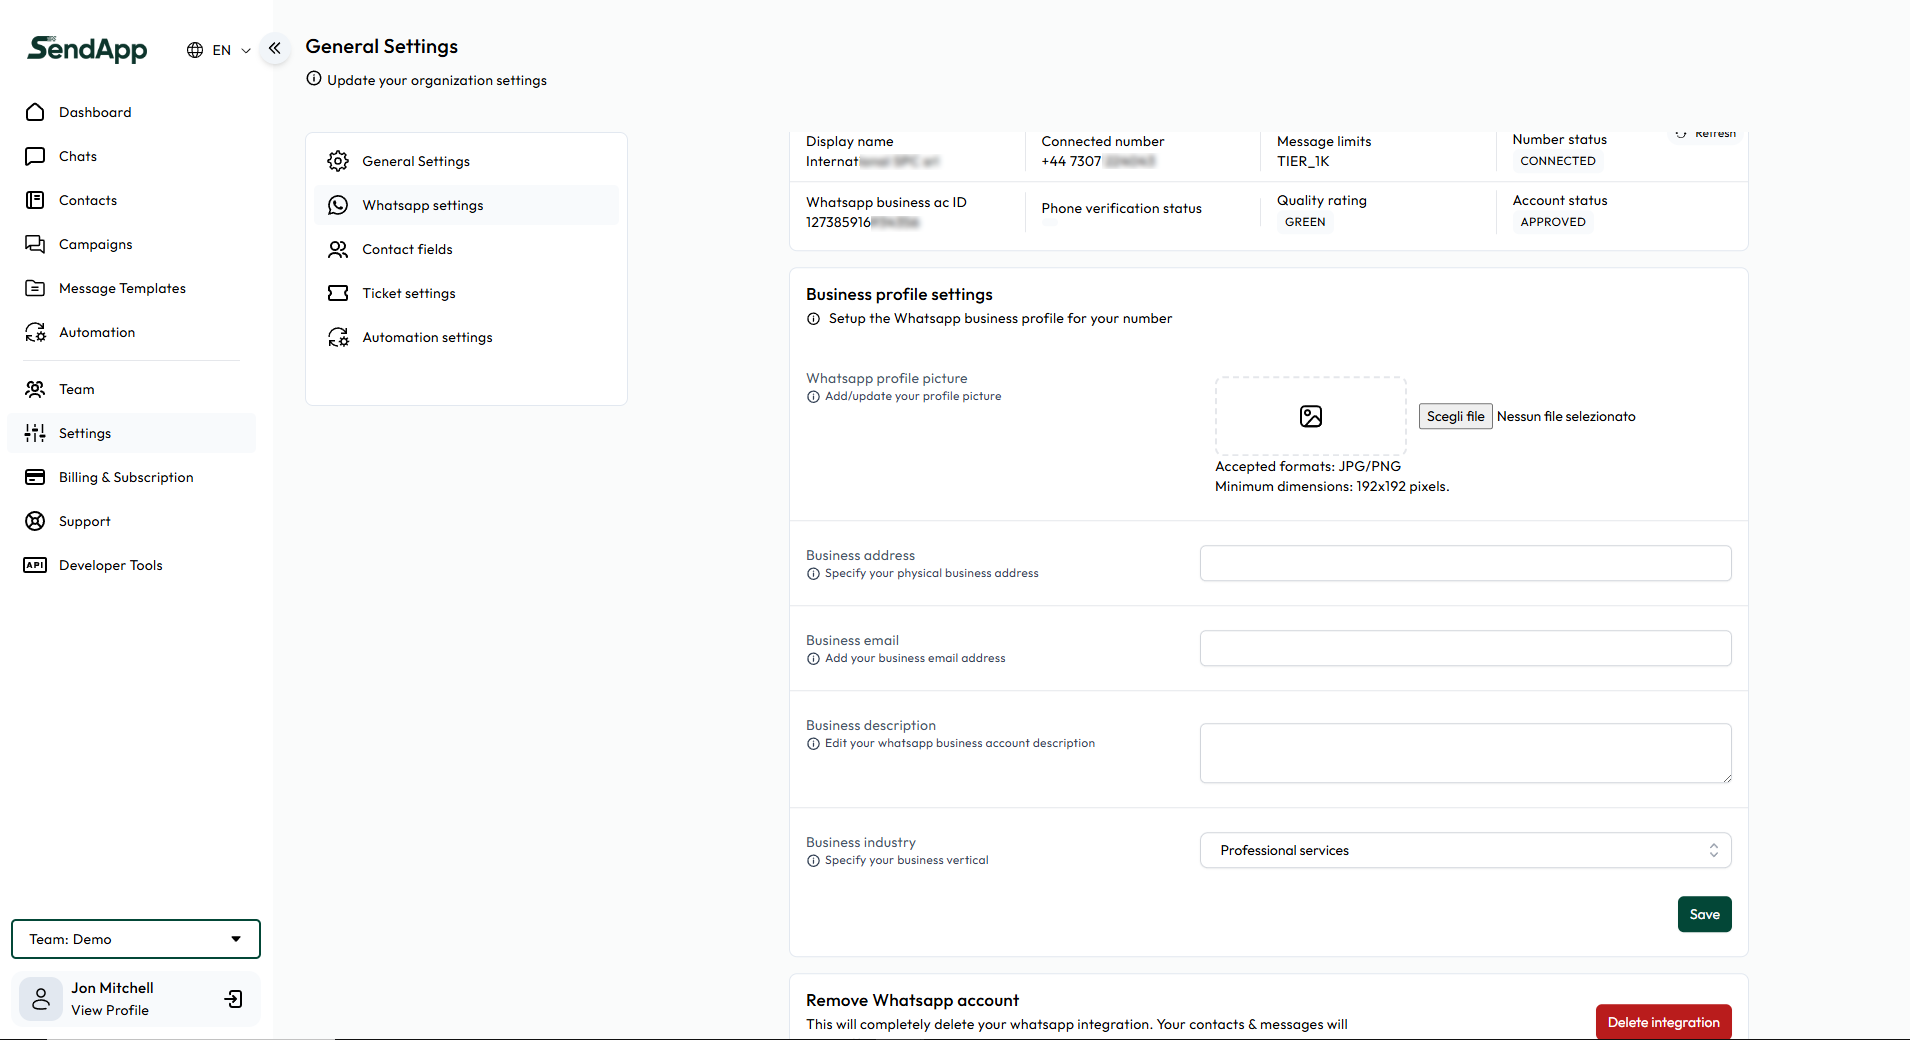
In the settings section you can manage all the details of your WhatsApp Business account.
Basic Information:
Display Name — Your display name on WhatsApp.
Connected Number — The number linked to the account.
WhatsApp Business ID — Unique account ID.
Message Limits — Message limits expressed in TIERs.
Quality Rating — Traffic quality rating (GREEN = excellent).
Account Status — Current status (e.g. APPROVED).
Company Profile:
Profile photo, address, email, business description, and industry. Everything can be edited and saved with the button. Save.
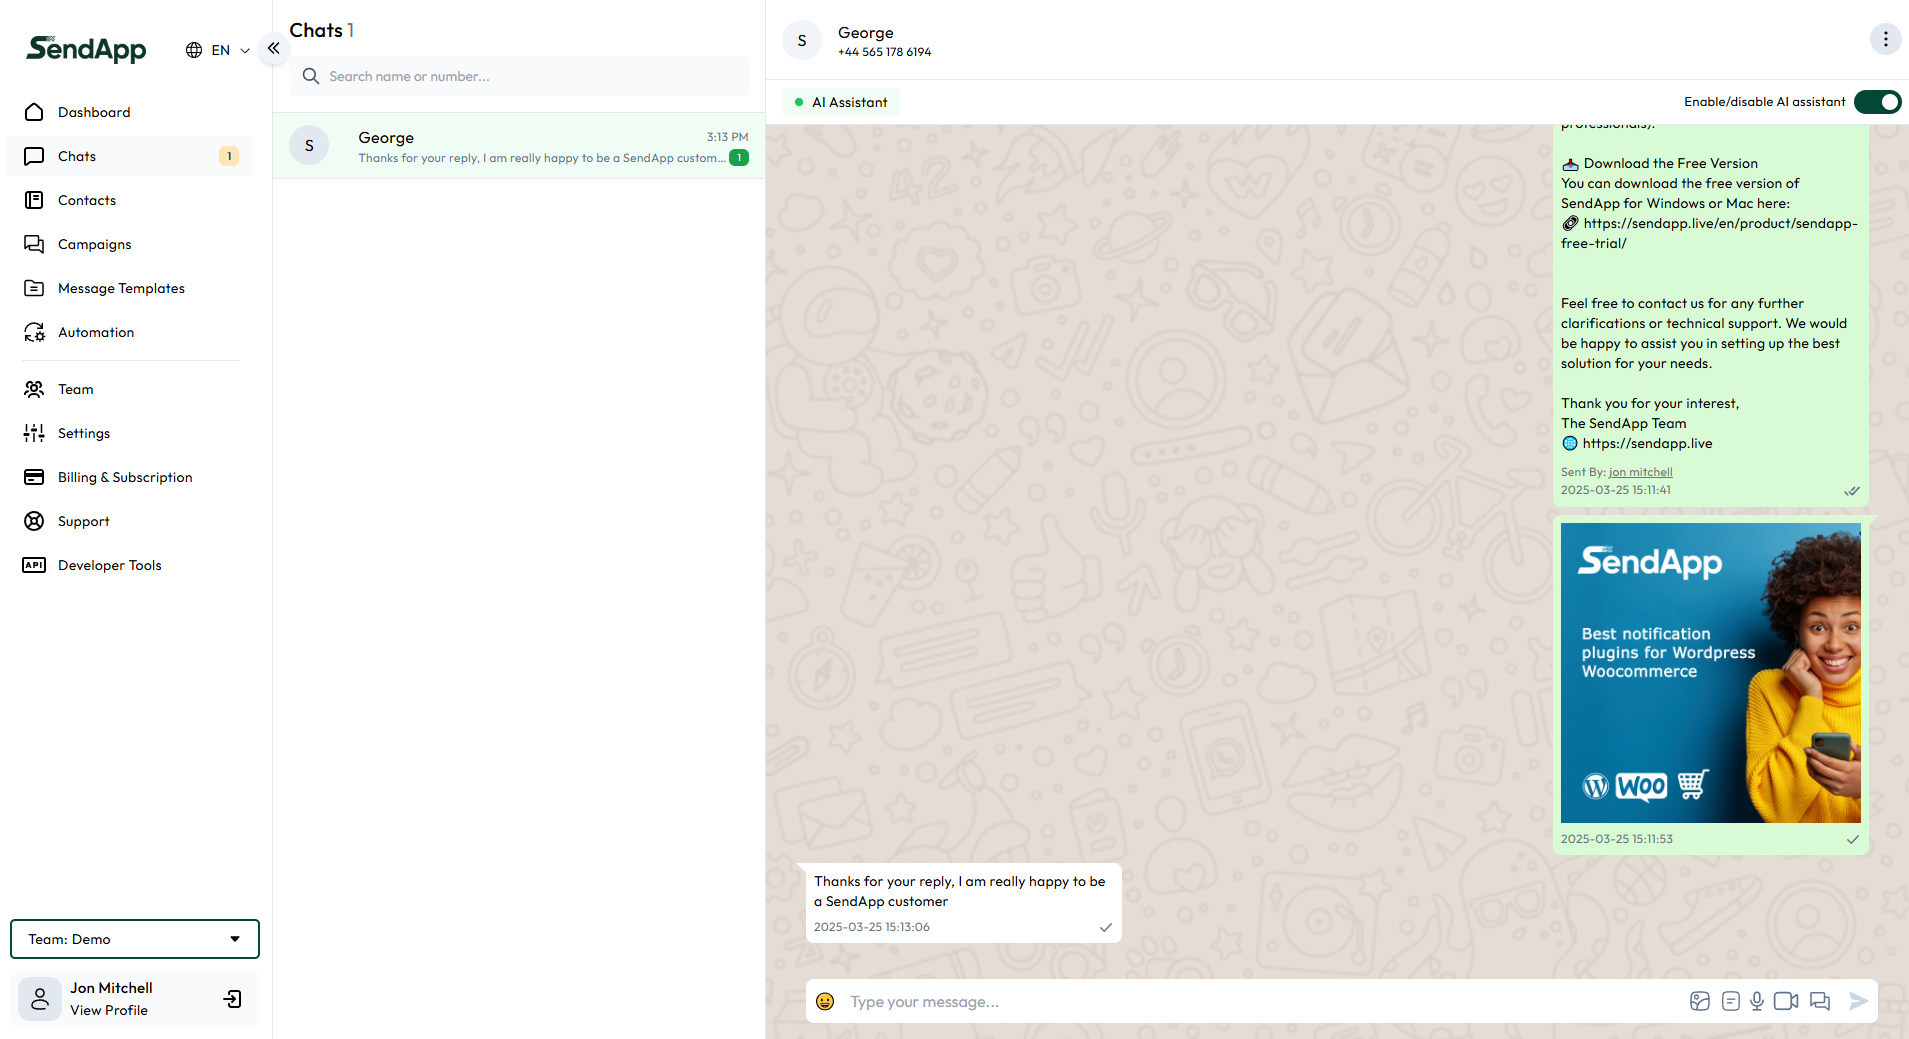
SendApp's chat interface lets you manage all your WhatsApp conversations in one place.
Main elements:
Sidebar — Quick navigation to all features.
Chat active — Name, customer number, and message history.
Messaging — Send text, attachments, emojis.
WhatsApp Meta API Rules:
24-hour window — You can freely respond within 24 hours of the customer's last message.
After 24 hours — You must use a WhatsApp-approved message template to reactivate the chat.
New customer message — The 24-hour window reopens automatically.
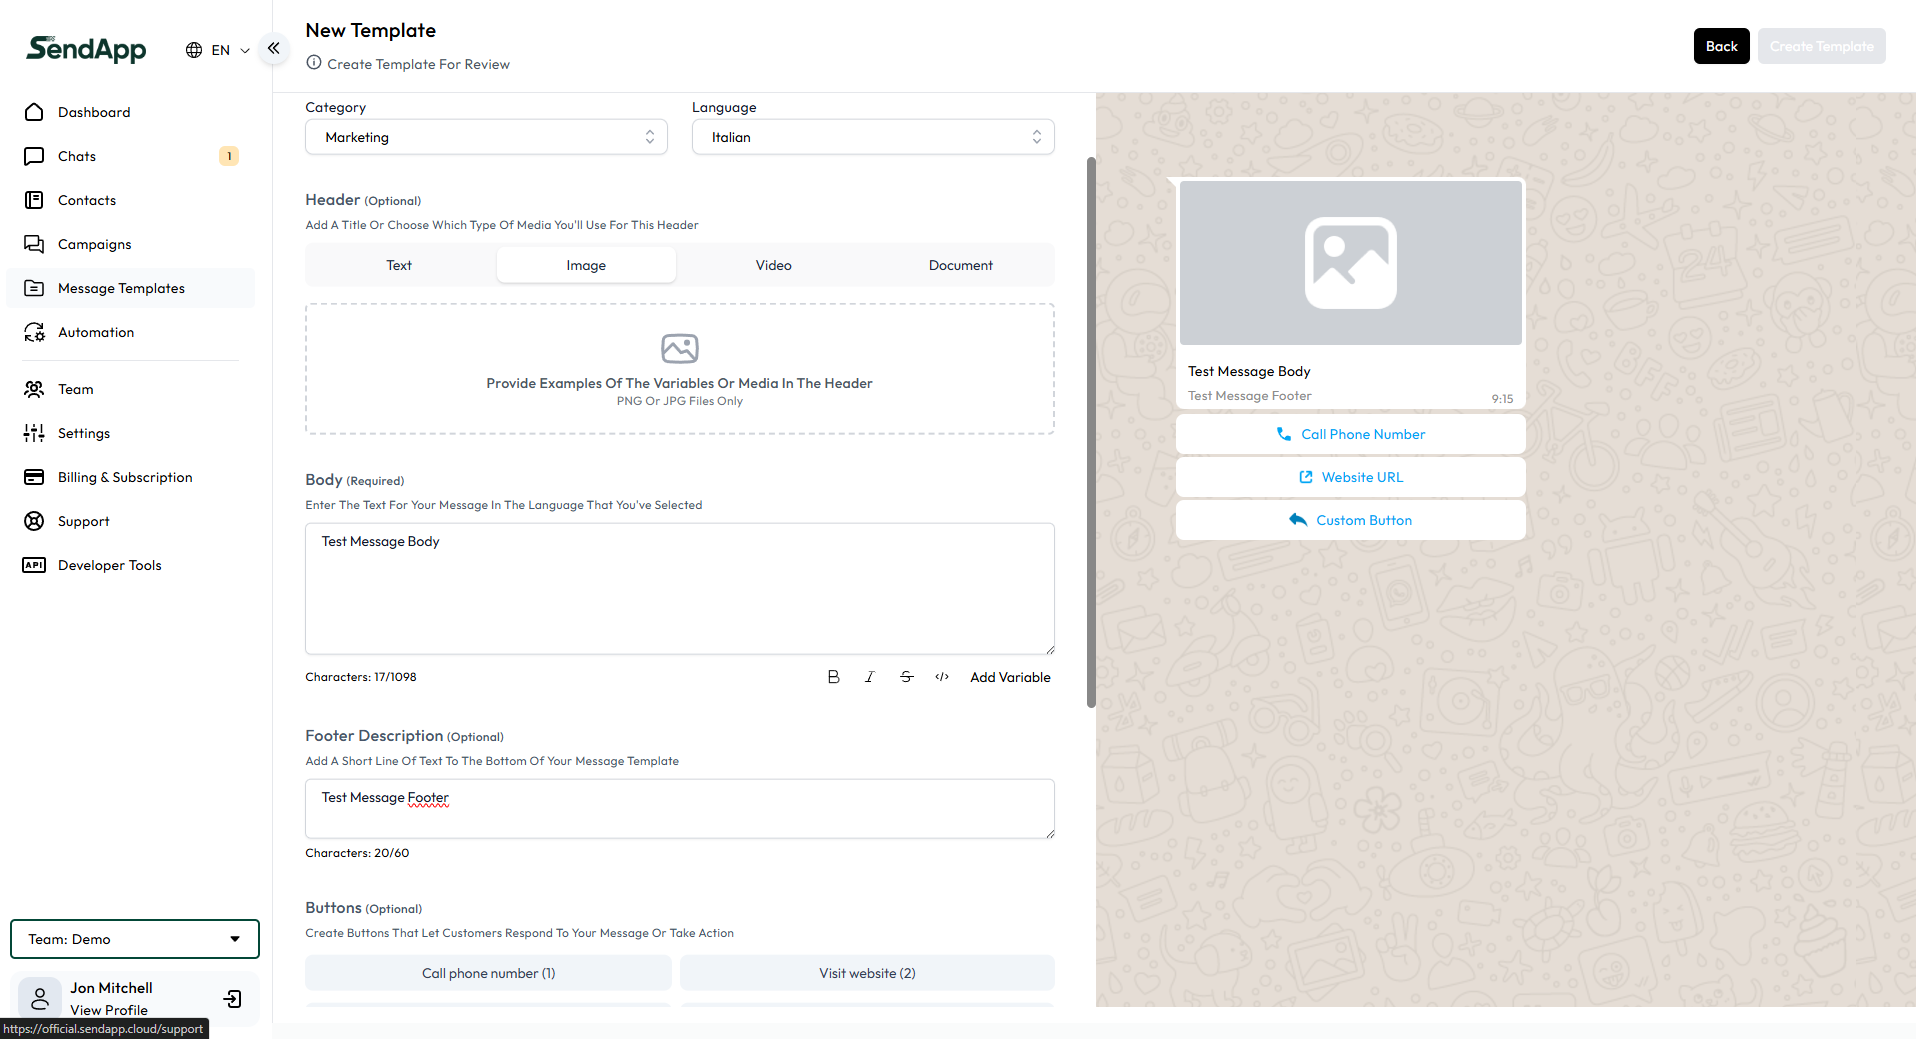
Templates are pre-approved messages from Meta, needed to start conversations or follow up with customers after 24 hours.
Name and Category — Give your template a name and choose the category (e.g. Marketing, Utilities).
Tongue — Select the message language for proper review.
Header — Text, image, video, or document to make your message more engaging.
Body — Main message text with the option to add custom variables (e.g., customer name).
Footer — Optional description at the bottom of the message.
Buttons — Call to action (call, visit website, promo code) and customizable buttons.
Preview — See how your message will appear before sending it for approval.
The contacts section allows you to manage your address book and import lists in bulk.
Research — Search for contacts by name, number, or email.
Add Contact — Add a contact manually.
Bulk Upload — Upload contacts in bulk via CSV or XLSX file.
Number format — Numbers must begin with the country code (e.g., +39 for Italy).

Create and manage mass mailing campaigns with approved templates.
Campaign Name — Campaign ID.
Template — Select a pre-approved template from Meta.
Scheduled Time — Schedule a sending date and time, or send immediately.
Recipients — All contacts or specific groups.
Header/Body Variables — Personalize your message with dynamic variables.
Attachments — PDFs, images, documents up to 100MB.
Preview — View the final result before sending.
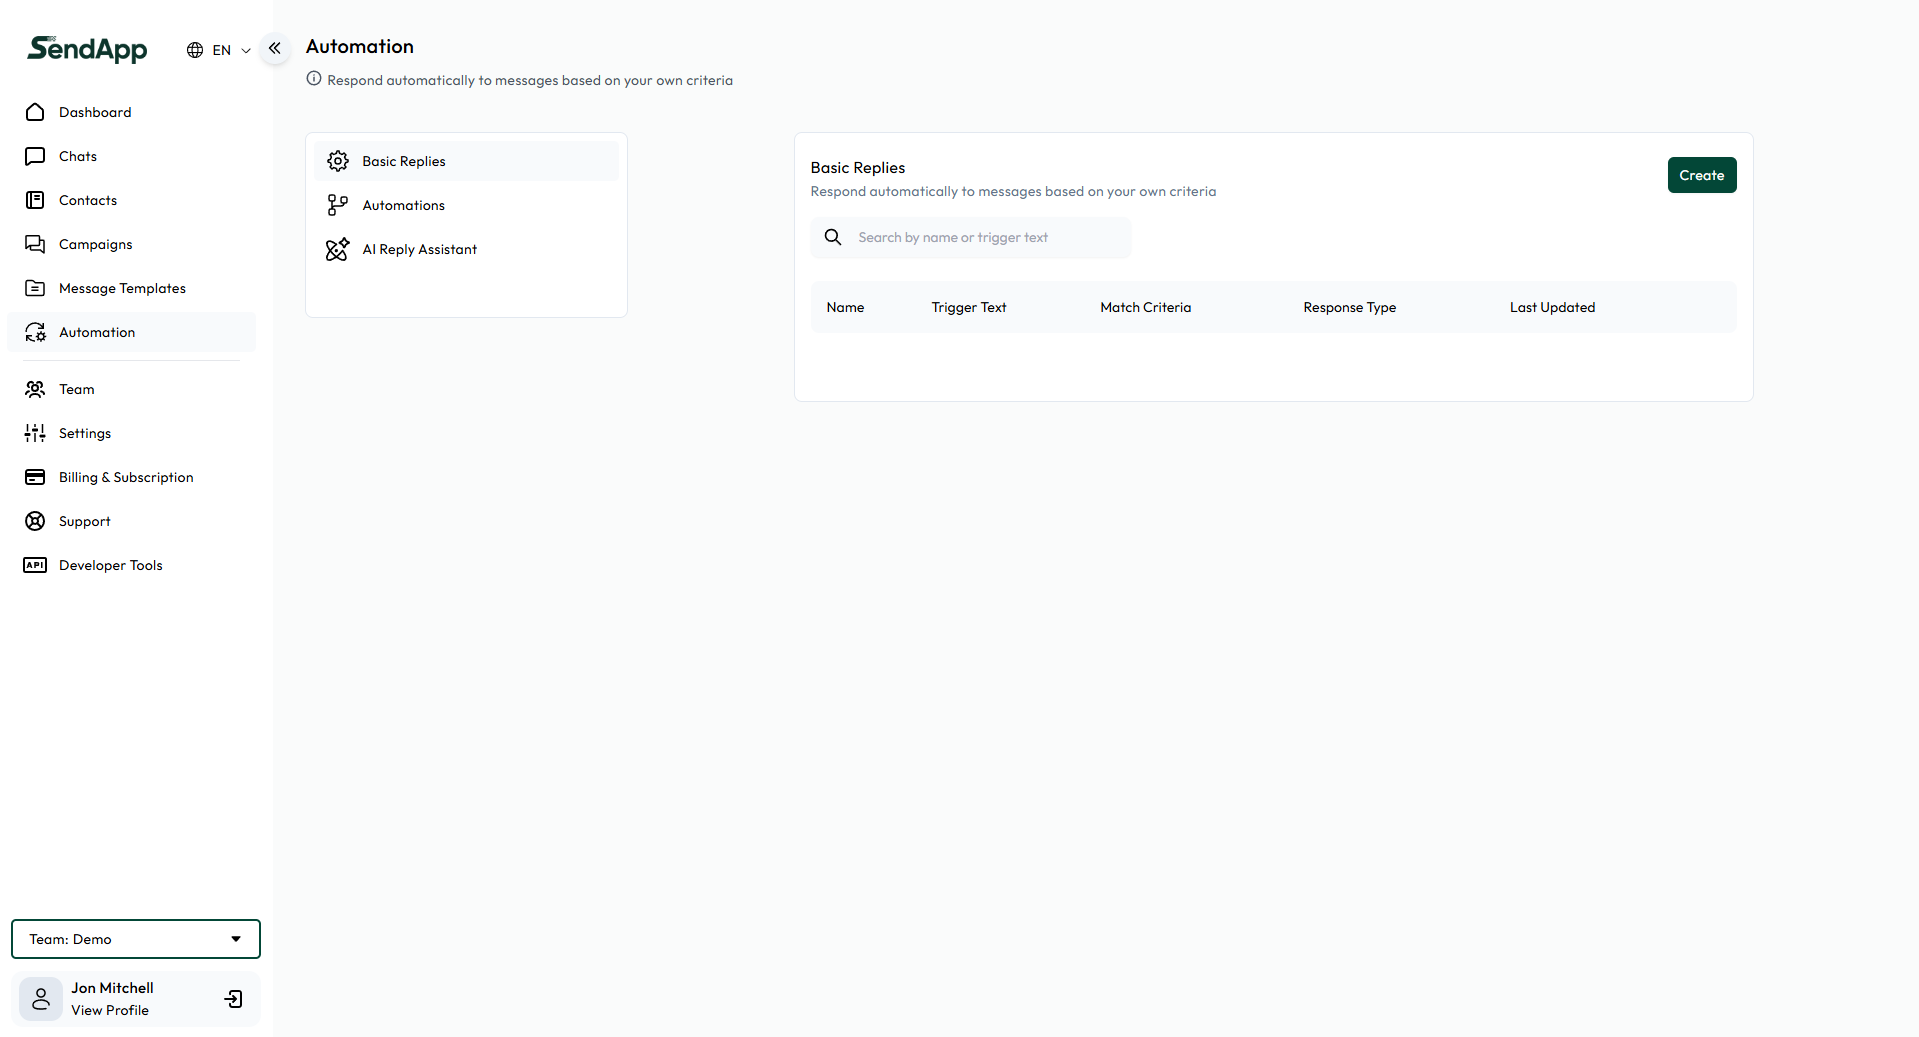
Automations let you set up automatic responses and intelligent workflows.
Three categories available:
Basic Replies — Simple automatic responses based on specific criteria (welcome, FAQ).
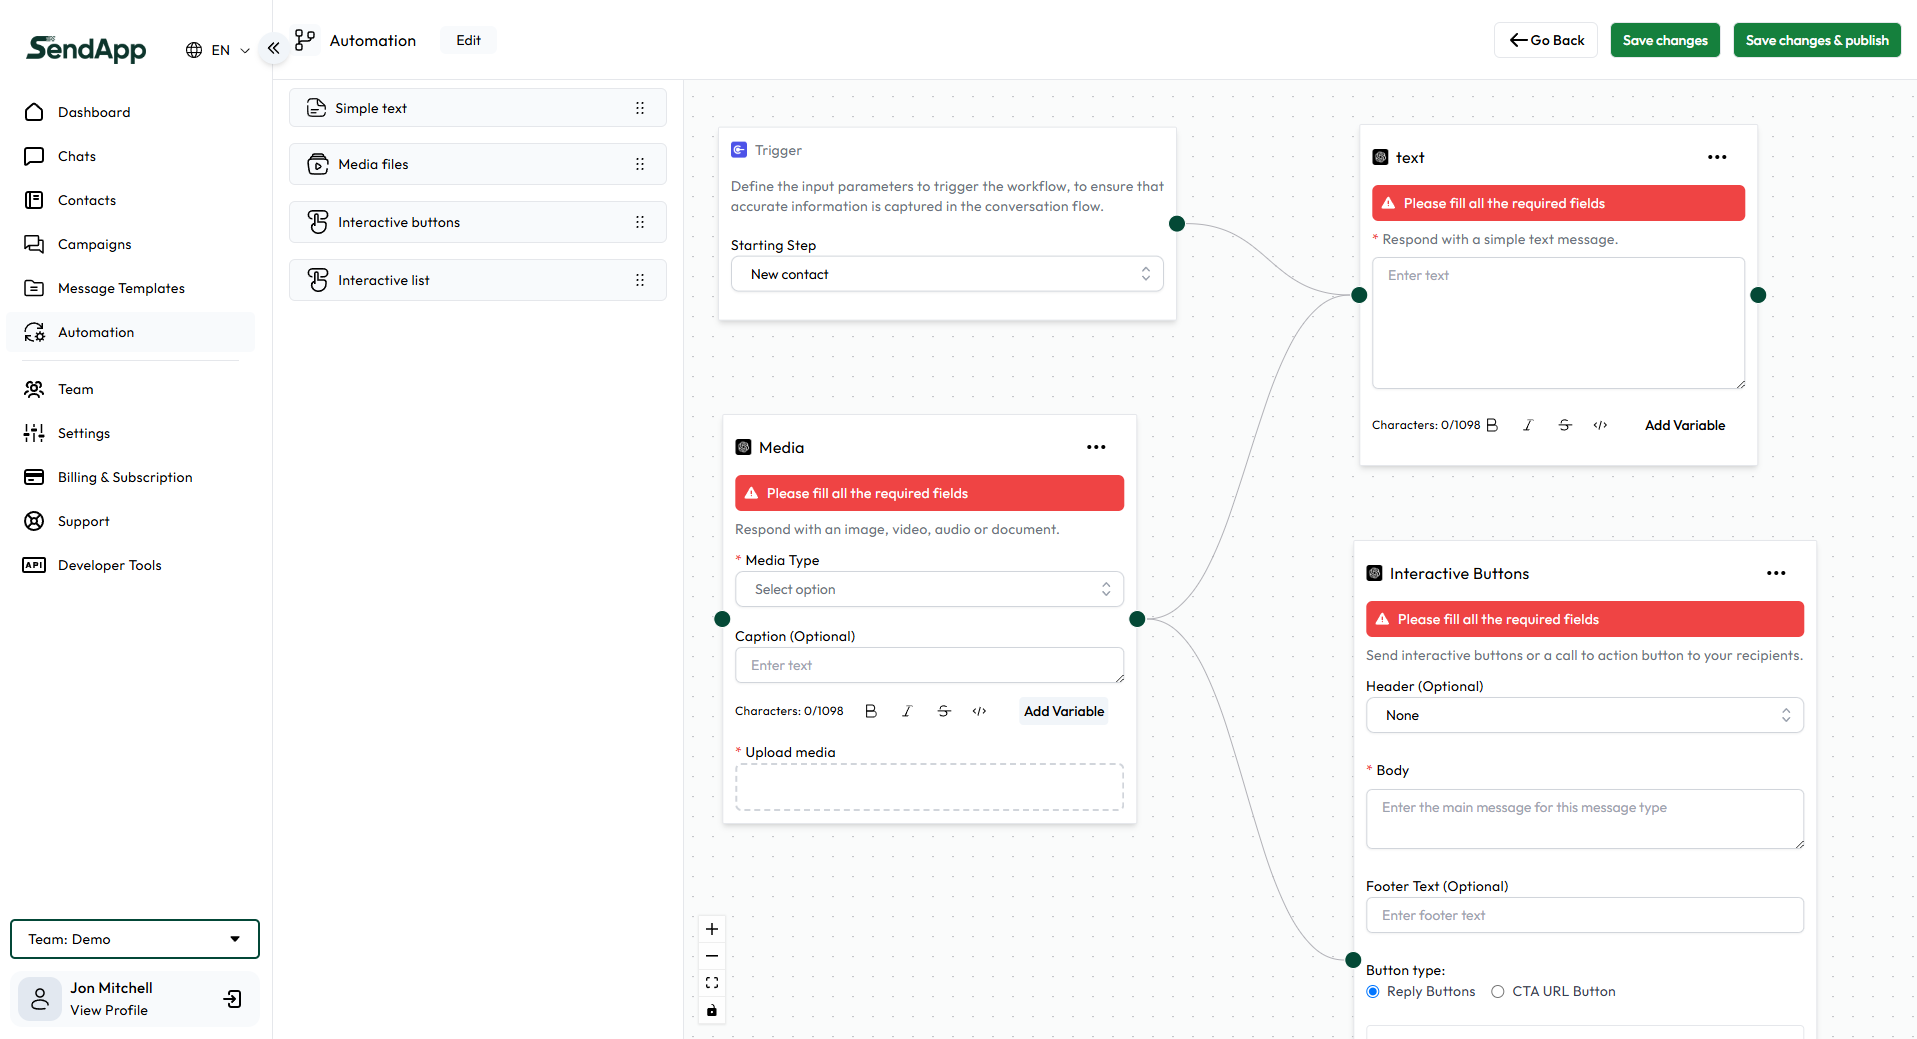
Automations — Complex workflows with customizable triggers, conditions, and actions.
AI Reply Assistant — Artificial intelligence (OpenAI)-generated responses for sophisticated, contextualized interactions.
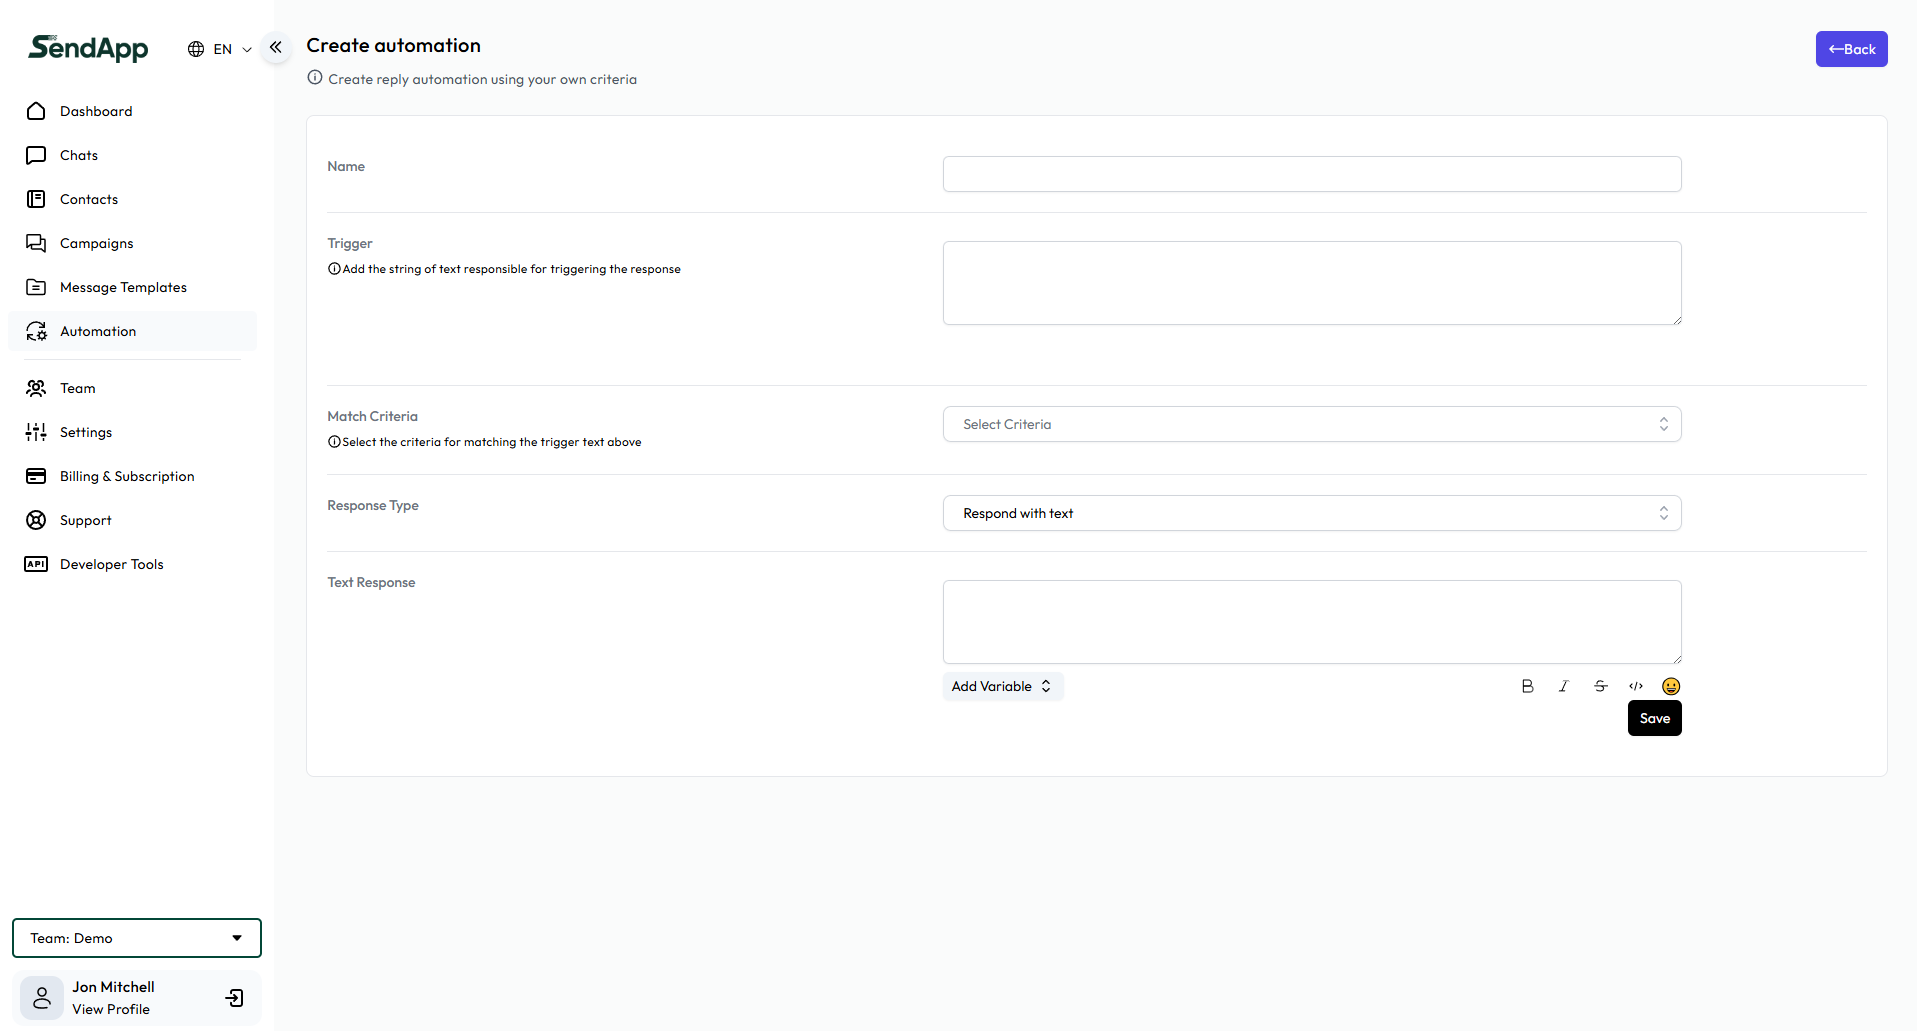
Automation Details:
Trigger — Keywords or phrases that trigger the response.
Matching criteria — Exactly, it contains, it begins with.
Response Types — Text, media (images, videos), interactive buttons.
Interactive buttons — They direct the user to specific resources or perform actions.
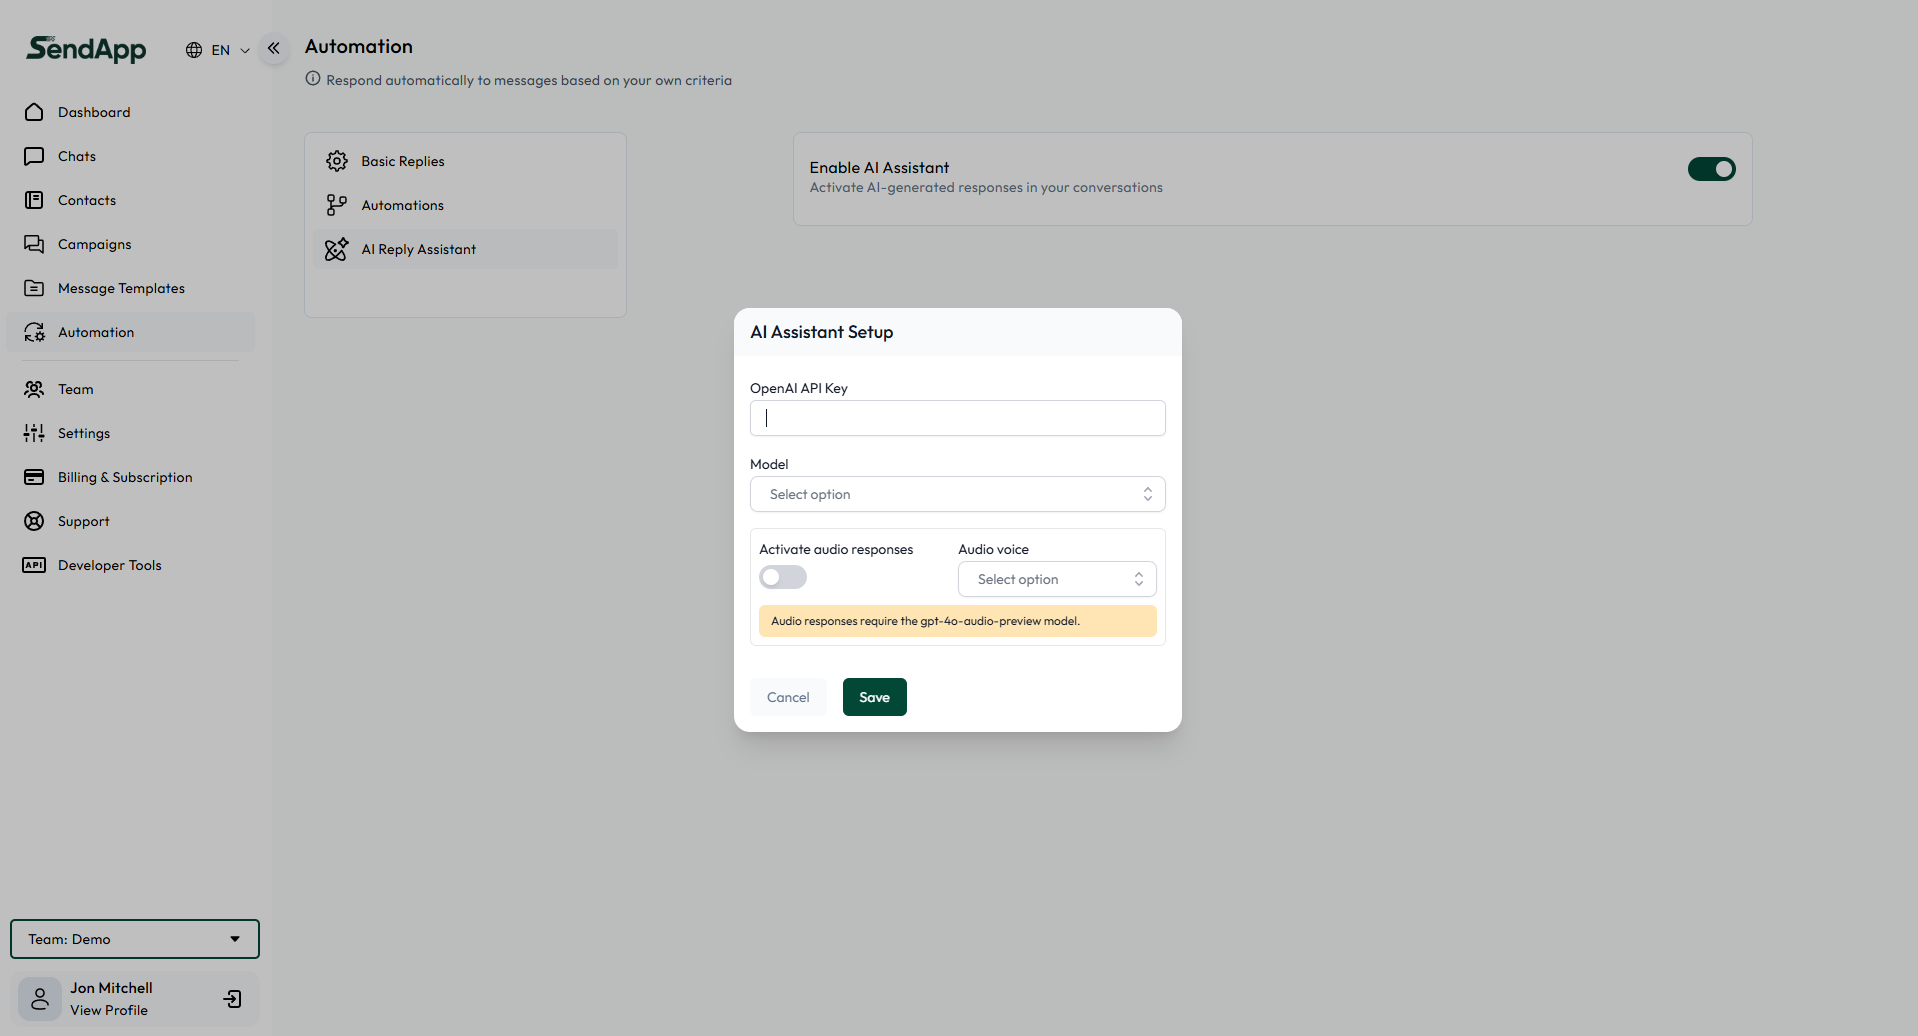
Set up AI Assistant to generate intelligent replies in WhatsApp conversations.
Enabling — Enable AI-generated responses in conversations.
OpenAI API Key — Enter the API key to connect the desired AI model.
Model Selection — Choose the specific AI model to use.
Audio Responses — Enable voice responses with voice selection for generated responses.
START NOW
Marketing, sales, AI support, and bookings. All integrated, all automated, all on WhatsApp.