STEP-BY-STEP GUIDE
How to connect WhatsApp Meta a SendApp Agent
Set up the official WhatsApp Business API integration with SendApp Agent. Choose the option that best suits you from the two available options.
STEP-BY-STEP GUIDE
Set up the official WhatsApp Business API integration with SendApp Agent. Choose the option that best suits you from the two available options.
SendApp Agent
15:24
WhatsApp Meta
Connected ✓
Hi! Welcome to SendApp Agent 👋
How do I connect WhatsApp?
Follow the step-by-step guide!
You can choose between:
• New Issue
• Coexistence Mode
Perfect, I'm going! 👍
CHOOSE YOUR MODE
Click on the section that applies to your situation to expand the complete guide.
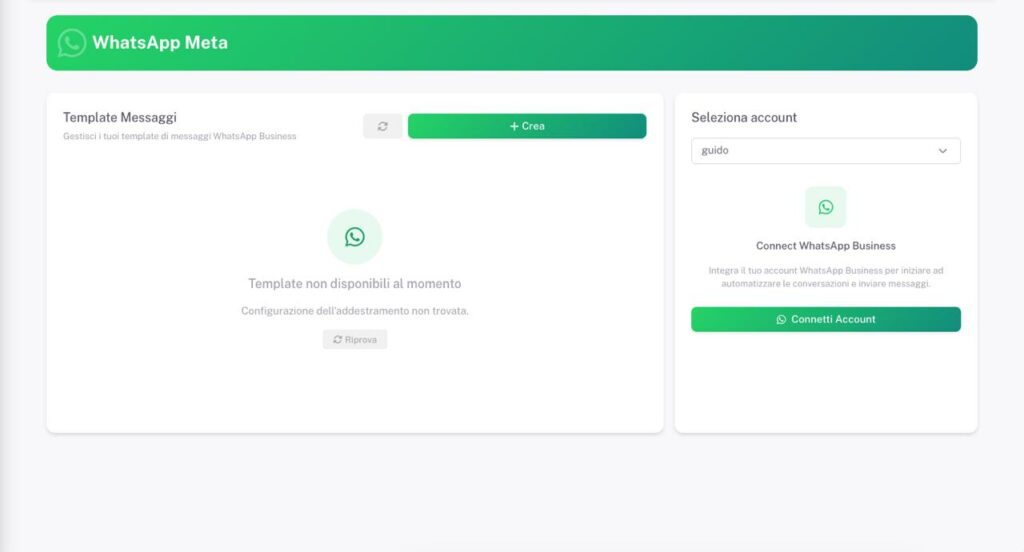
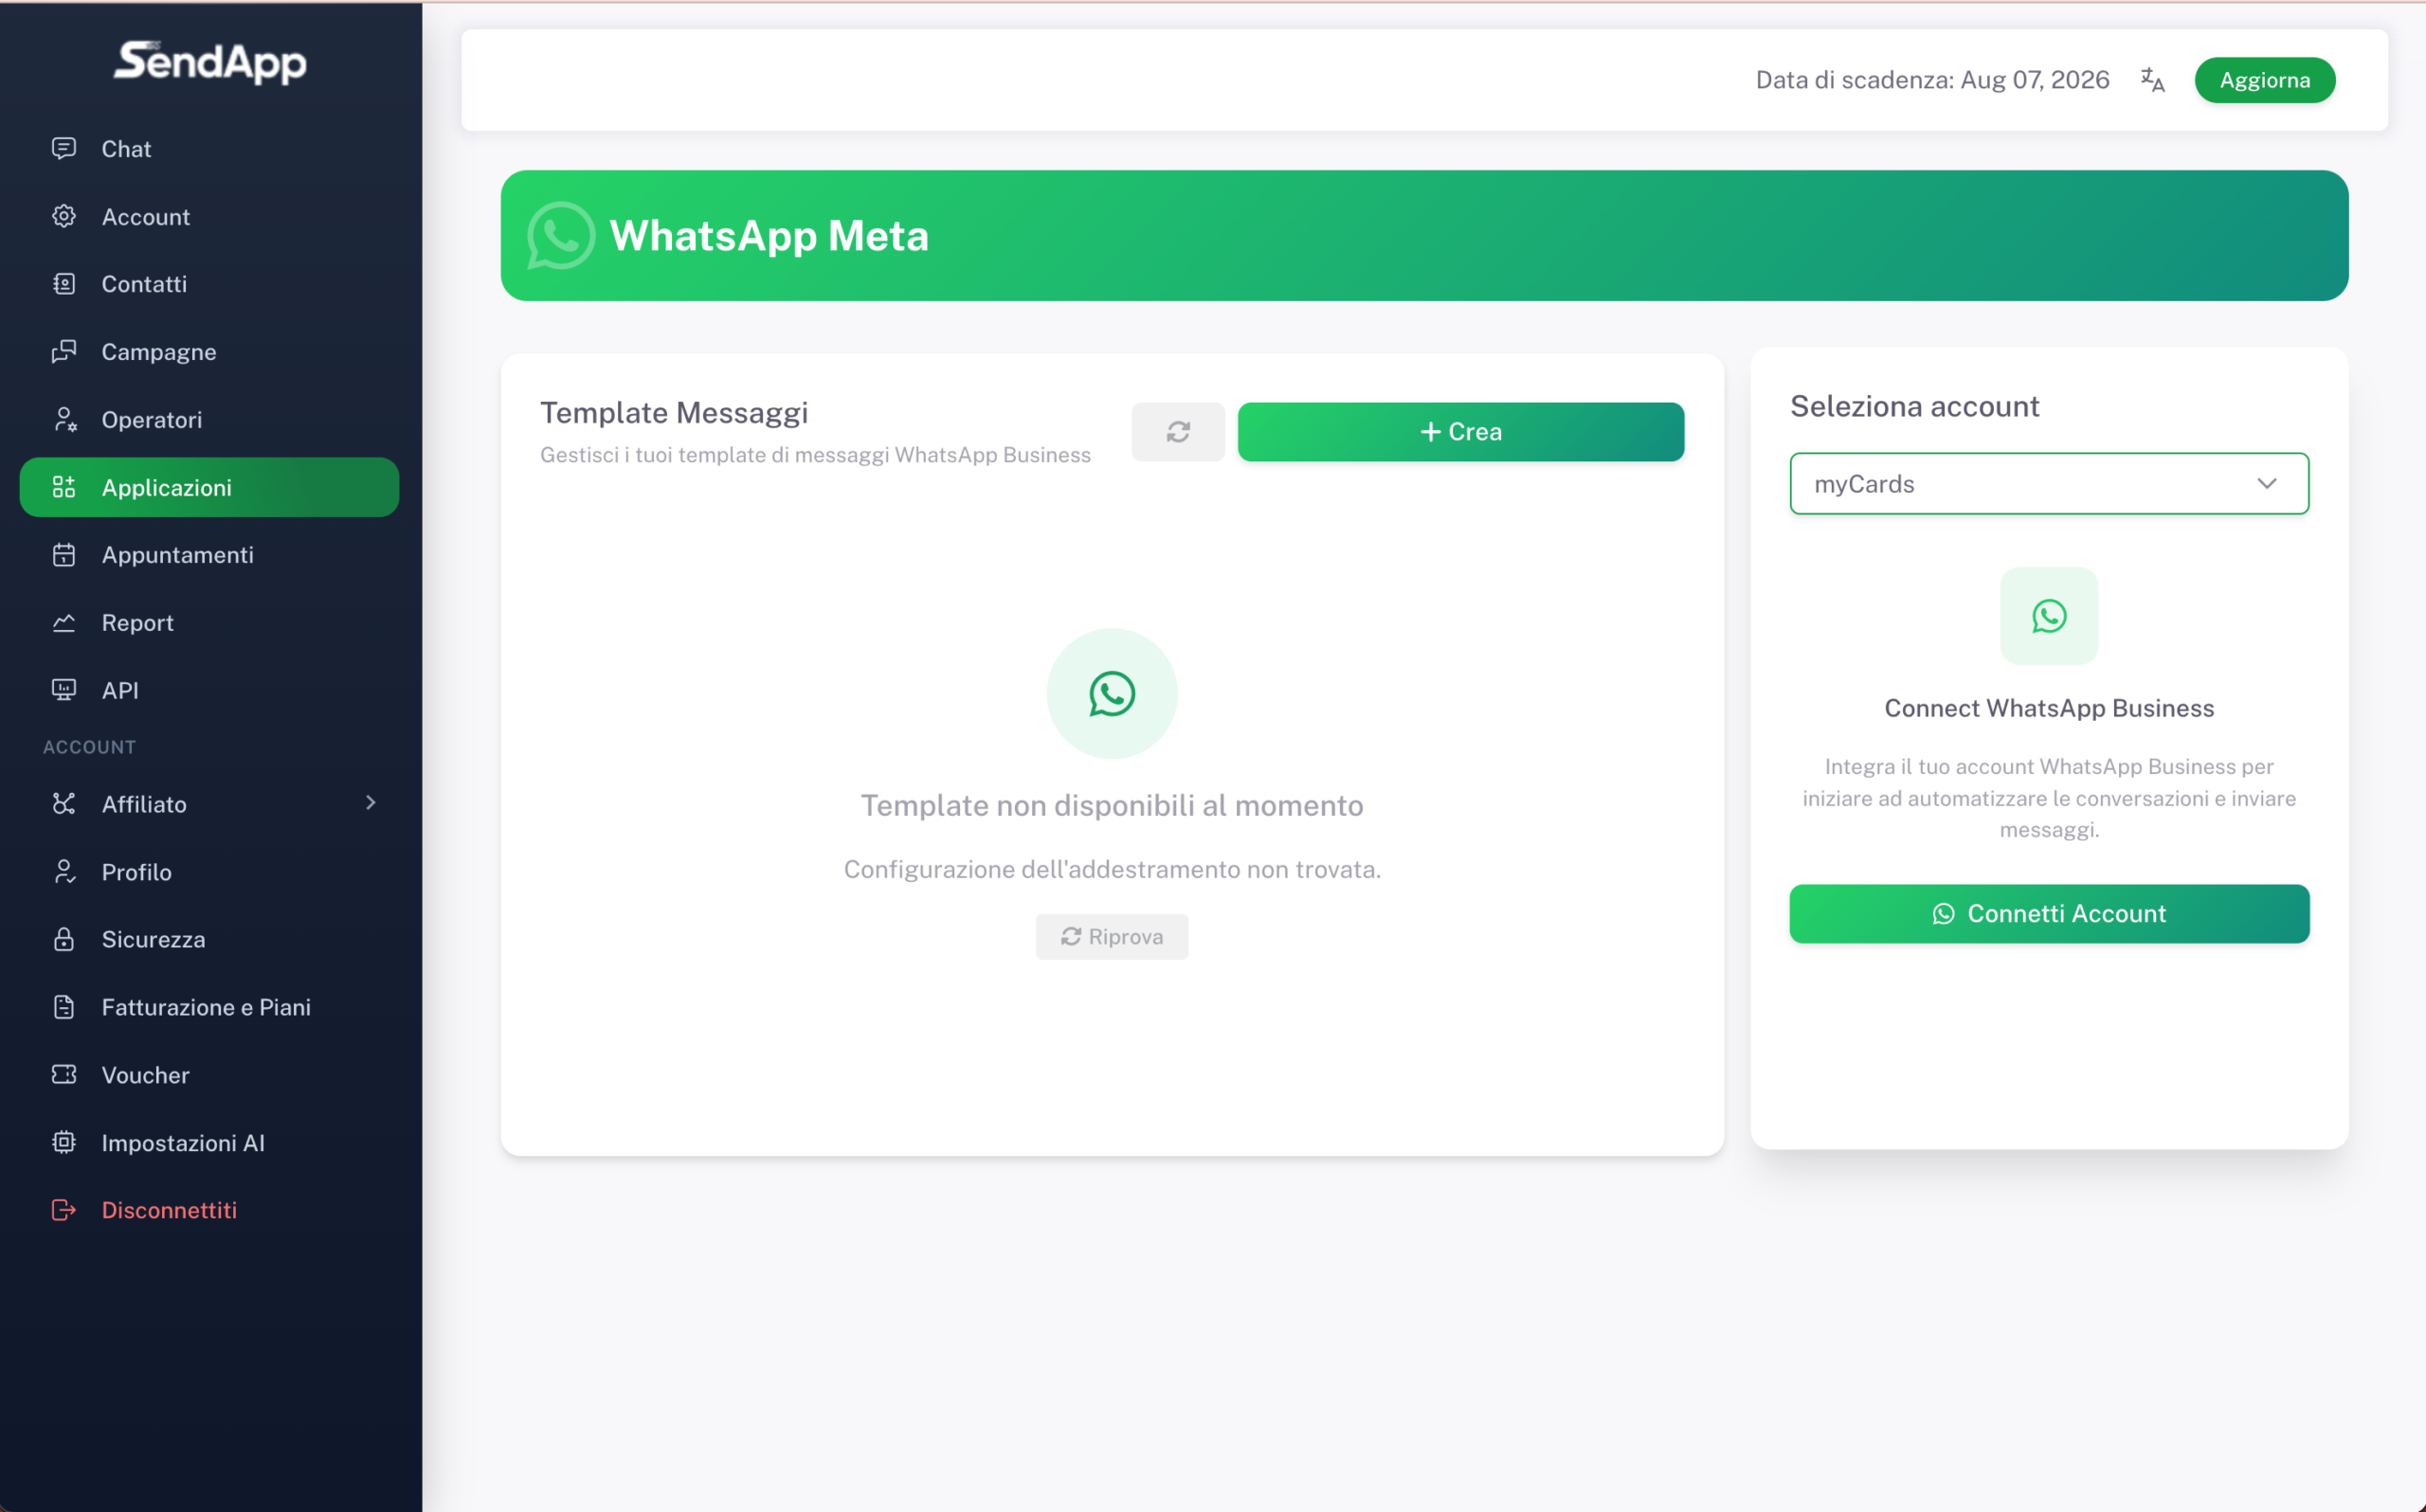
Here you'll see the WhatsApp Meta templates screen (empty if your account isn't connected yet). On the right, you'll find the menu to select the SendApp account you want to connect to.
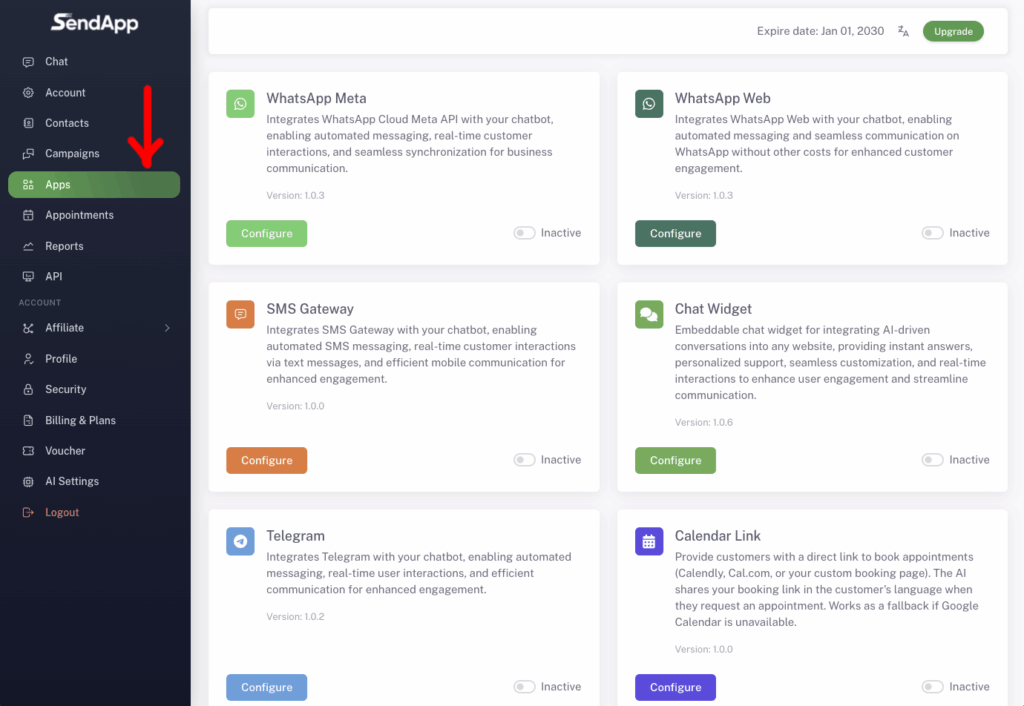
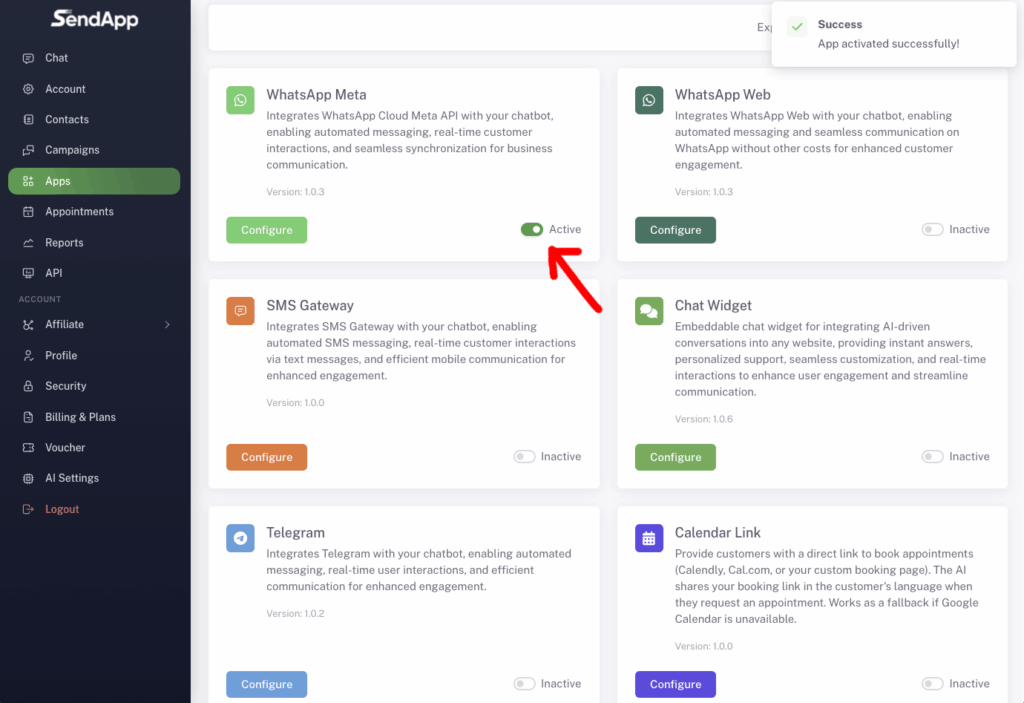
From the sidebar click on Apps, finds WhatsApp Meta and activate the switch on Active. This way, SendApp is ready to start Meta authentication.
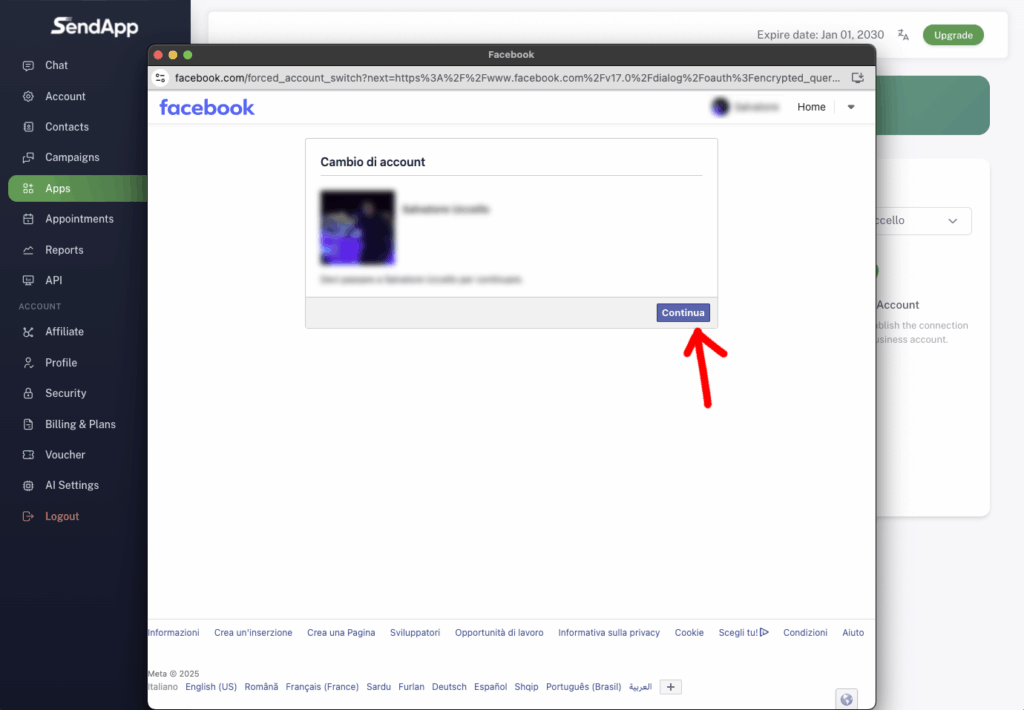
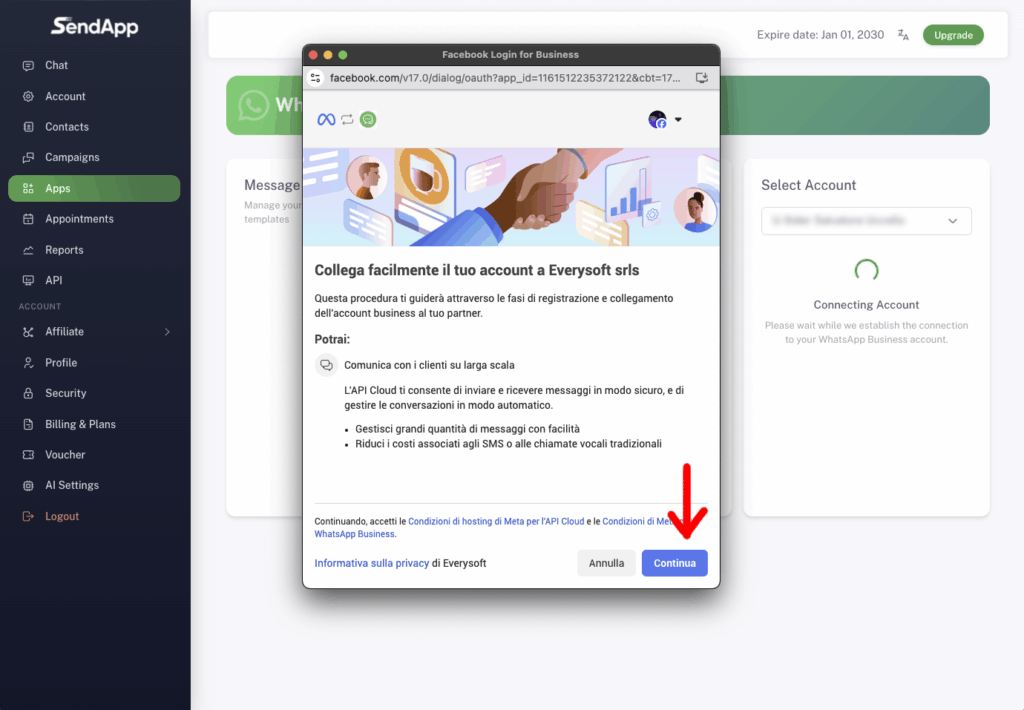
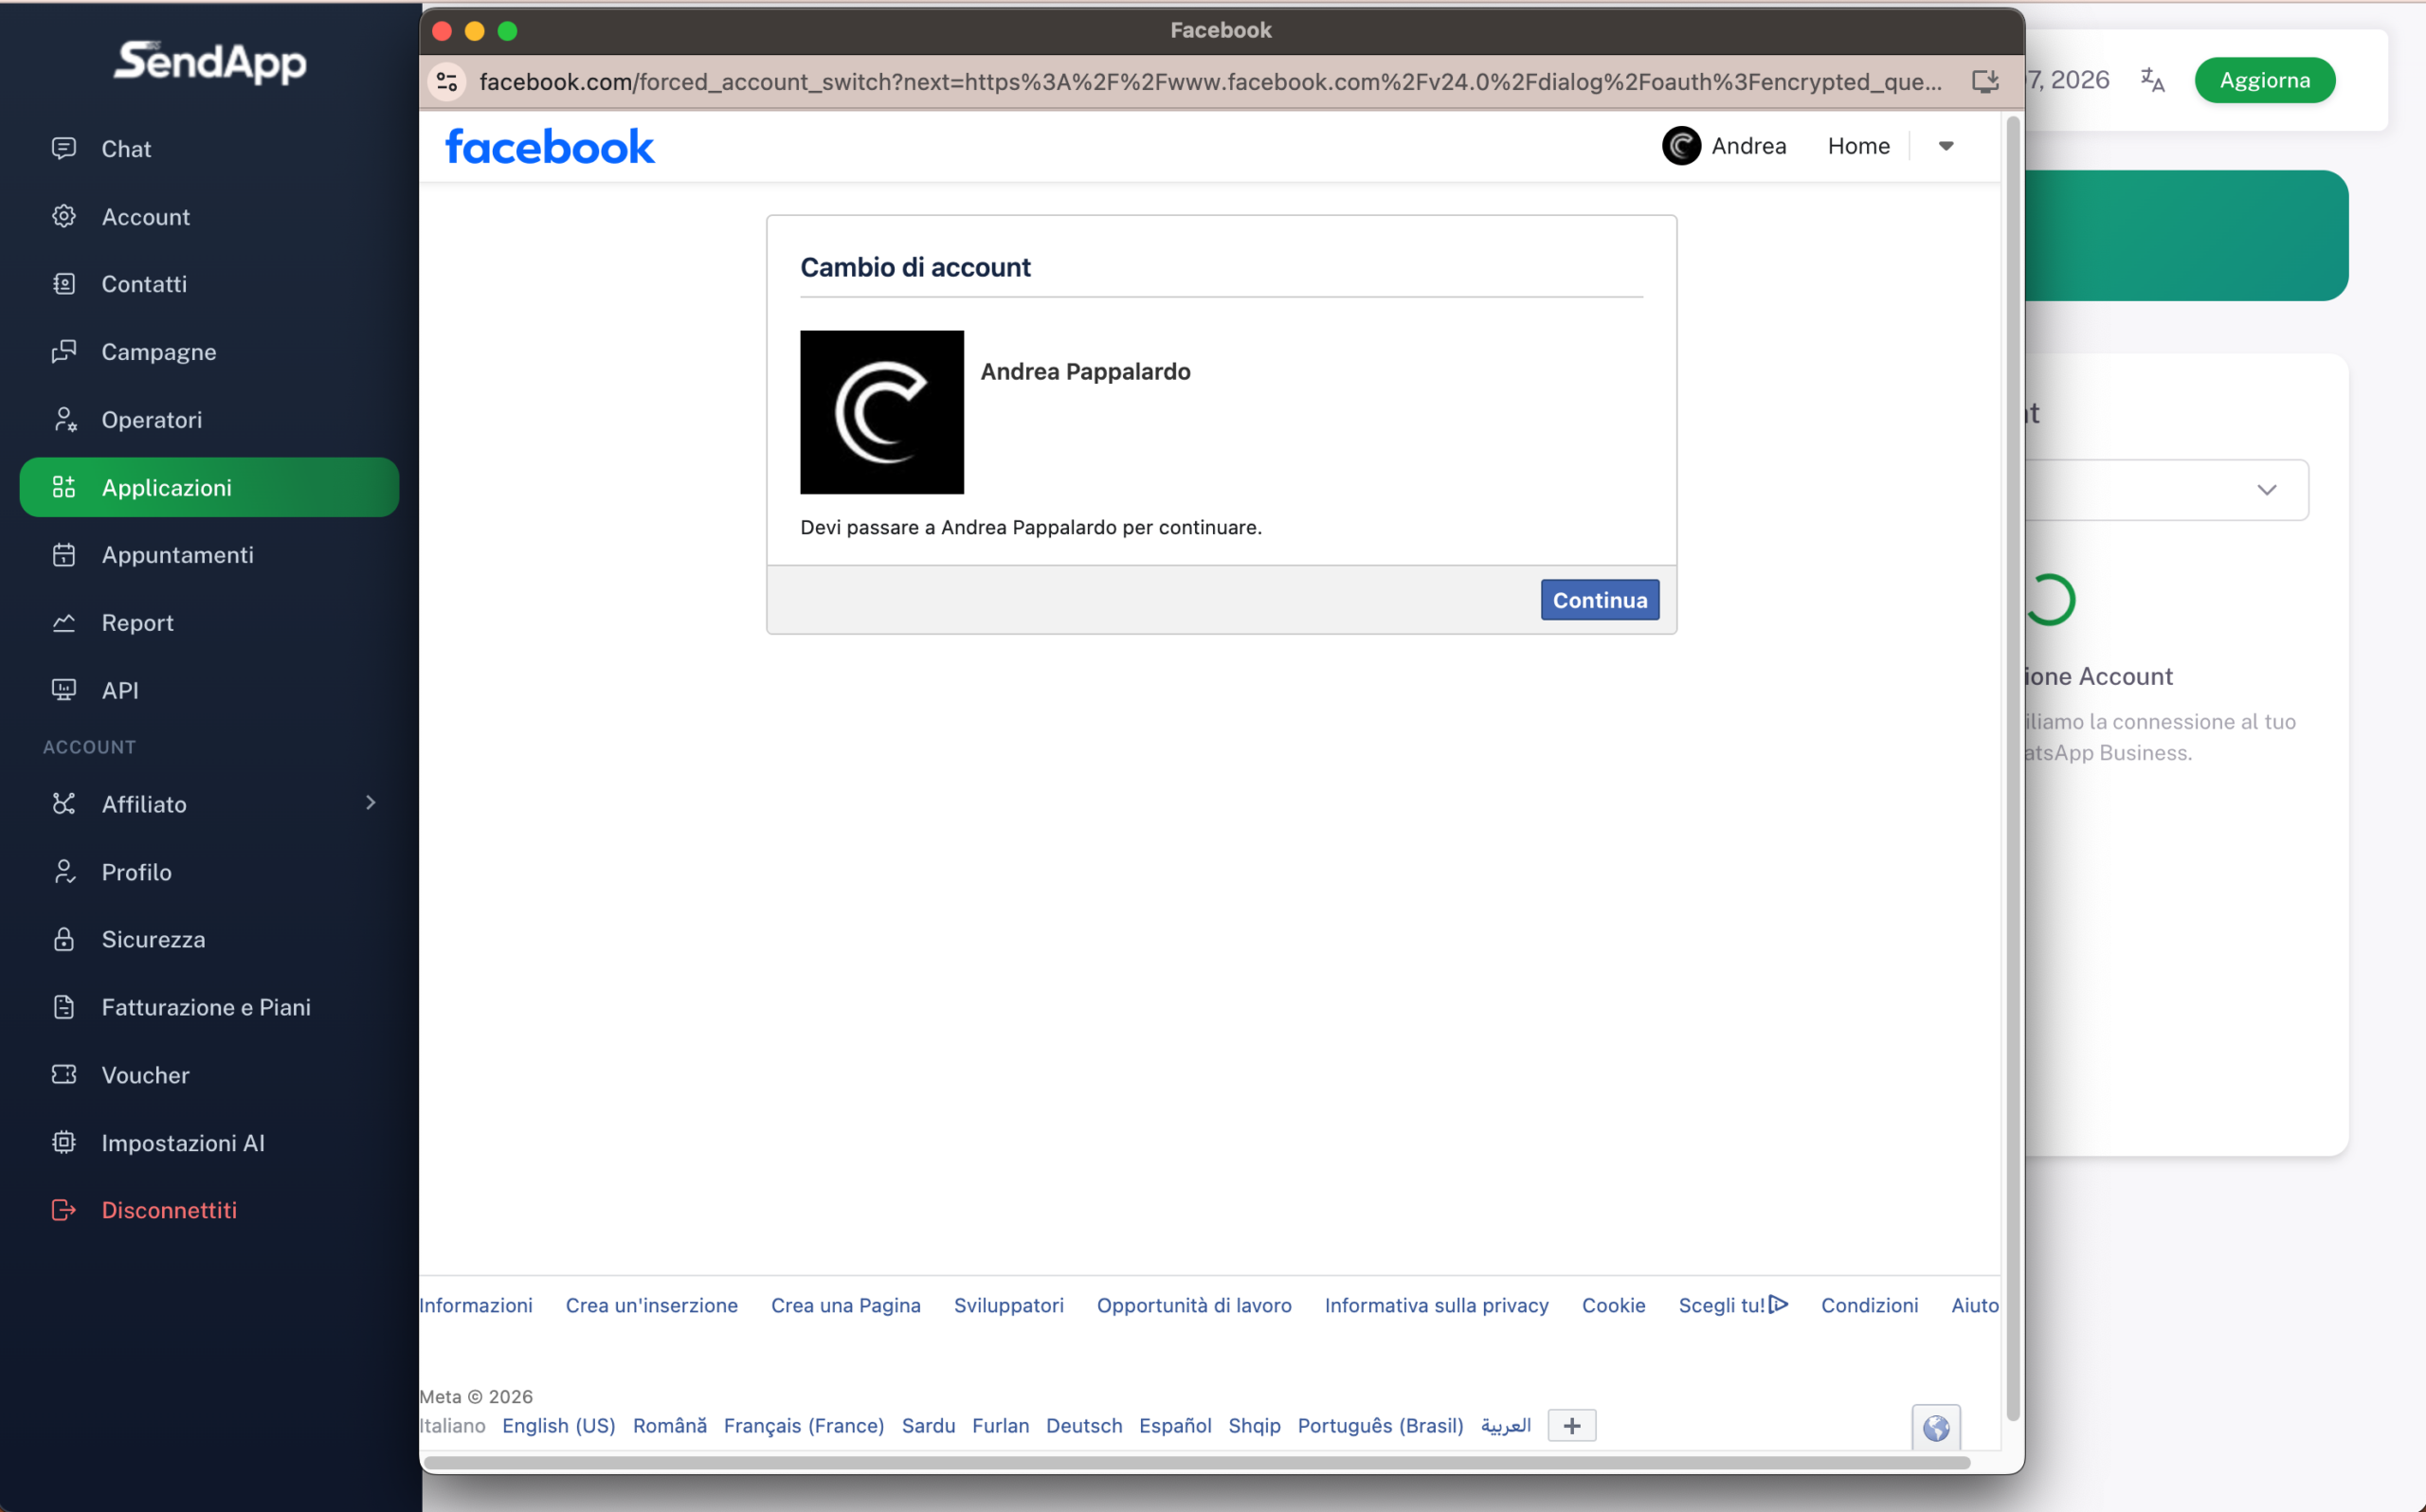
Click on Connect Account. Meta will ask you which Facebook profile to use to connect Business Manager. Select the correct profile and press Continued.
Meta informs you that it will connect the Business Manager, the WhatsApp Business Account (WABA) and the WhatsApp number for use in APIs. Press Continued.
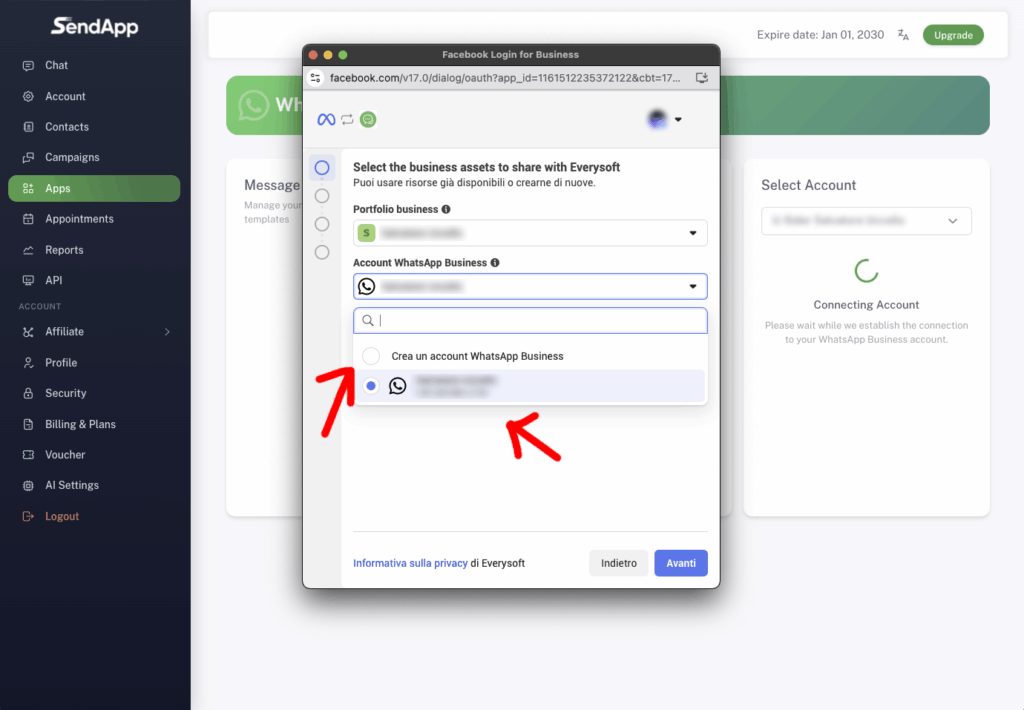
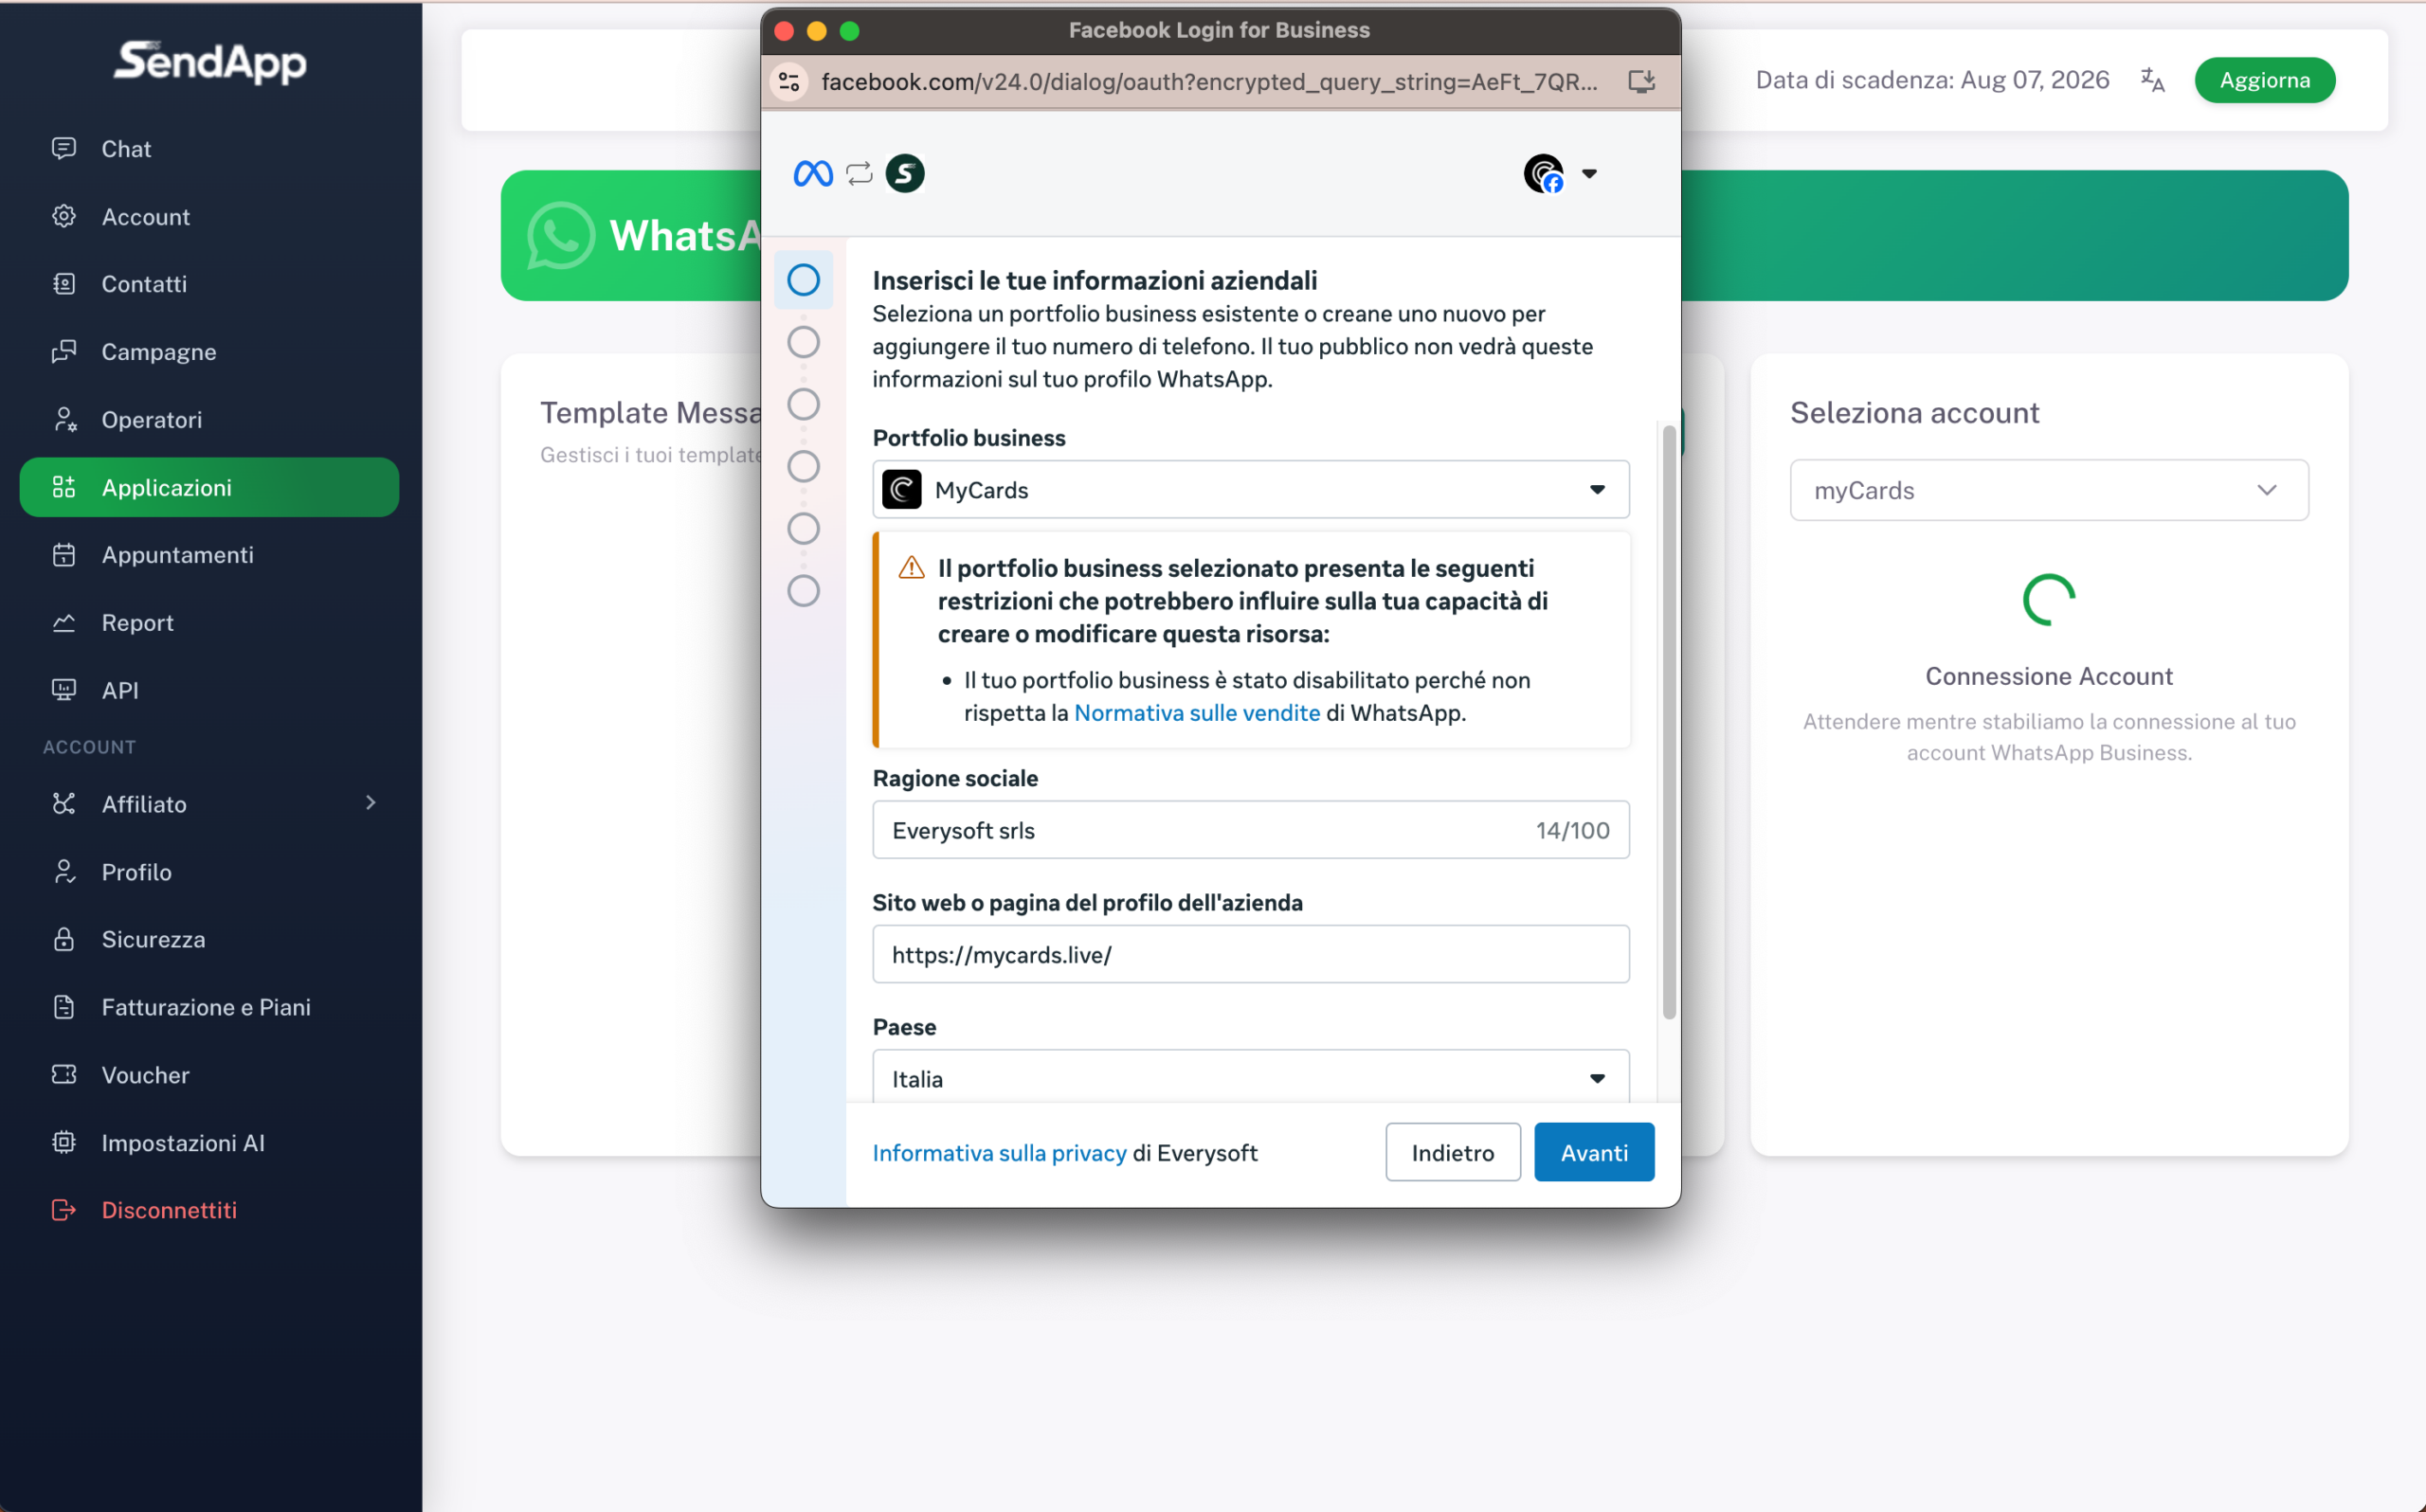
In this screen you can choose a Existing WhatsApp Business Account or create a new one. Select the correct account and click After you.
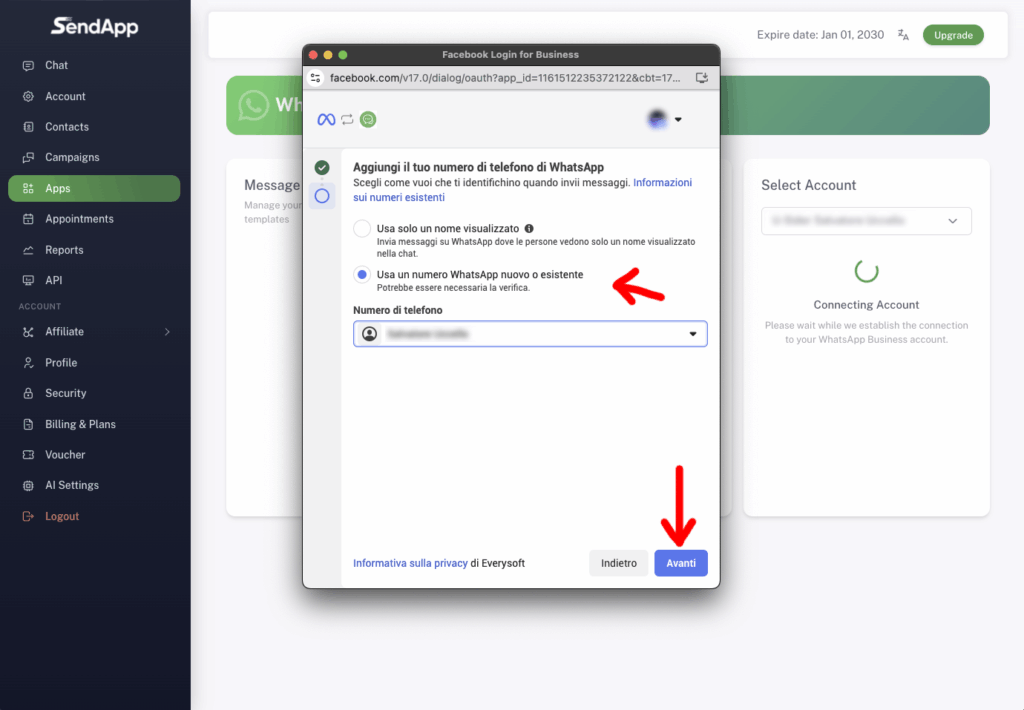
You have two options: add a new WhatsApp number or use a number already verified. If the number shows the badge Verified, you can move on.

Select “Use a new or existing WhatsApp number”, then choose the number from the drop-down menu and press After you.
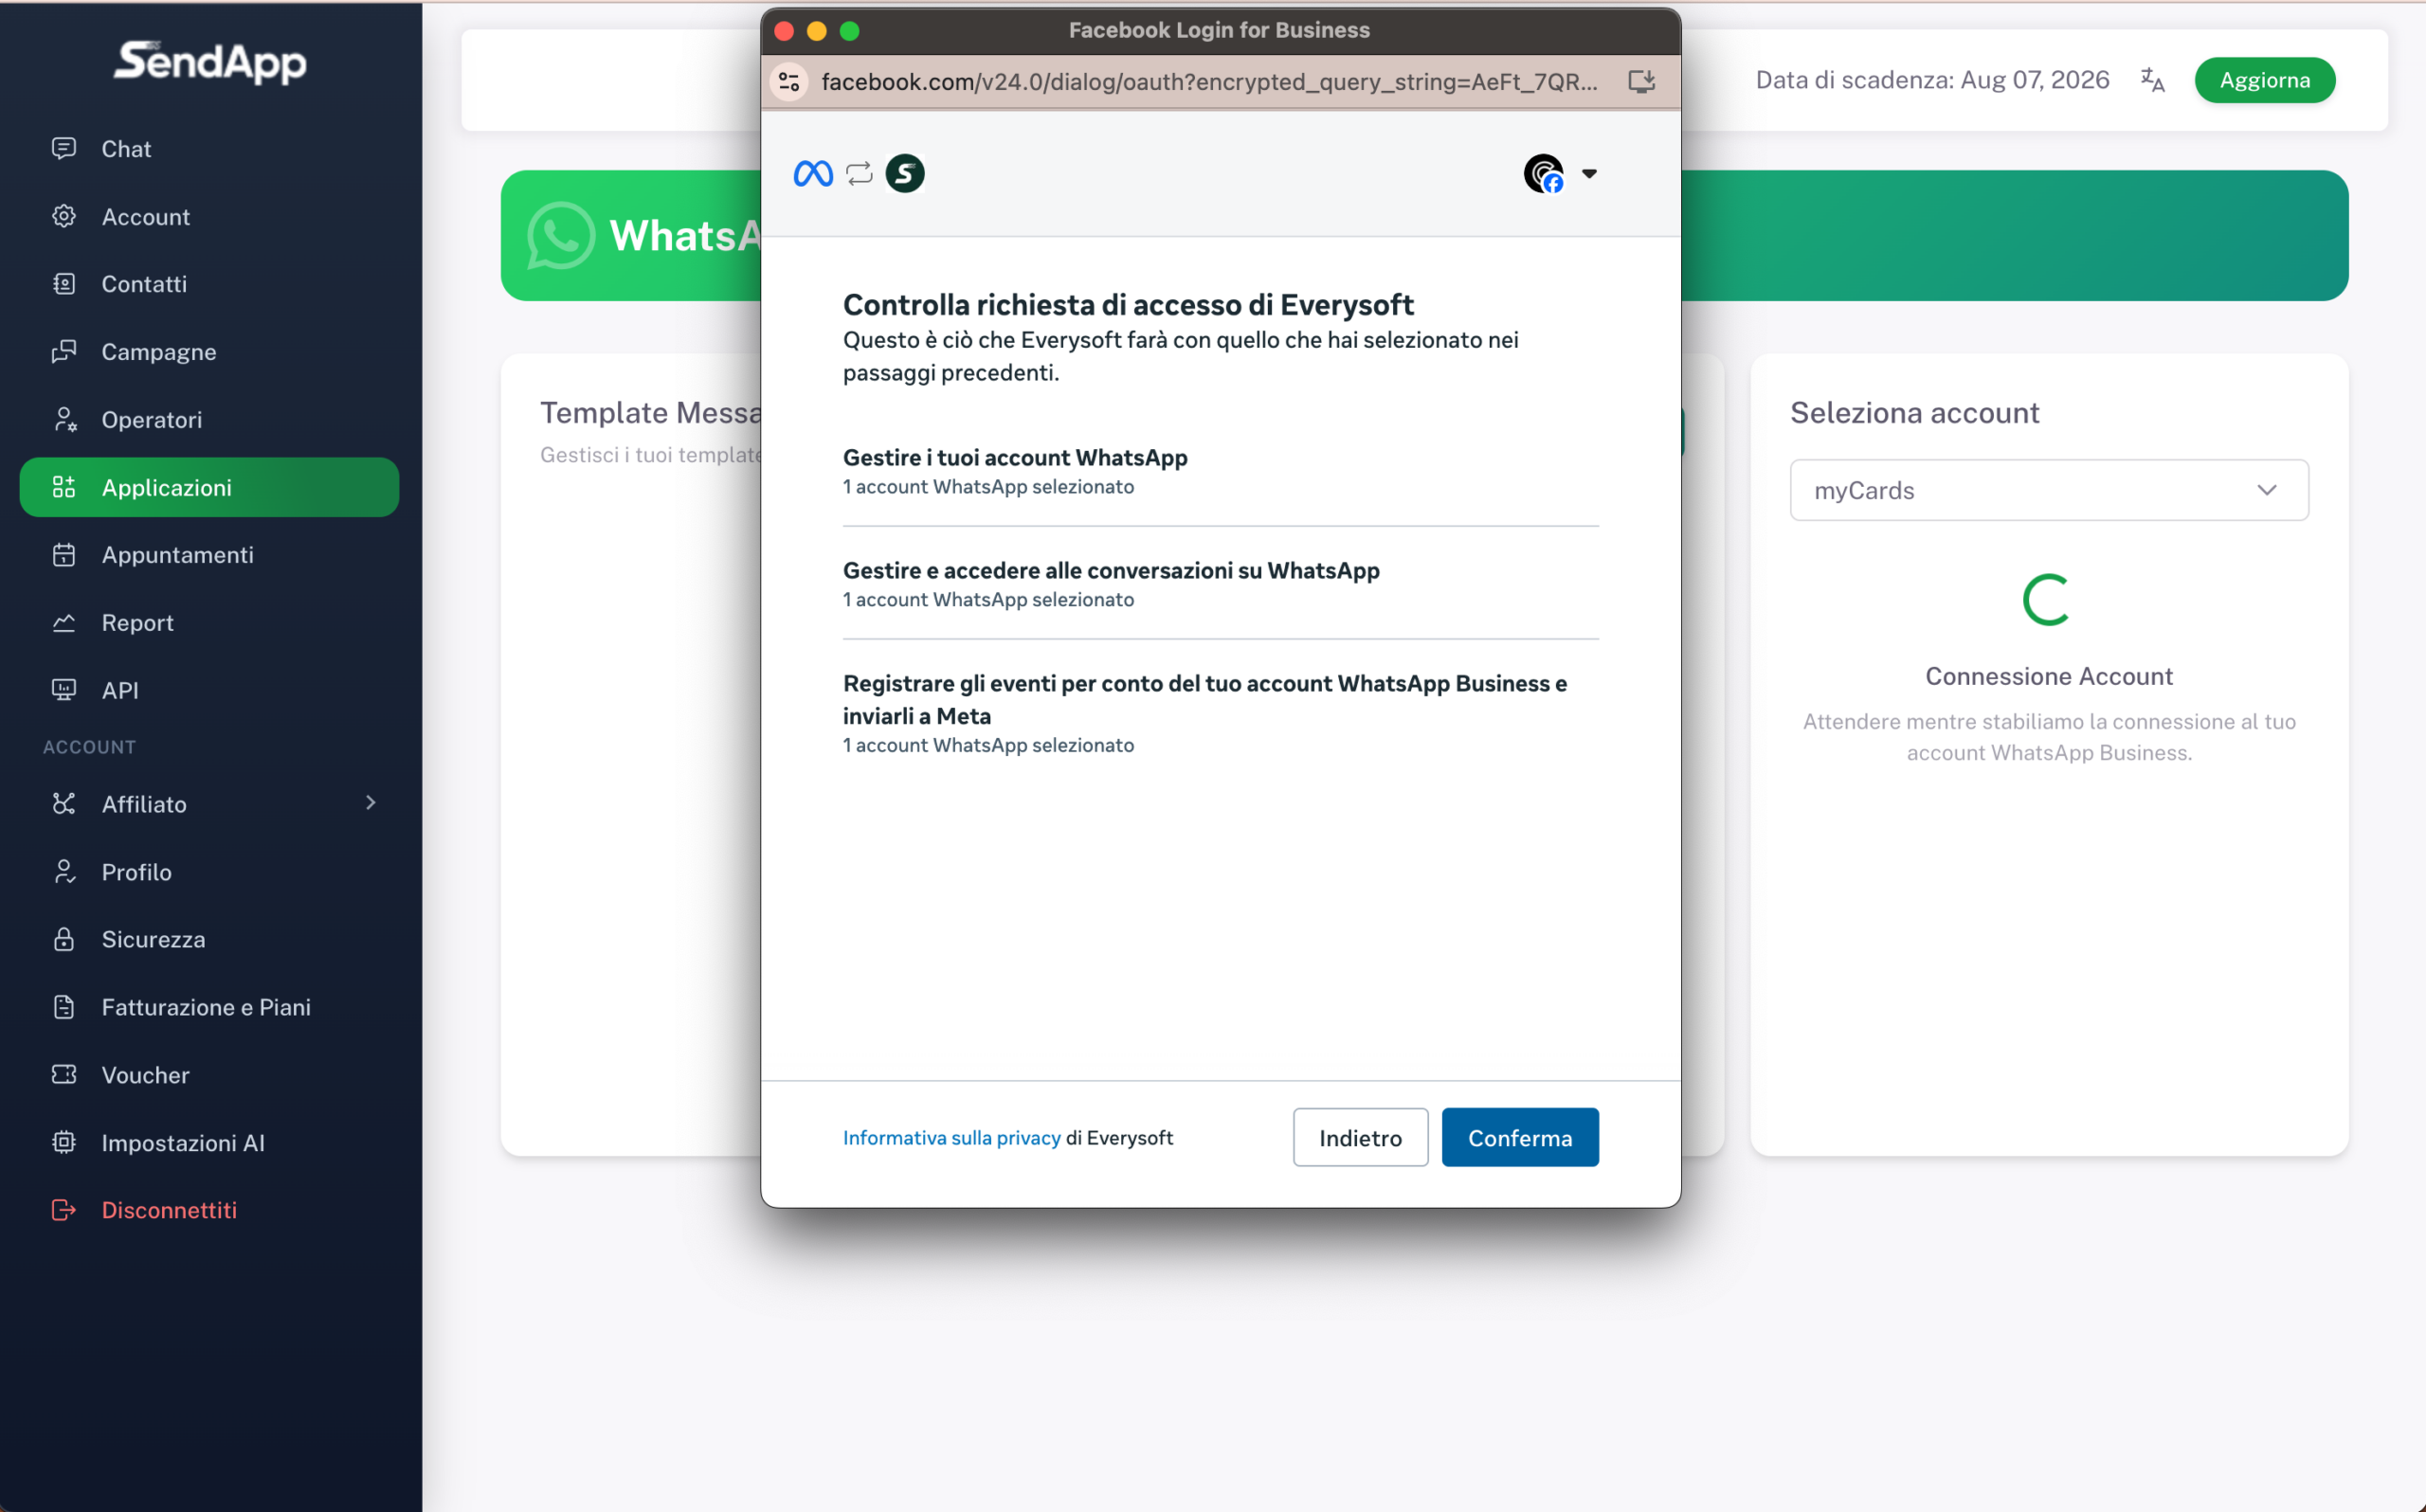
Meta shows you what SendApp can do: access API conversations, manage your WhatsApp Business account, and log necessary events. He confirms.

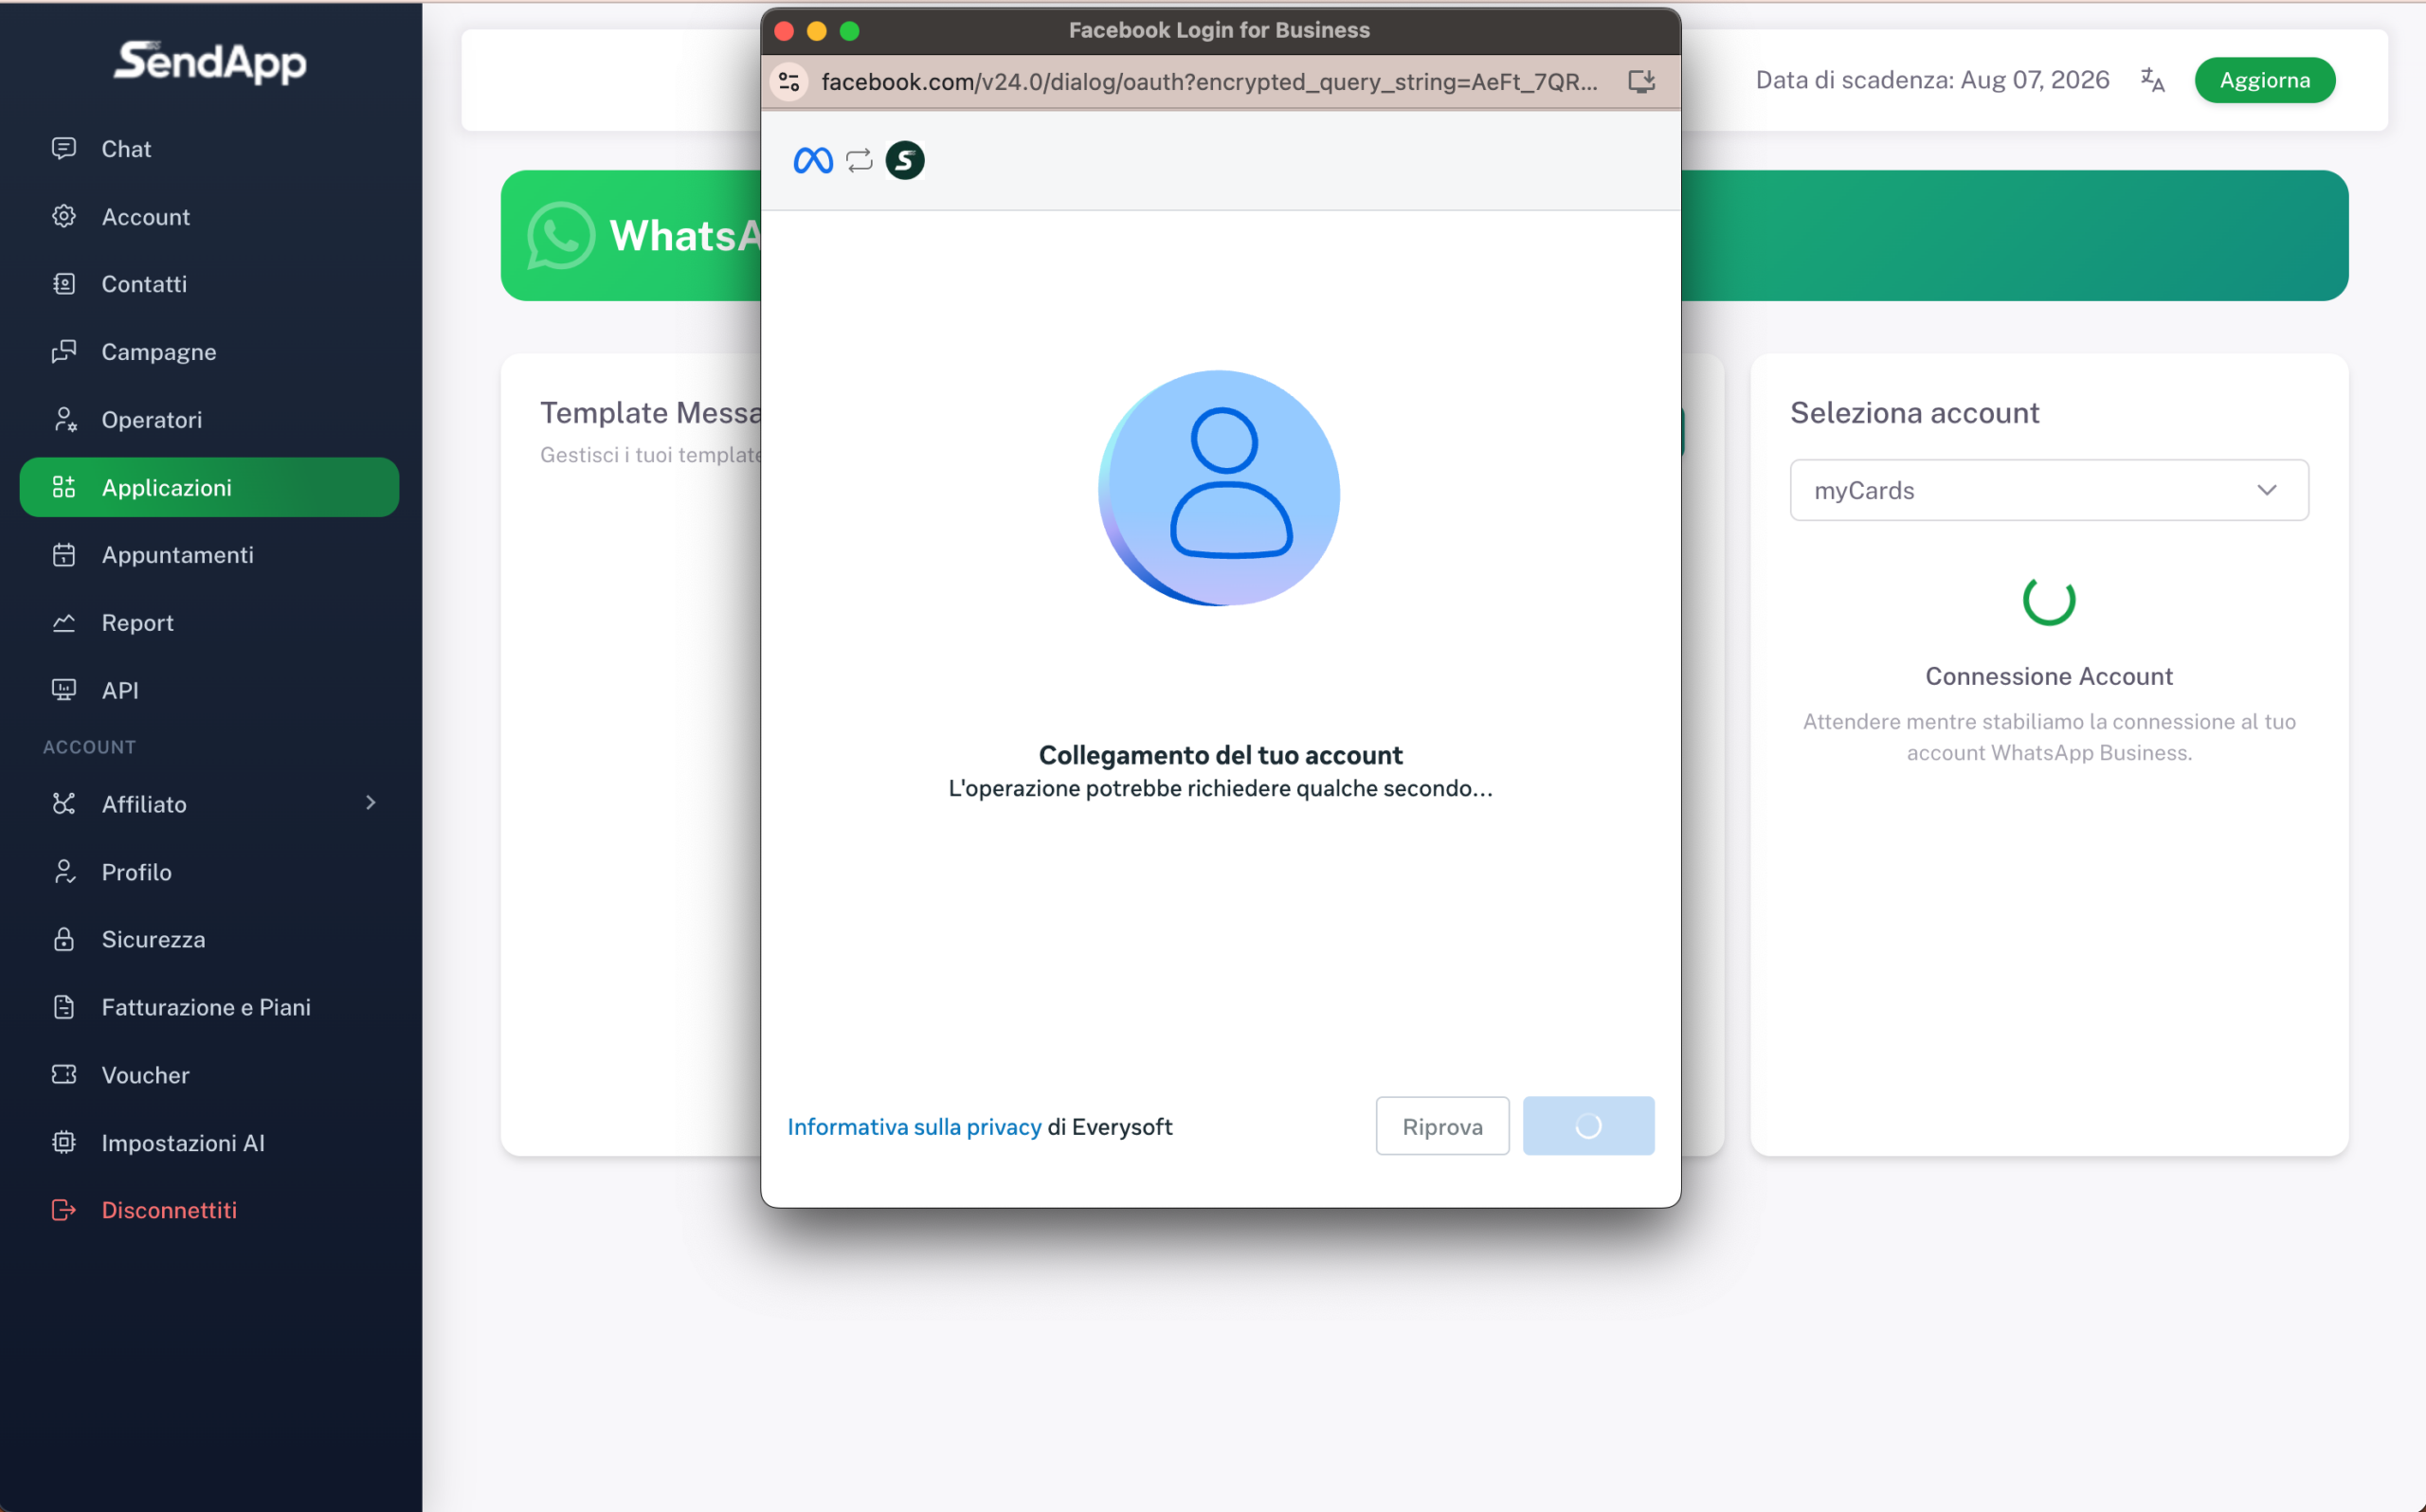
Meta completes the connection. This step may take a few seconds. don't close the window.

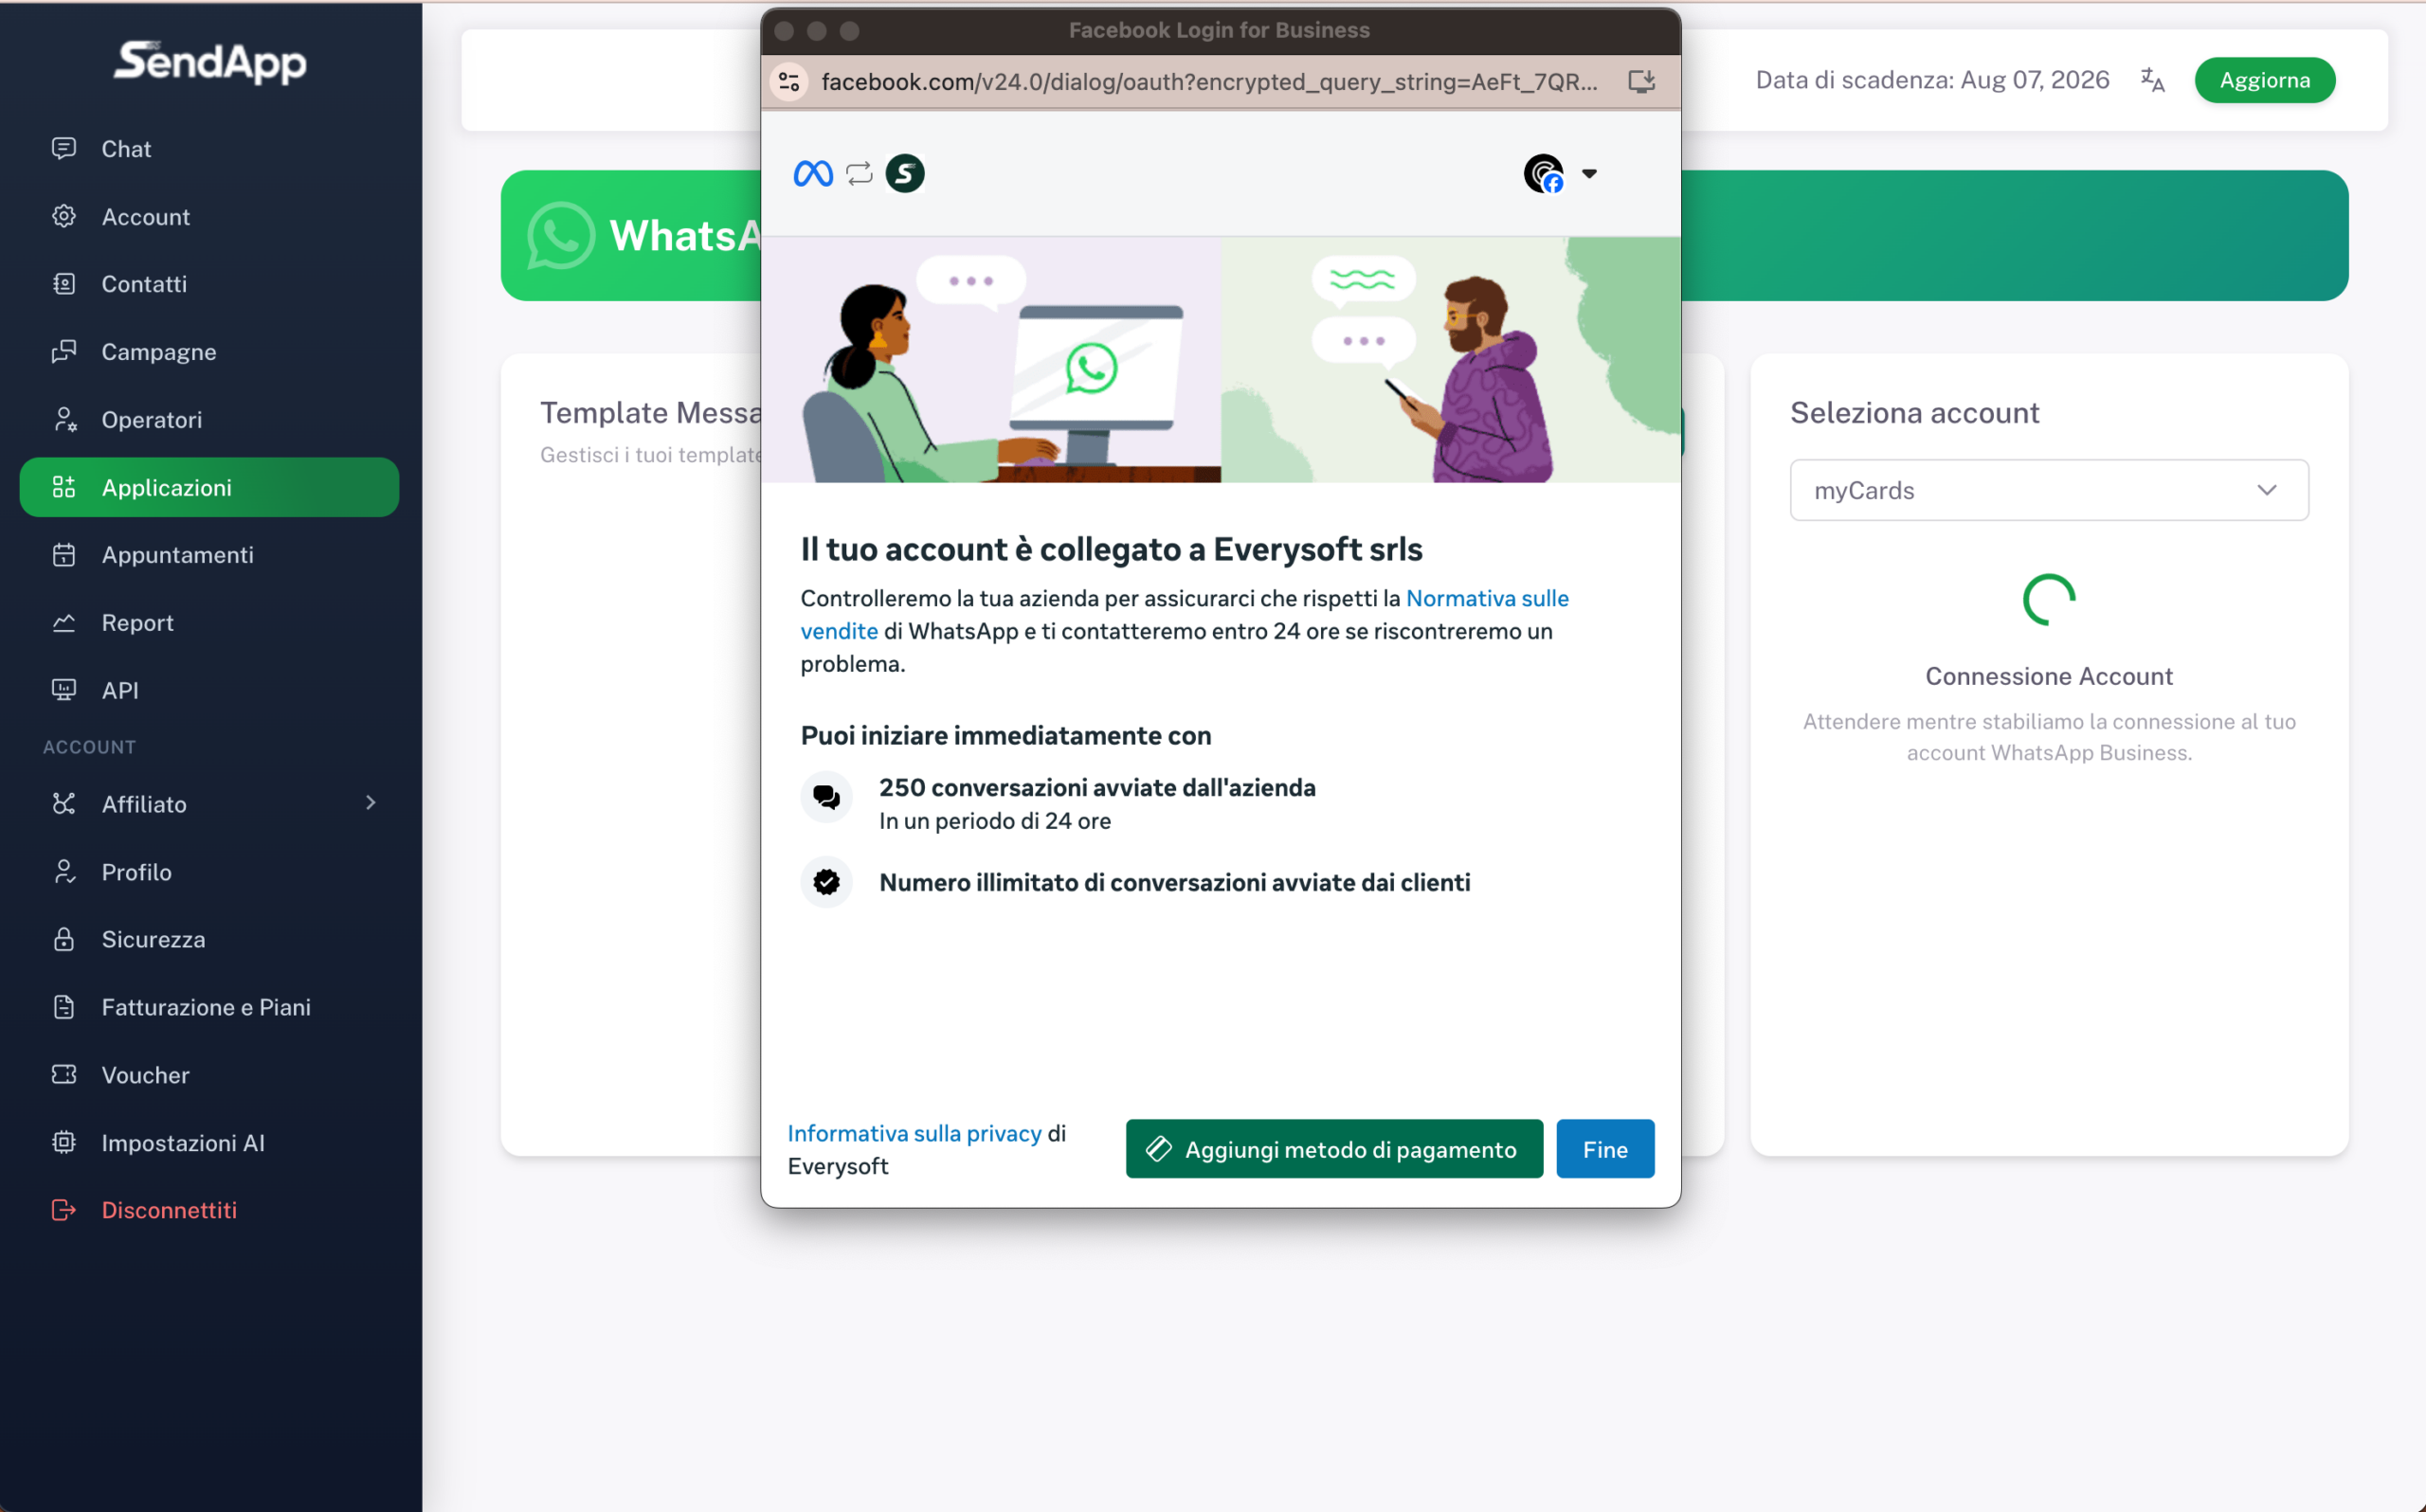
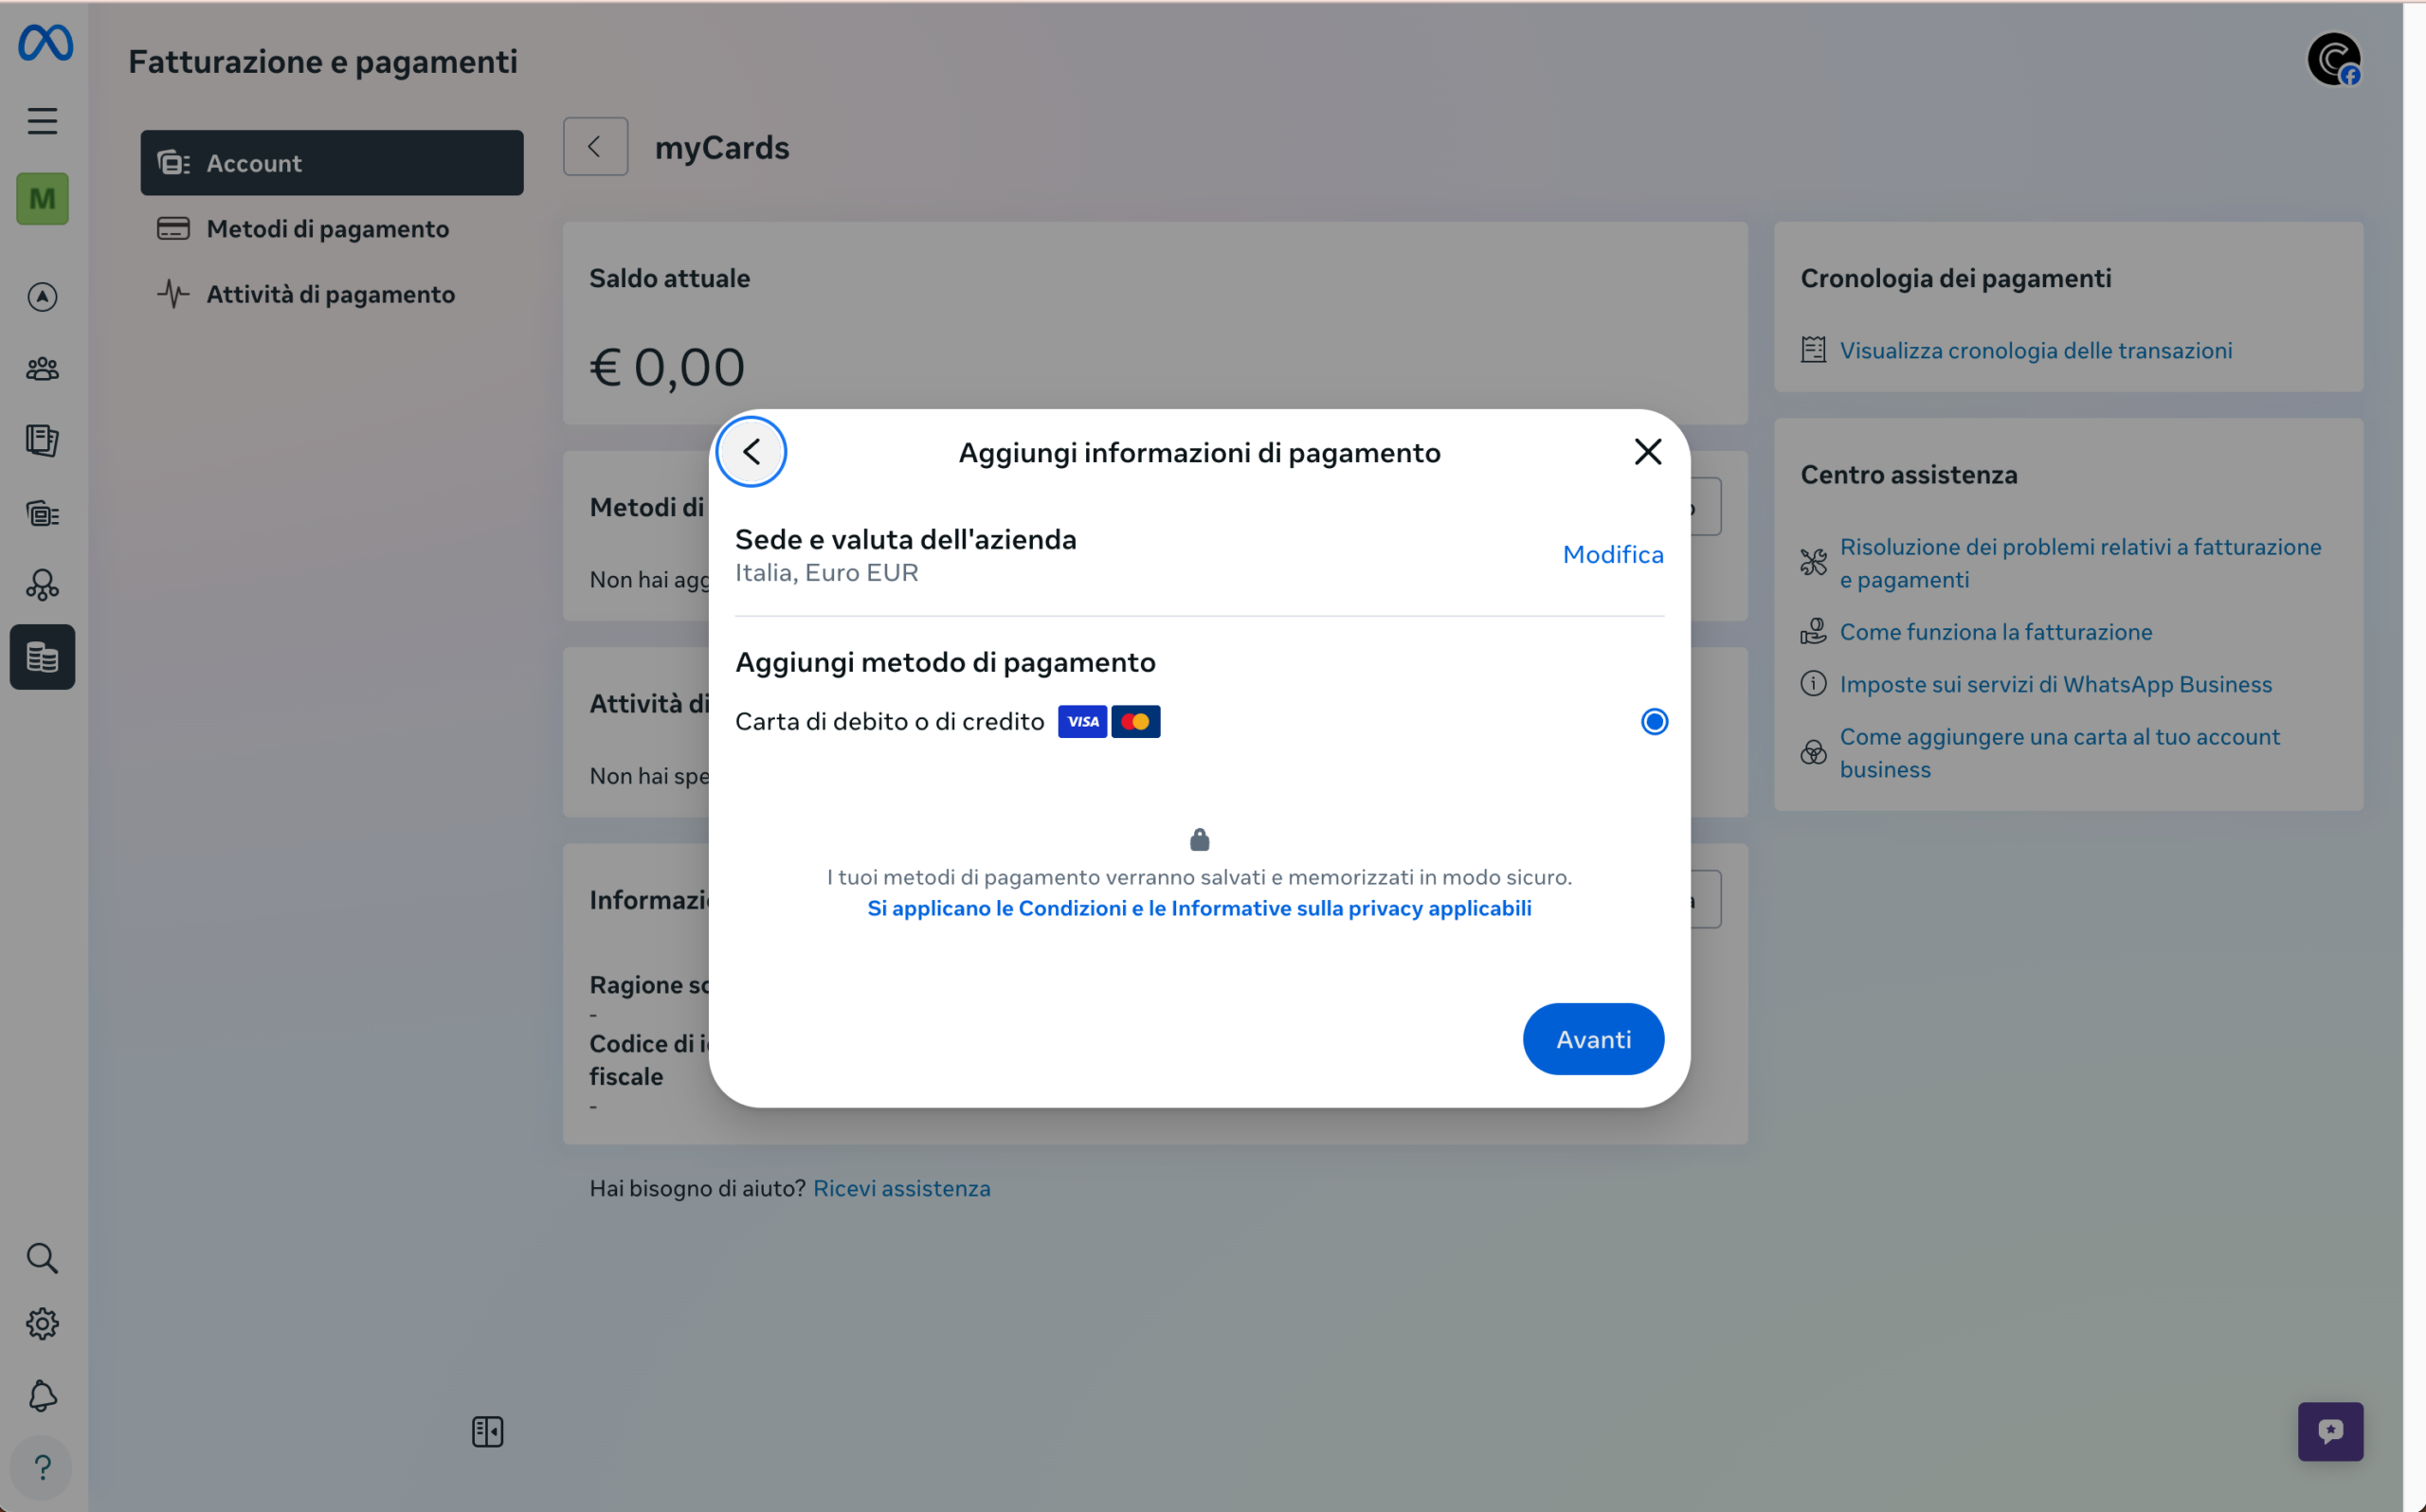
Meta confirms the connection with the message “Your account is linked to Everysoft srls”. To complete, select Add payment method.
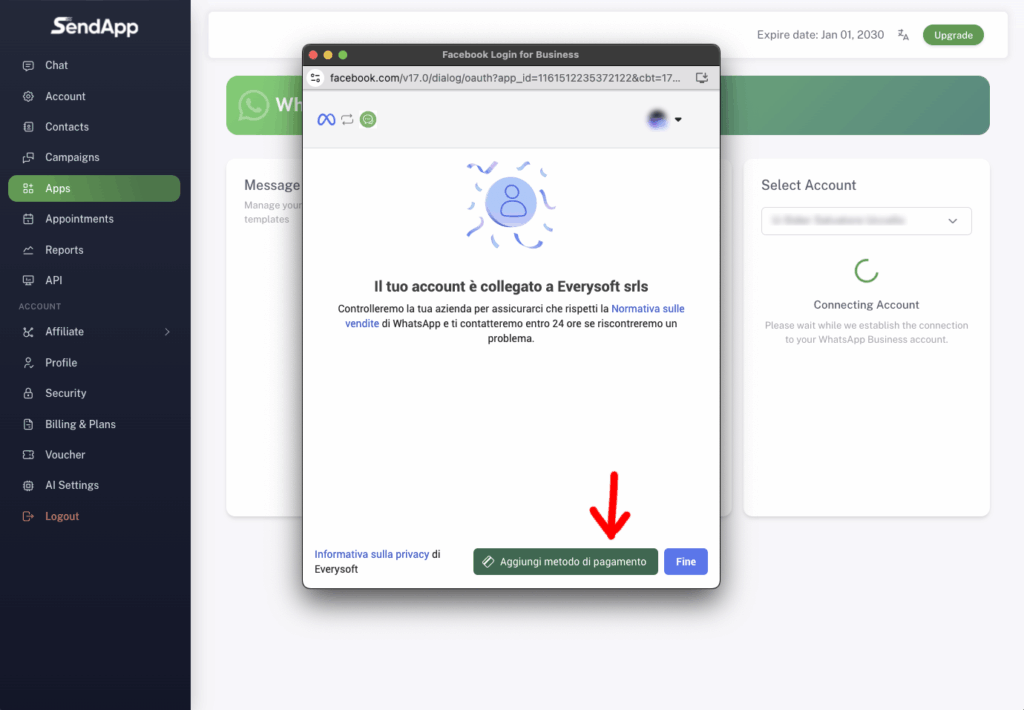
Meta opens the dashboard Billing and payments. Here you'll find your current balance, payment methods, tax information, and transaction history. Add payment method.
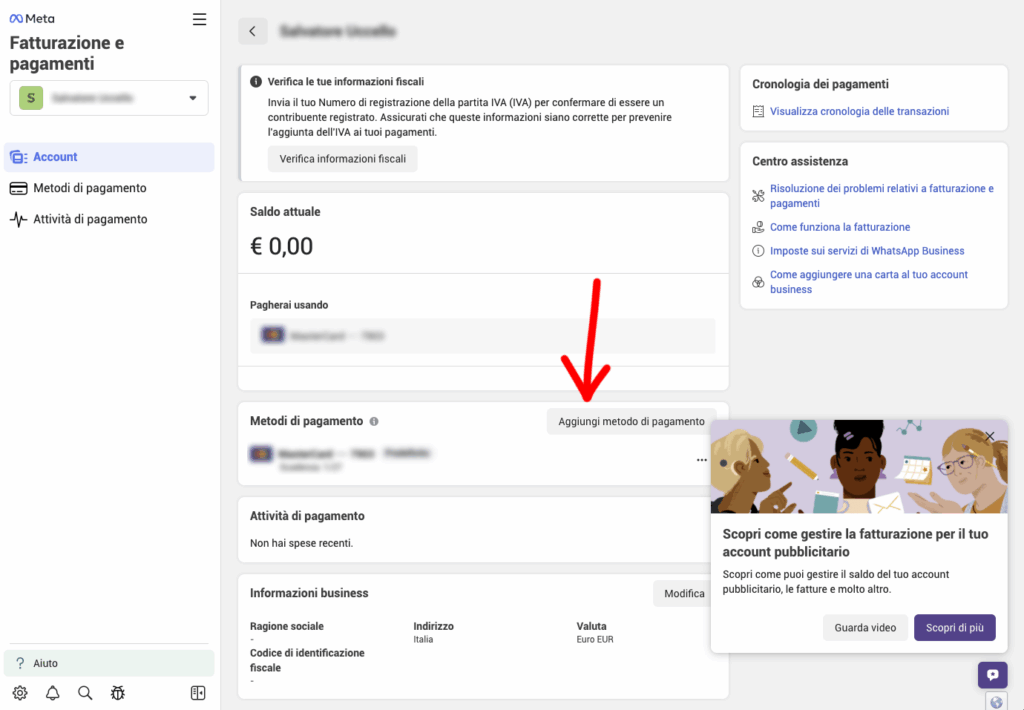
Add yours credit/debit card or an alternative payment method accepted by Meta. Once configured, Meta will make it available for paying for WhatsApp Cloud API messages and authorize SendApp to manage your credit line.
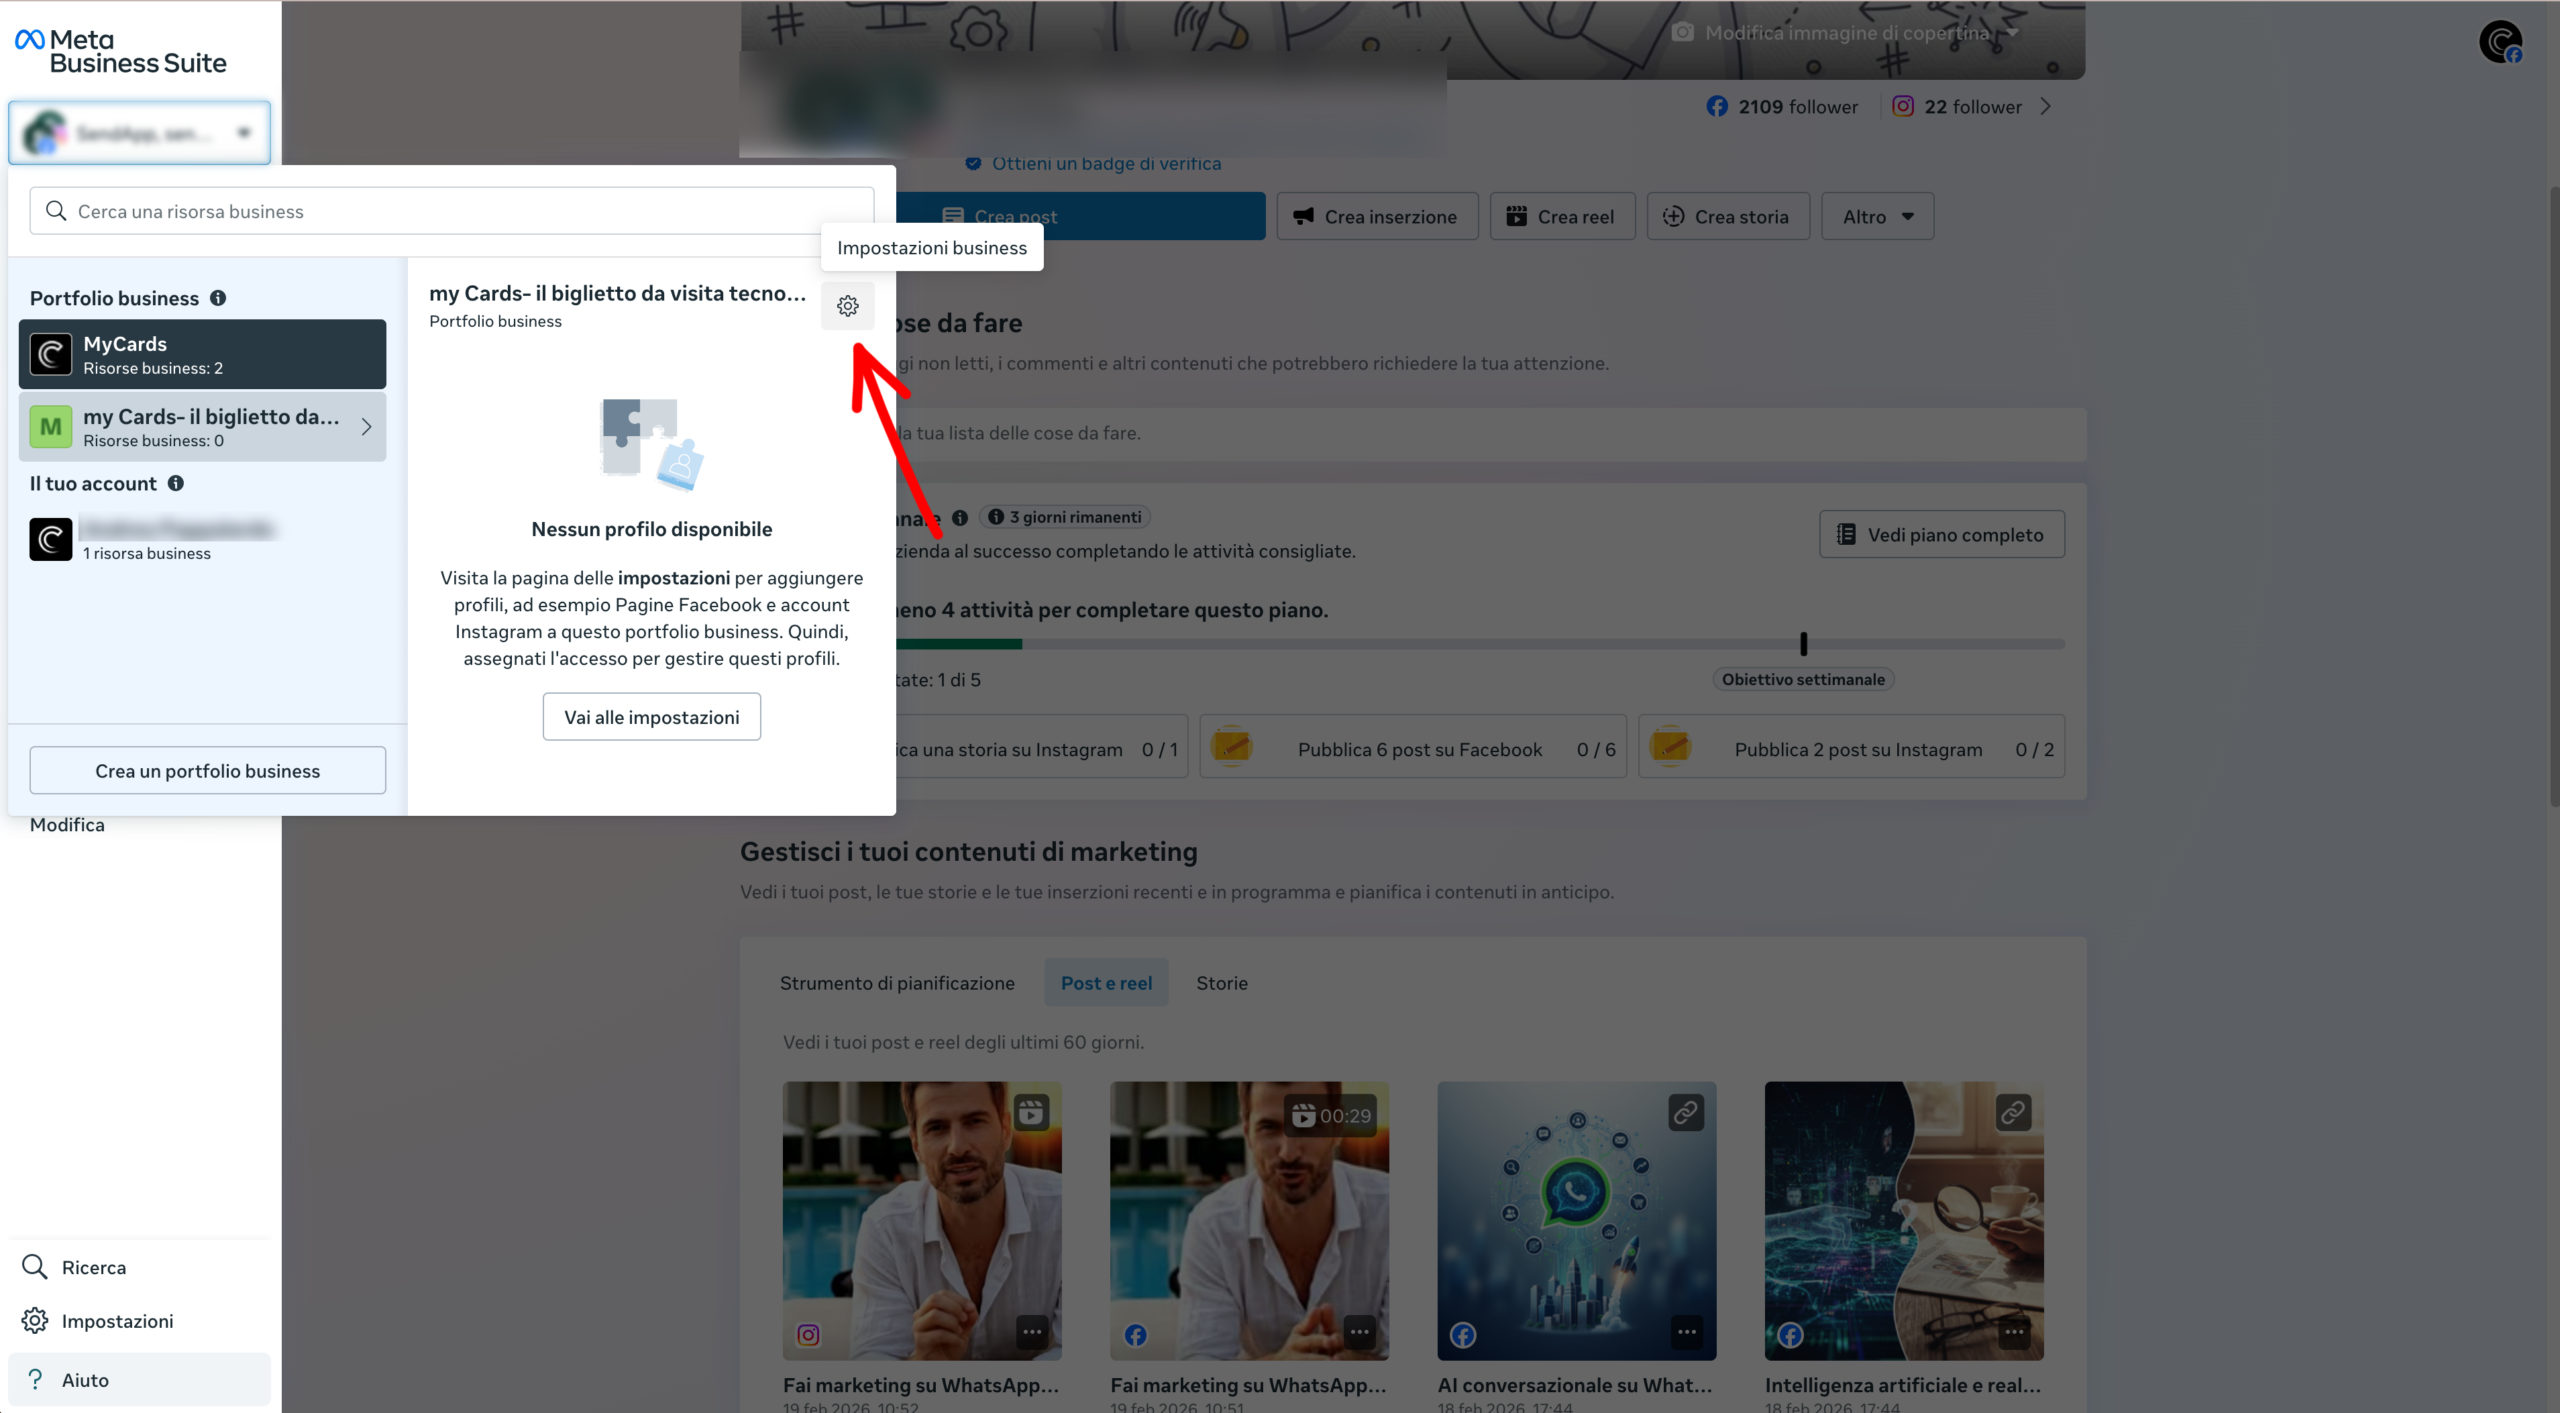
From the SendApp Agent dashboard, click on Applications in the sidebar. The section will open WhatsApp Meta. On the right you will find the account selector and the button Connect Account.
The Facebook window opens with the screenshot “Account Change”. If you have multiple profiles connected, select the correct one and press Continued.
You will see the message “Do you want to continue as [Name]?”. Facebook informs you that Everysoft (SendApp) will receive your name and profile picture. Press the green button. “Continue as [Name]…”.

Select or create your own Business portfolio (Business Manager). Fill out Company name, Website is country (Italy). Awards After you.
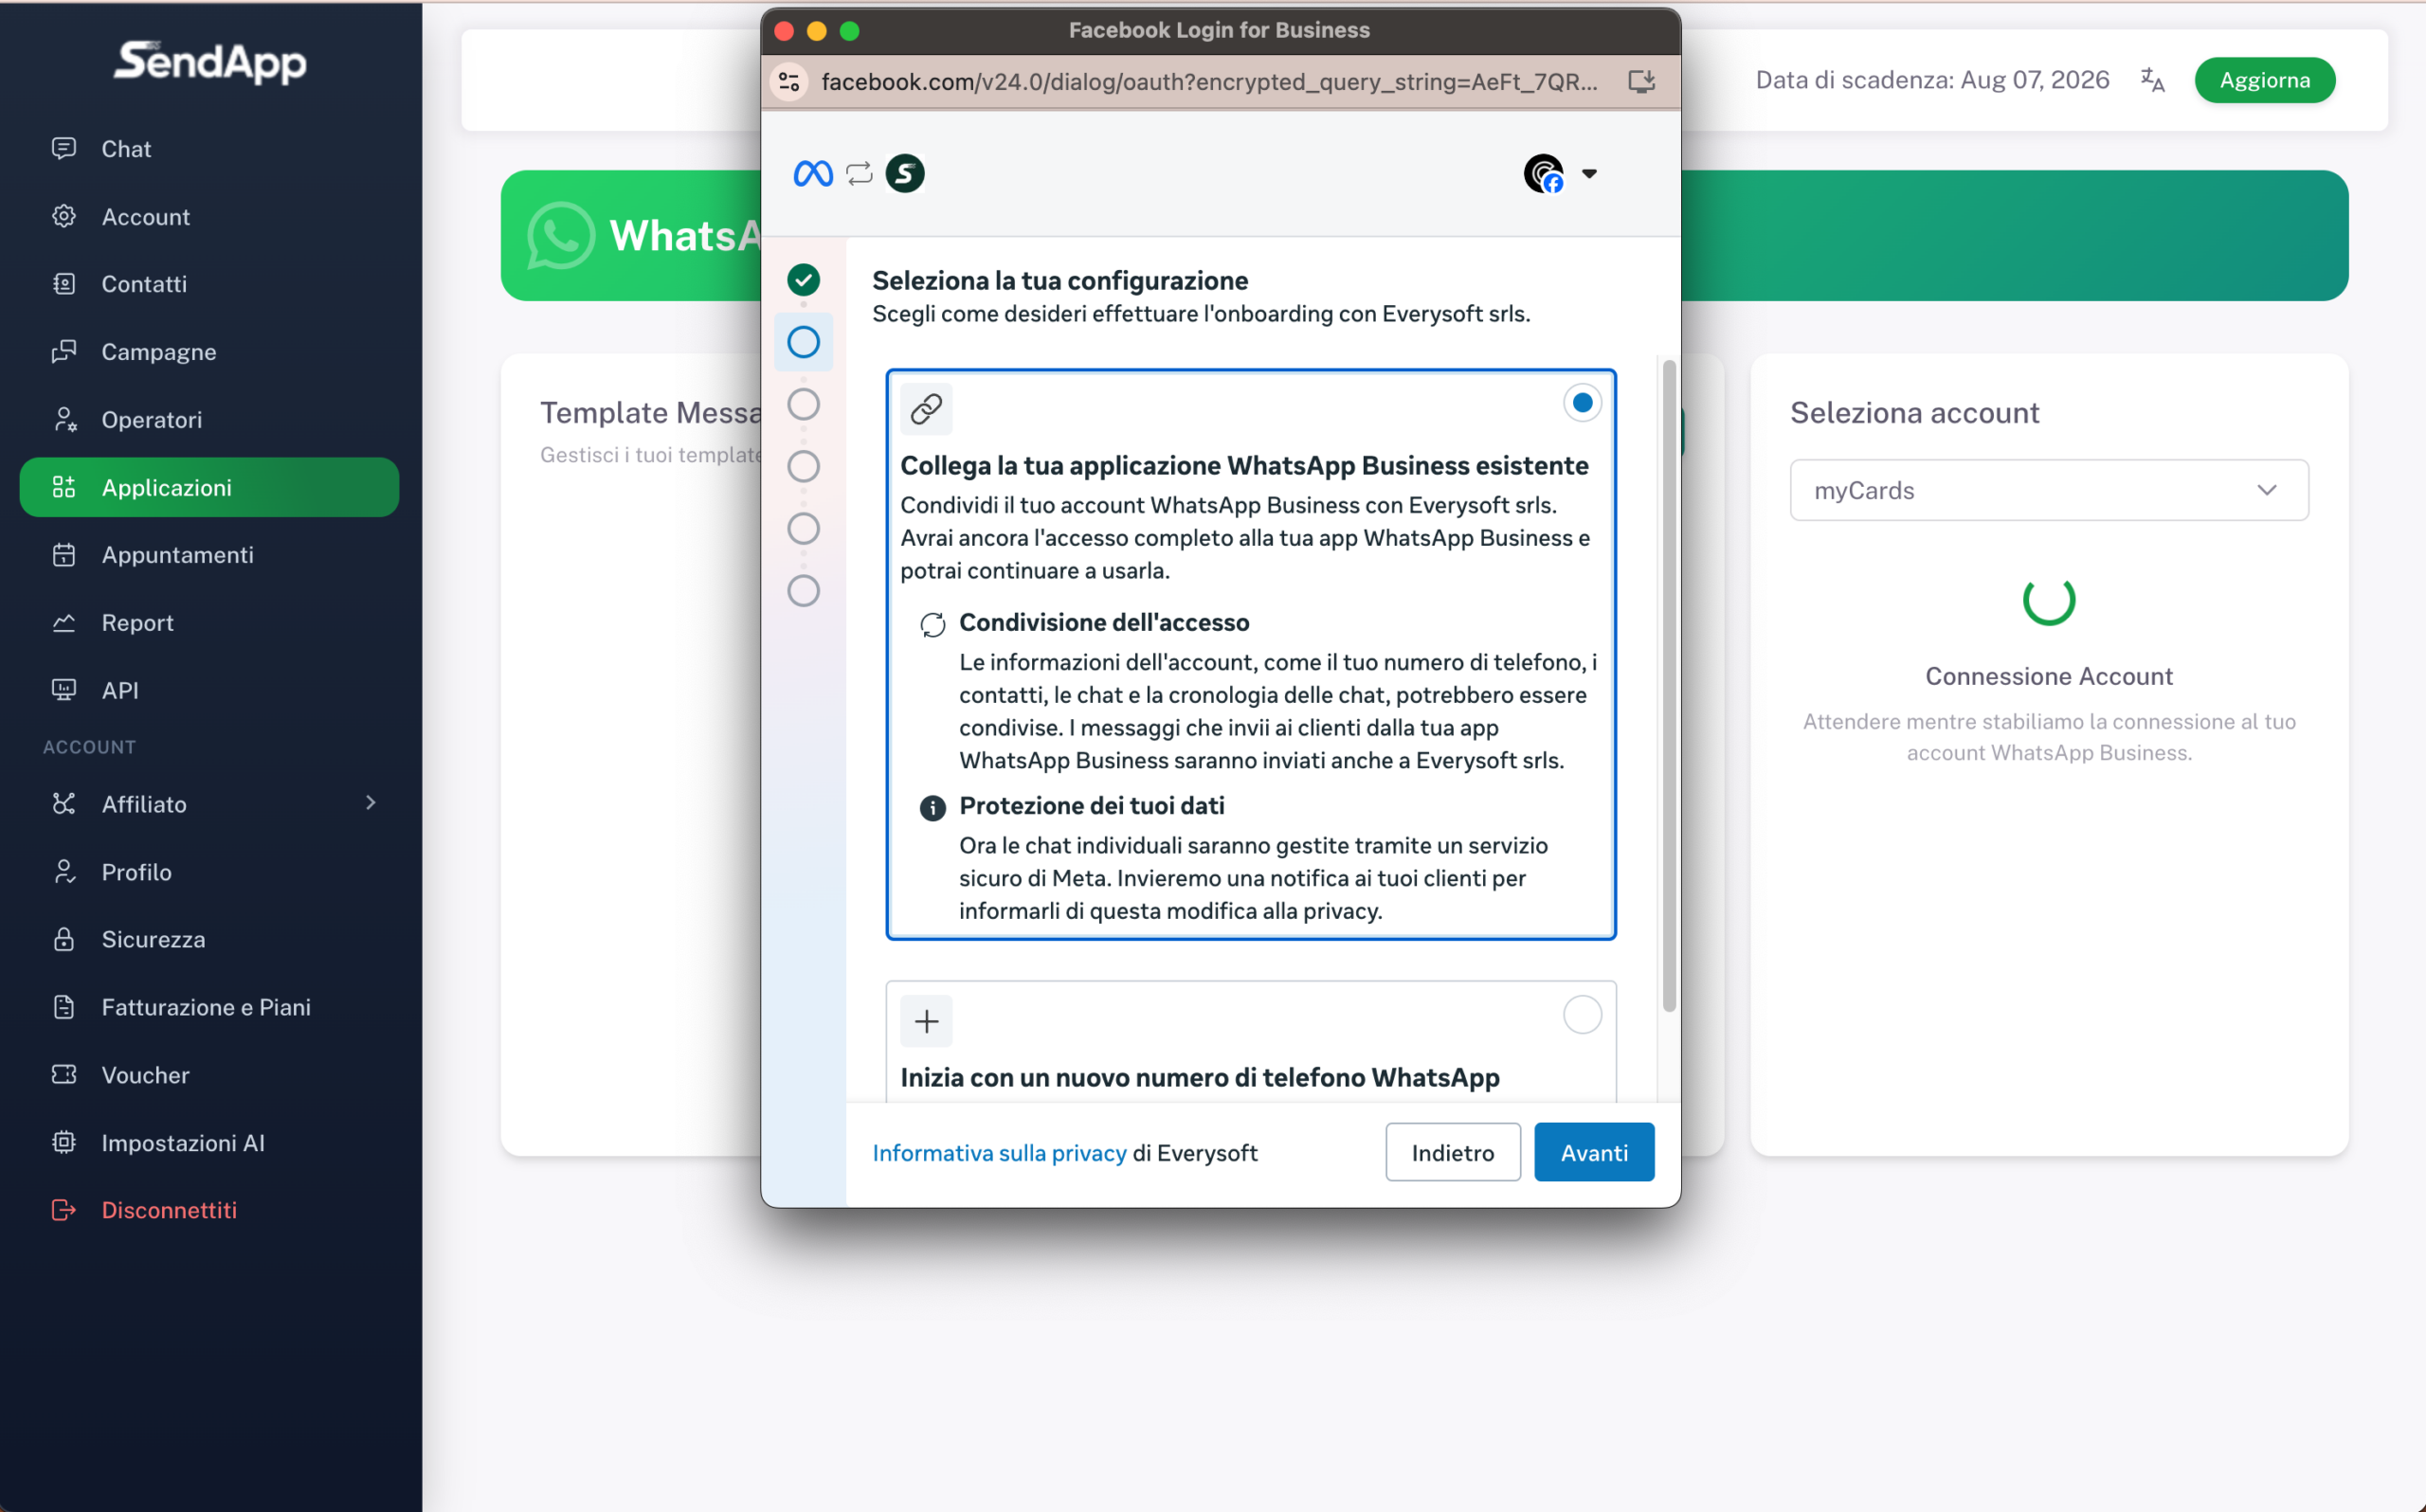
Meta asks you how to configure the connection. Select “Connect your existing WhatsApp Business app”. This way you will share the account with SendApp but You will be able to continue using the WhatsApp Business app on your phone. At the bottom there is also the option “Start with a new number” — do not select it. Awards After you.
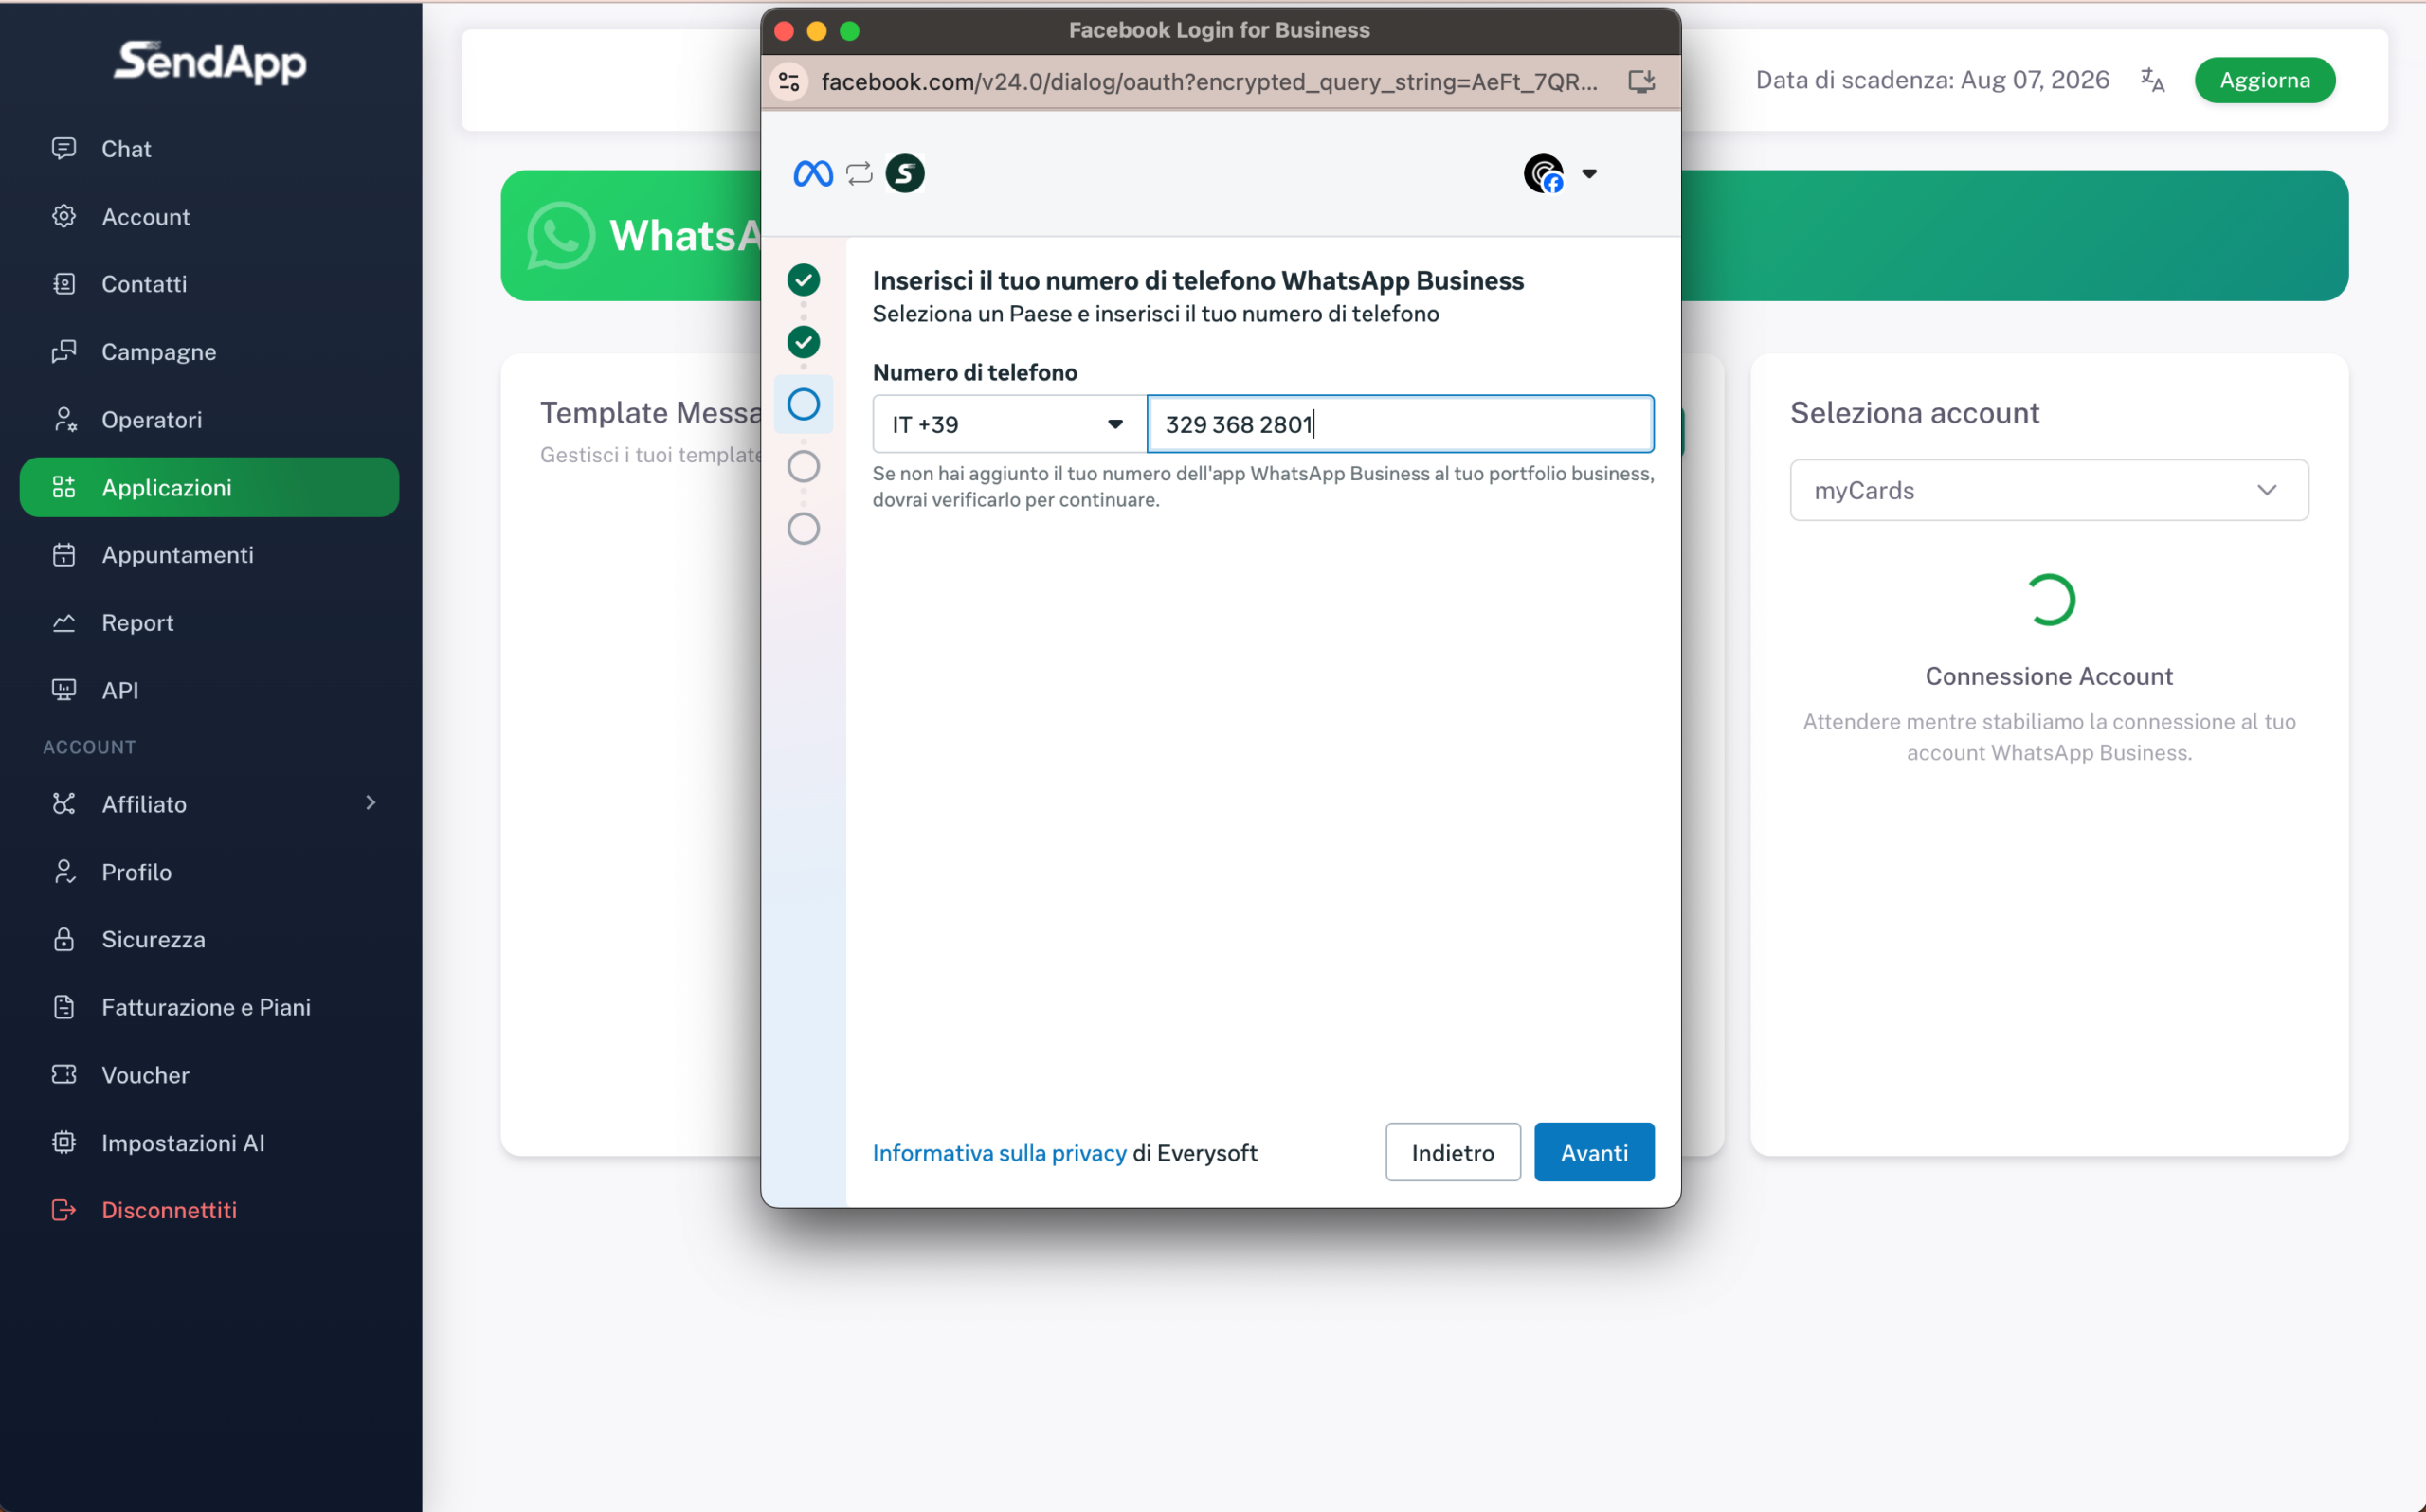
Select Country (IT +39) and enter the number already active on your phone's WhatsApp Business app. Tap After you.
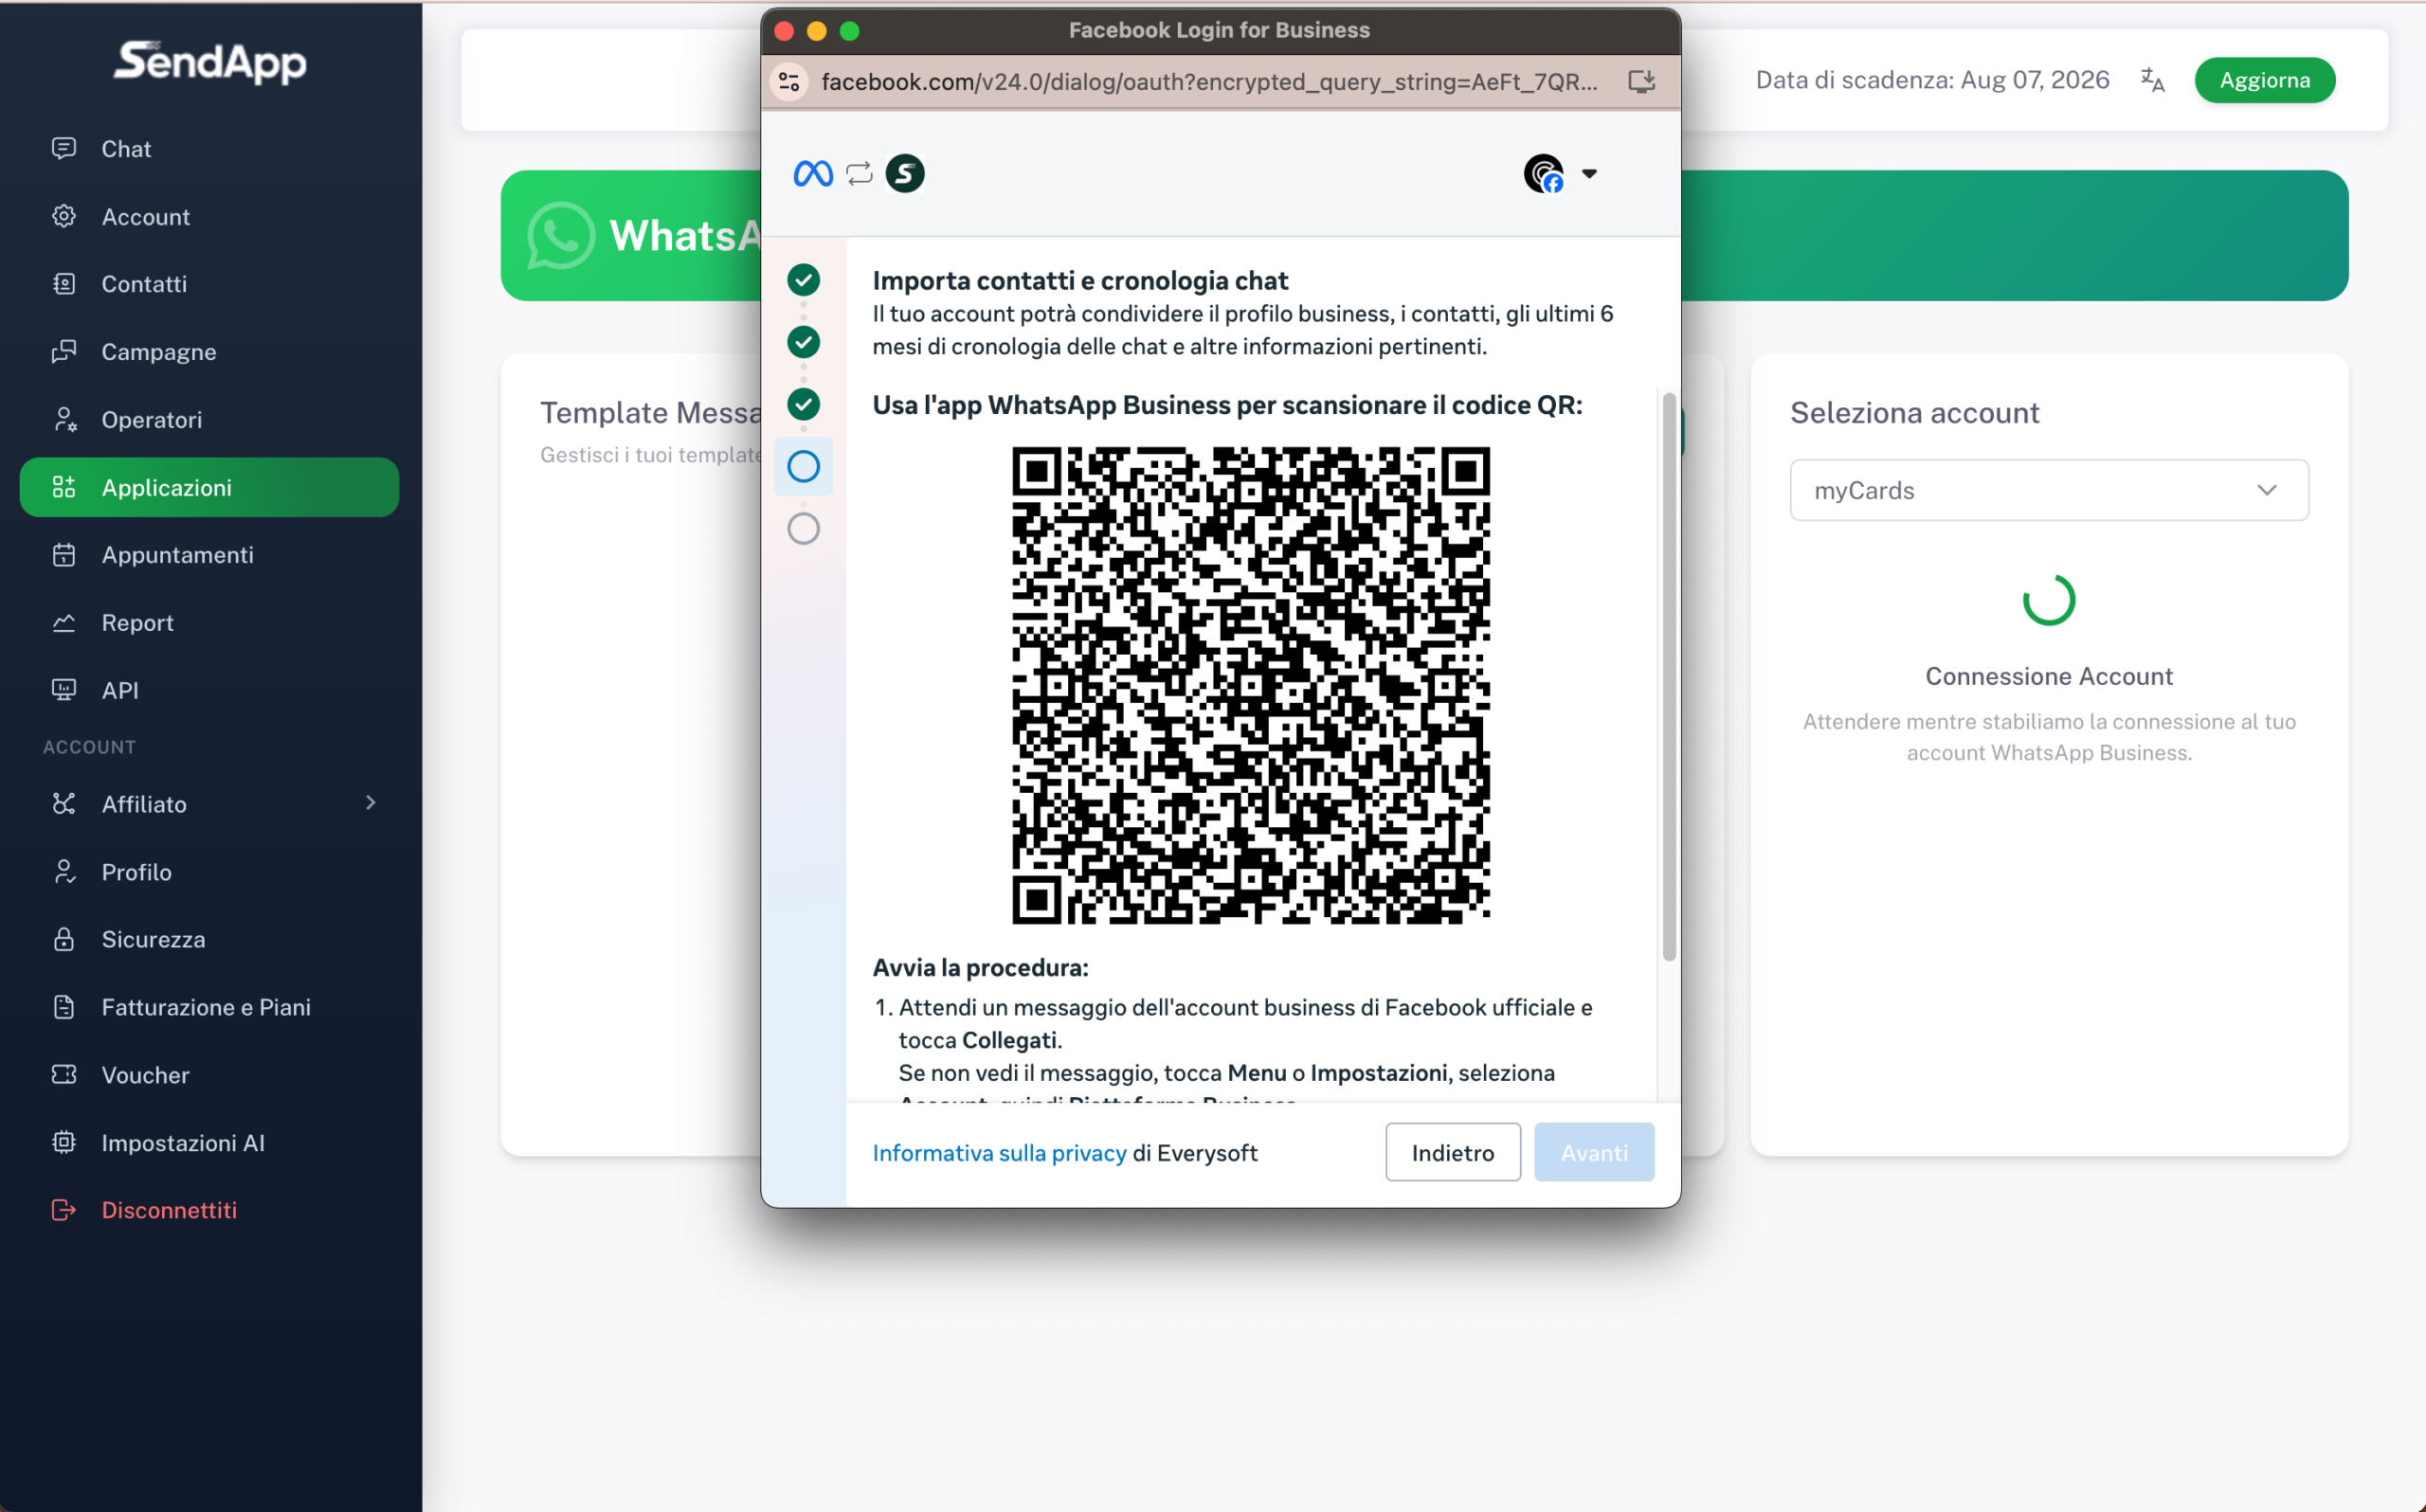
Meta shows you a QR code To scan with the WhatsApp Business app on your phone. Open WhatsApp Business, wait for the message from your Facebook business account, tap Connect. If you don't see the message: Menu – Settings – Account – Business Platforms.
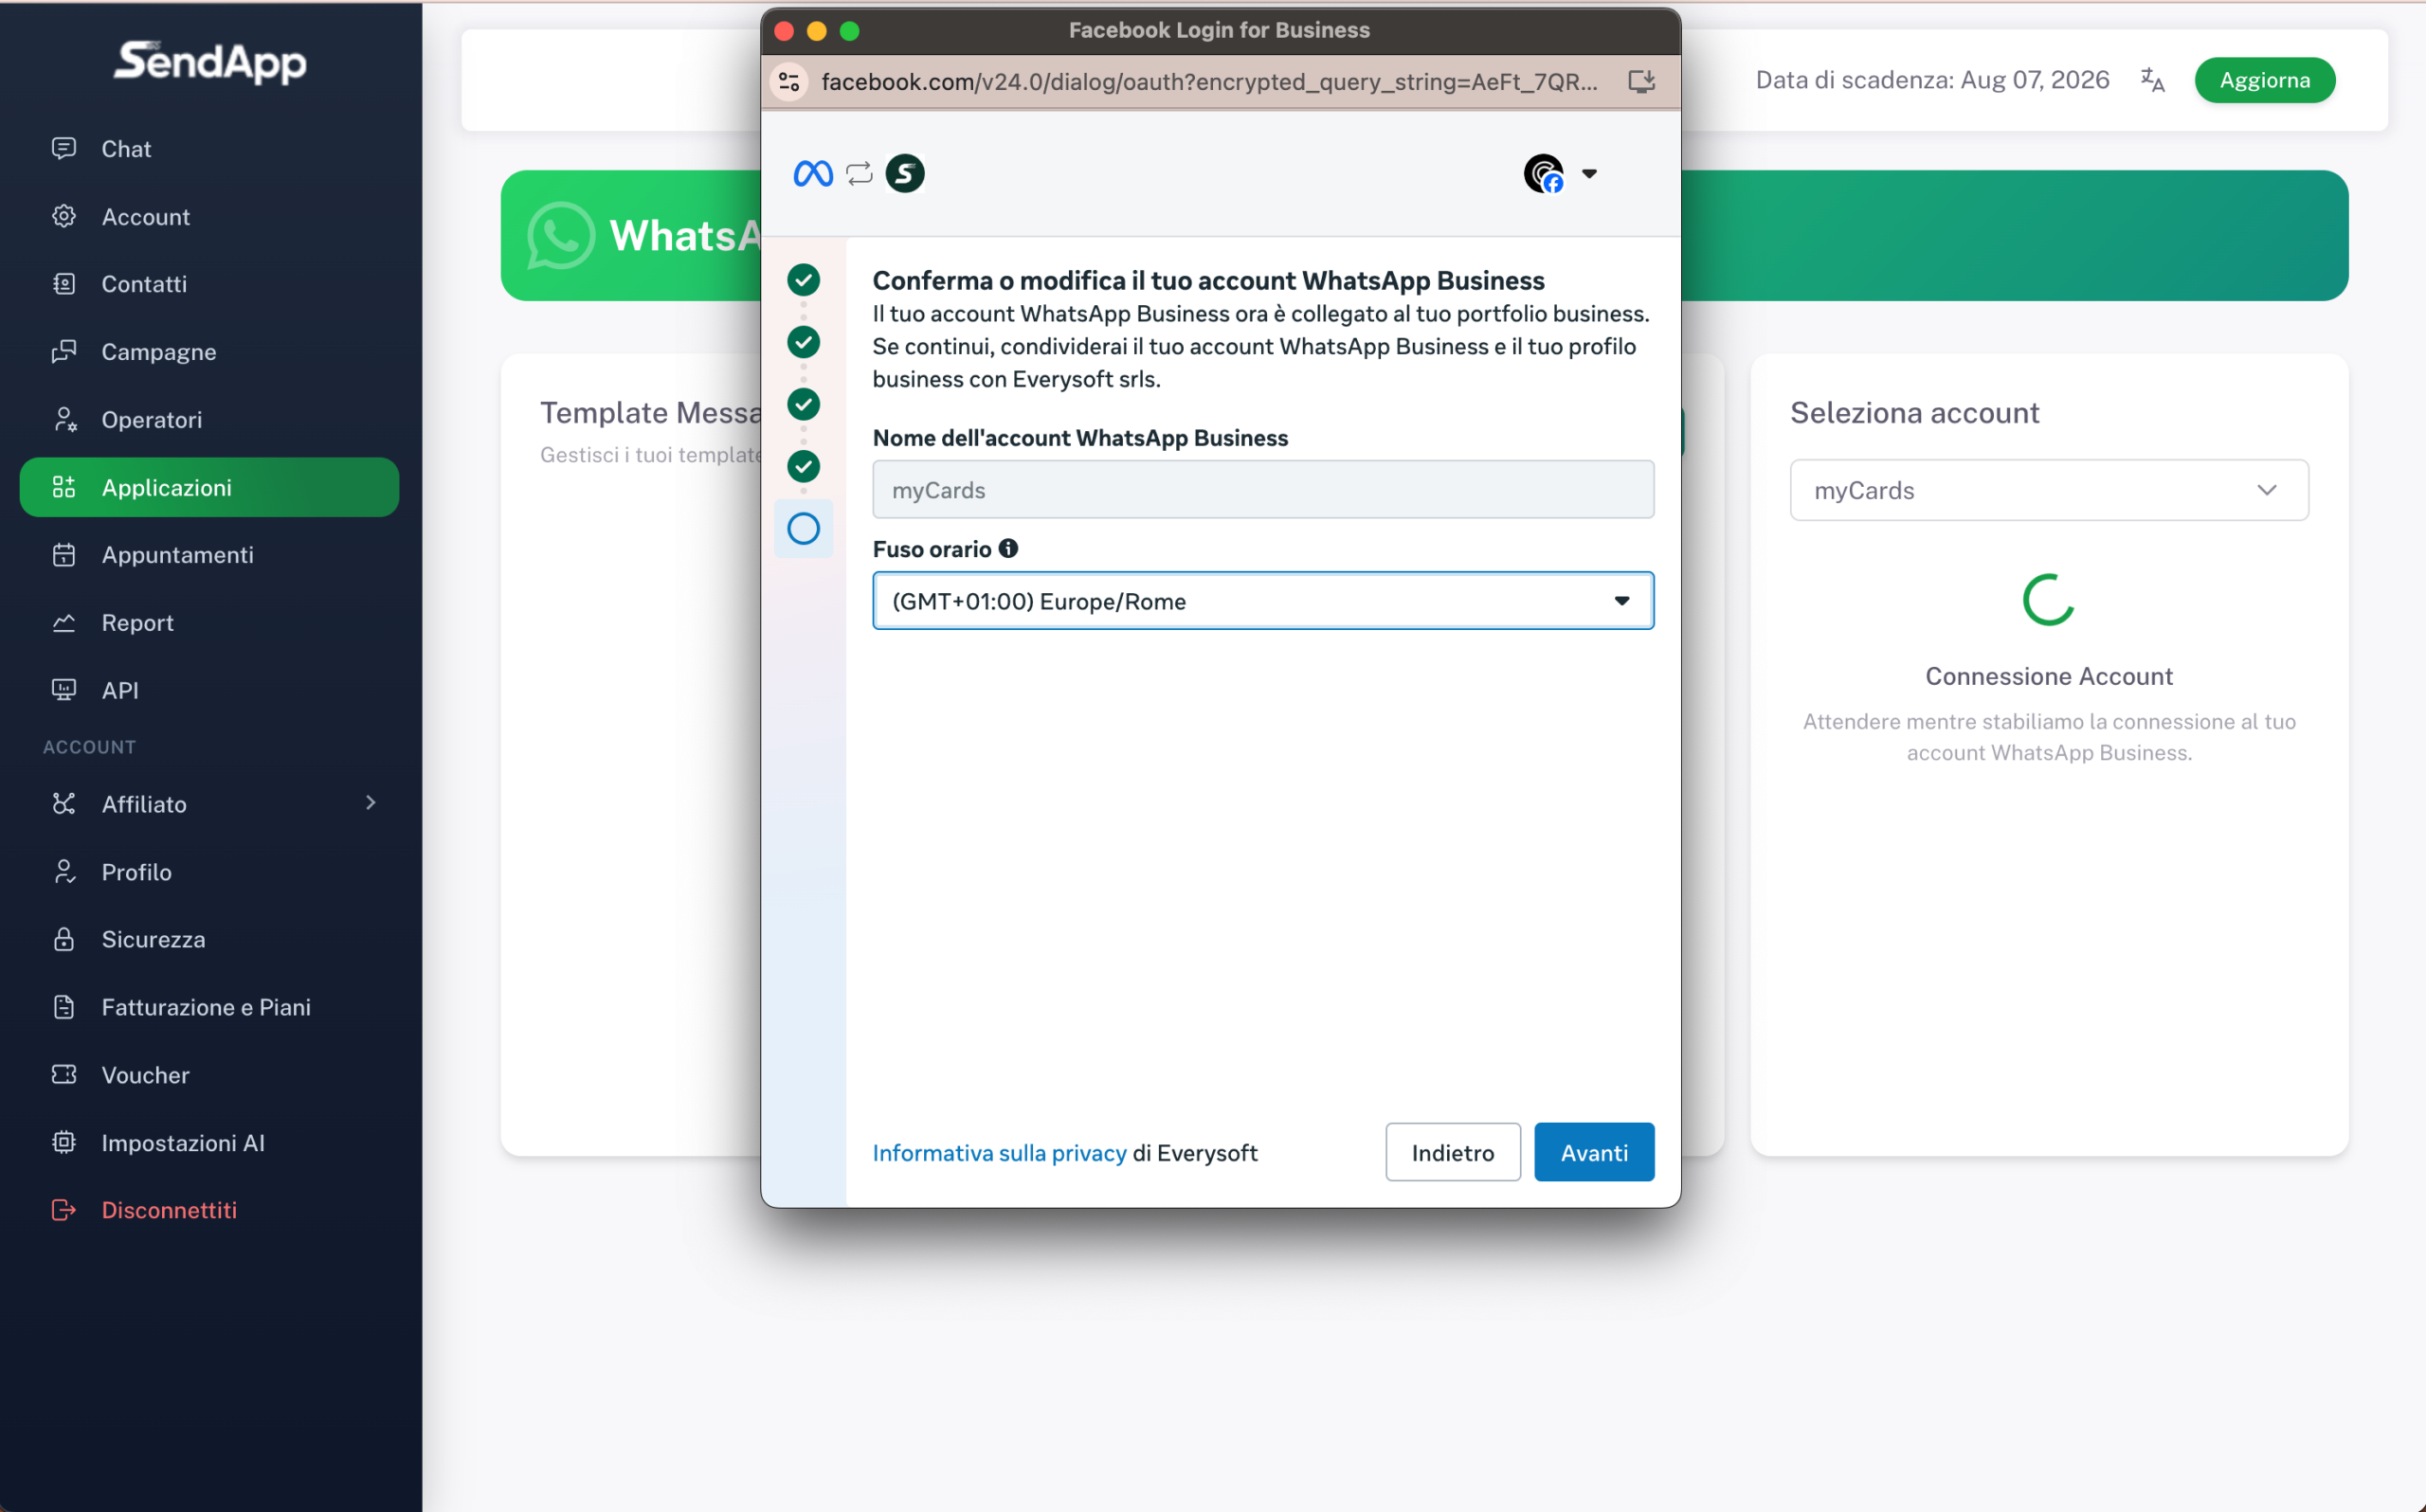
Meta confirms that the account is linked to the business portfolio. Verify the First name and the Jet lag (GMT+01:00 Europe/Rome). Press After you.
Meta shows what Everysoft (SendApp) will be able to do: manage WhatsApp accounts, access conversations is record events. Awards He confirms.
Meta is completing the connection. This may take a few seconds. don't close the window.
Meta confirmation: “Your account is linked to Everysoft srls”. You have suffered 250 conversations started by the company in 24 hours and unlimited customer-initiated conversations. Click Add payment method.
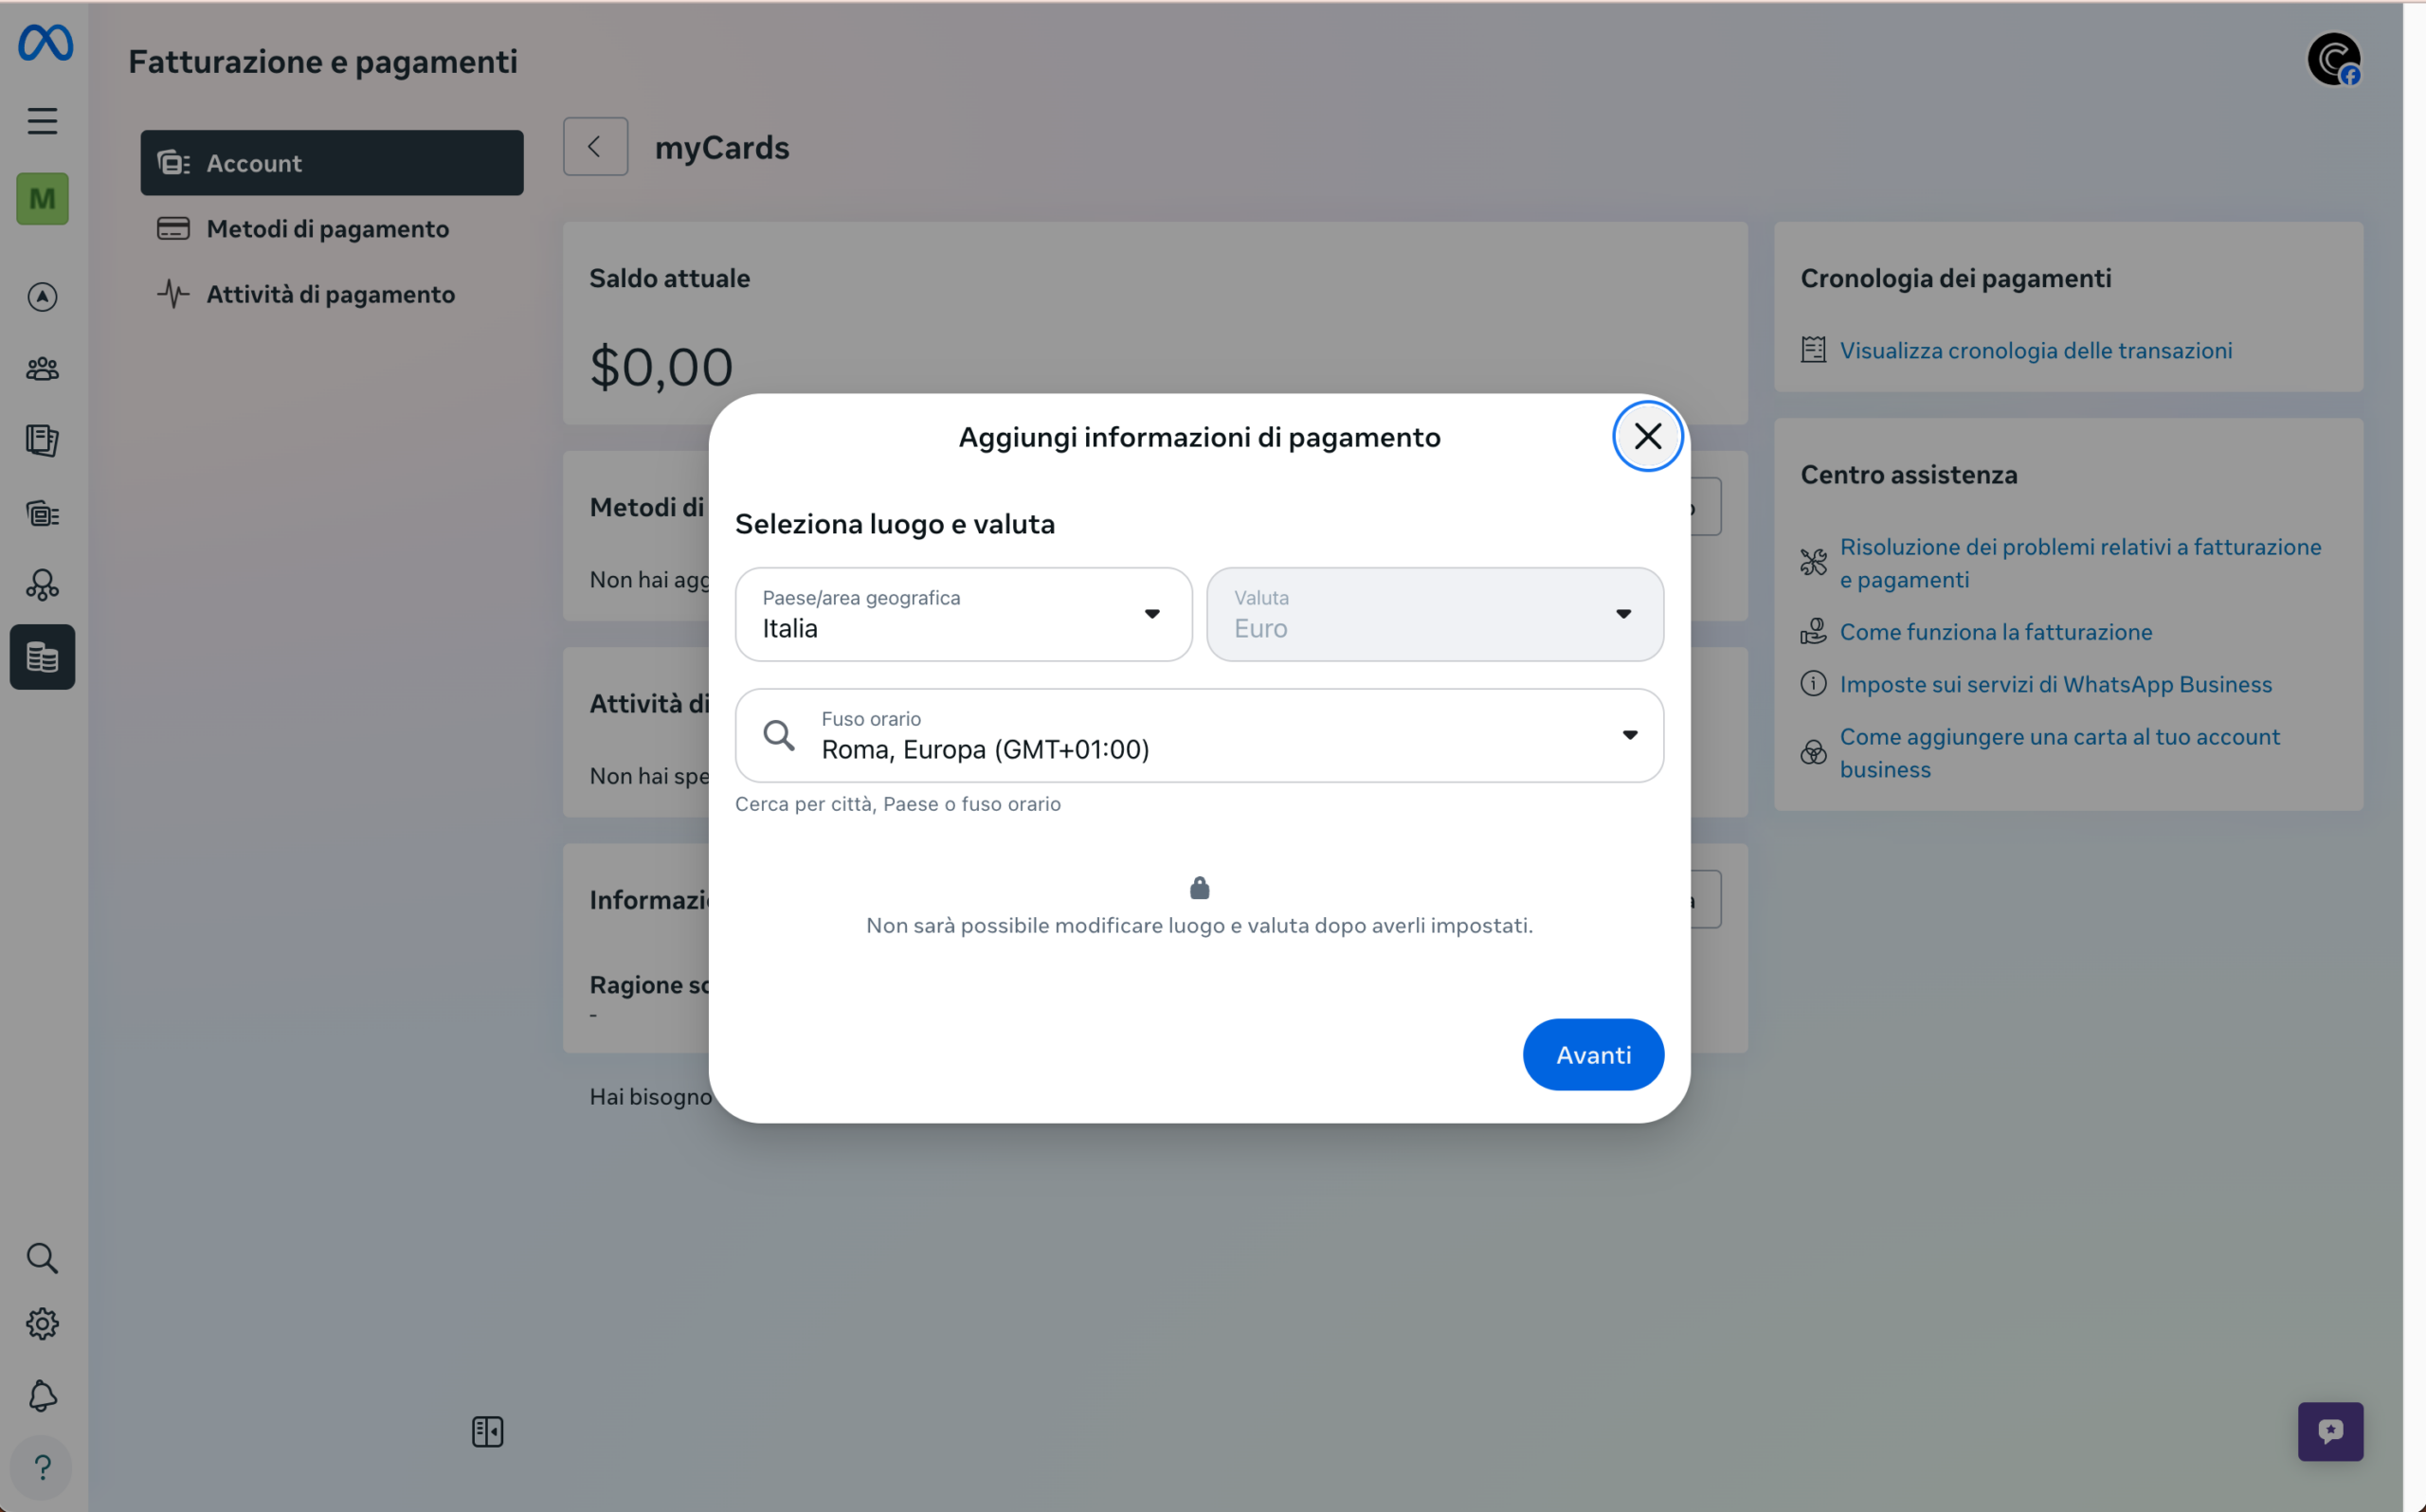
In the form “Add payment information” select Italy, EUR and time zone Rome (GMT+01:00). Warning: it will not be possible to modify them afterwards. Press After you.
Meta confirms the seat (Italy, Euro EUR) and asks to add a debit or credit card (Visa/Mastercard). Your data will be securely stored. Press After you to complete.
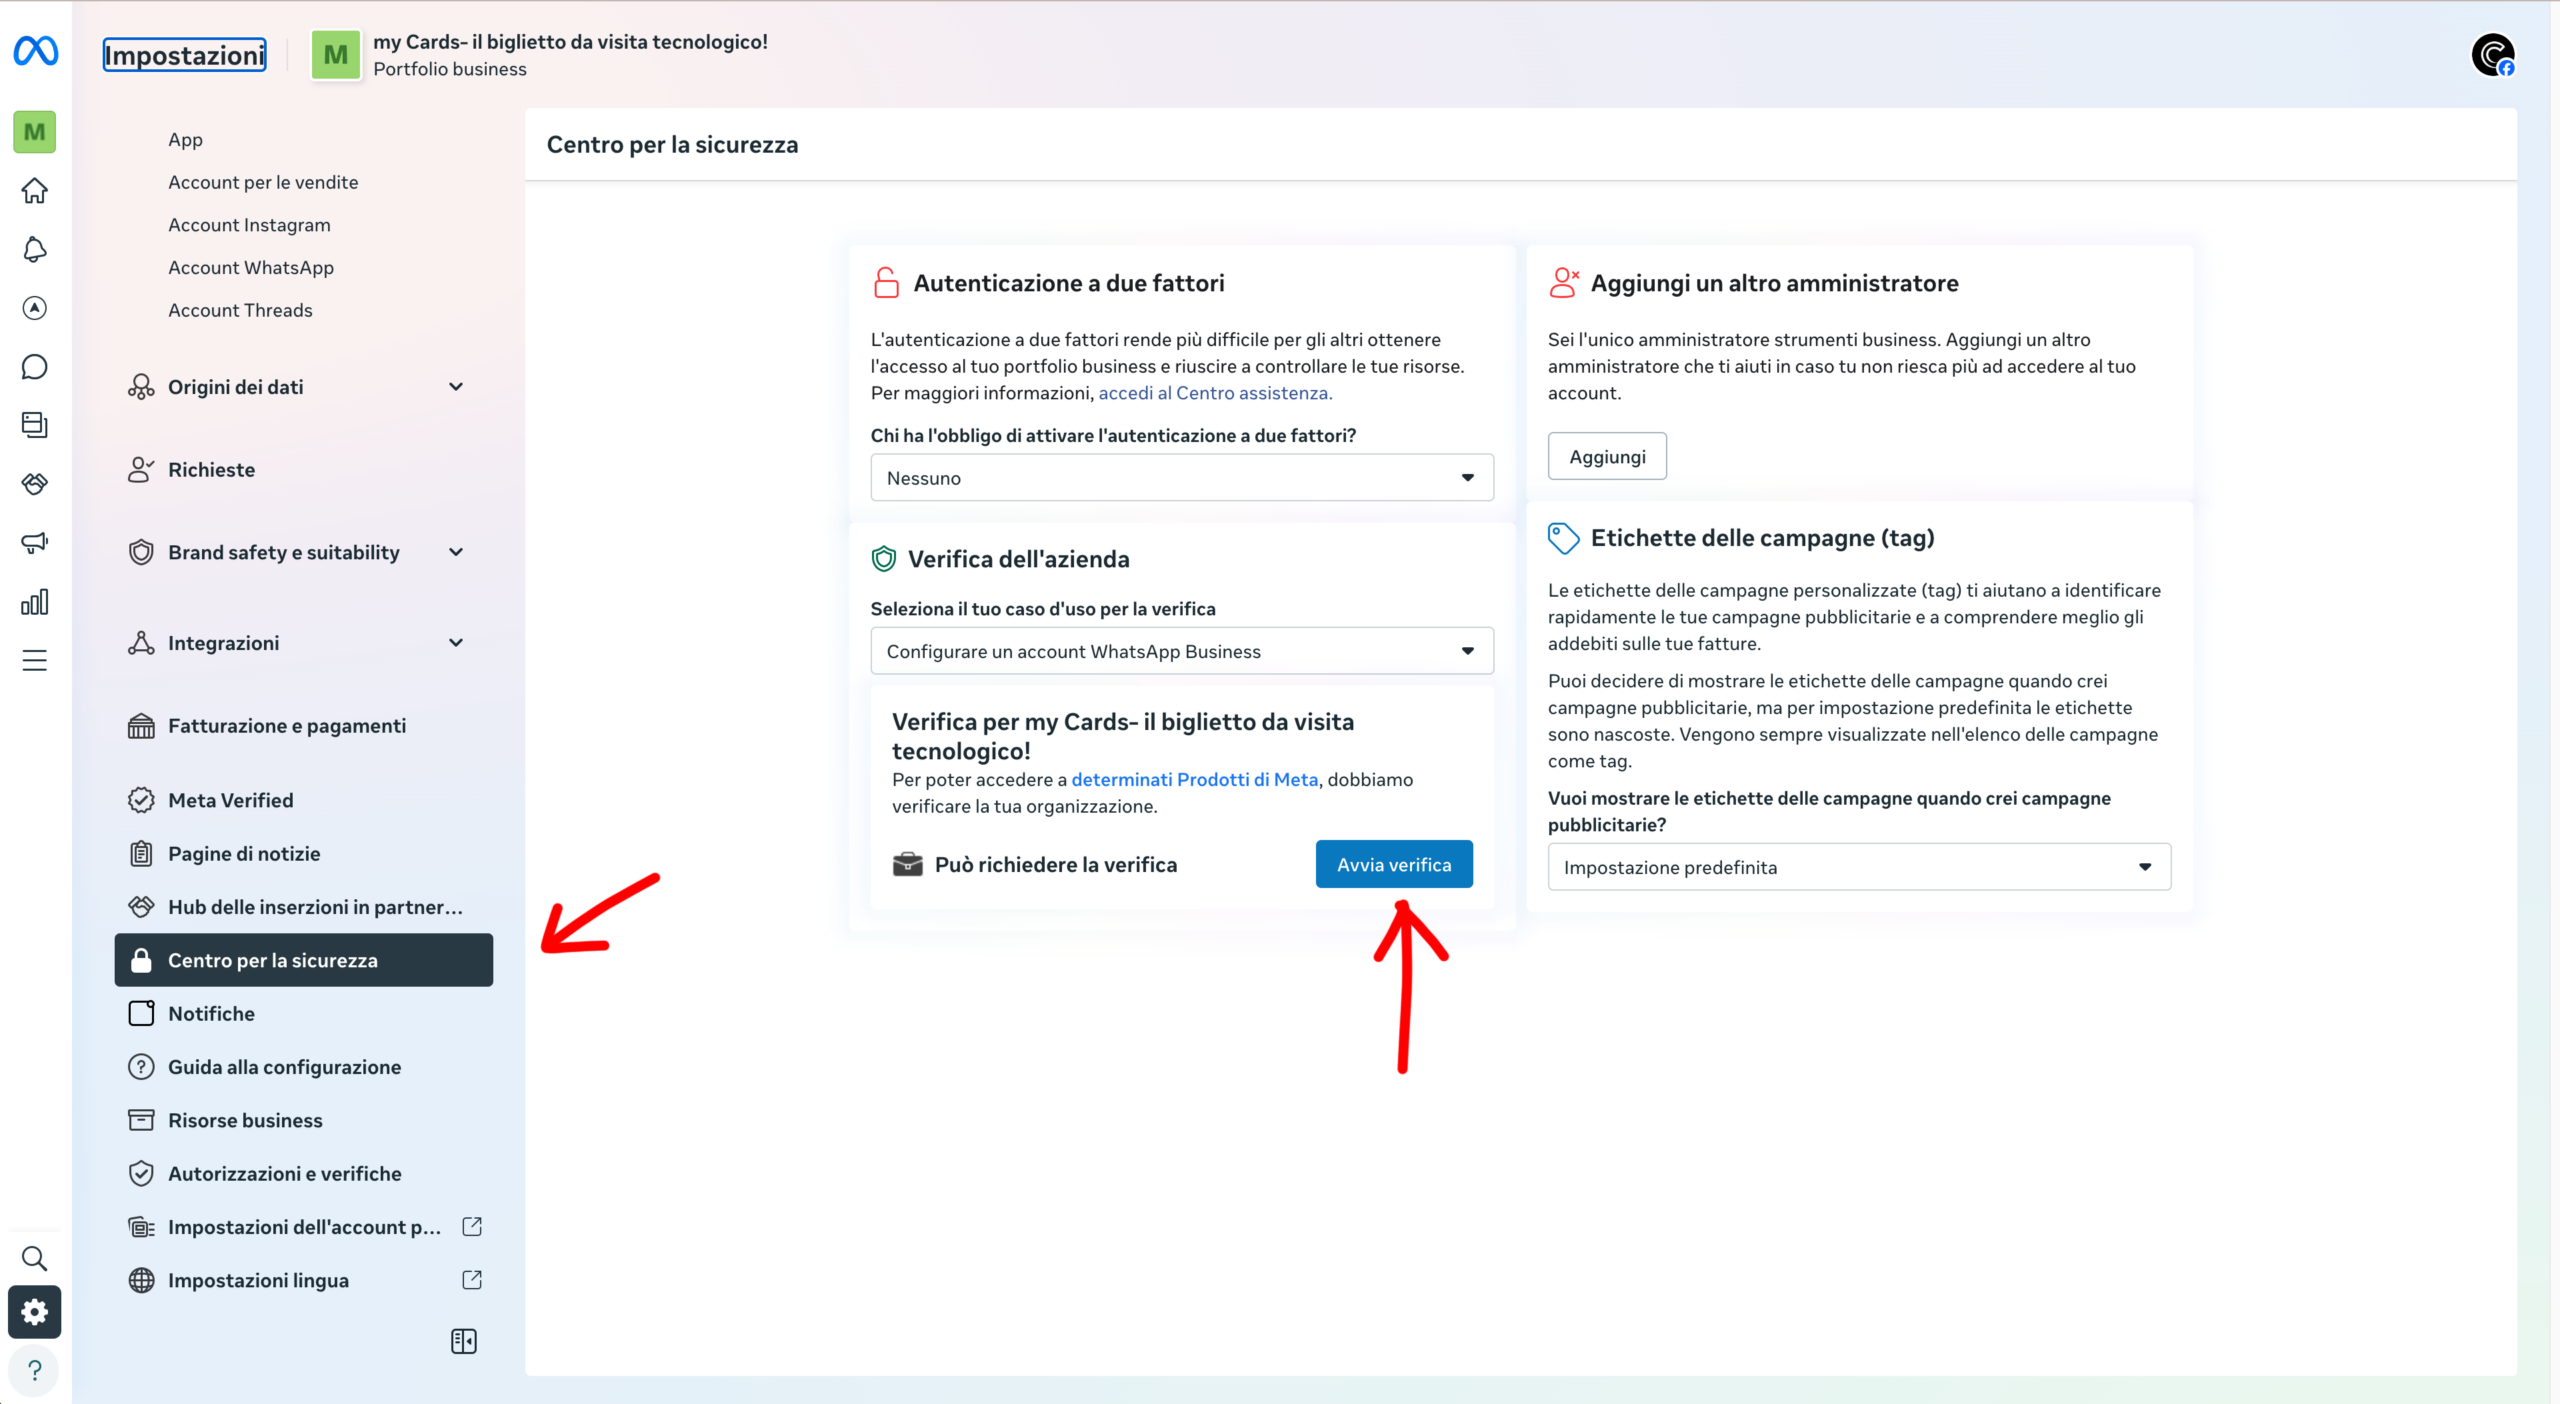
MANDATORY STEP
After connecting your number, Meta requires your company verification to enable sending messages. The process takes approximately 48 working hours.
⚠ Important: Without business verification, you won't be able to send messages via the WhatsApp API. Complete all steps and wait for Meta's approval (approximately 48 business hours).
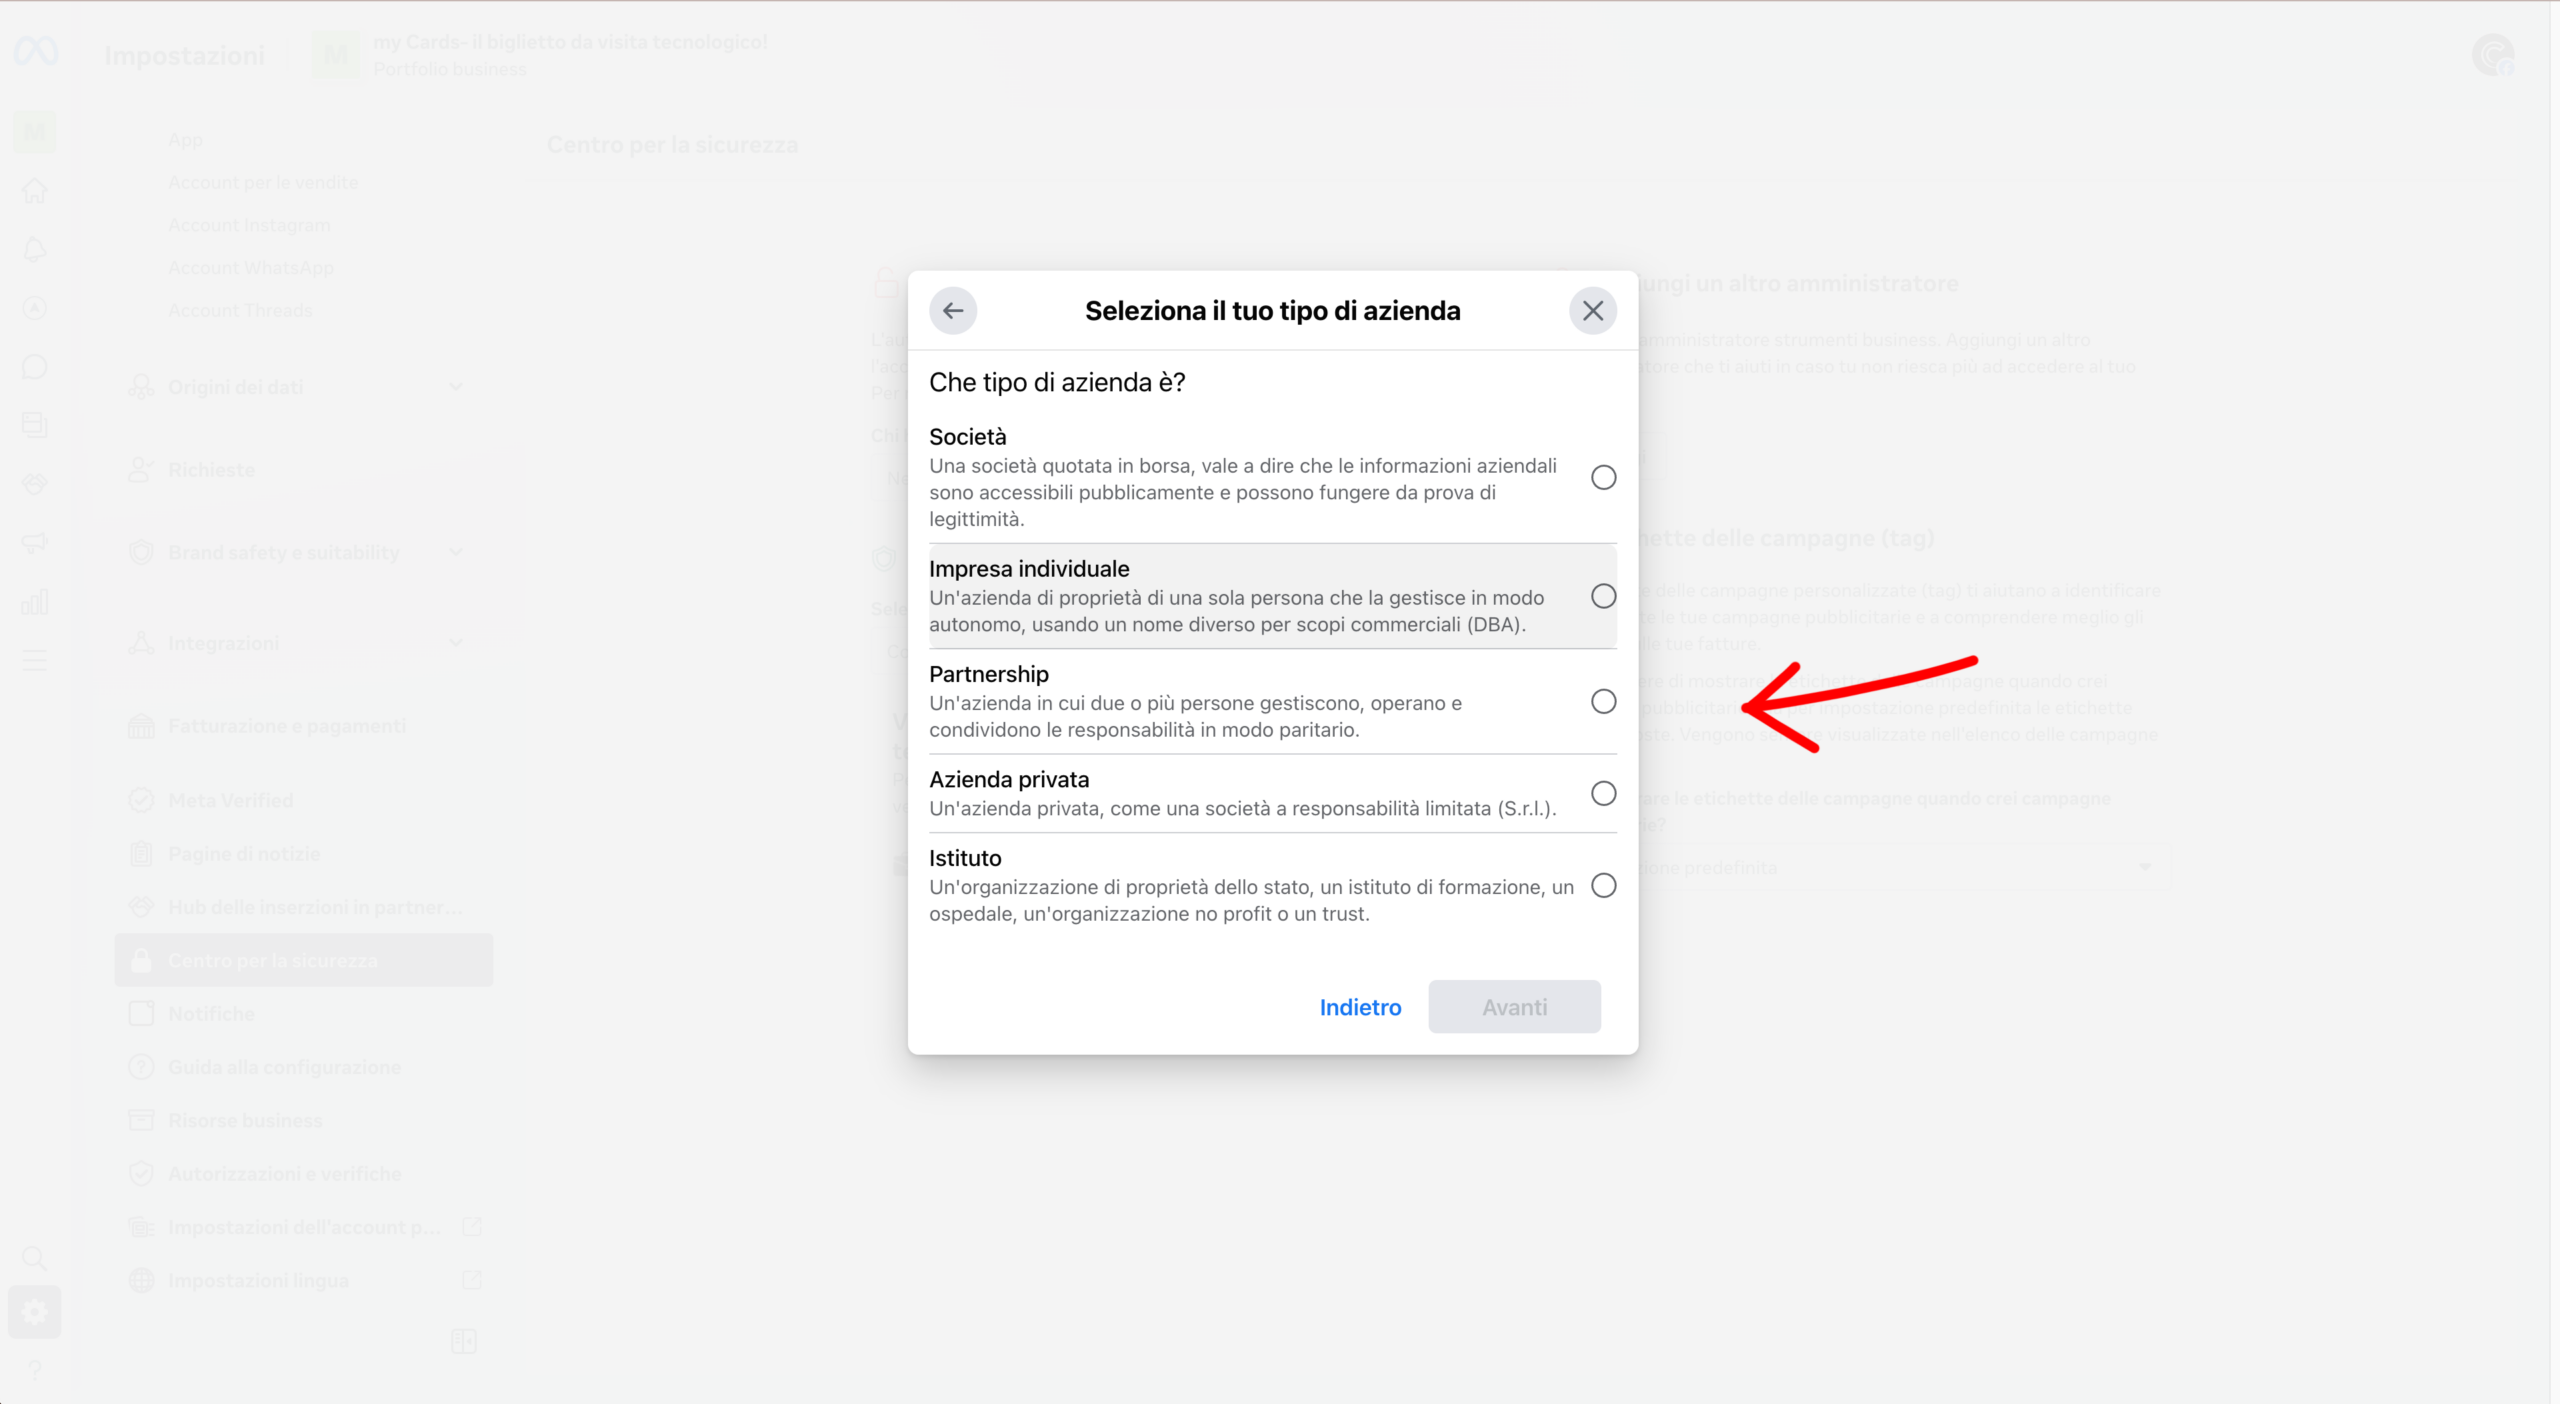
From the Meta Business Suite, go to Settings > Account Center Security or go directly to the section Company Verification.
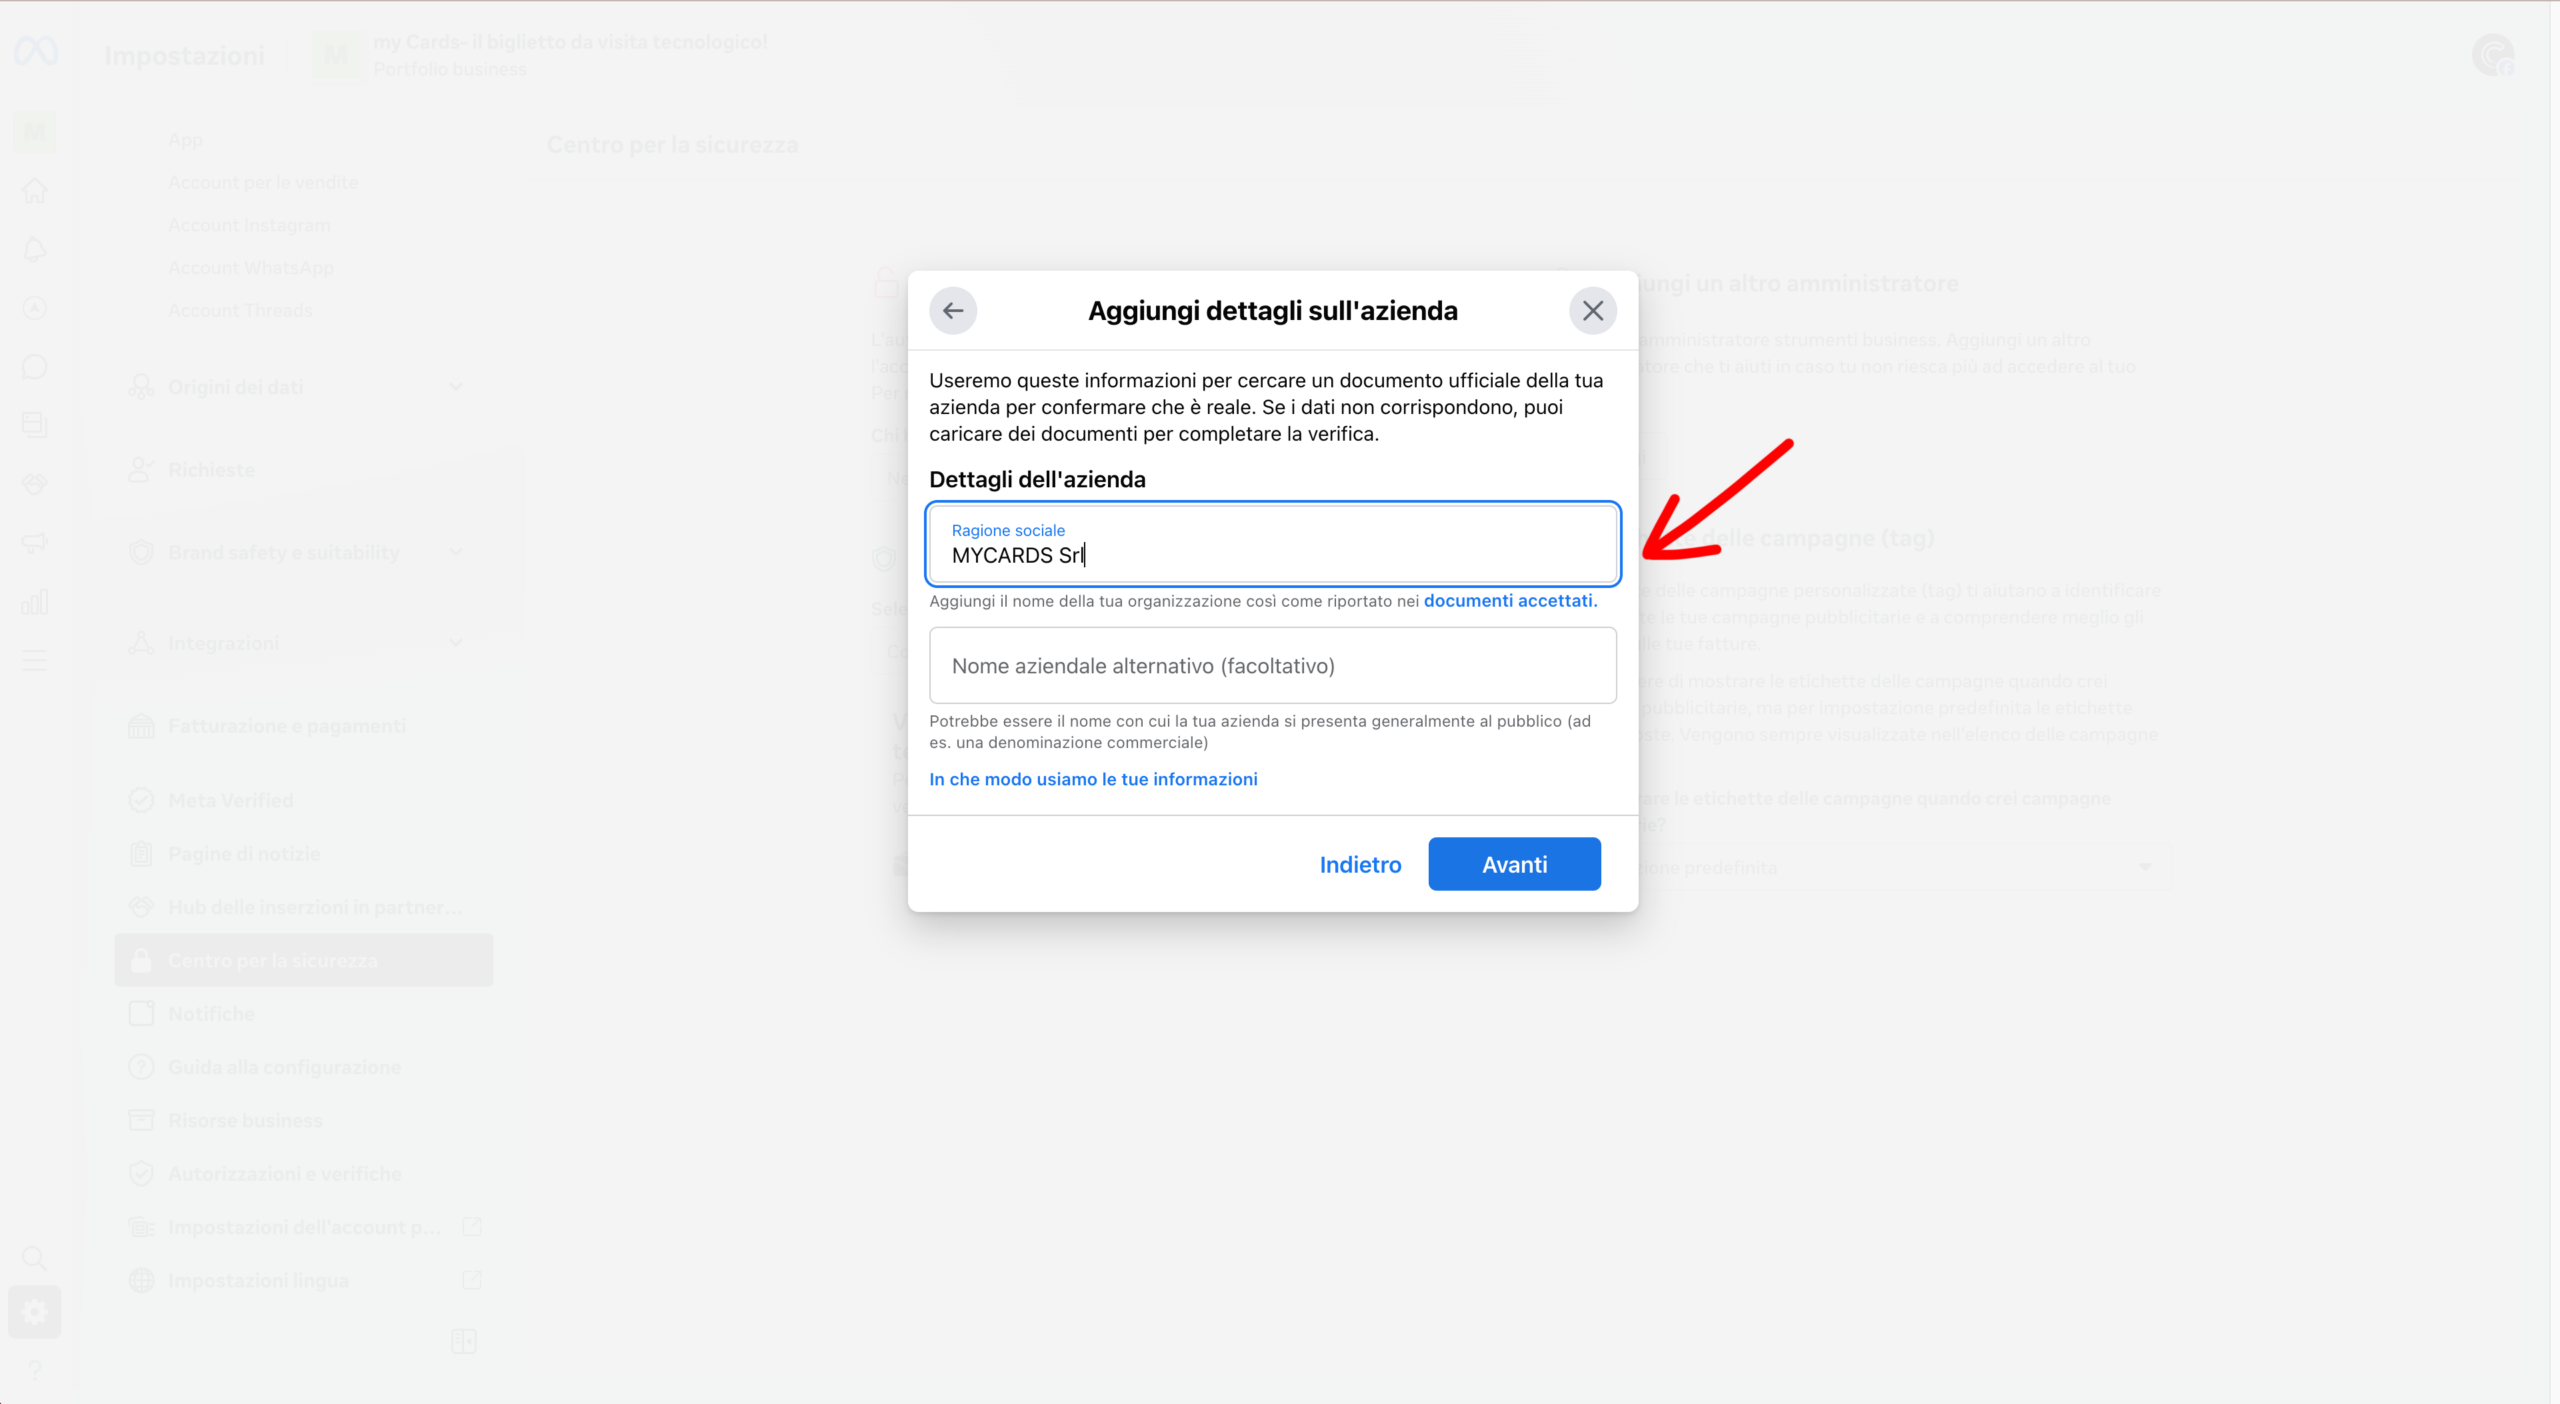
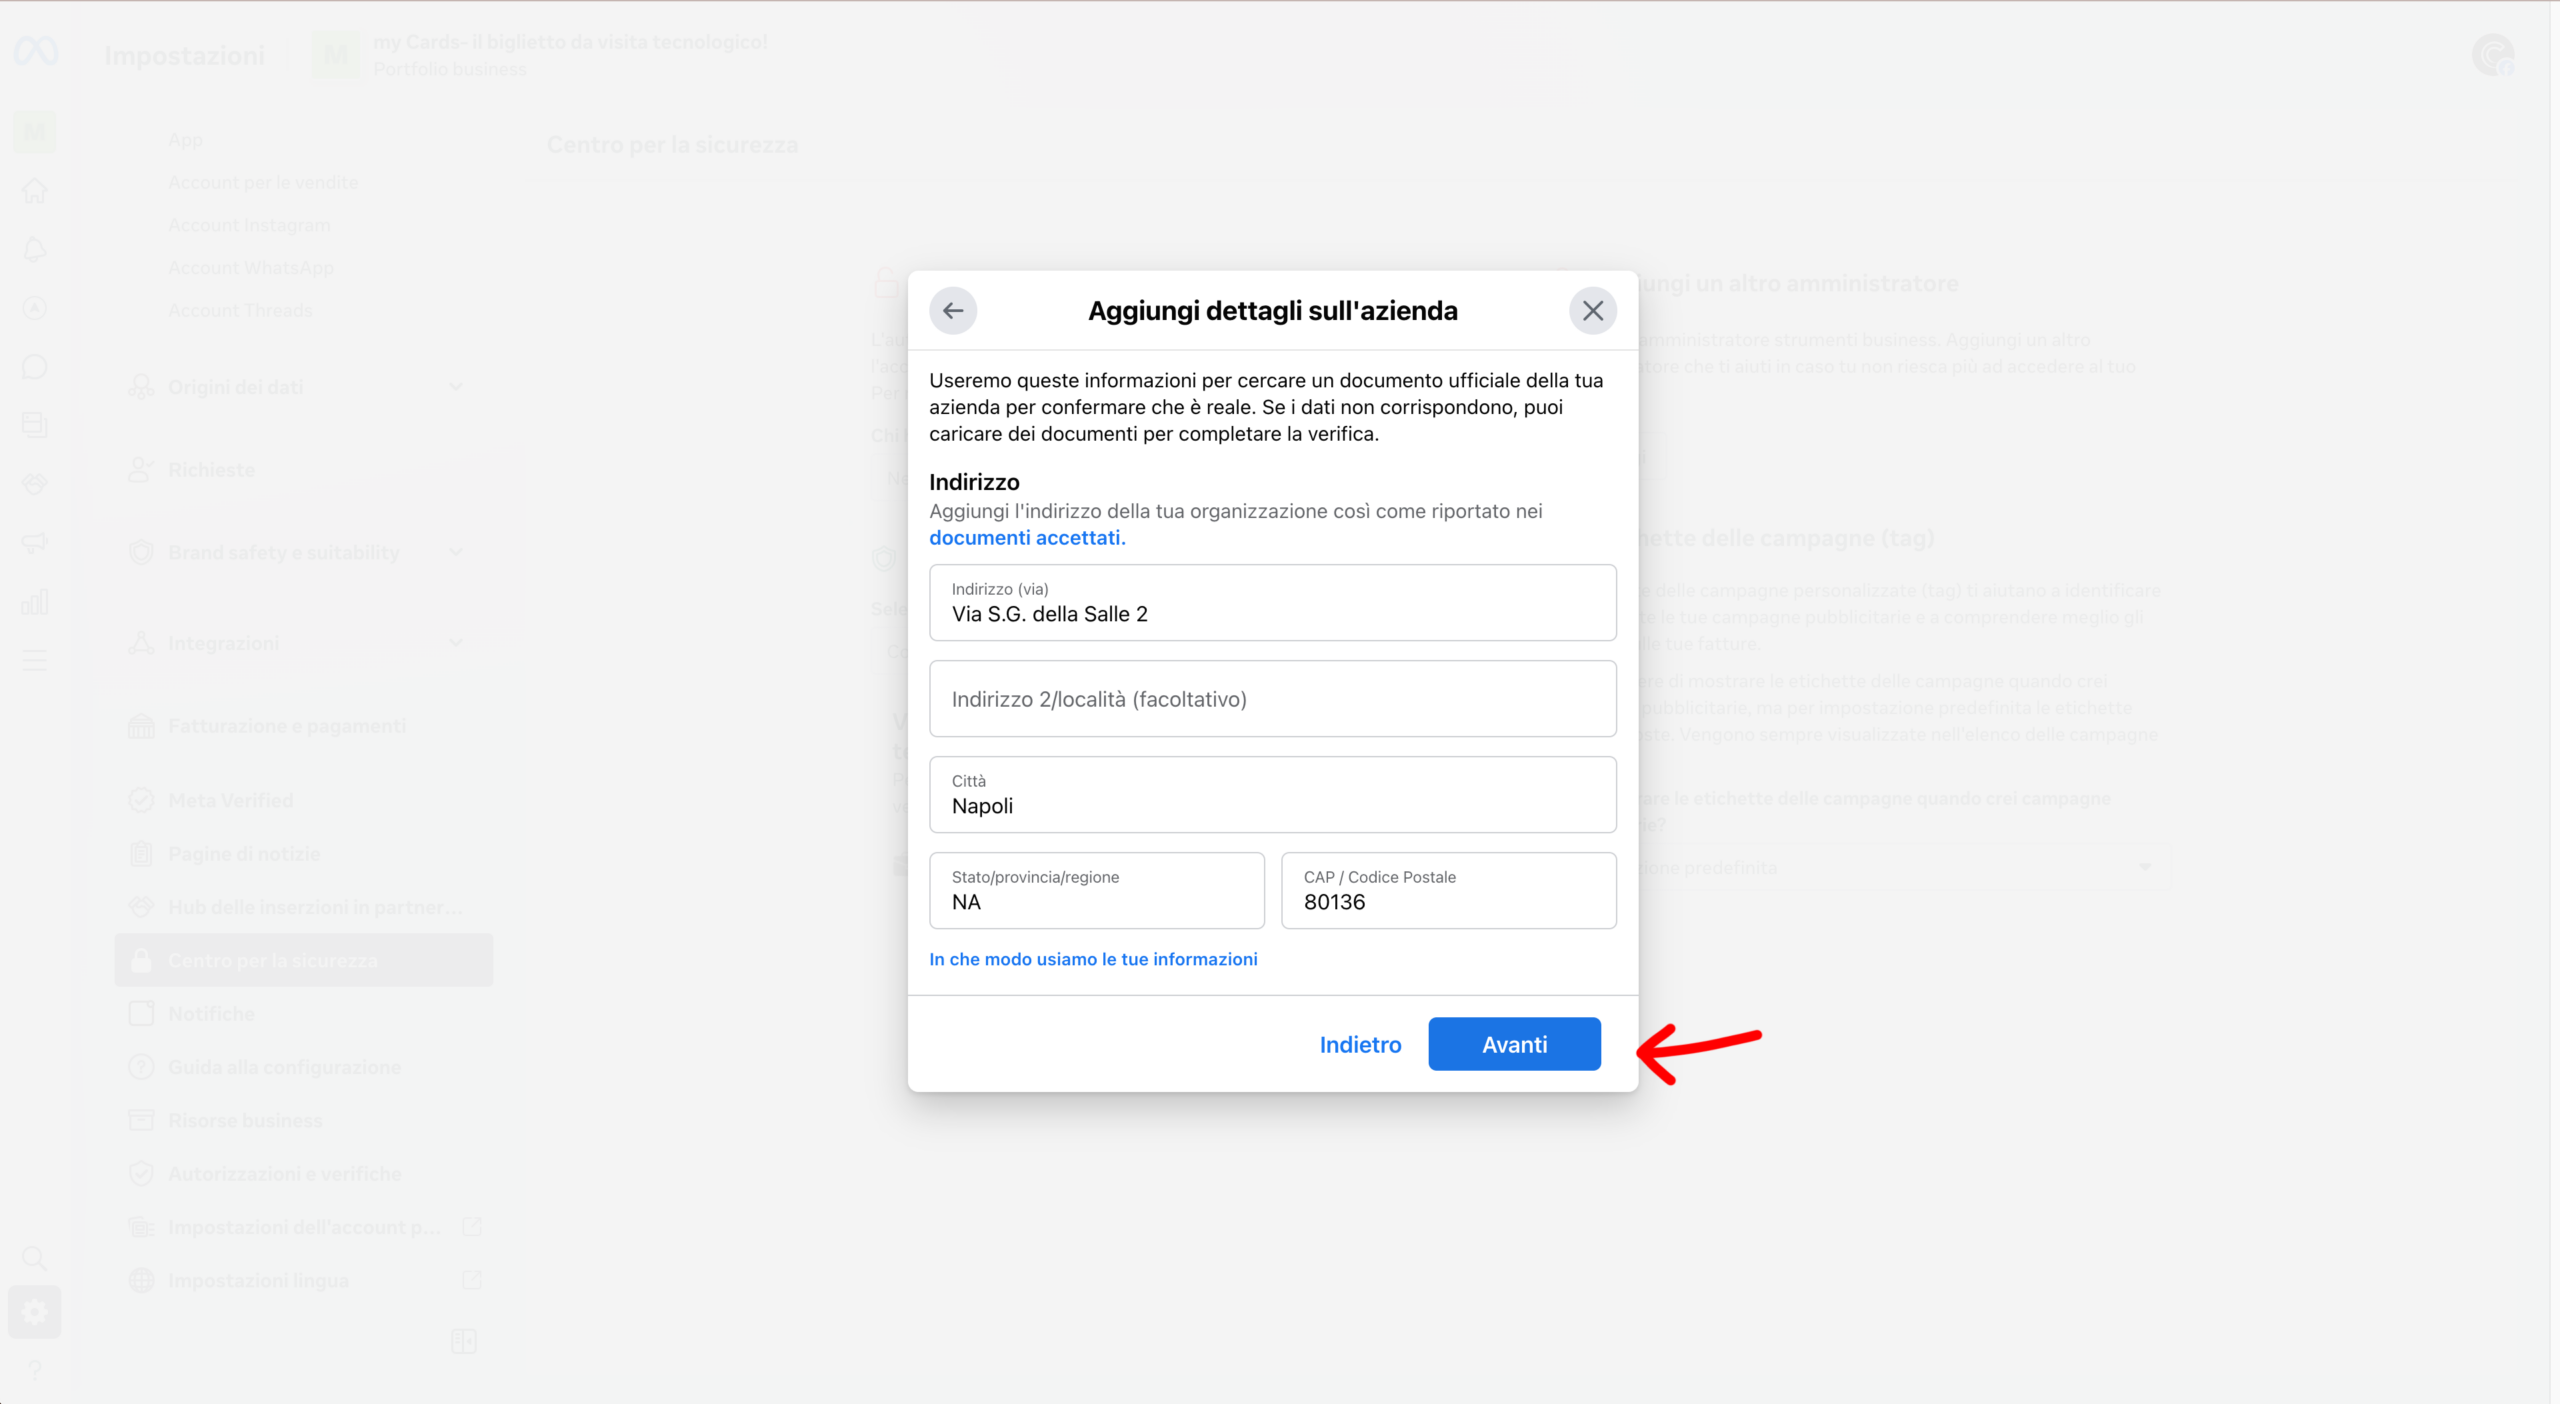
Fill in the required fields: Company name, Address, City, POSTAL CODE, province is country. Make sure the information matches that in your official documents (company registration or VAT number certificate).
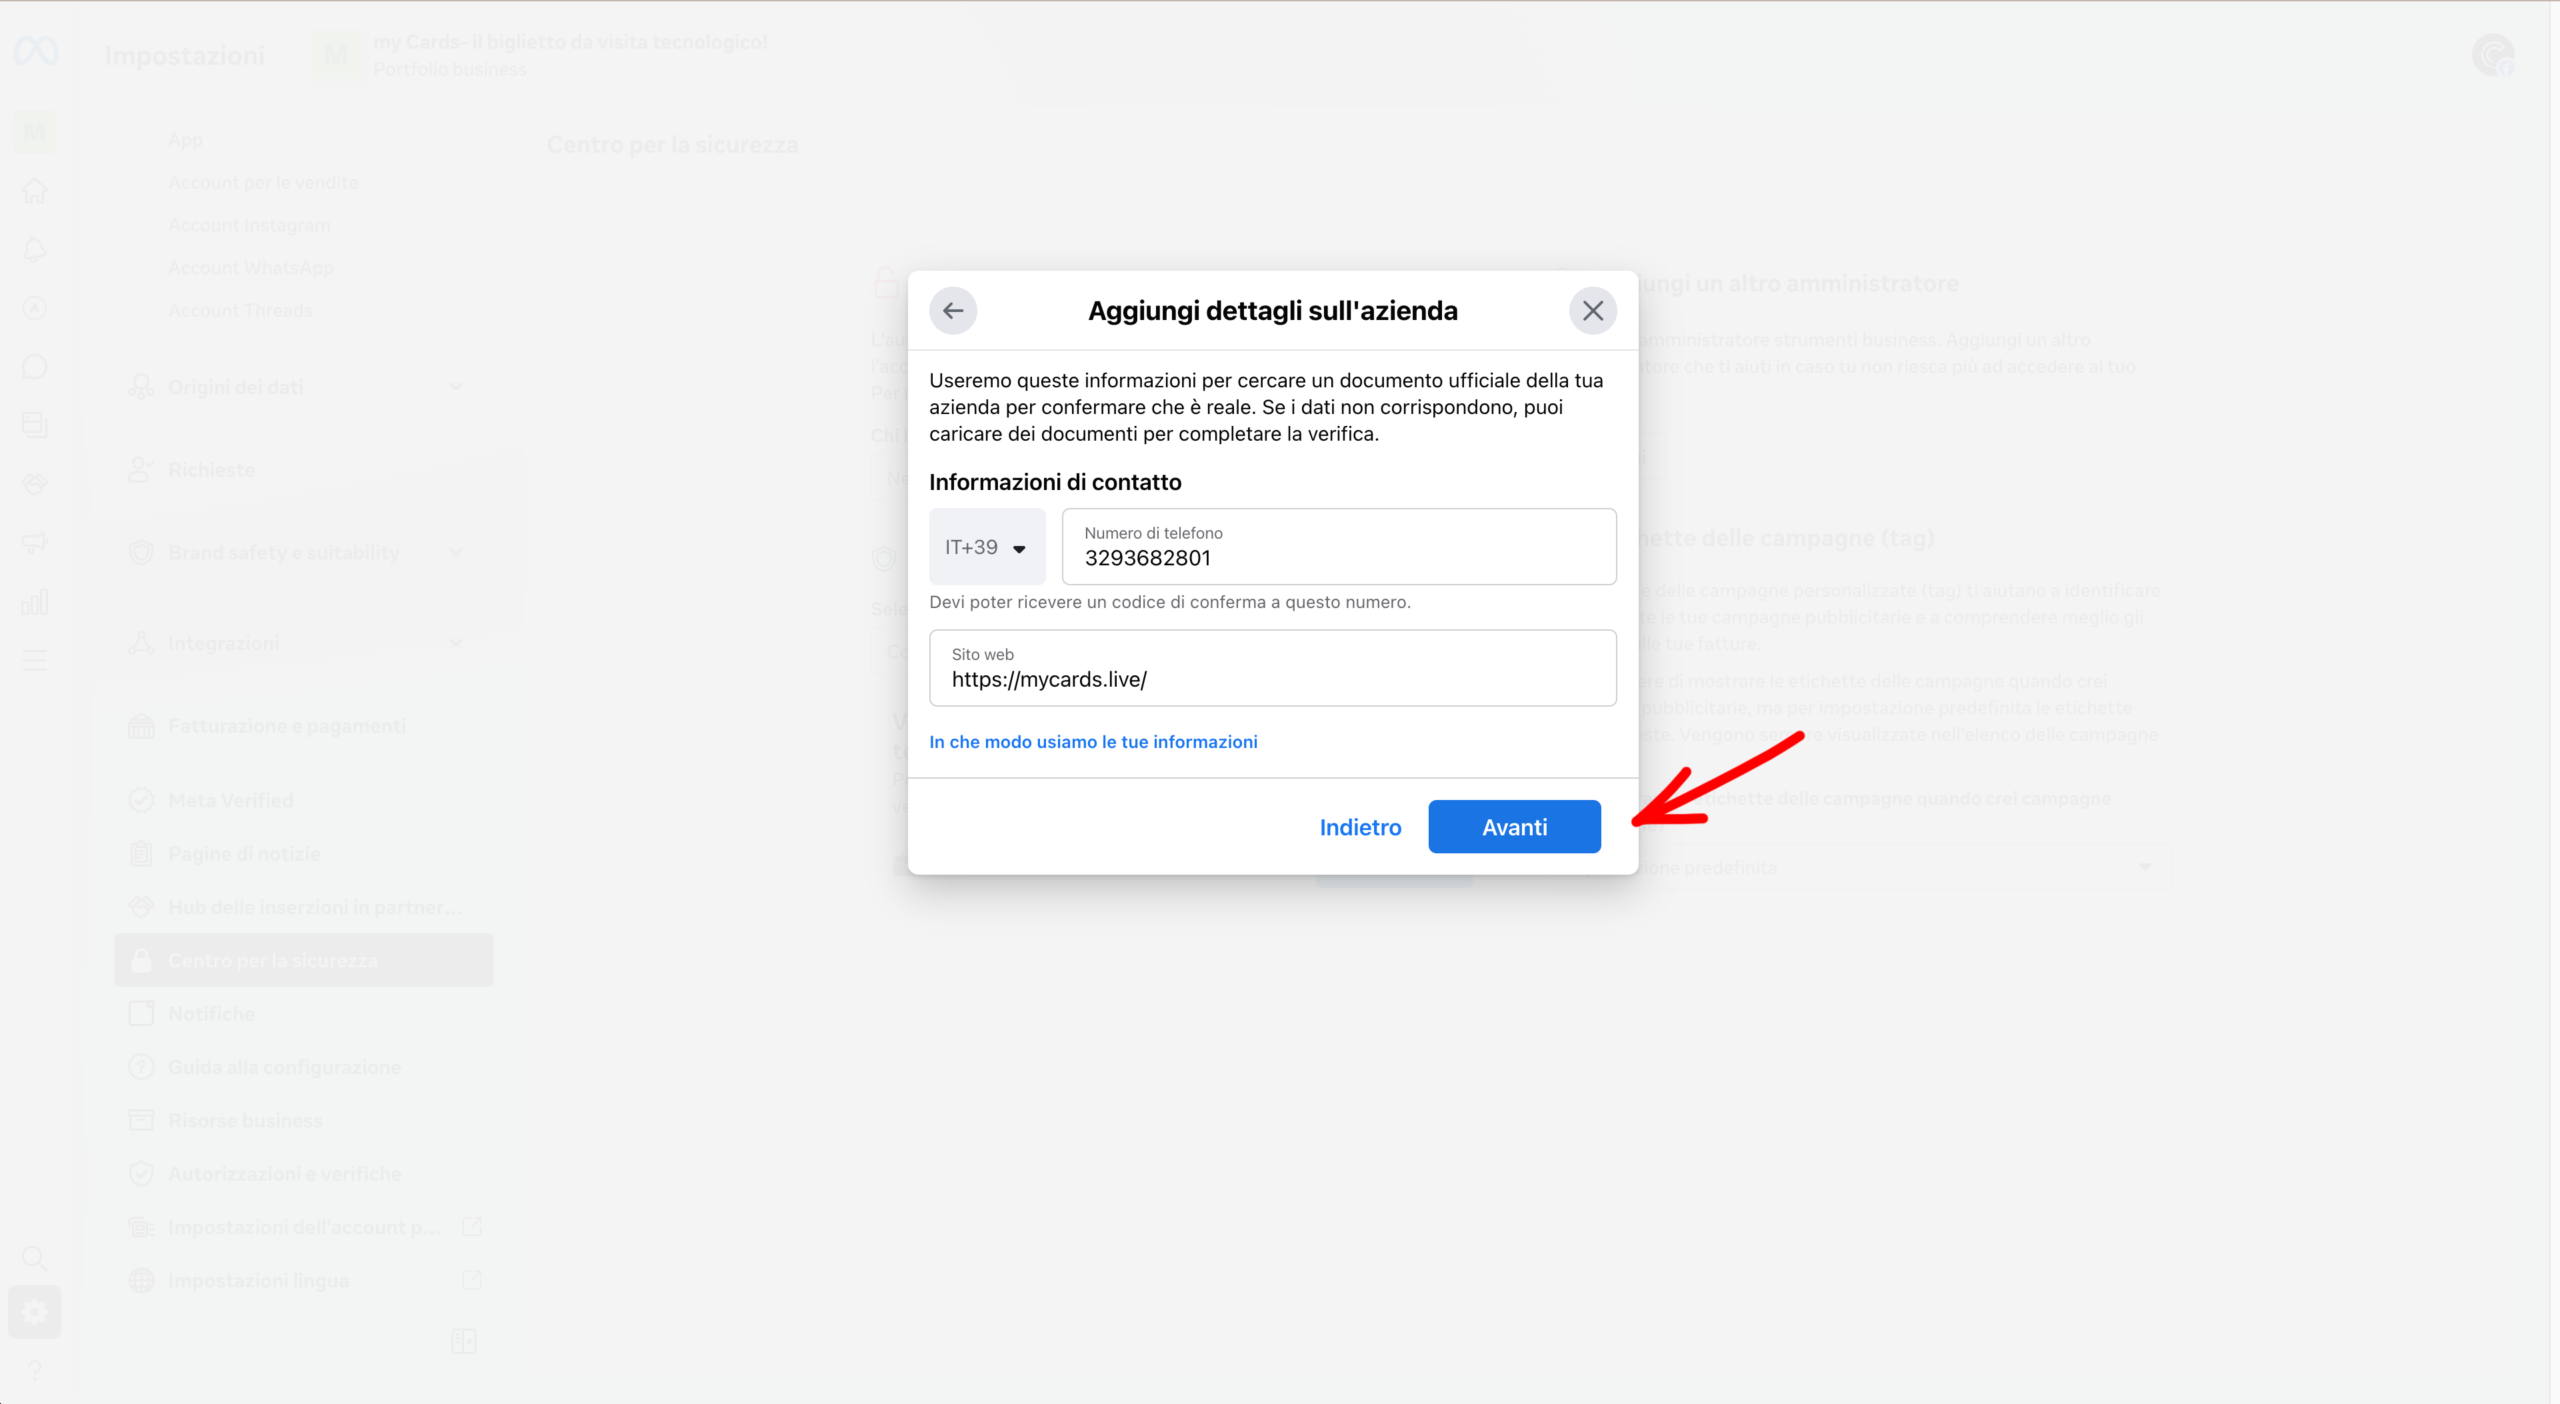
Enter the VAT number it's a telephone number verifiable information associated with the company. Meta will use this information to cross-check with public records.
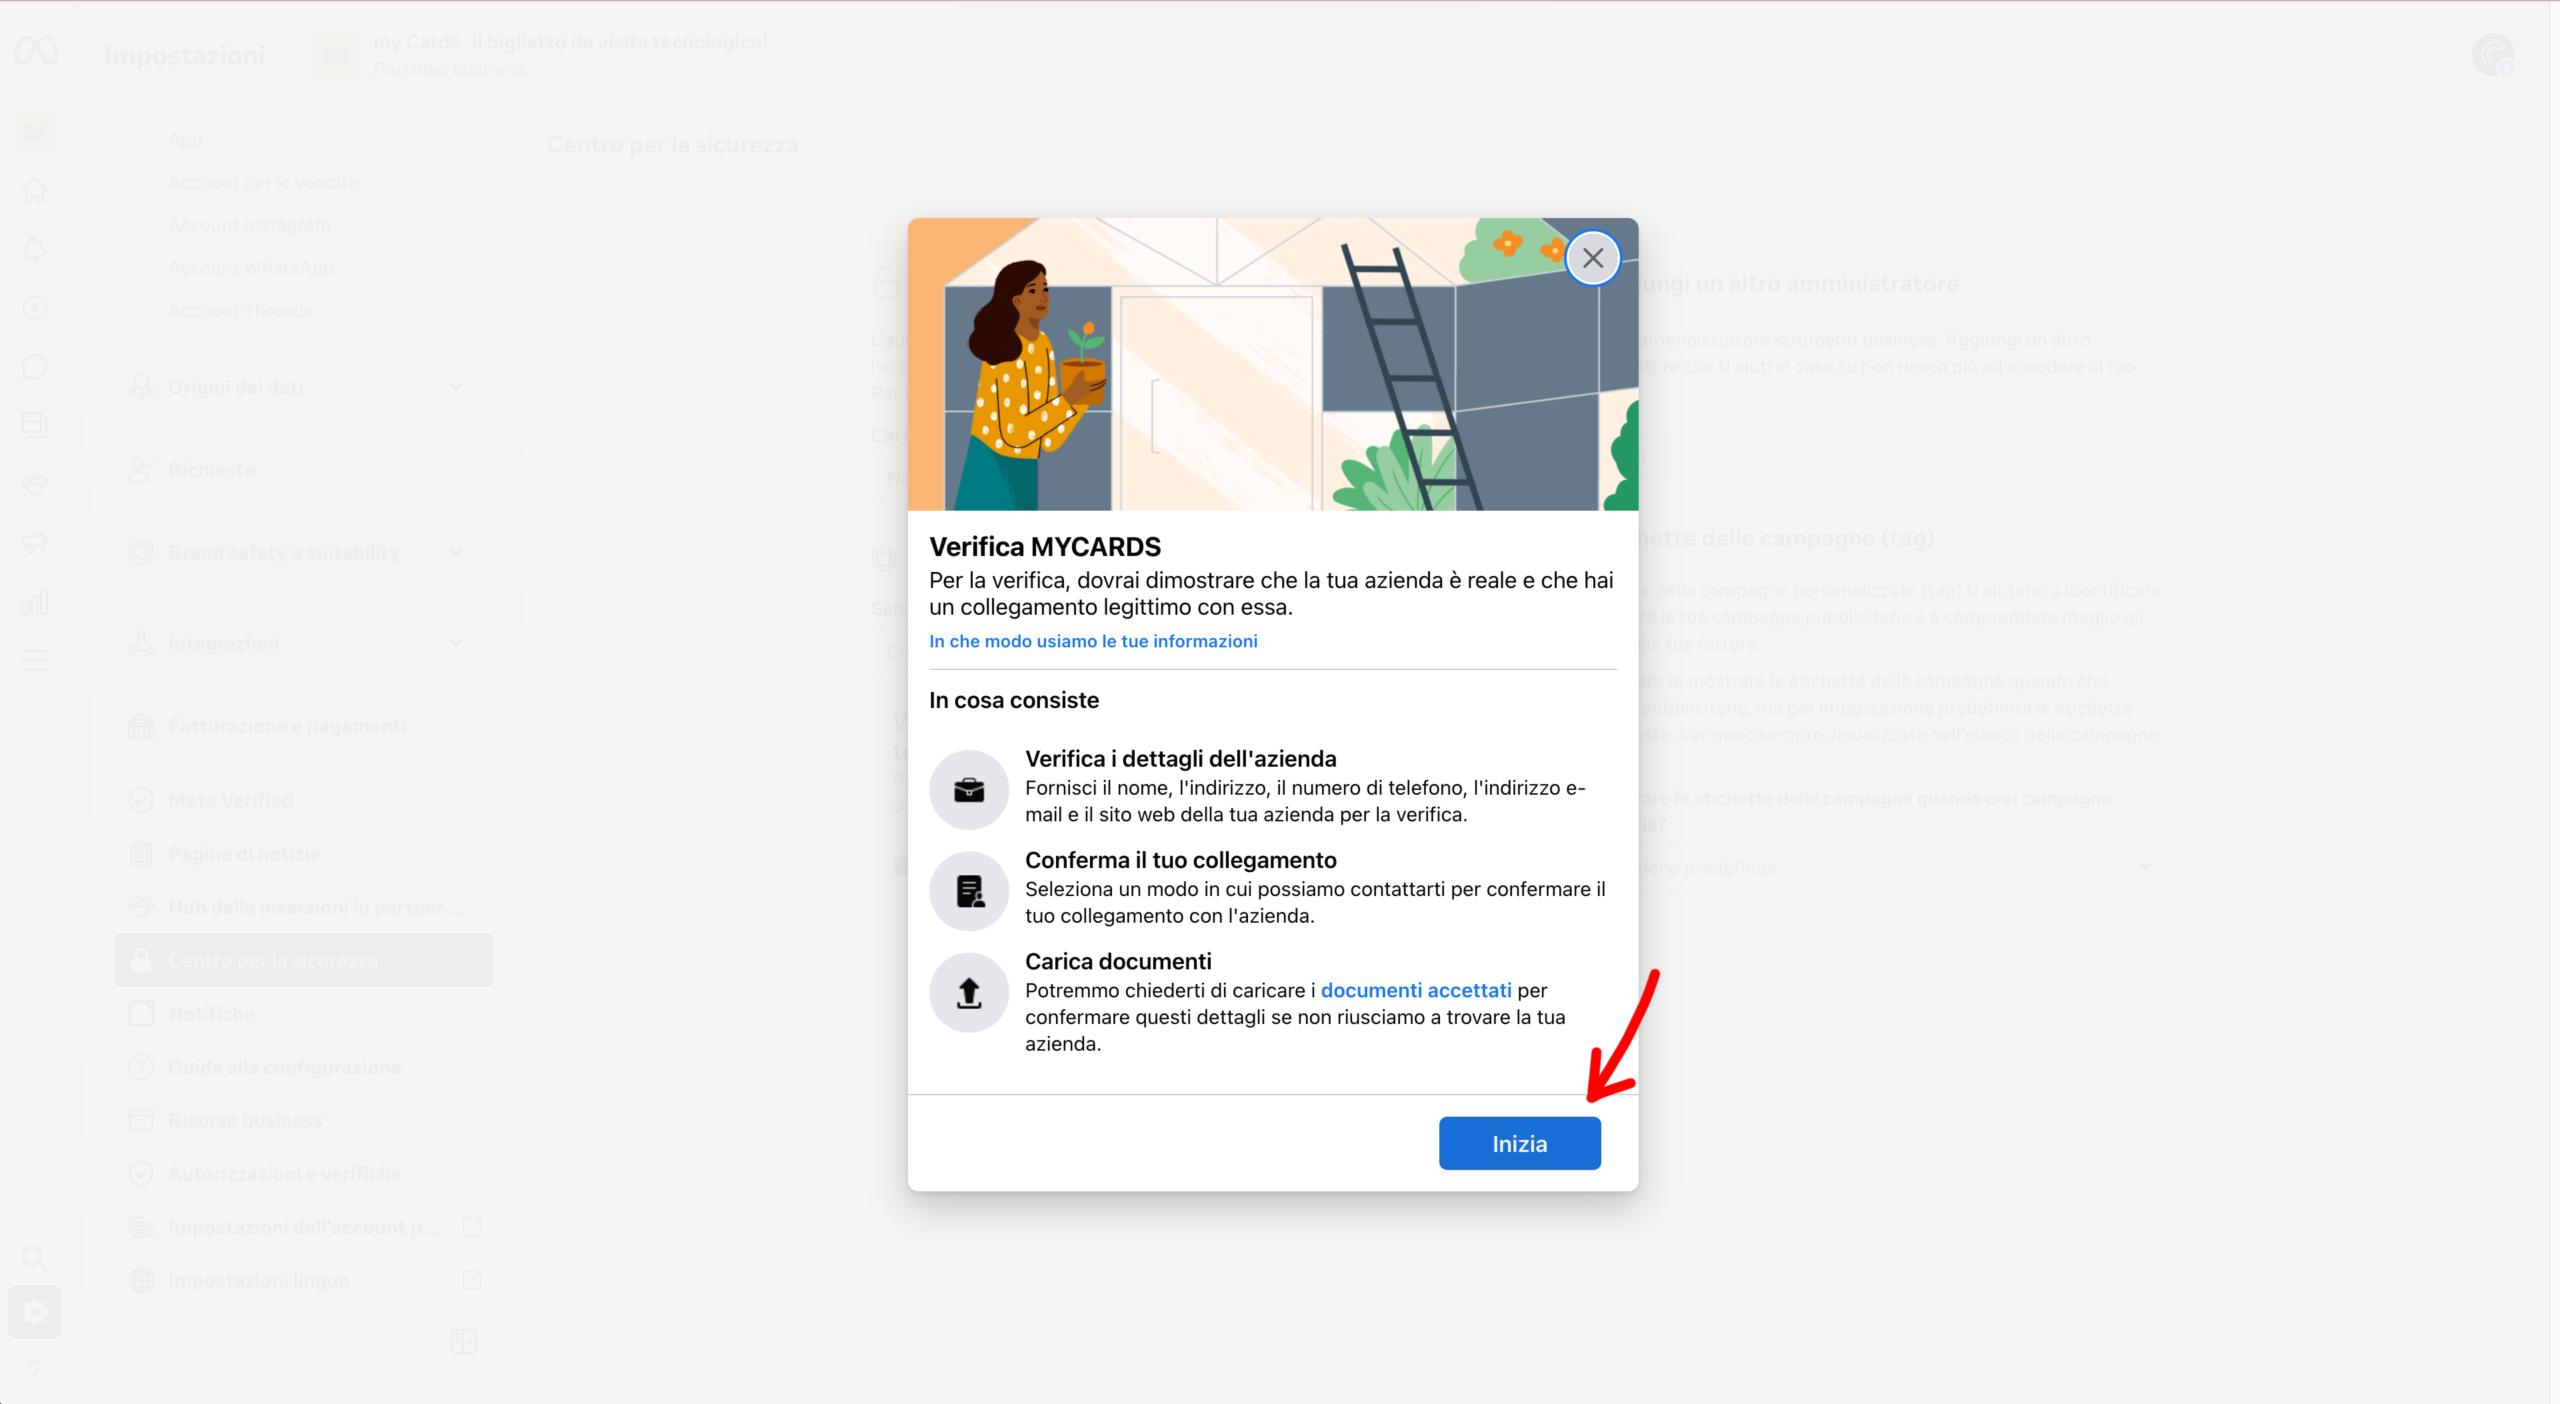
Meta requires a official documentChamber of Commerce certificate, VAT certificate, utility bill in the company's name, or company bank statement. The document must be recent and legible.
Enter the website of your company. Meta will verify that the domain is consistent with the company data provided.
Meta asks you to verify the contact via e-mail or phone. You will receive a verification code. The email address must match your company domain.
Check your company email or the phone and enter the confirmation code received from Meta. Awards He confirms.
Meta shows you a summary of all the data entered. Check that everything is correct and press Submit.
The process is complete! Meta show “Verification in progress”. Approval takes approximately 48 working hours. You'll receive an email notification. Once approved, you'll be able to send messages via the WhatsApp API without restrictions.

✓ Connected WhatsApp number
✓ Connected Business Manager
✓ WABA connected
✓ Meta permissions accepted
✓ Payment method configured
✓ Coexistence mode available
⏲ Company verification completed (48 working hours)
Your WhatsApp Meta API Cloud integration is active and ready to run inside SendApp Agent.