CONFIGURATION
Connect WhatsApp Business API Meta to SendApp
Step-by-step guide to connecting your official WhatsApp Business API account to SendApp Official and start sending campaigns securely.
CONFIGURATION
Step-by-step guide to connecting your official WhatsApp Business API account to SendApp Official and start sending campaigns securely.
BEFORE YOU START
To complete the connection you need a Meta Business Account (formerly Business Manager) and a dedicated phone number.
Active personal account
Active Business Manager
Not used on standard WhatsApp
Meta API Billing Card
10 STEPS
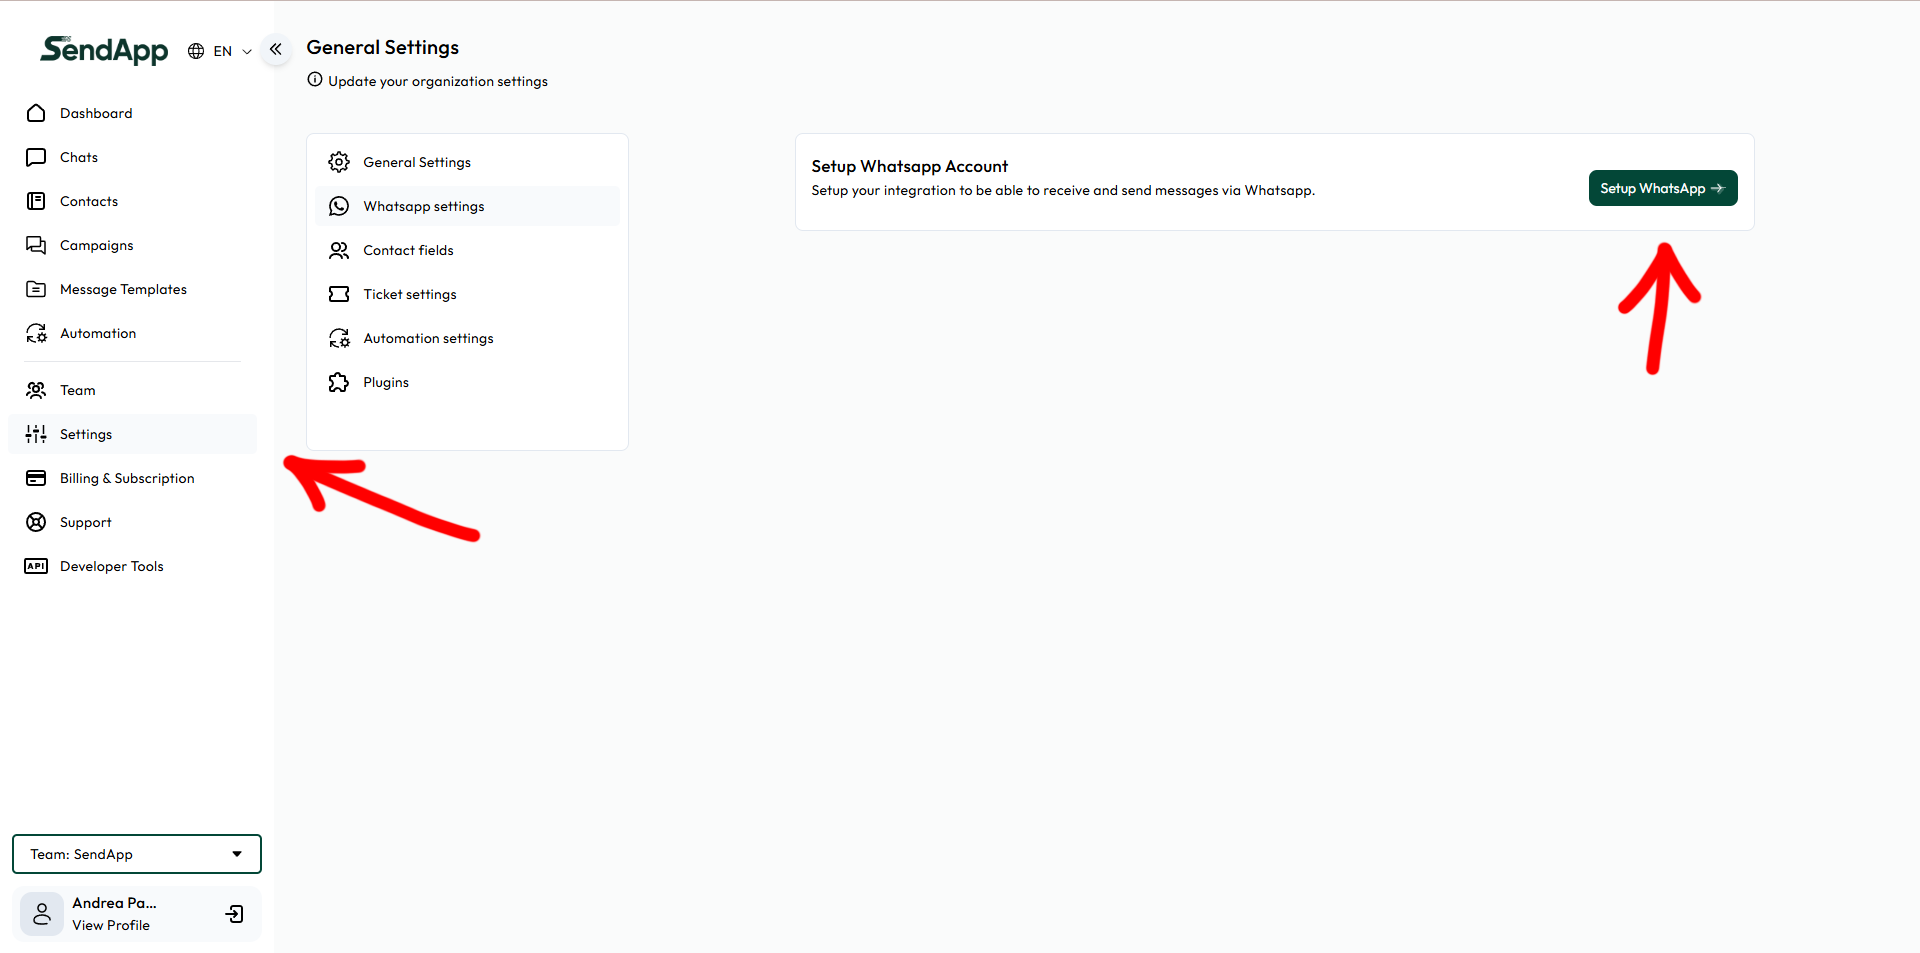
In SendApp go to Settings → WhatsApp settings and click WhatsApp Setup. The Meta connection wizard will open.
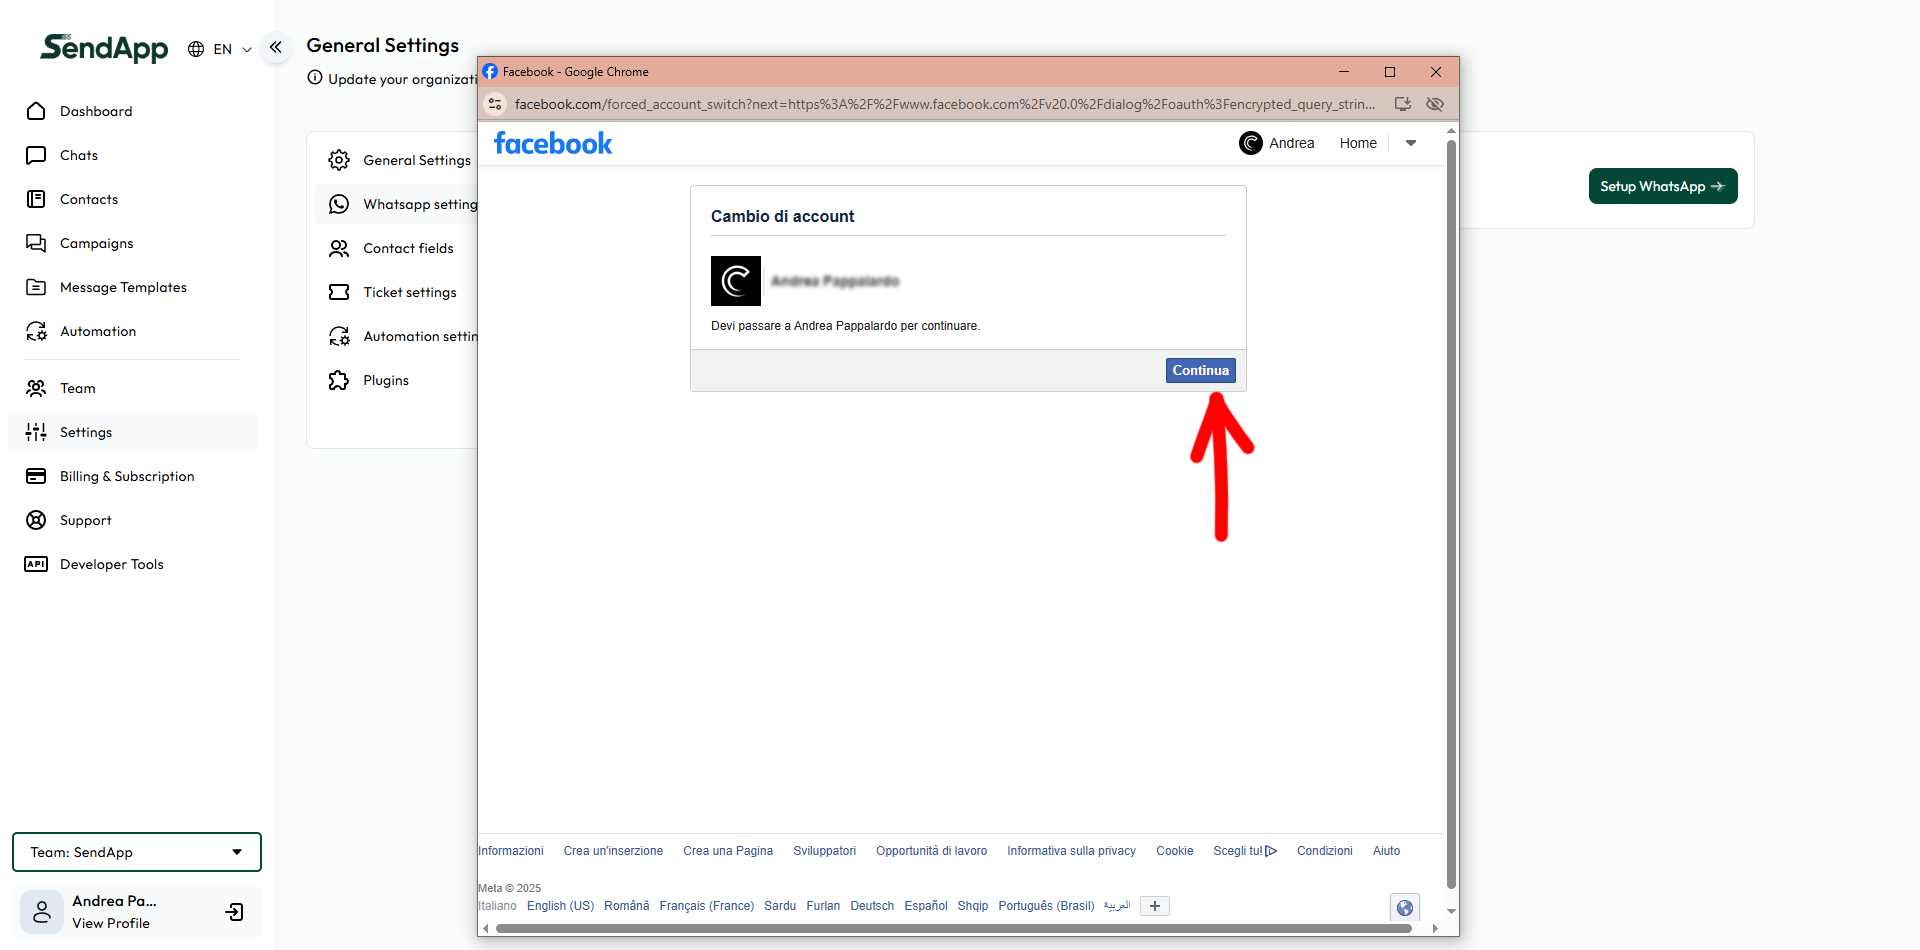
If prompted, confirm the switch to the correct Facebook account and click Continued. Make sure you are using the account that has access to Business Manager.
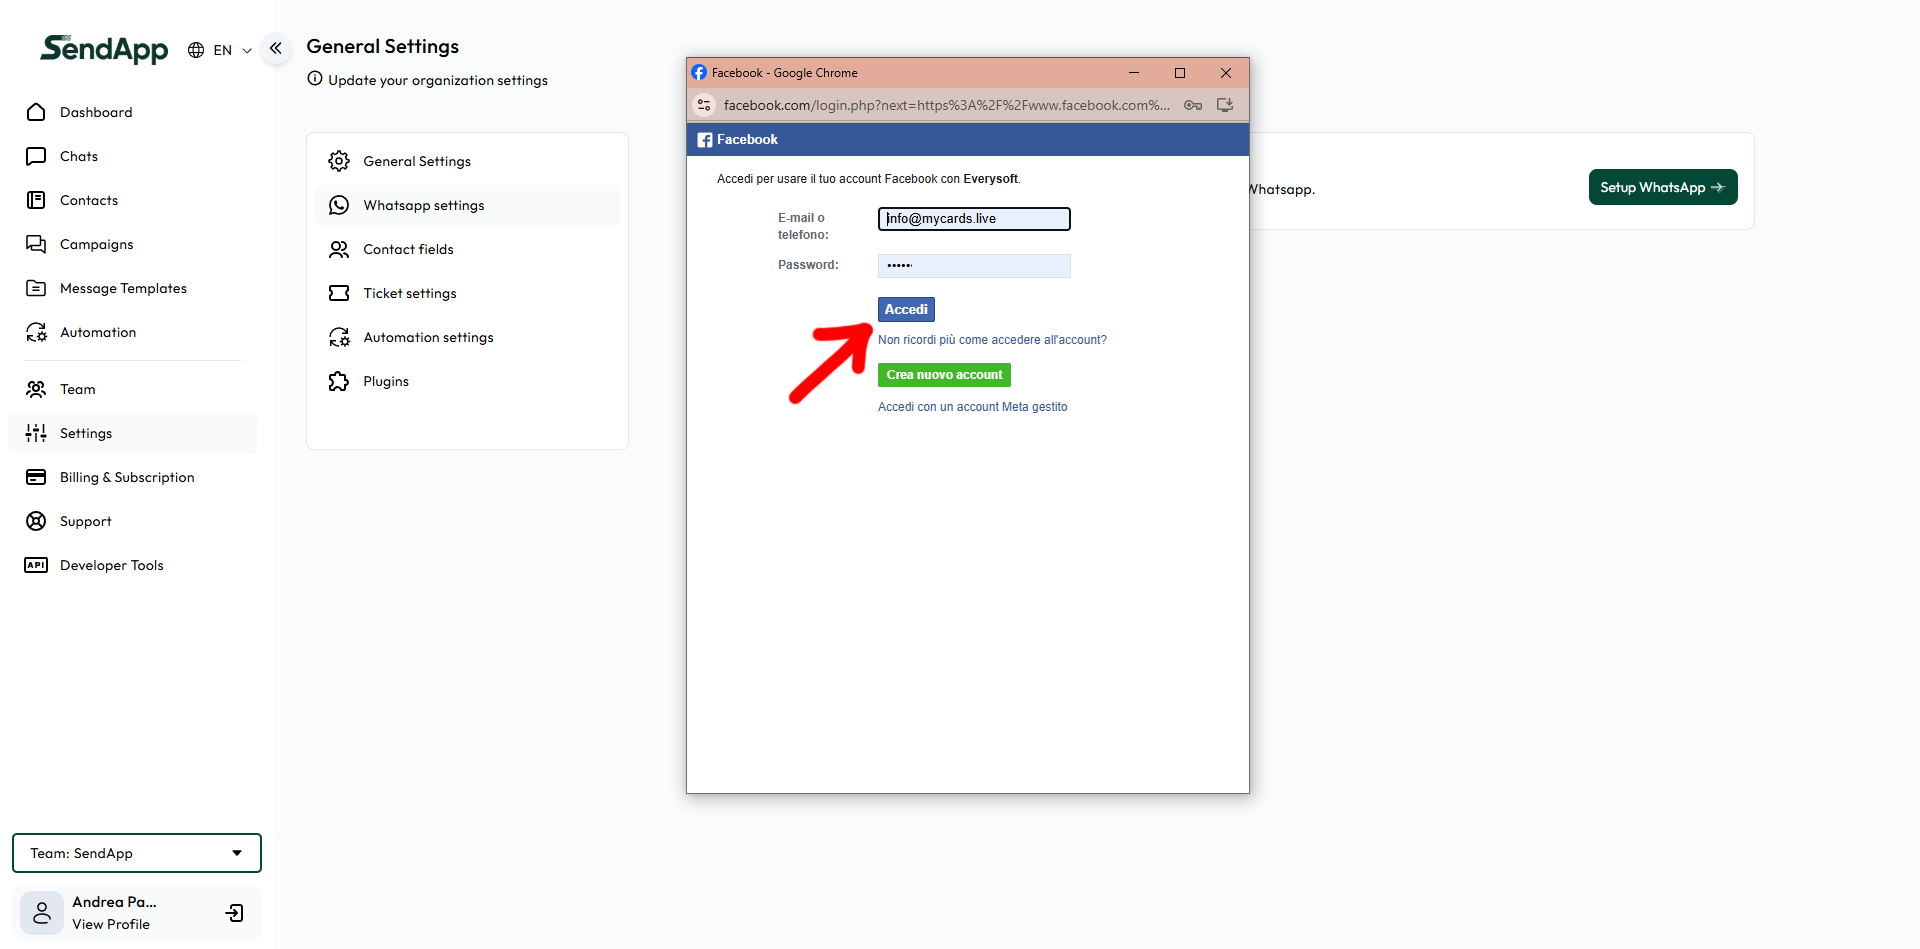
Enter the credentials of the Facebook account that has access to your Business Manager and click Log in.
Don't have a Meta Business Account yet?
1) Go to business.facebook.com and click Create account. Enter your company name, first name, and work email address.
2) In Business Settings go to Account → WhatsApp Account, click Add → Create a new WhatsApp account.
3) Add your phone number and verify via SMS or call. Set your display name, category, and description.
4) In Account → WhatsApp Account select your WABA, open People or Partners and grant permissions on Accounts, Numbers and Messages.
5) Go back to SendApp and select the account you just created.
Don't see your account?
Make sure you are Administrator in the Business Account.
Verify that the WABA is in the correct company.
Make sure the number is not used on the standard WhatsApp app.
If “access denied” appears, reassign permissions to the app/partner.
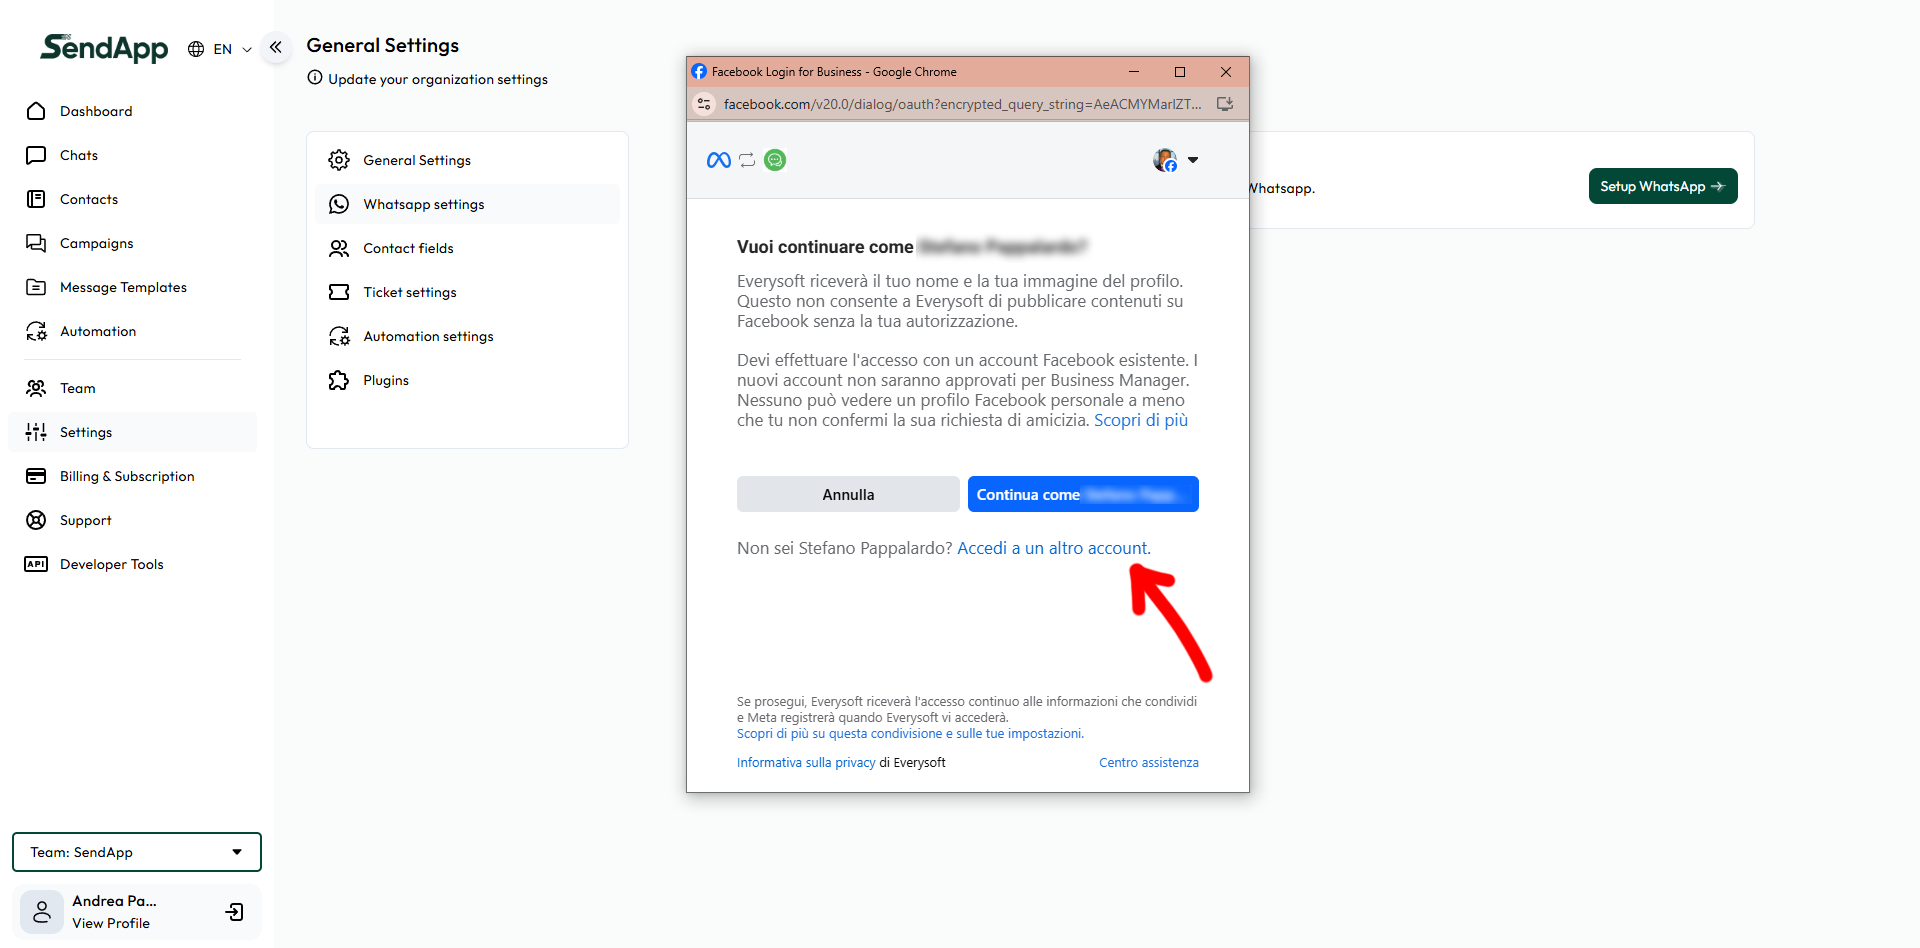
Click Continue as [name]. If this is not the right user, use Log in to another account to change profile.
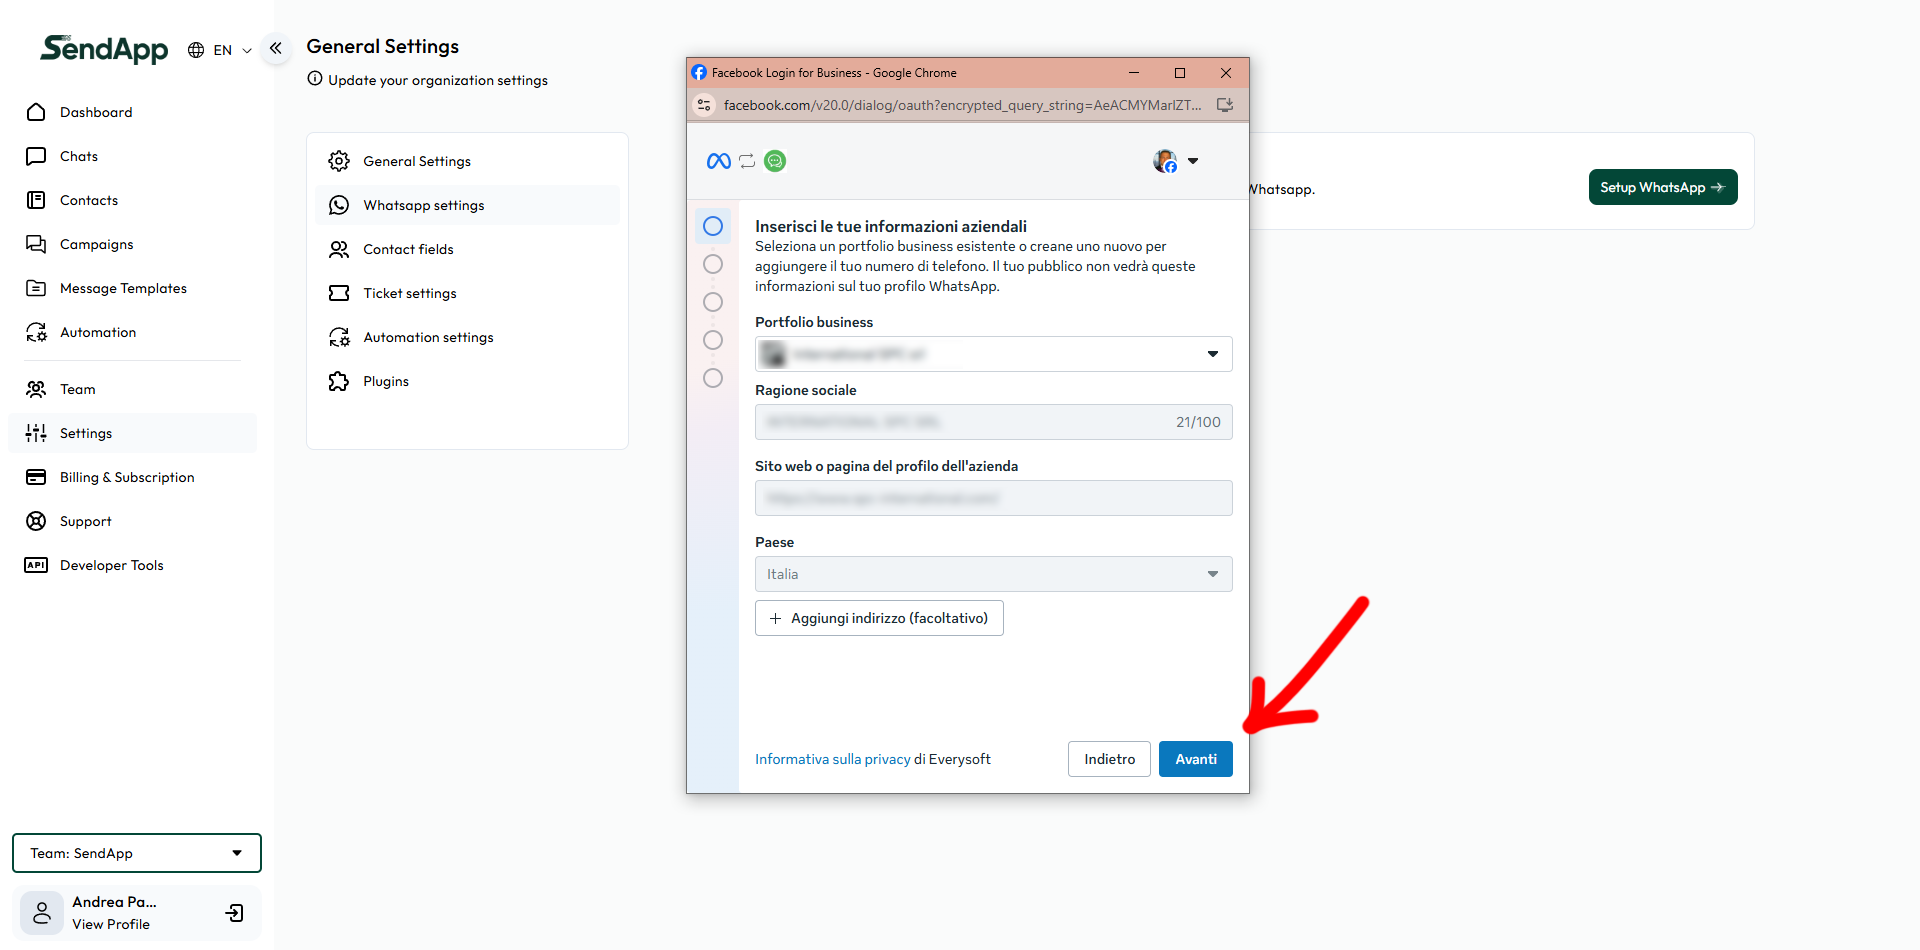
Select the Portfolio Business (Business Manager), enter company name, website or page, country and possibly the physical address. Click After you.
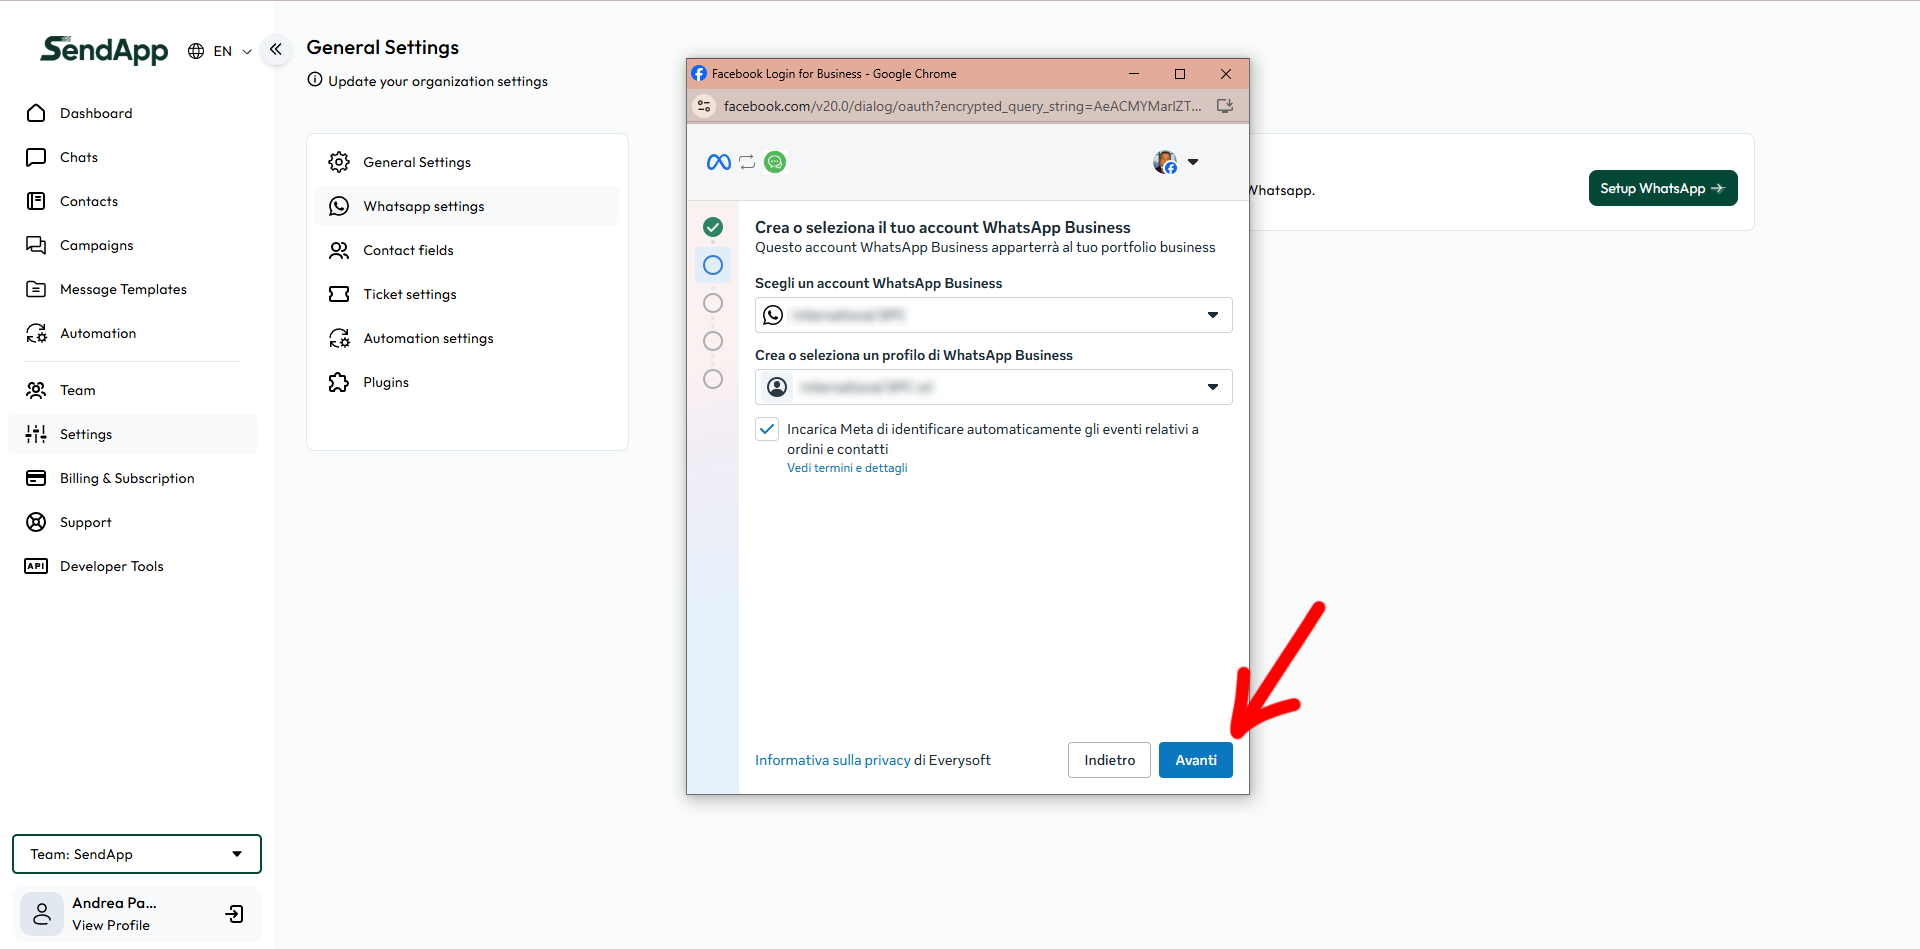
Select or create your own WhatsApp Business Account (WABA) and its related WhatsApp Business Profile.
Leave the event tracking option enabled if you want automatic logs. Click After you.
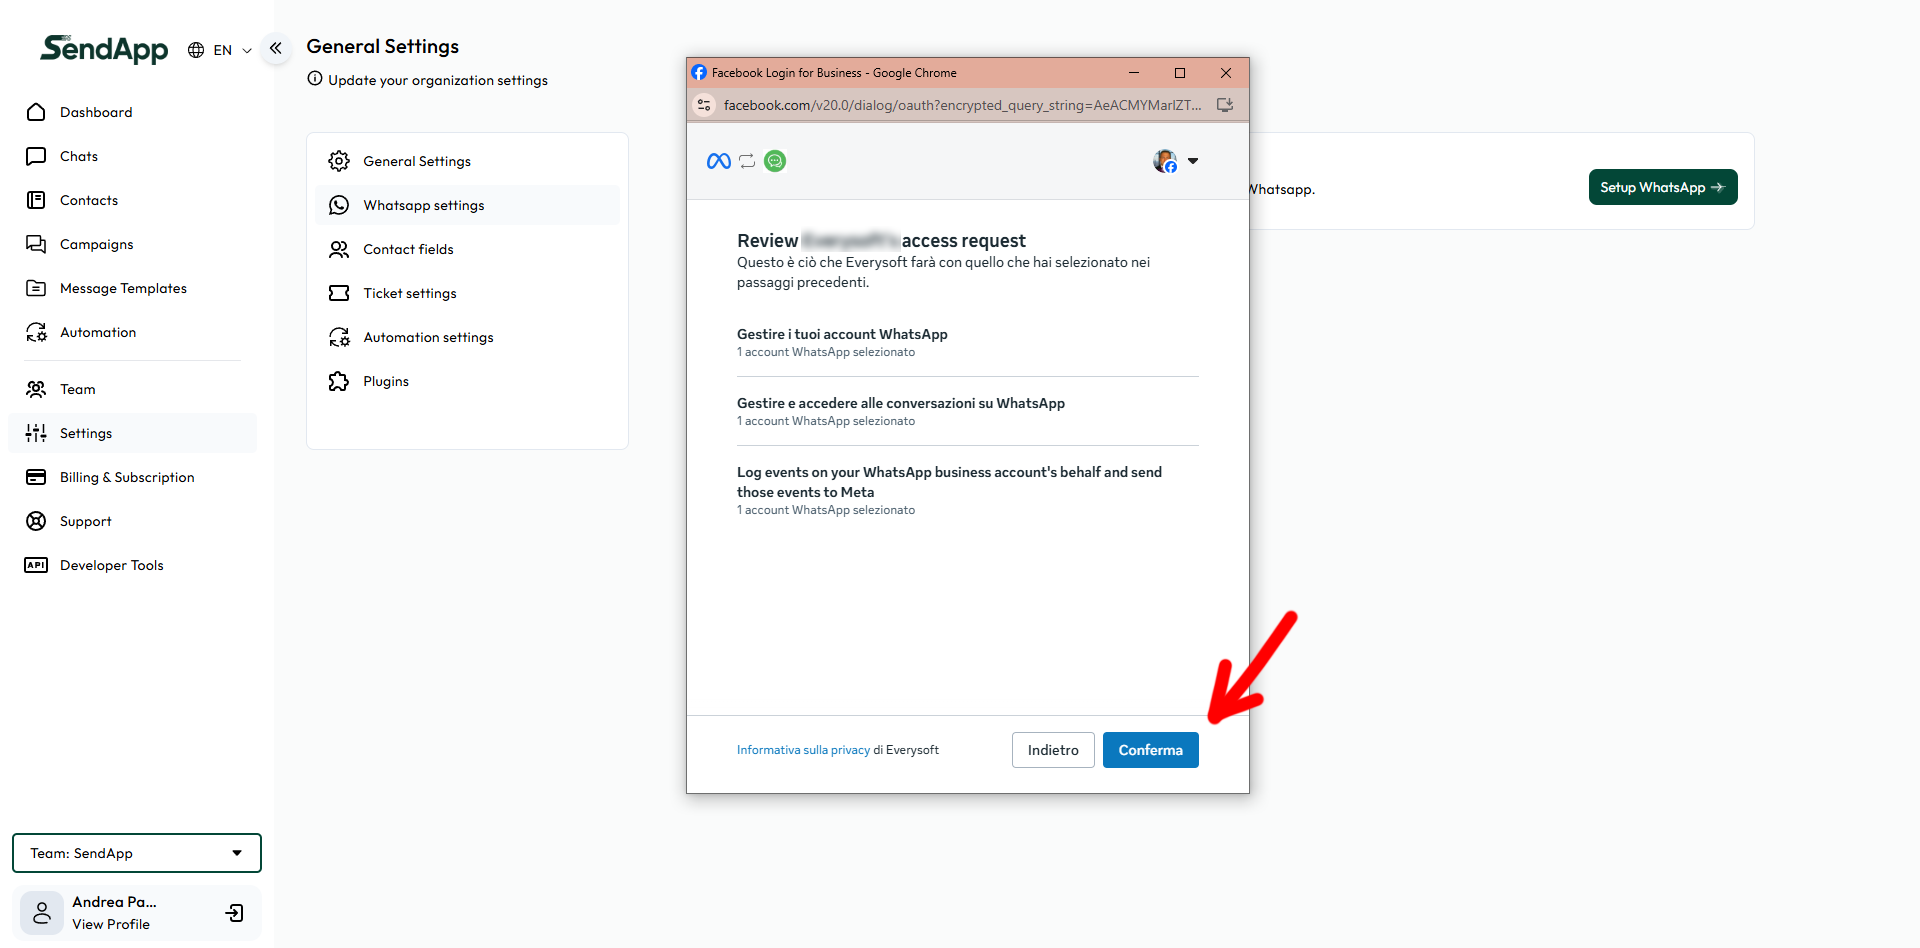
Review permission requests (account management, conversation access, event logs) and click He confirms. These permissions are required for the platform to function fully.
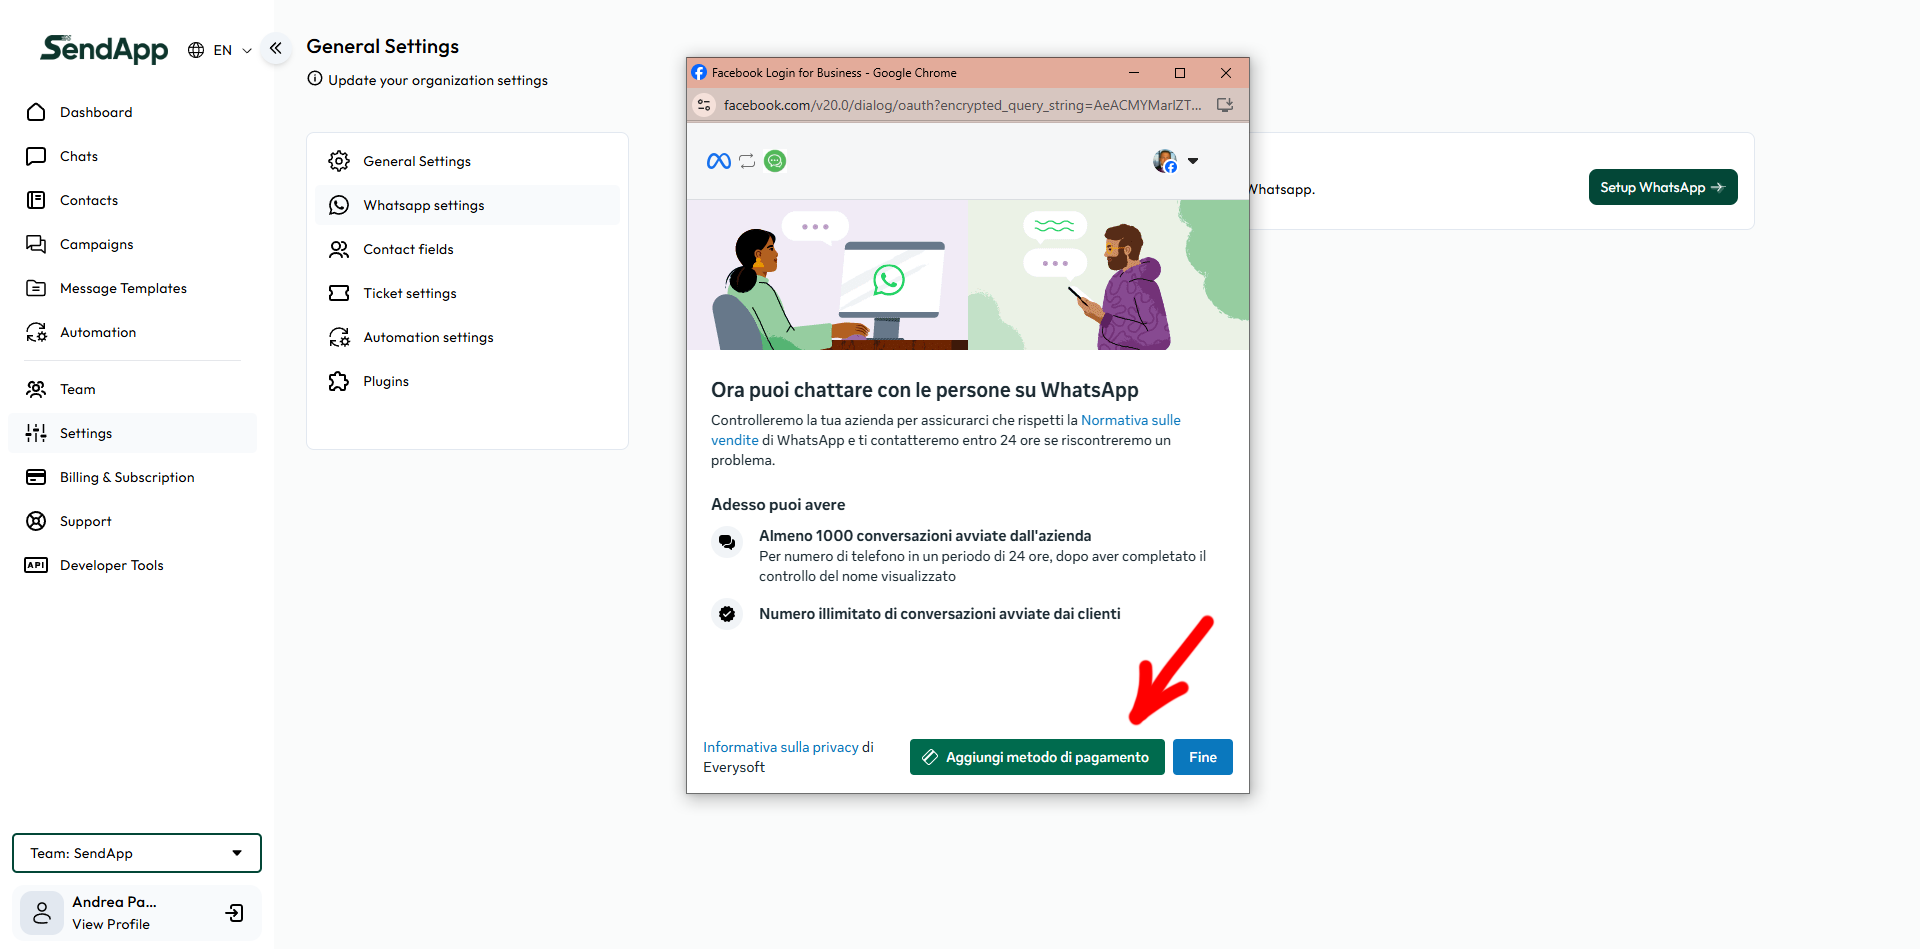
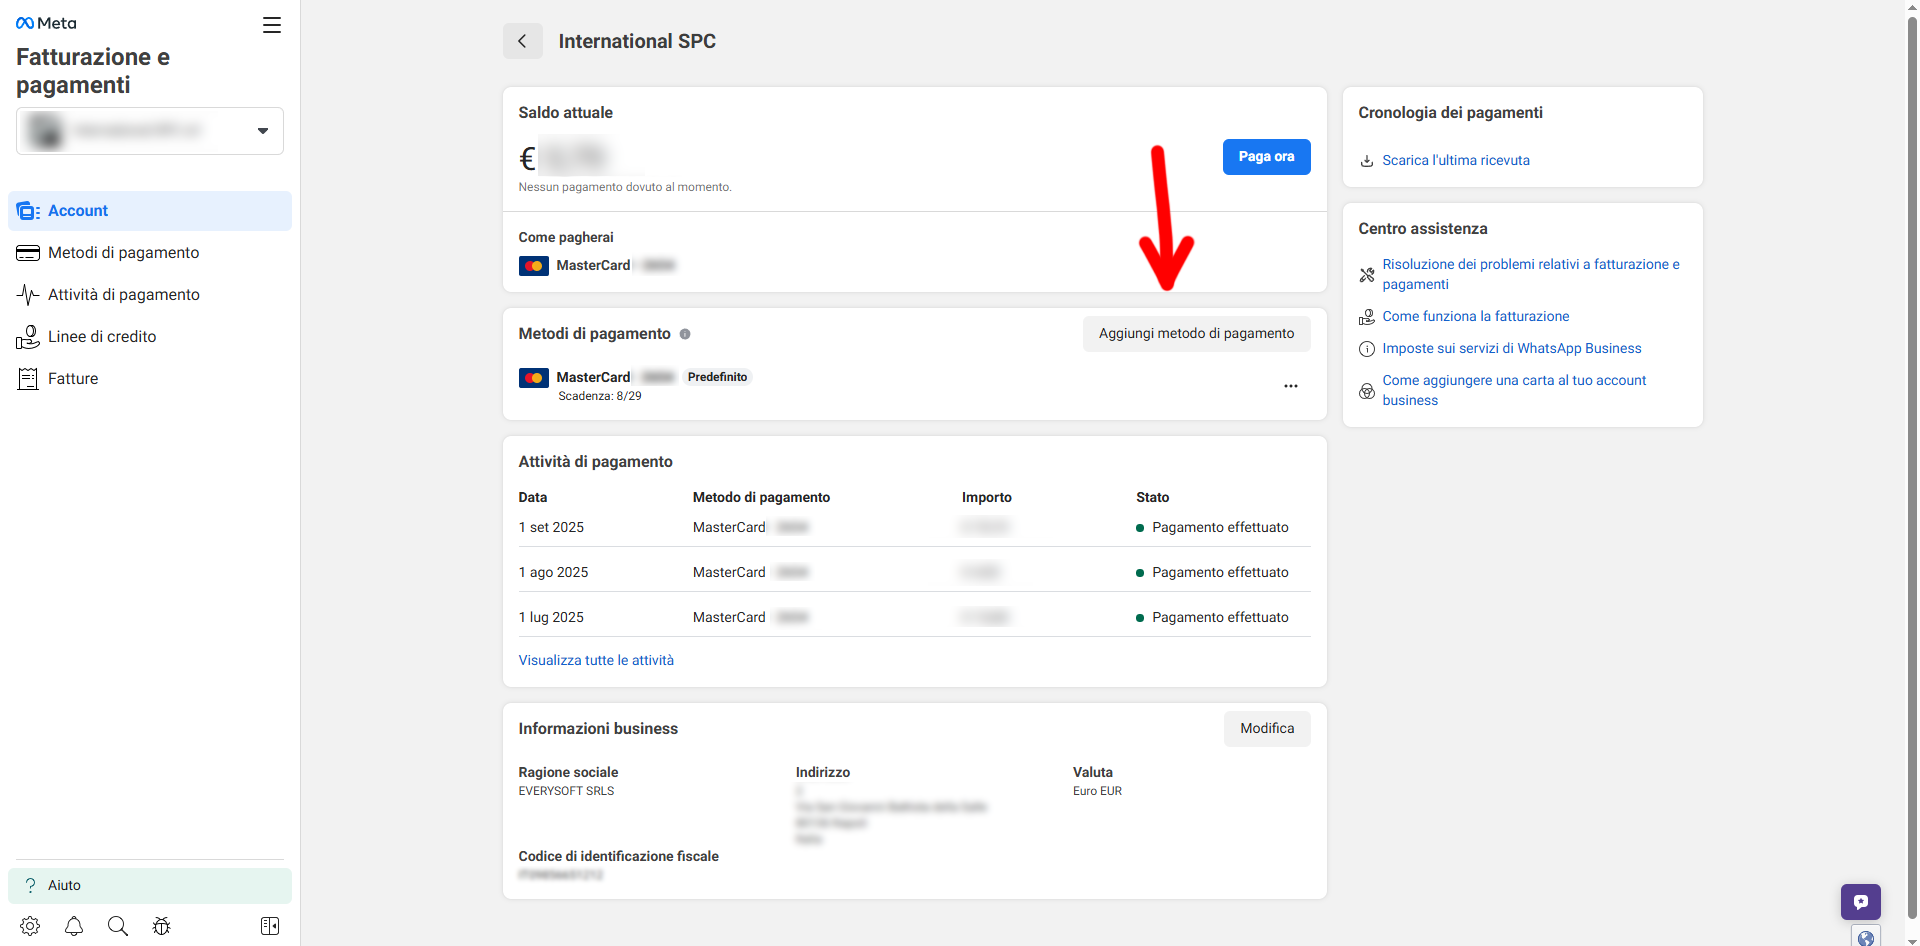
Meta shows the configuration summary and asks for a payment method For WhatsApp API costs, click here. Add payment method or End if you already have one set up.
In the center Billing and payments of Meta, add a paper and set it as Default for the correct Business. Go back to the configuration flow and close with End.
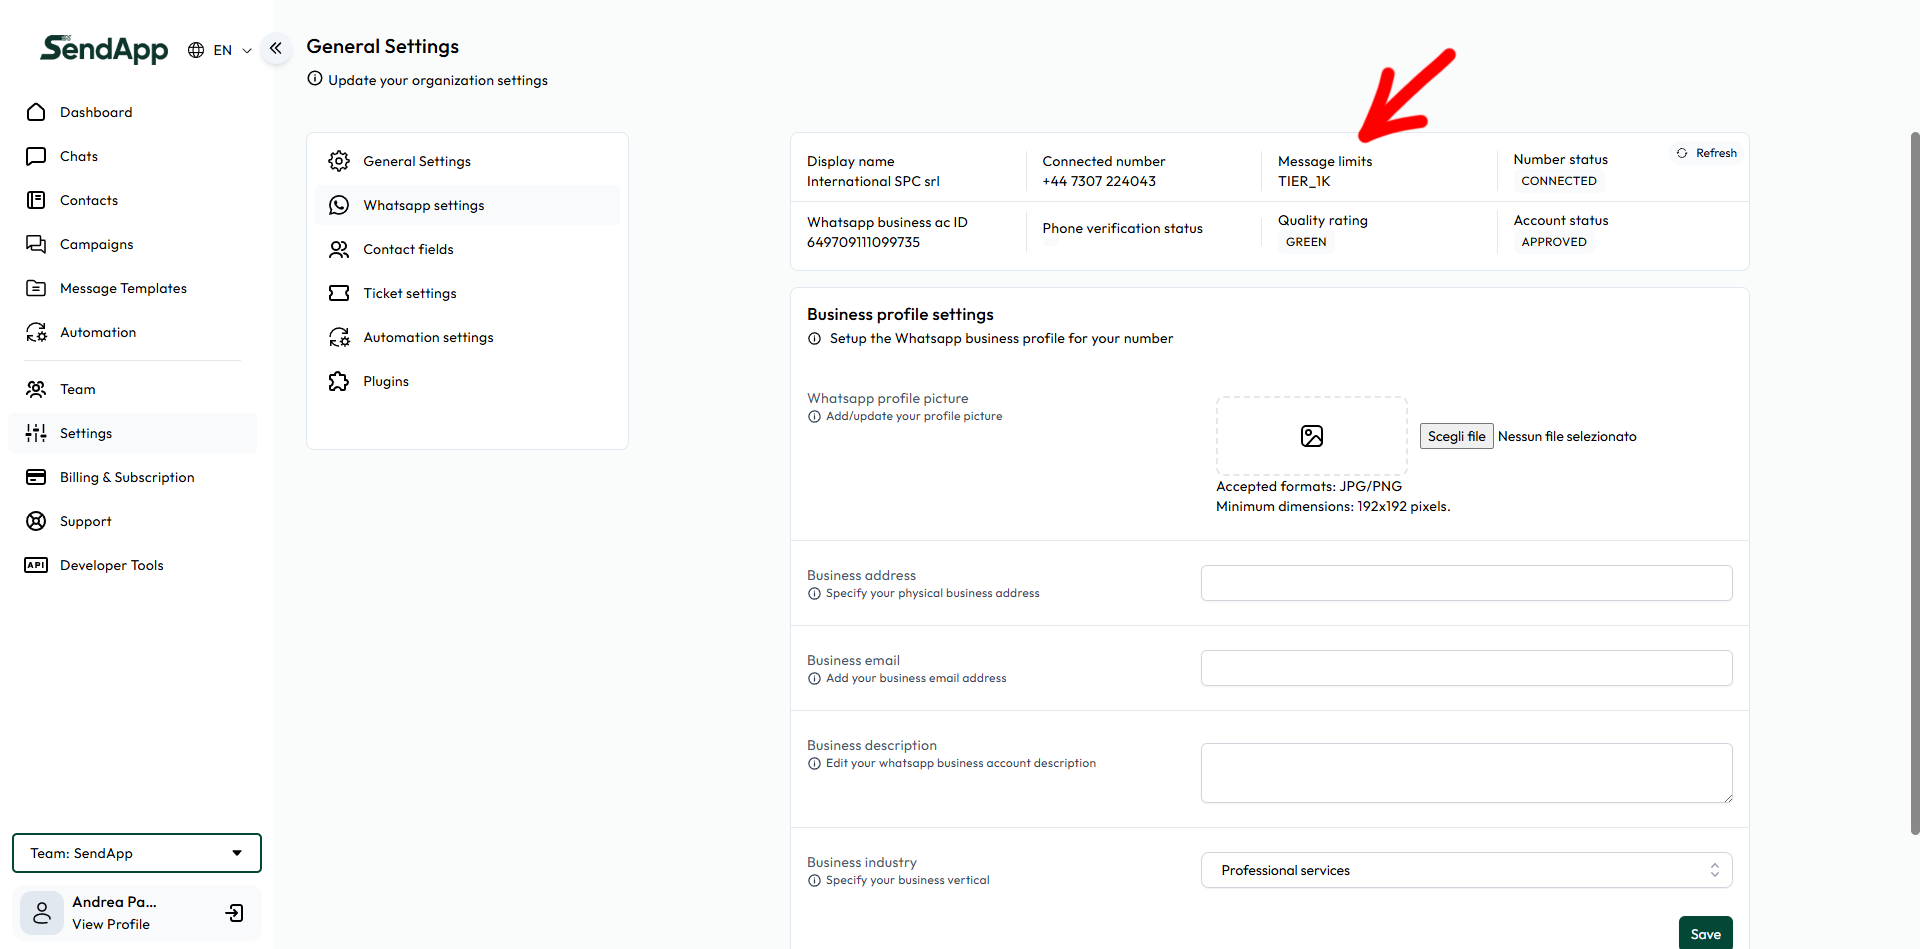
In WhatsApp settings Check that all data is correct:
Complete the Business Profile with logo (192×192 px), address, email, description, and industry. Click Save. If prompted, perform the number verification via SMS or call by entering the OTP.
EVERYTHING CONNECTED
Now you can create templates, import contacts and launch your first campaigns. marketing on WhatsApp via the official Meta APIs.