The first native mobile app
SendApp is the first solution of Marketing Conversational
also on Mobile, find out how it works and take it everywhere
your marketing
Download Android App
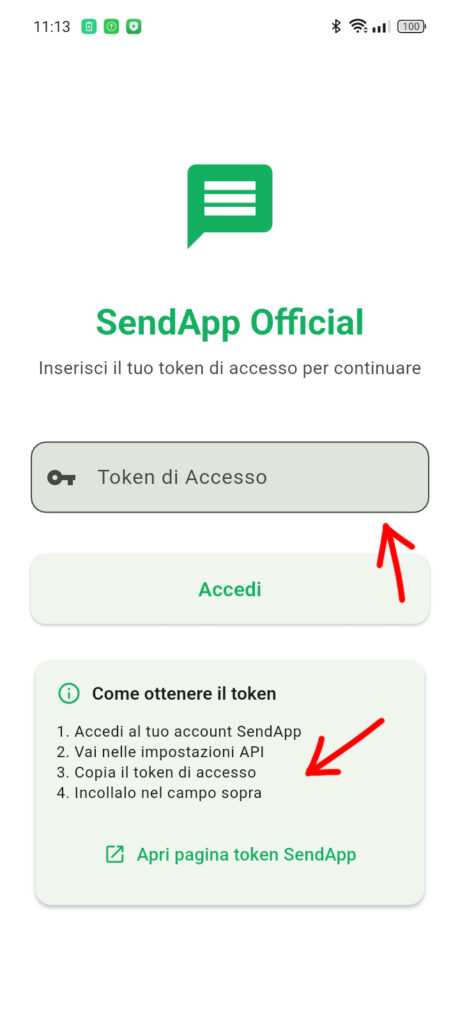
1 – Access with Token
Open the app.
Tap Access Token and paste your token.
Tap Log in.
If you don't have the token, use Open SendApp token page to go immediately to the correct section on the portal.
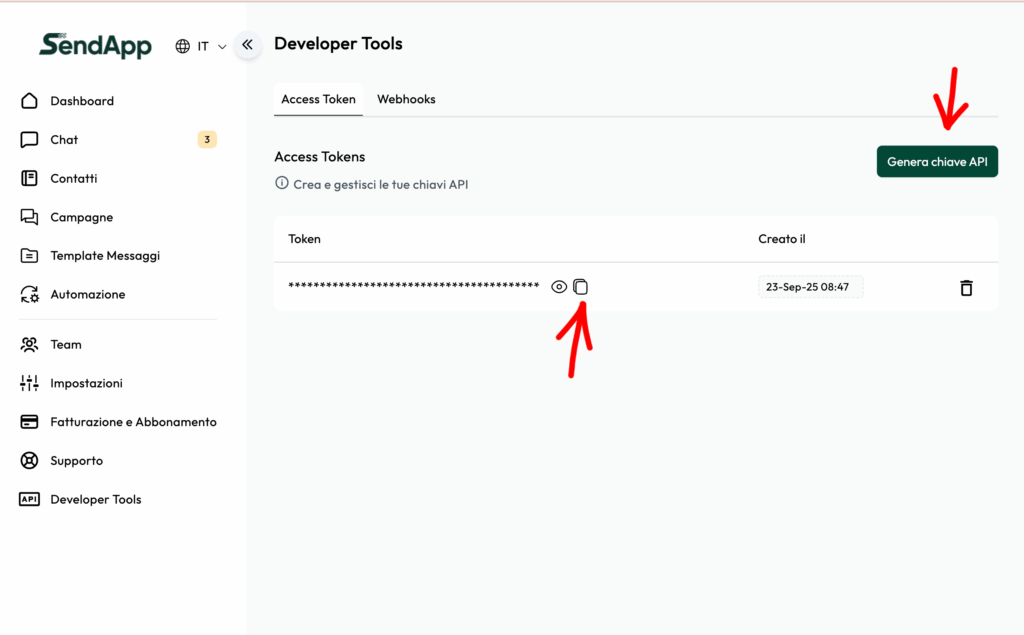
 2 – Generate/retrieve the Token on SendApp
On the web portal: Developer Tools → Access Tokens.
Click Generate API key if you don't have one or copy the existing one with the icon Copy.
Paste the token into the app (page 1) and log in.
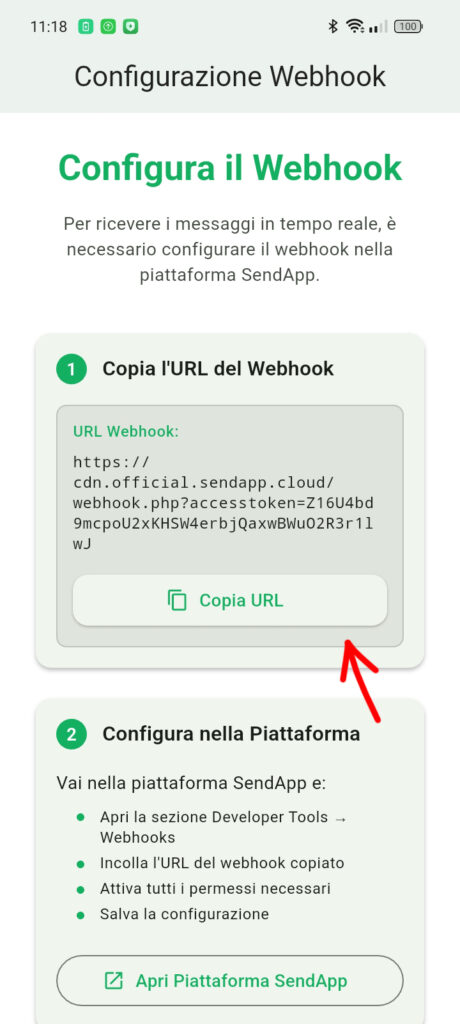
 3 – Copy the Webhook URL from the app
In Webhook Configuration on the app, tap Copy URL.
This URL is unique and will be used by the platform to send you events in real time.
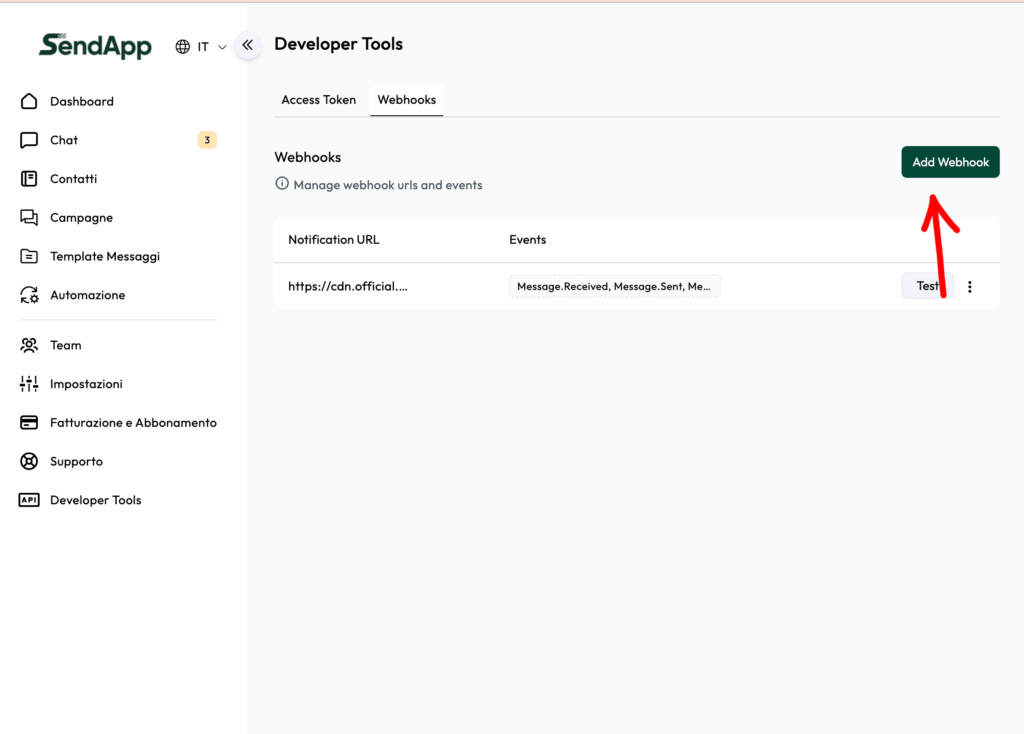
 4 – Add the Webhook on SendApp
On the web portal: Developer Tools → Webhooks.
Click Add Webhook.
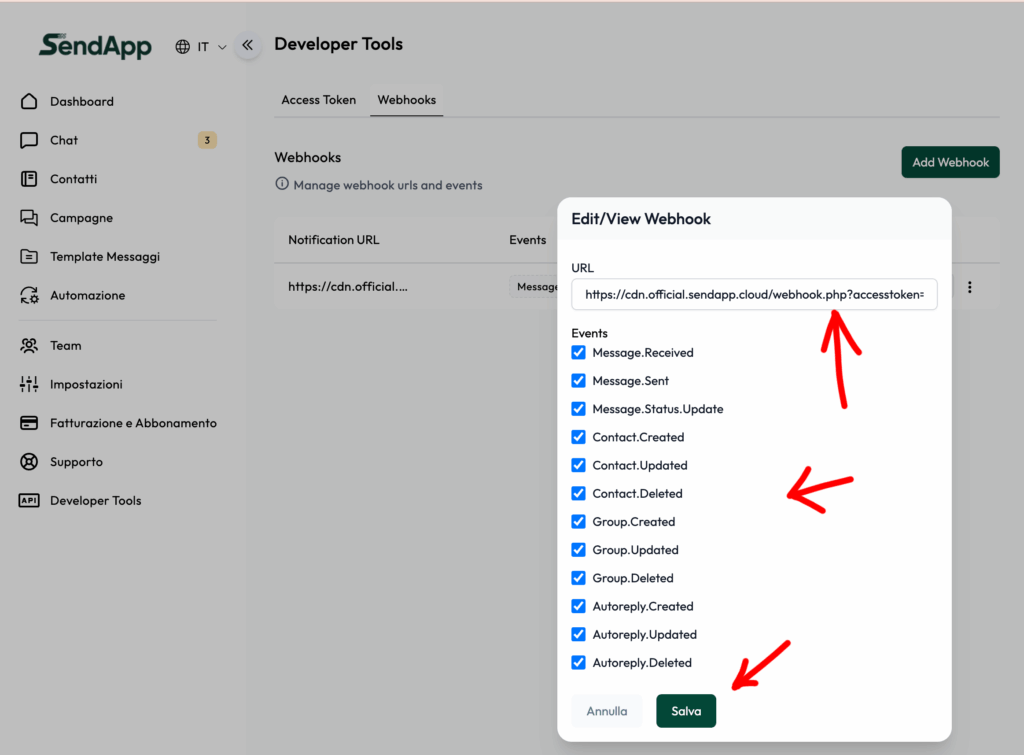
 5 – Configure the Webhook
Paste the URL copied from the app into the field URL.
Select all events for reception
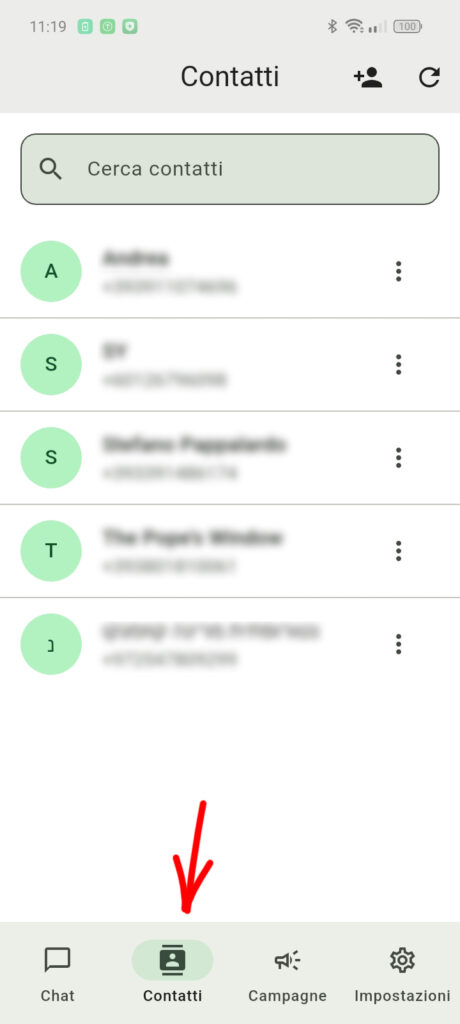
 6 – Contacts (in the app)
Enter the tab Contact to see the address book linked to your account.
Use the search above, the icon + to add, and the three-dot menu for each contact for quick actions.
Make sure the numbers are in international format (e.g. +39…).
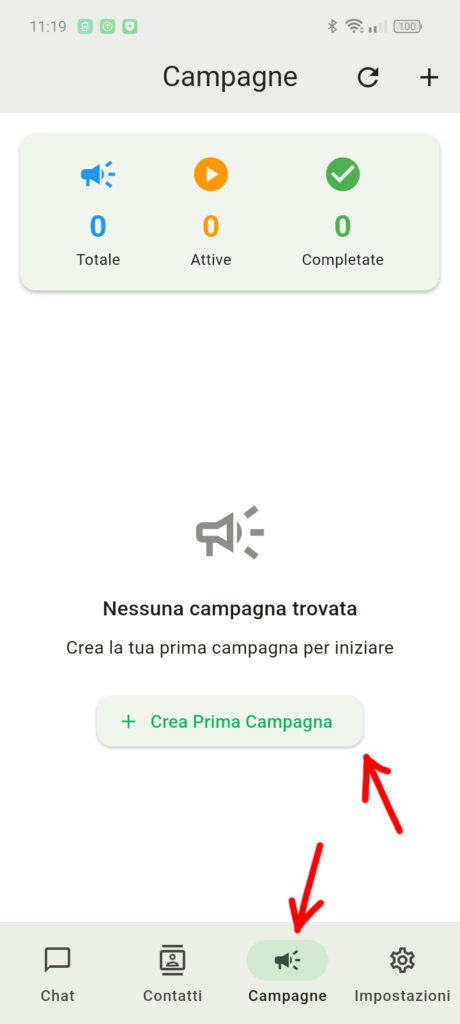
 7 – Campaigns (overview)
Go to the tab Campaigns and it's up Create First Campaign to get started.
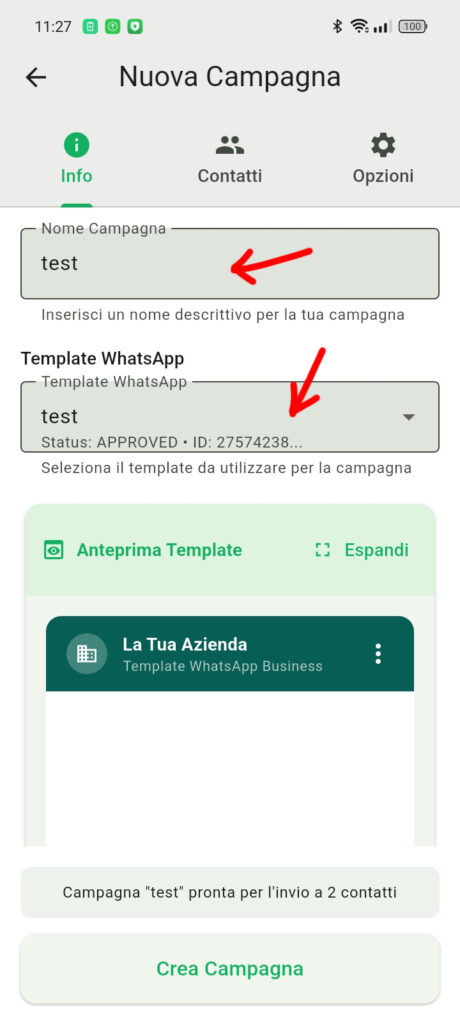
 Page 8 – New Campaign: Info
Give a Campaign Name descriptive.
Choose a WhatsApp Templates approved (show status and ID).
Check thePreview Template; if the template has variables, you will be prompted for the values later.
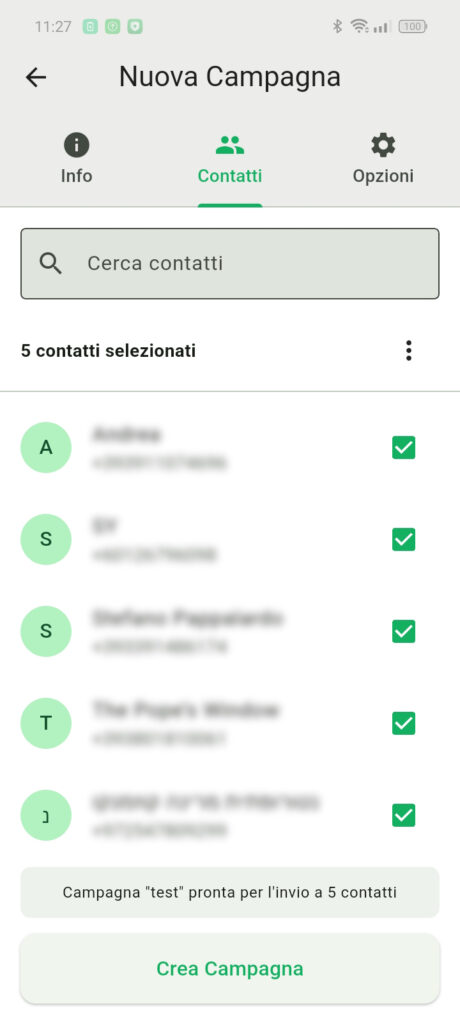
 9 – New Campaign: Contacts
Select the contacts to send the campaign to.
Check the count below (“ready to send to X contacts”).
Continue.
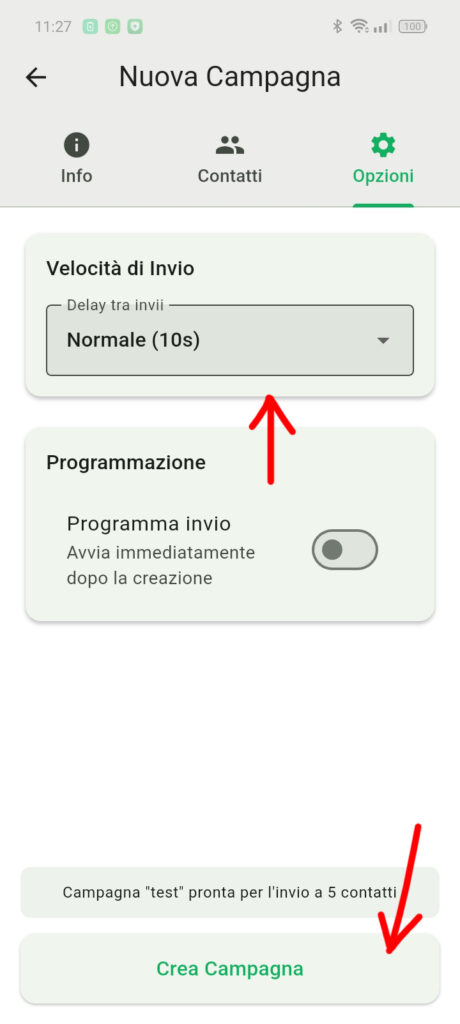
 10 – New Campaign: Options
Sending speed: Choose the delay between messages (e.g. Normal 10s) to distribute traffic and respect limits.
Programming: enable the switch if you want to schedule; otherwise, sending will start immediately after creation.
Tap Create Campaign to start or plan.
11 – Chat: Start a new conversation
Open the tab Chat.
Tap the button + at the bottom right to create a new chat.
If you need it, use Filter or Near at the top to manage conversations.
Note: If the contact has not had an active session in the last 24 hours, you must send a message to get started. approved template.

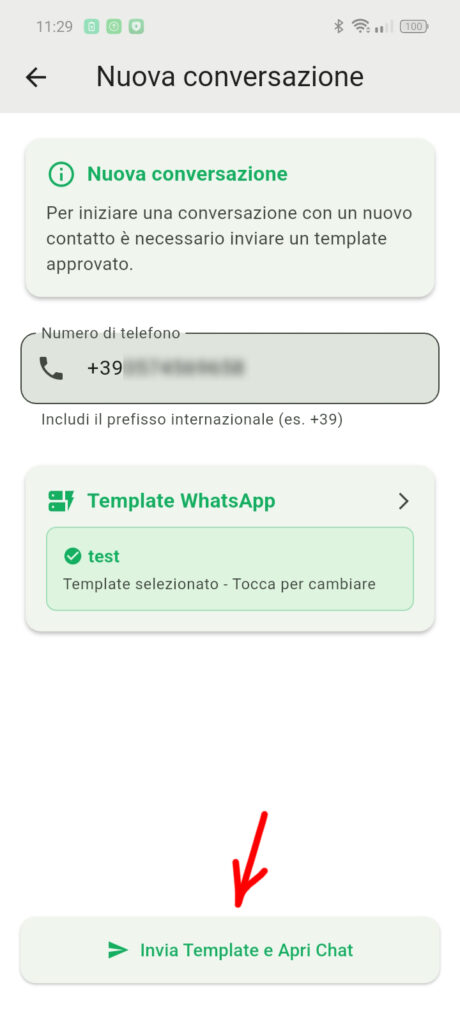
12 – New conversation: send template and open chat
Enter the telephone number in international format (e.g. +39…).
Select the WhatsApp Templates approved to send.
Fill in any variables of the template.
Tap Send Template and Open Chat to send the message and open the conversation.
From this moment the 24-hour windowYou can reply freely from the chat. If the window expires, you can resubmit an approved template to contact the user.