STEP-BY-STEP GUIDE
Management Product Stock with SendApp Agent
Connect your WooCommerce to SendApp Agent and let AI respond in real time about your product availability and prices, directly on WhatsApp.
STEP-BY-STEP GUIDE
Connect your WooCommerce to SendApp Agent and let AI respond in real time about your product availability and prices, directly on WhatsApp.
Real-time stock
OVERVIEW
Connect WooCommerce to SendApp Agent using a dedicated plugin. AI queries your catalog in real time and responds to customers on WhatsApp with constantly updated prices and availability.
Dedicated WooCommerce plugin with JSON API endpoint
Prices and stock updated with every request
AI responds on WhatsApp with product information
Every change on WooCommerce is reflected immediately
CONFIGURATION
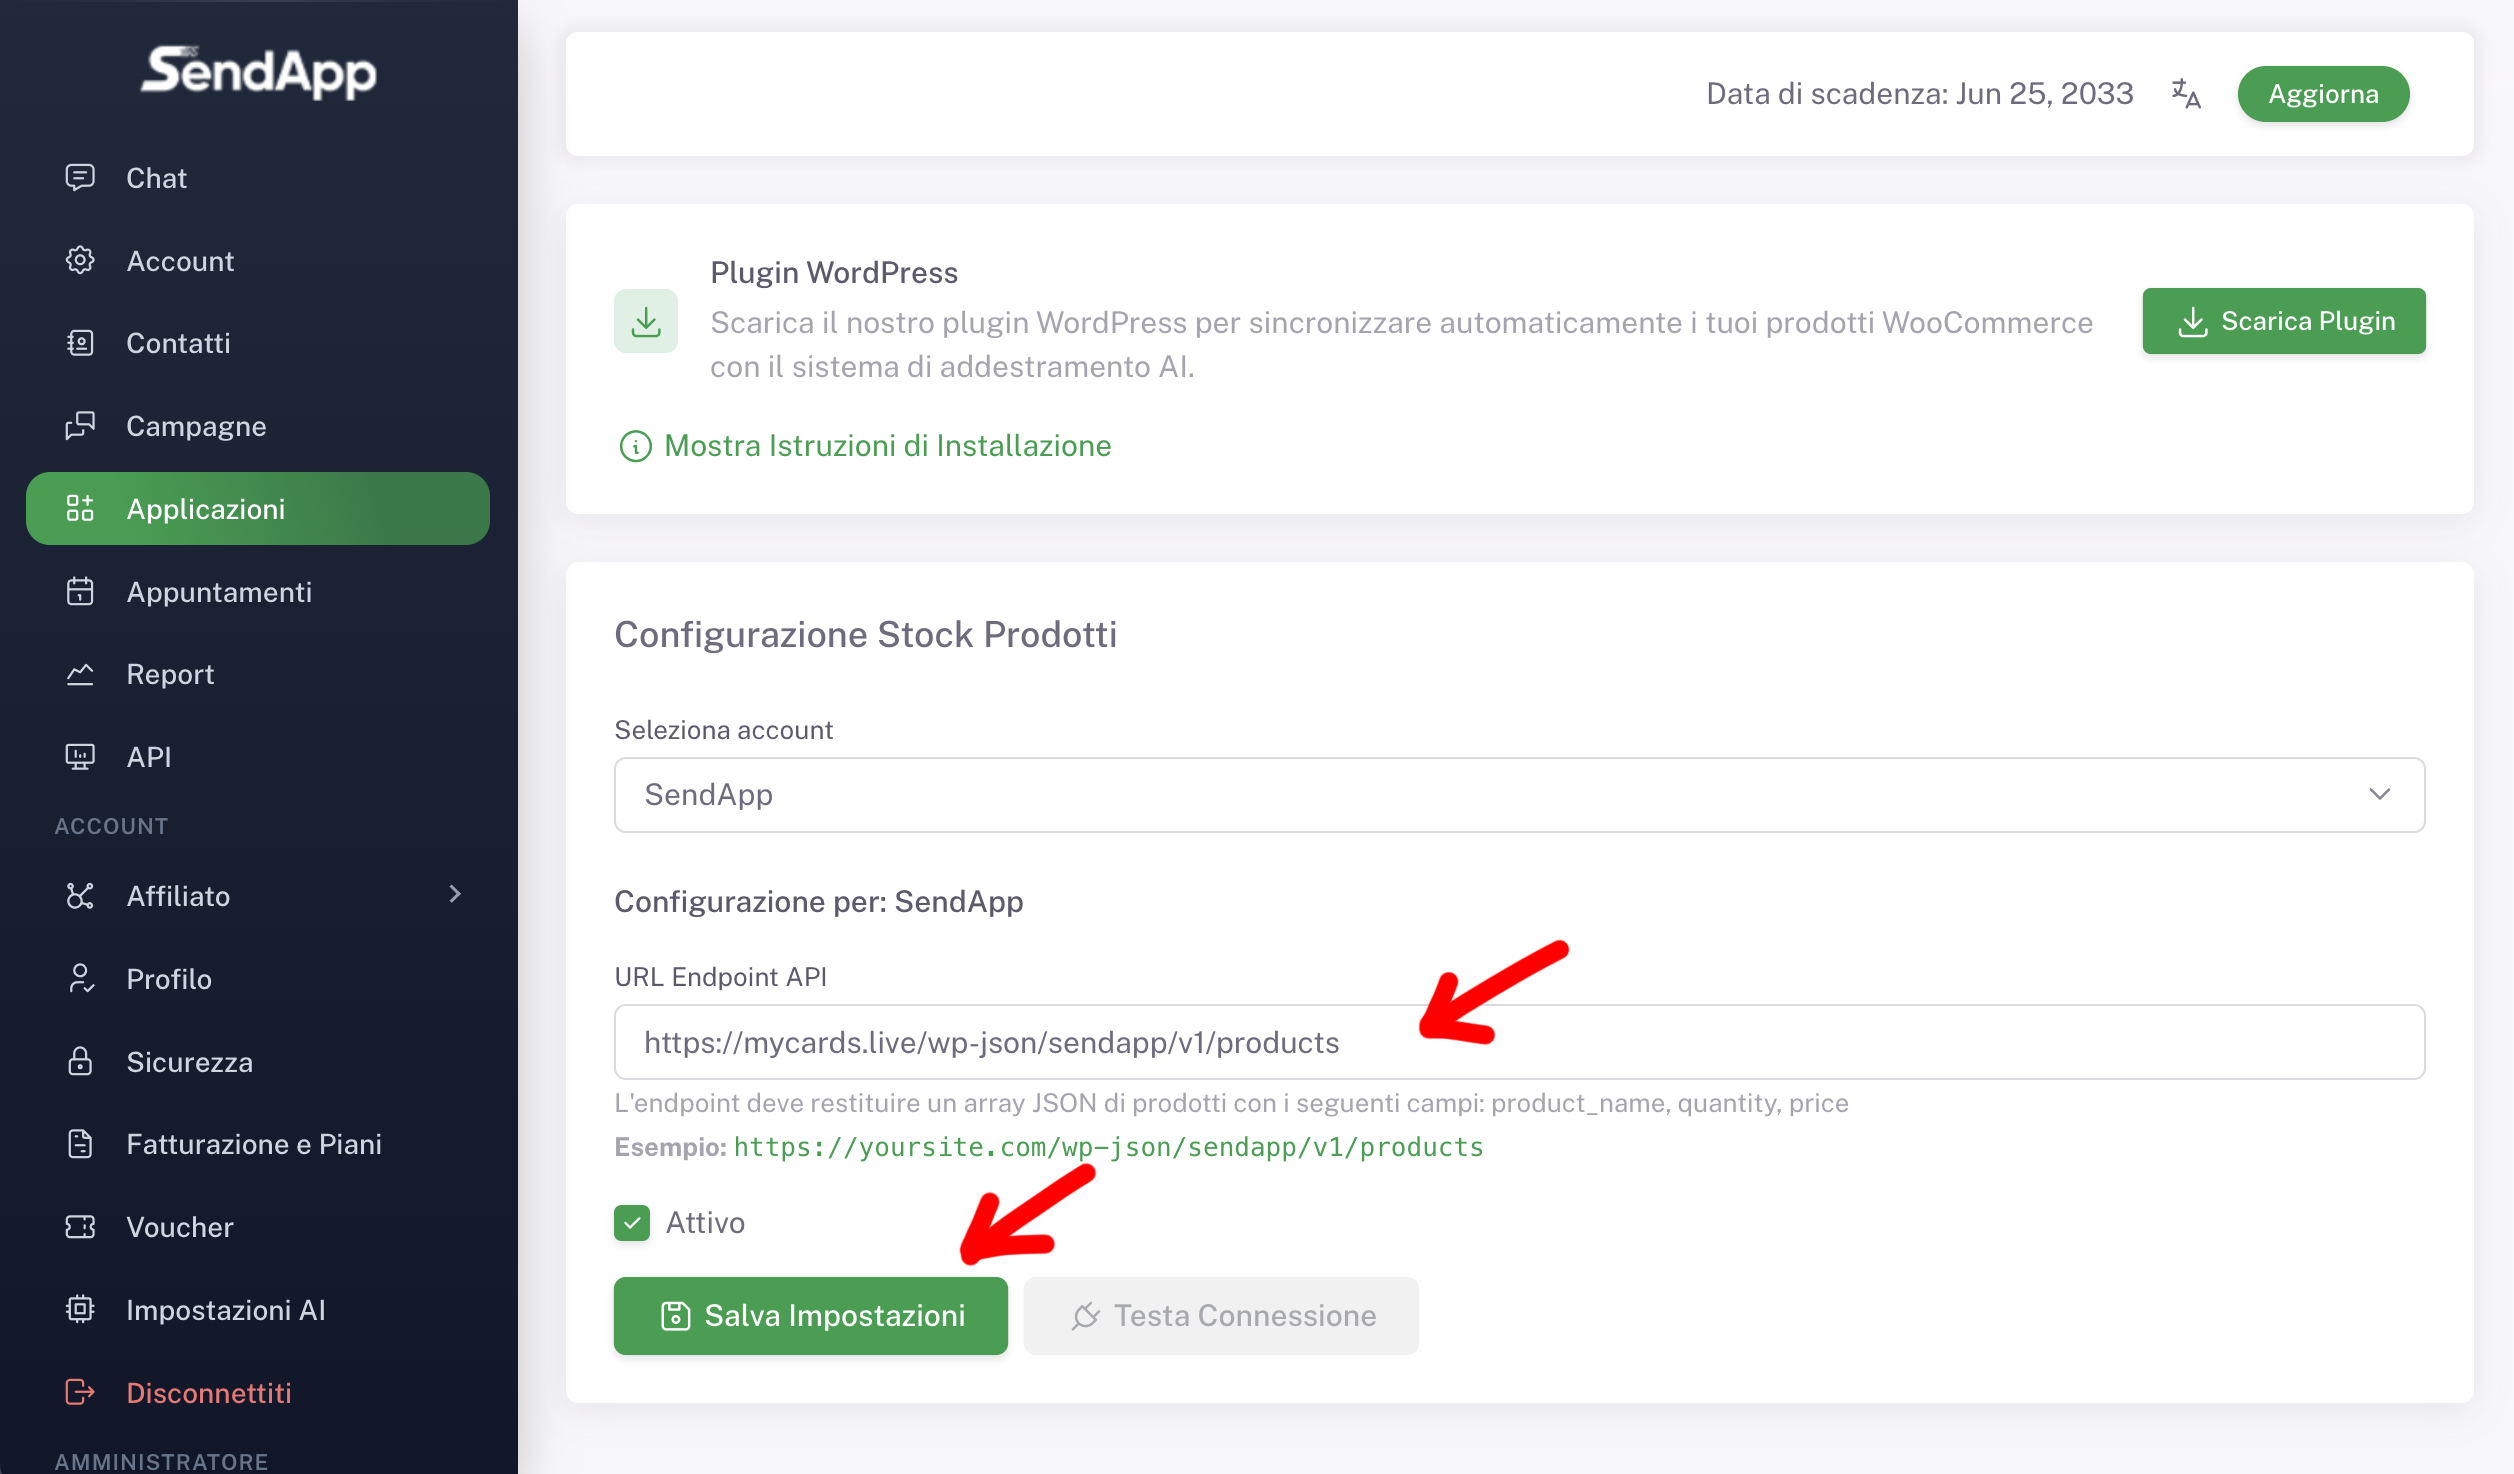
Access the dashboard SendApp Agent and from the side menu select Applications. Locate the app Product Stock and click on Configure. Make sure the app is set to Active and that the correct account is selected.
Inside the Product Stock configuration you will find the section WordPress plugins. Click on Download Plugin and wait for the confirmation message. The downloaded file is a plugin in .zip required to generate the product endpoint on your site.
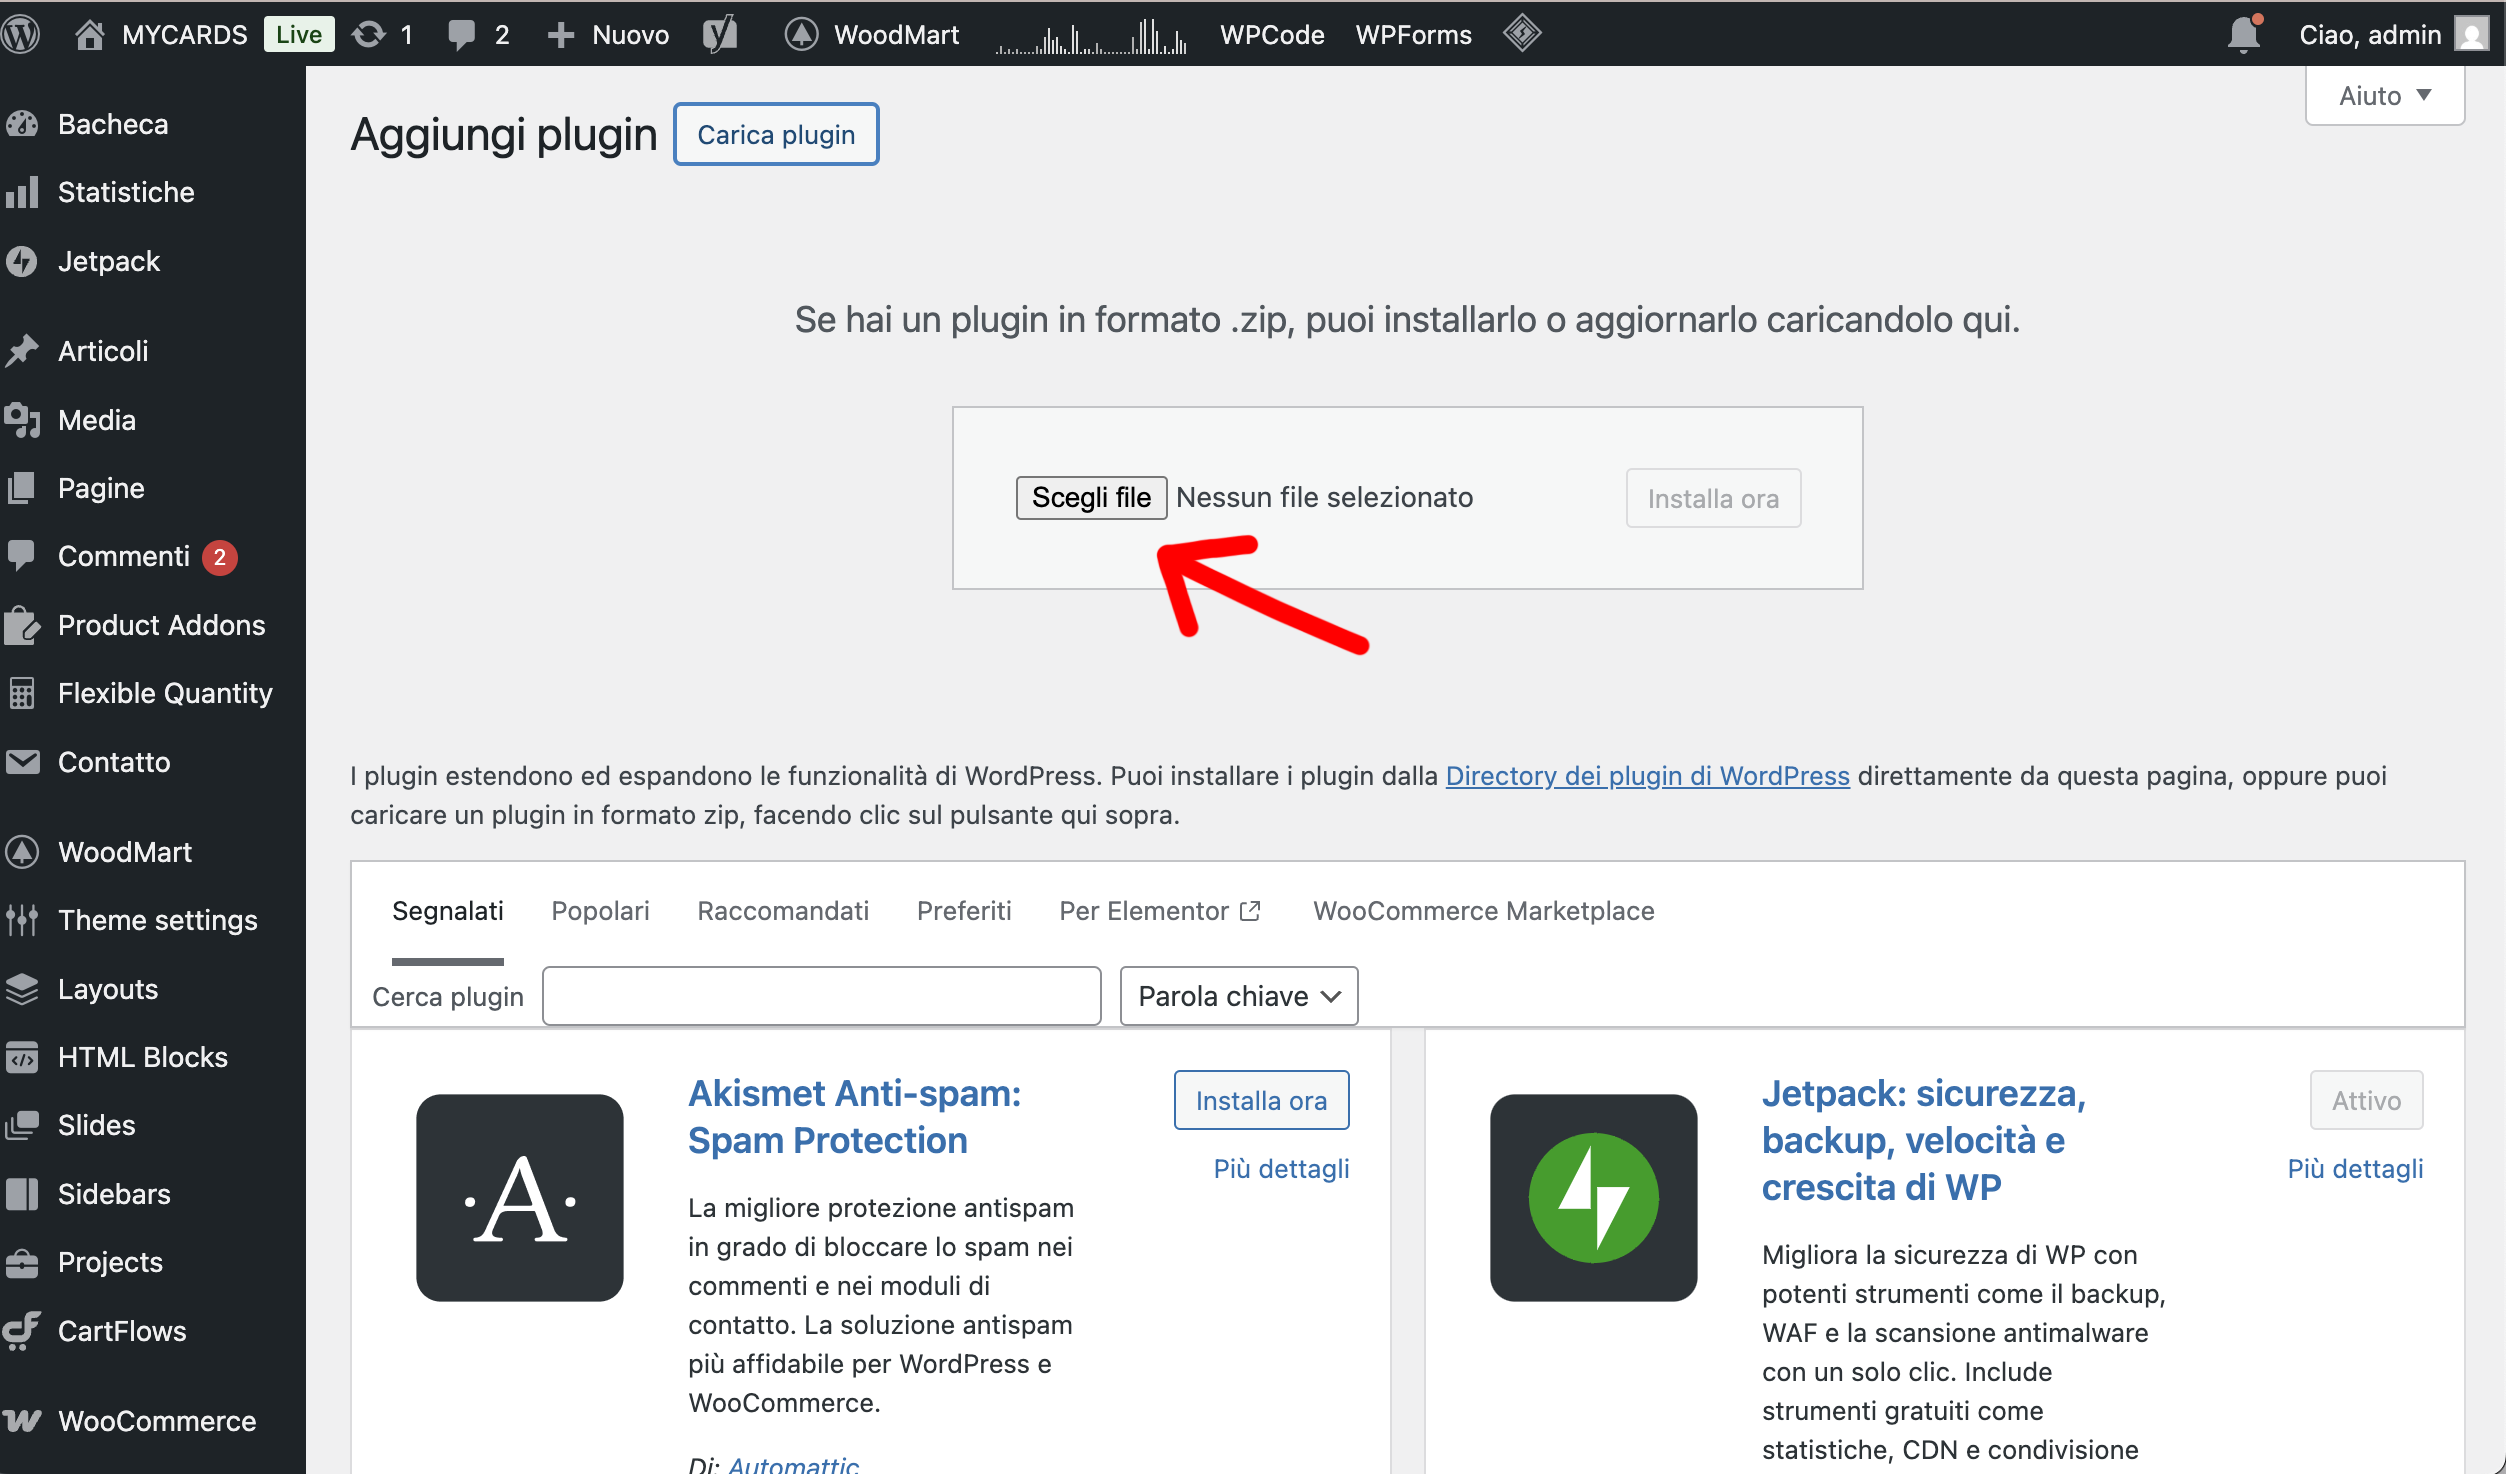
Log in to your WooCommerce site's WordPress admin panel. Go to Plugins → Add Plugin → Upload Plugin, select the file .zip just downloaded and start the installation. Once finished, click on Activate plugin.
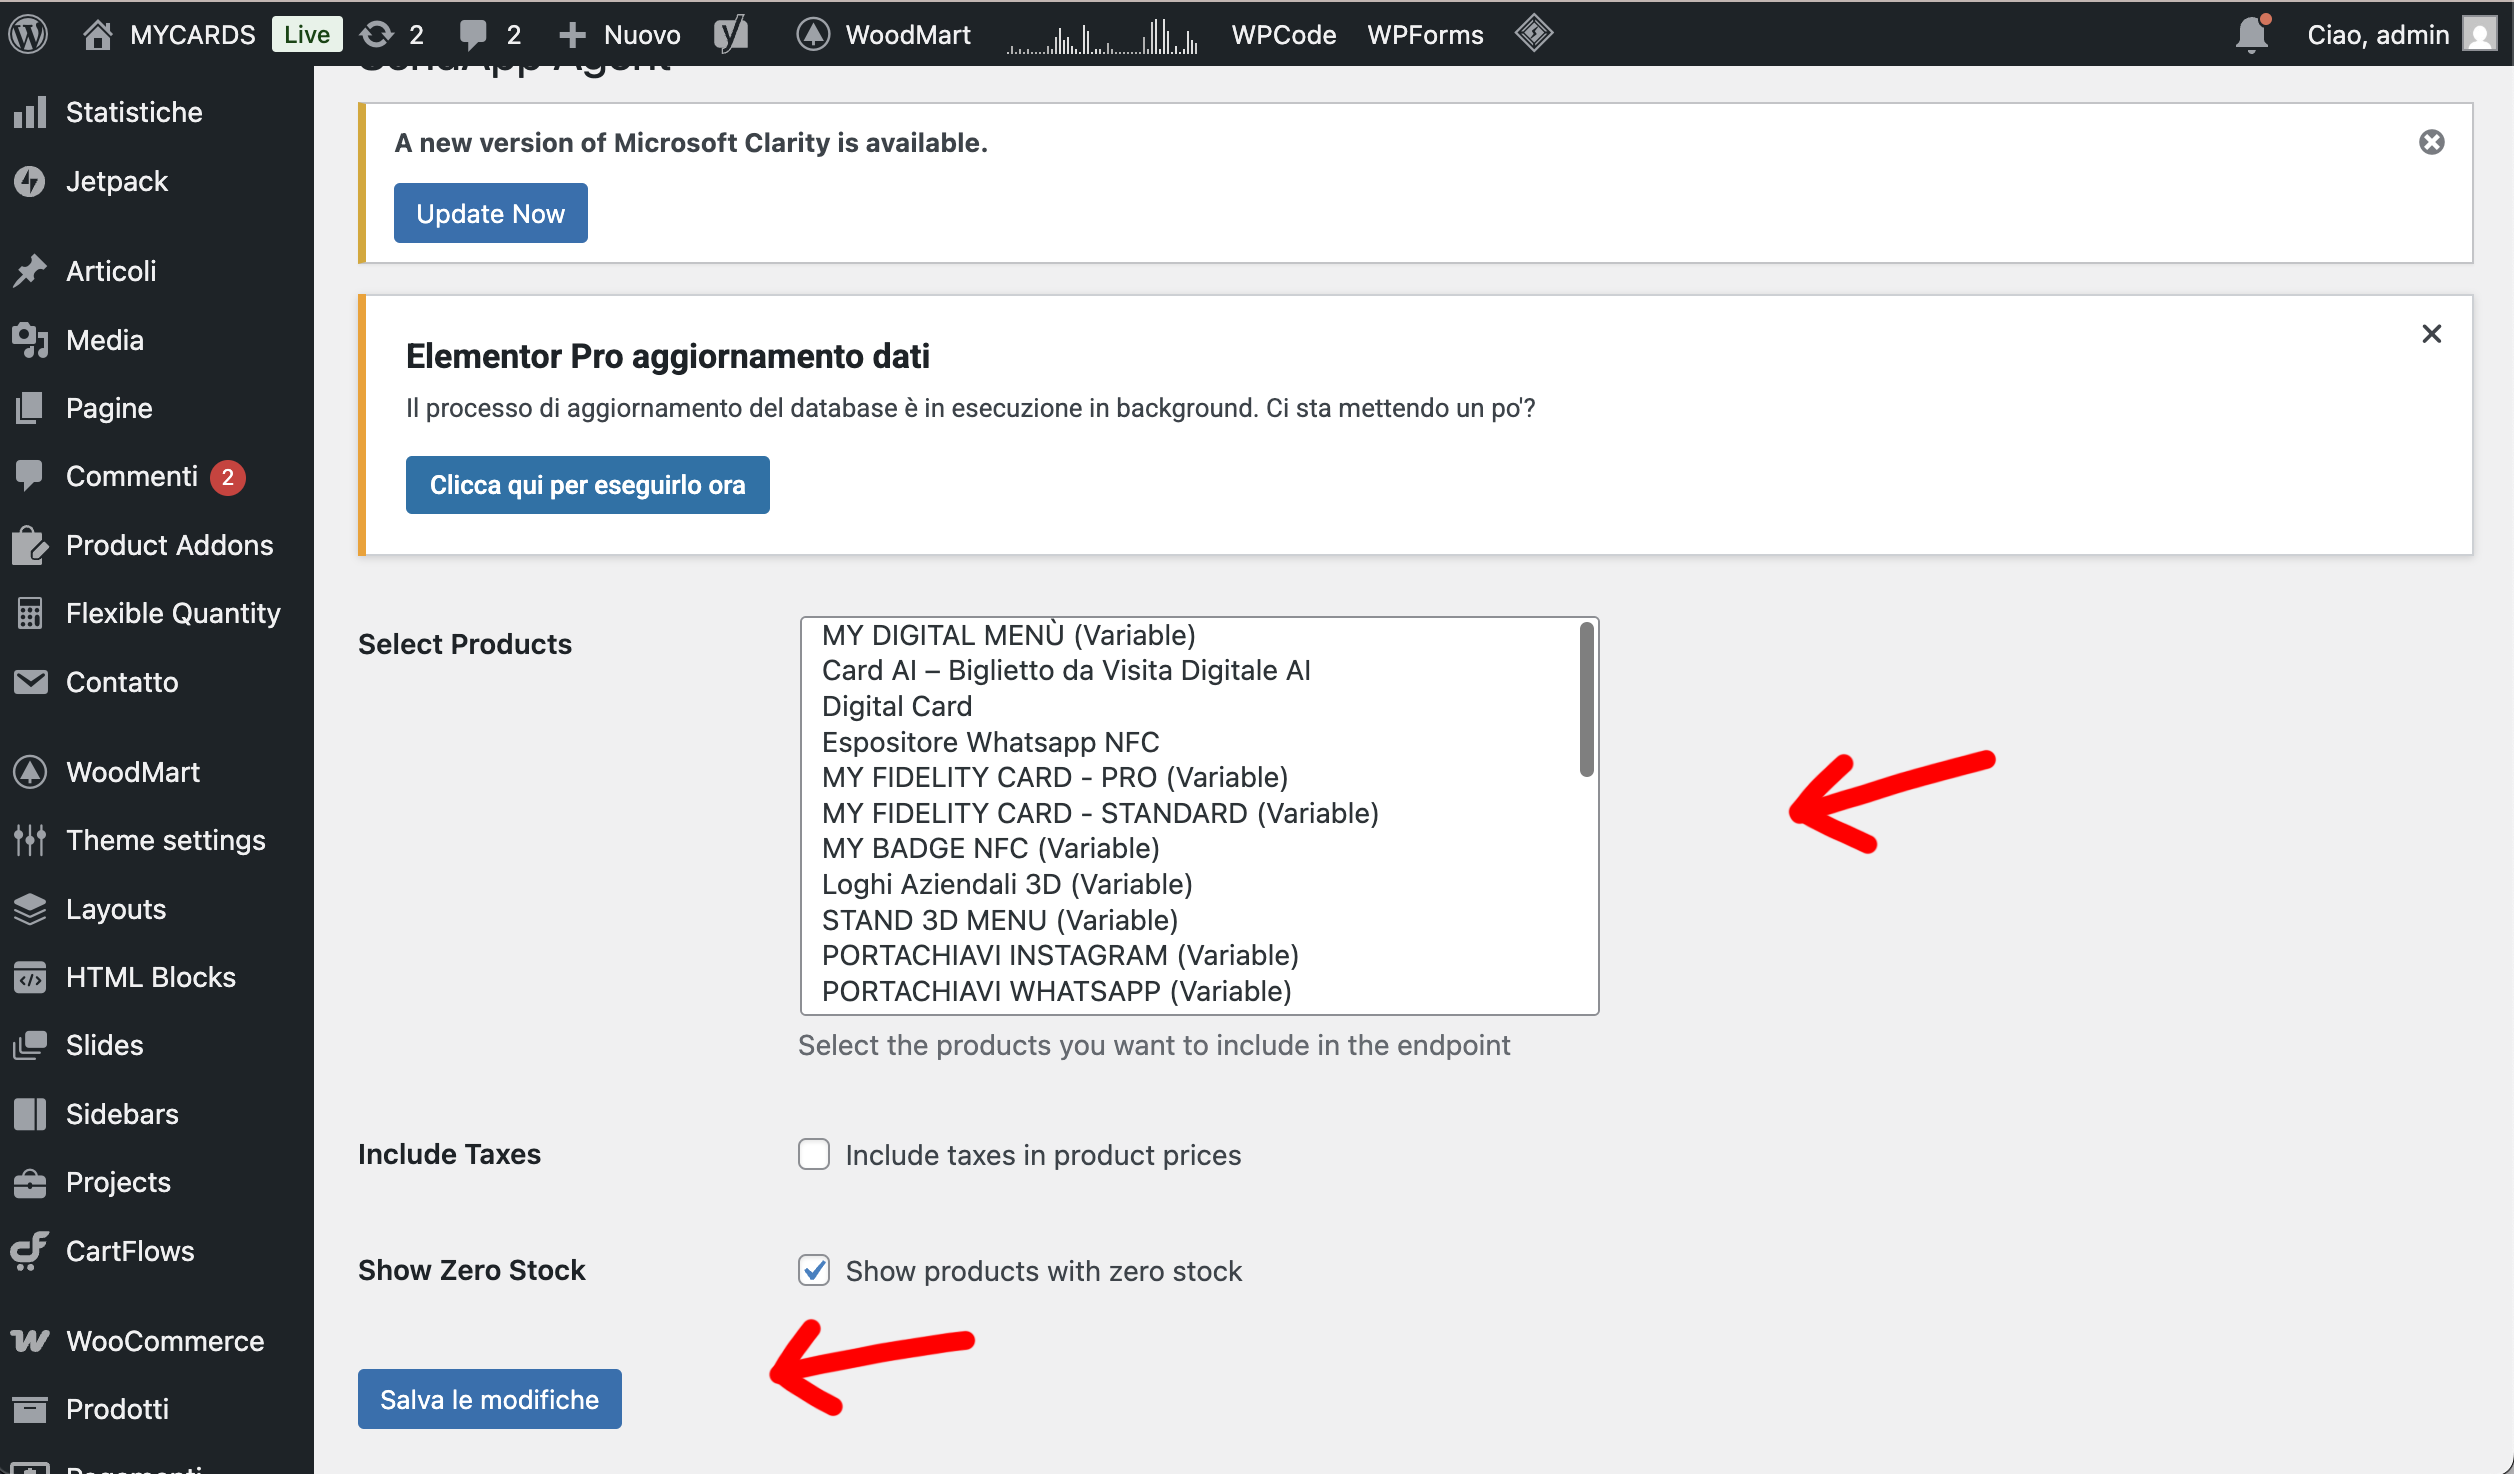
Open the section SendApp Agent from the WordPress menu. Here you can select the products to include in the endpoint, decide whether to include the taxes in the price and whether to also show products with zero stock. Click Save changes. The plugin automatically generates a public URL endpoint:
https://tuosito.it/wp-json/sendapp/v1/products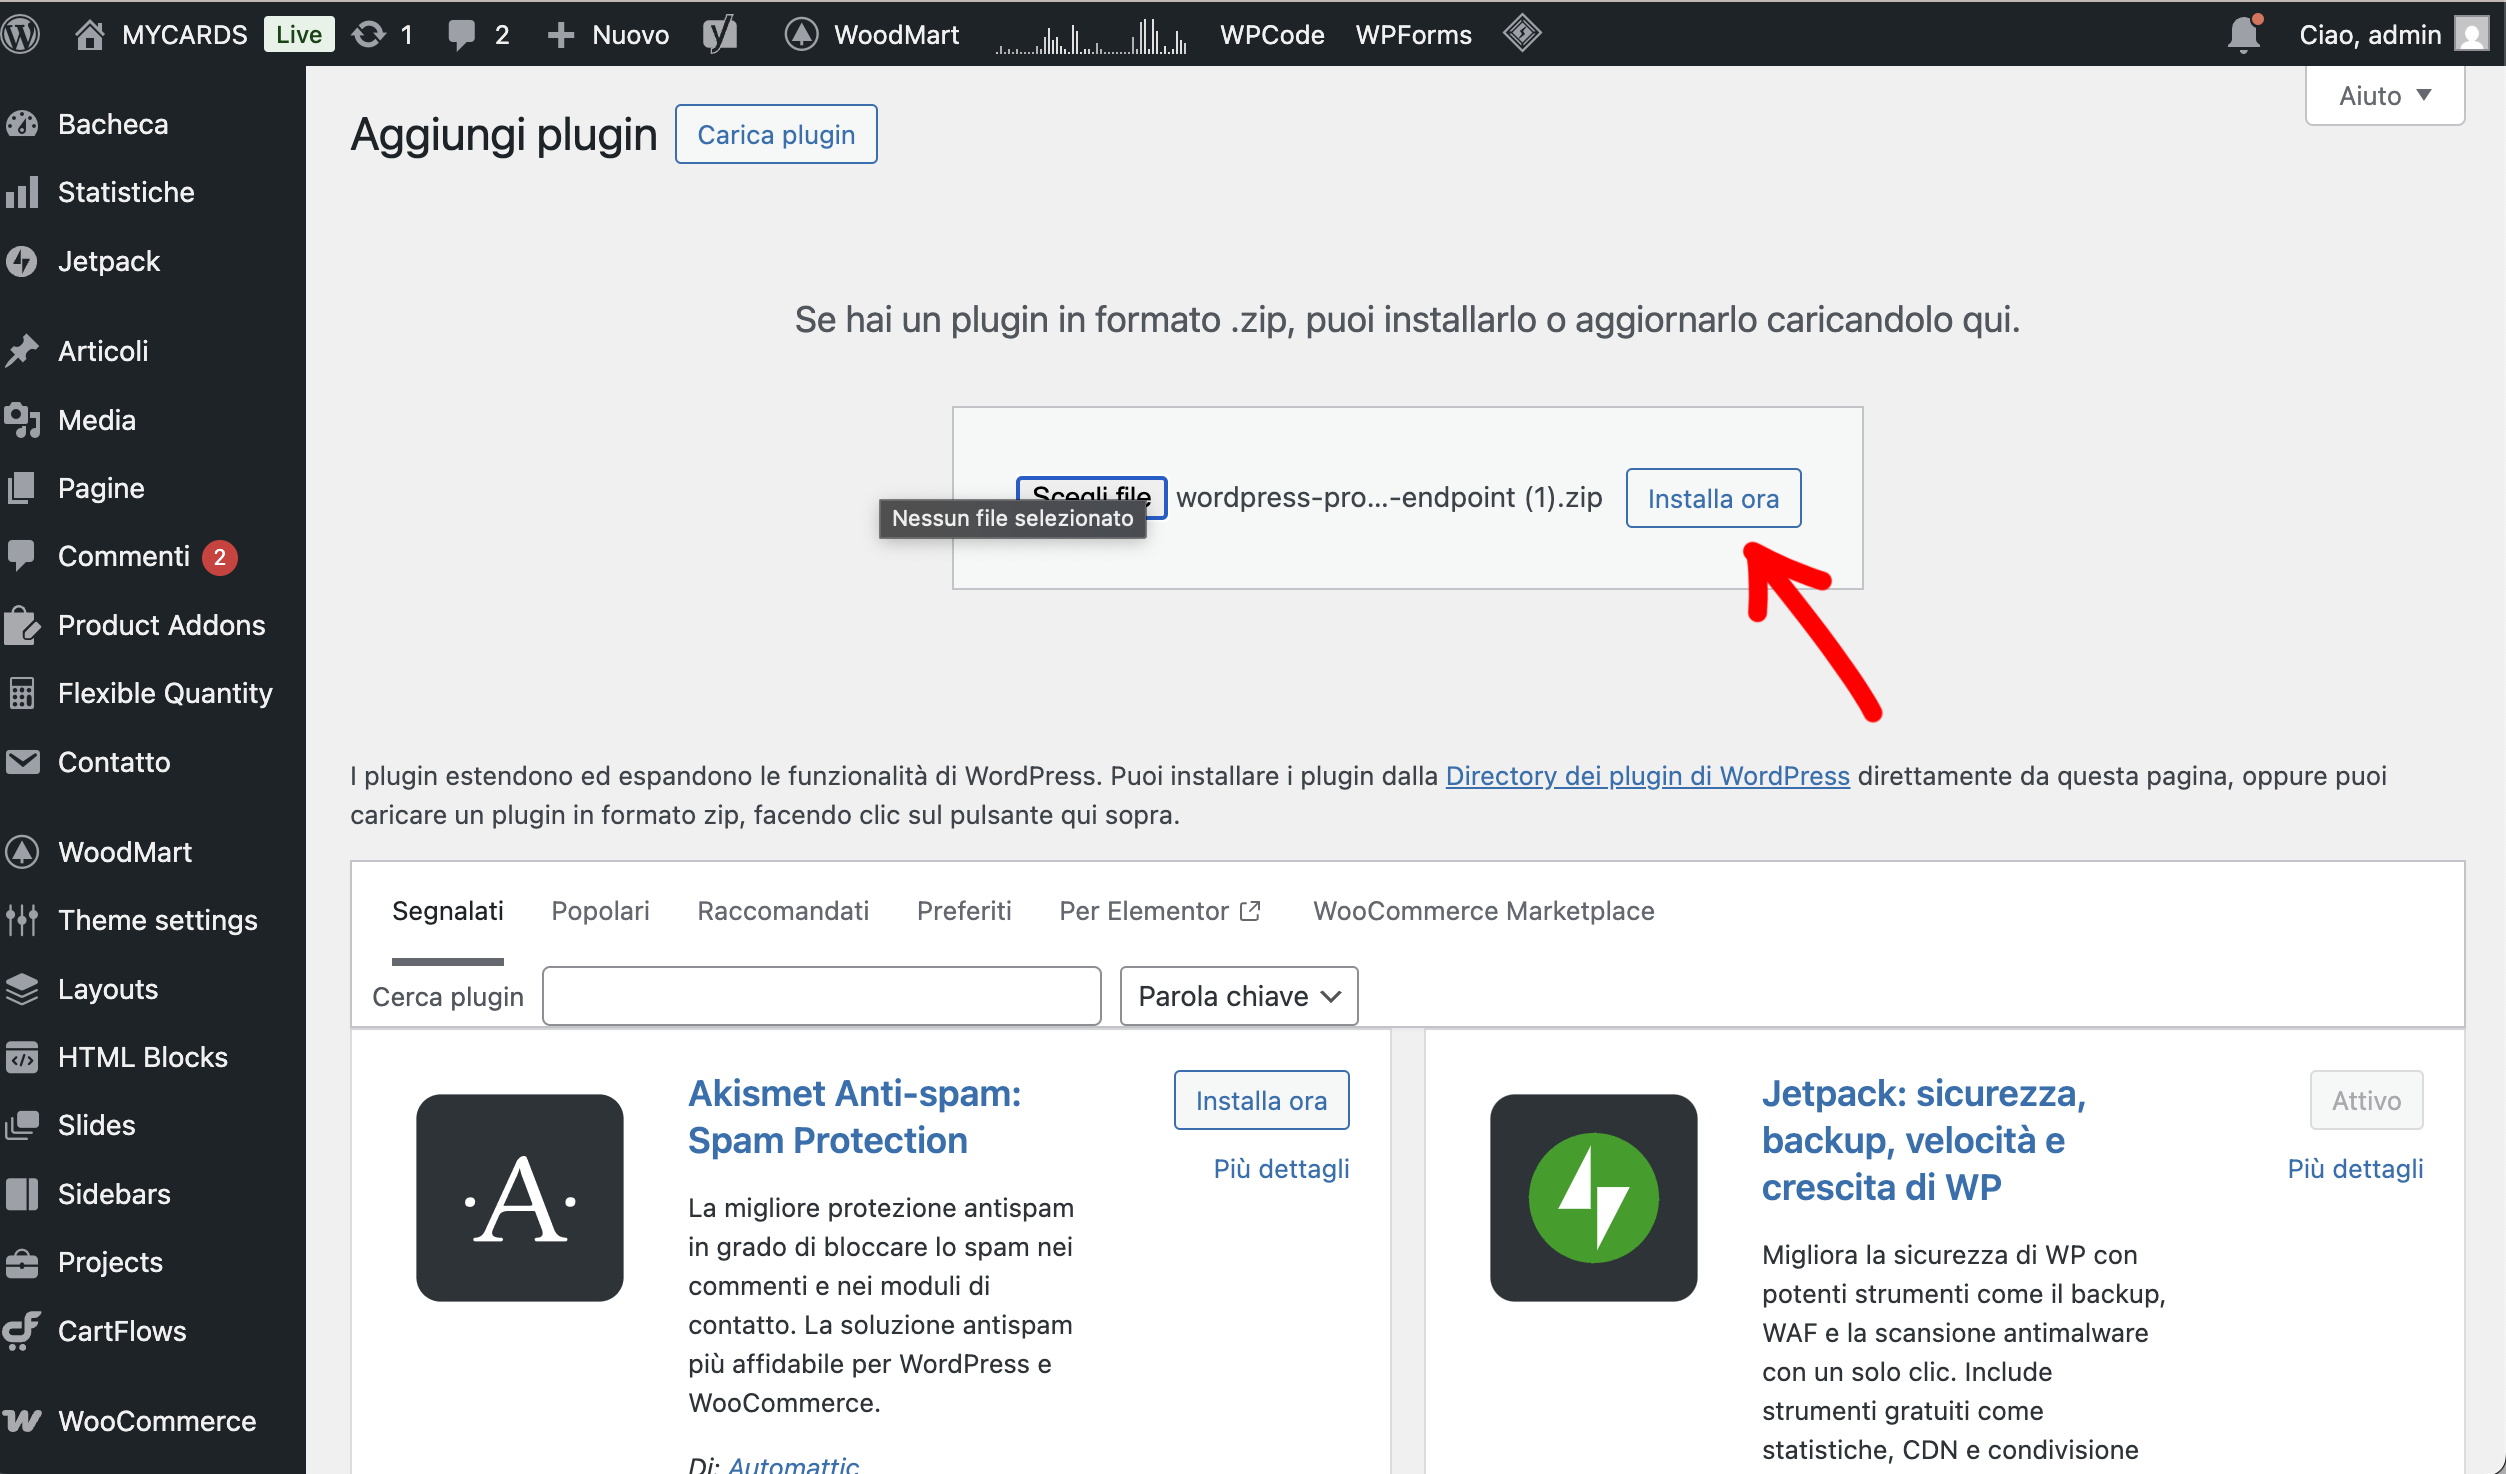
In the same WordPress screen, the field is visible Endpoint URL. Copy the entire URL: you will use it in the SendApp Agent panel to connect the product catalog.
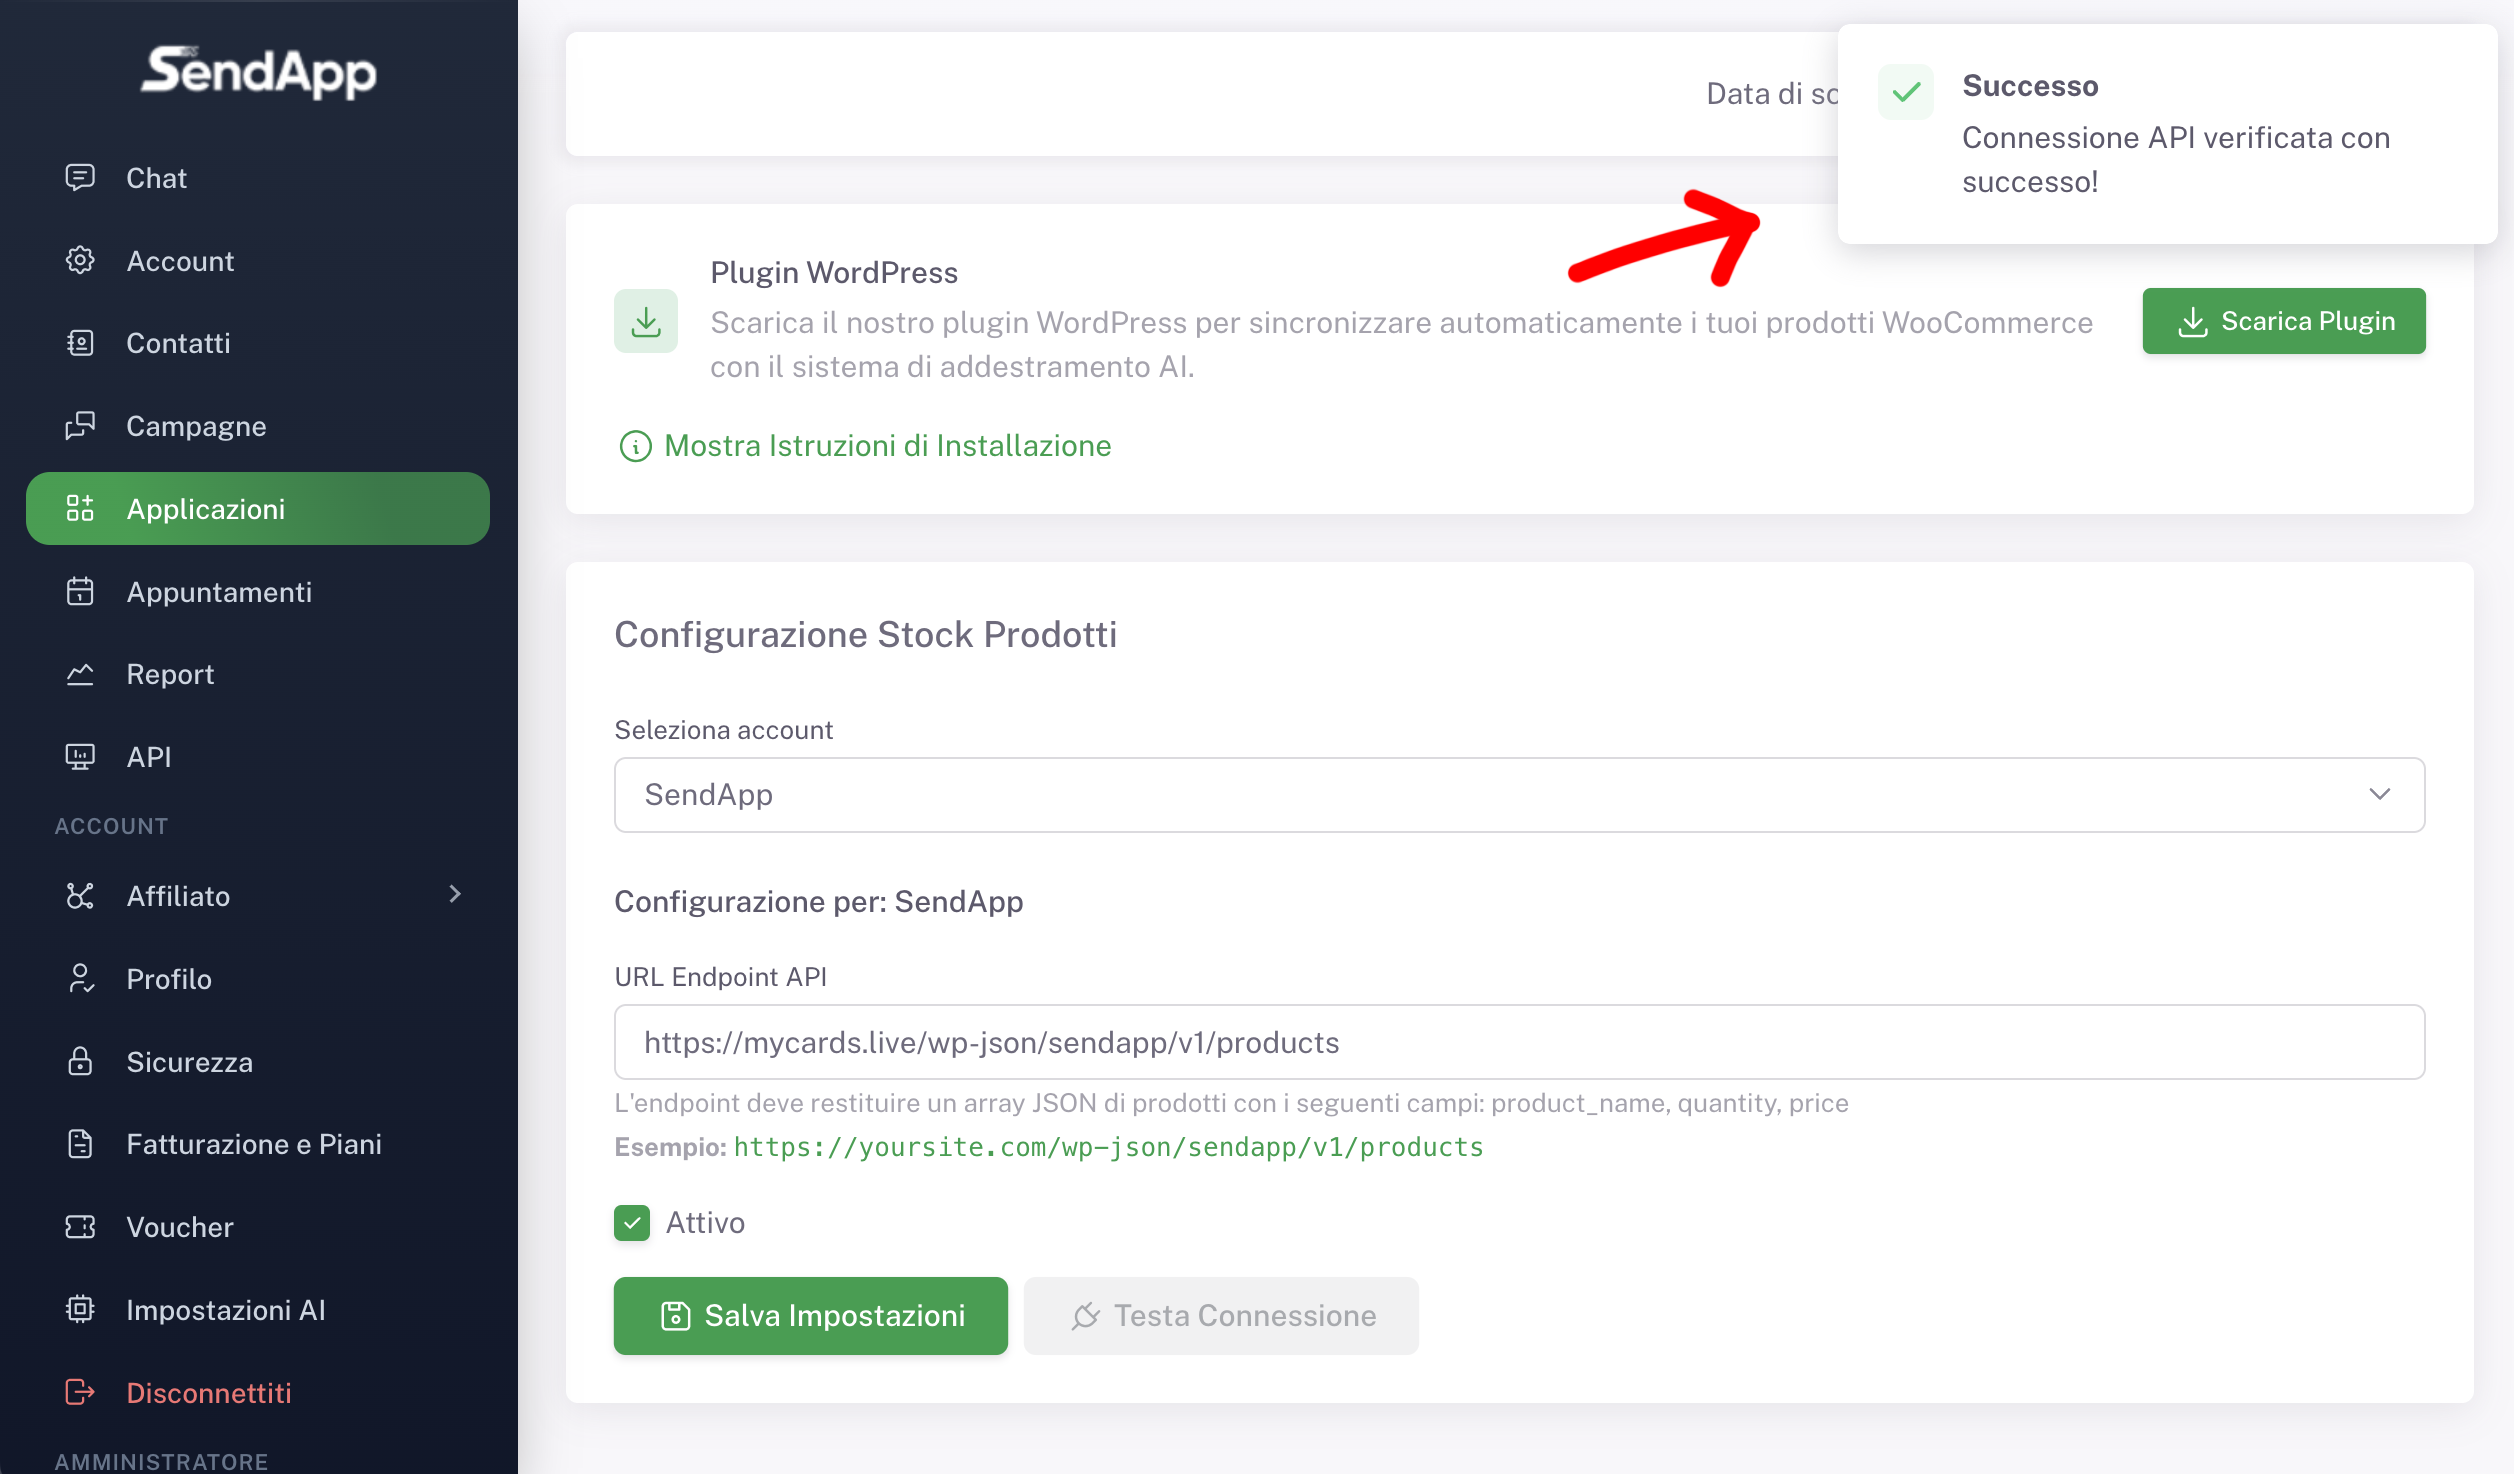
Return to the panel SendApp Agent in the section Product Stock Configuration. Paste the URL into the field API Endpoint URL, verify that the account is correct, activate the configuration and click Save. Use the button Head Connection to verify that the endpoint is responding correctly.
Setup complete! SendApp Agent queries the endpoint in real time. The chatbot uses up-to-date WooCommerce data, and users receive automatic responses regarding pricing and availability. No manual updates: every stock or price change on WooCommerce is automatically reflected in the AI responses.
ALL CONFIGURED
Customers ask for availability and prices on WhatsApp, AI responds with real-time data from your store.