Guide/SendApp Agent/Contacts & CRM
Importing contacts from CSV
If you already have an address book in Excel or another tool, there’s no need to re-enter contacts by hand: the CSV Bulk upload imports them all at once. The importer is robust and handles even messy files, but a few precautions save you surprises.
Updated on June 16, 2026 · 5 min read
Before you start
- A CSV file with your contacts
- A SendApp Agent account with access to Contacts
- Consent from your contacts to be messaged on WhatsApp
Prepare the CSV file
A CSV is simply a spreadsheet saved as text, and contacts are always imported from a CSV file. You have two options: export the contacts from an external tool (then save as CSV), or build the address book from scratch in Excel or Google Sheets.
If you start from scratch, use these four columns. The only required one is name; the others are optional:
- name (required)
- The contact’s name. It’s the only column that must always be there.
- phone
- The number in international format, with the prefix and the + sign (e.g. +393331234567). Optional as a column, but needed to message the contact on WhatsApp.
- The contact’s email address. Optional.
- tags
- One or more labels separated by commas (e.g. customer, milan) to segment contacts. Optional.
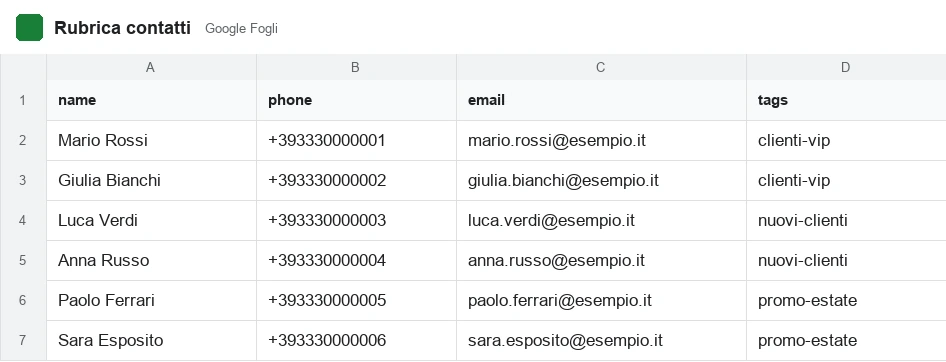
The safest way: in the import window click “Template” to download the model that already has the right columns, fill it with your contacts and save it. Always save the file in UTF-8 (“Save as → CSV UTF-8”), so accents and emoji don’t turn into strange characters. The importer recognizes different separators anyway (comma or semicolon).
Only import contacts who gave you consent to be messaged on WhatsApp (opt-in). It’s a requirement of Meta’s rules and of the GDPR: buying or uploading non-consenting lists risks getting your number blocked. When in doubt, import those who already wrote to you or left their number willingly.
Run the import (Bulk upload)
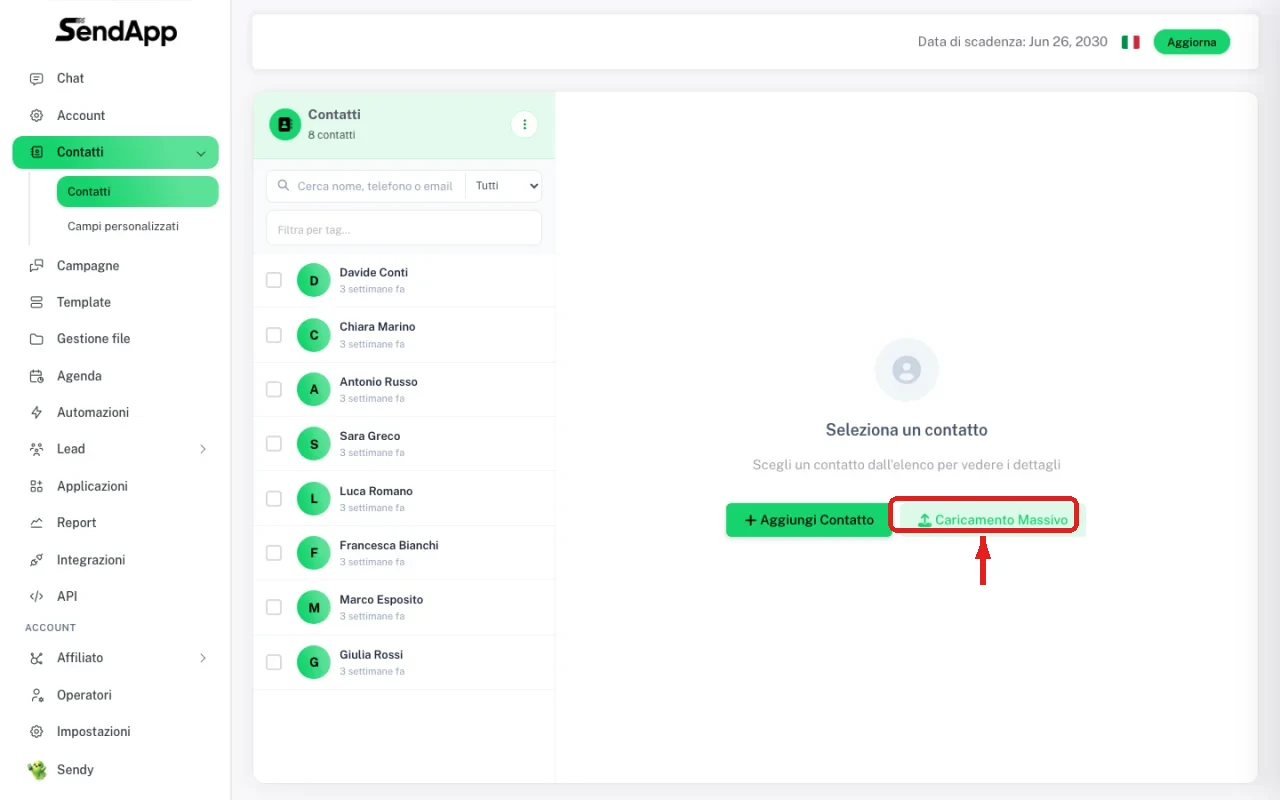
Open the Contacts section from the left menu: you’ll find two buttons, “Add Contact” to add one at a time and “Bulk upload” to import a whole CSV. Here’s the full flow, with the real screens (shown in Italian, but the steps are identical).
- 1
Open Contacts and click “Bulk upload”
In the Contacts section press the “Bulk upload” button: that’s the CSV import.
- 2
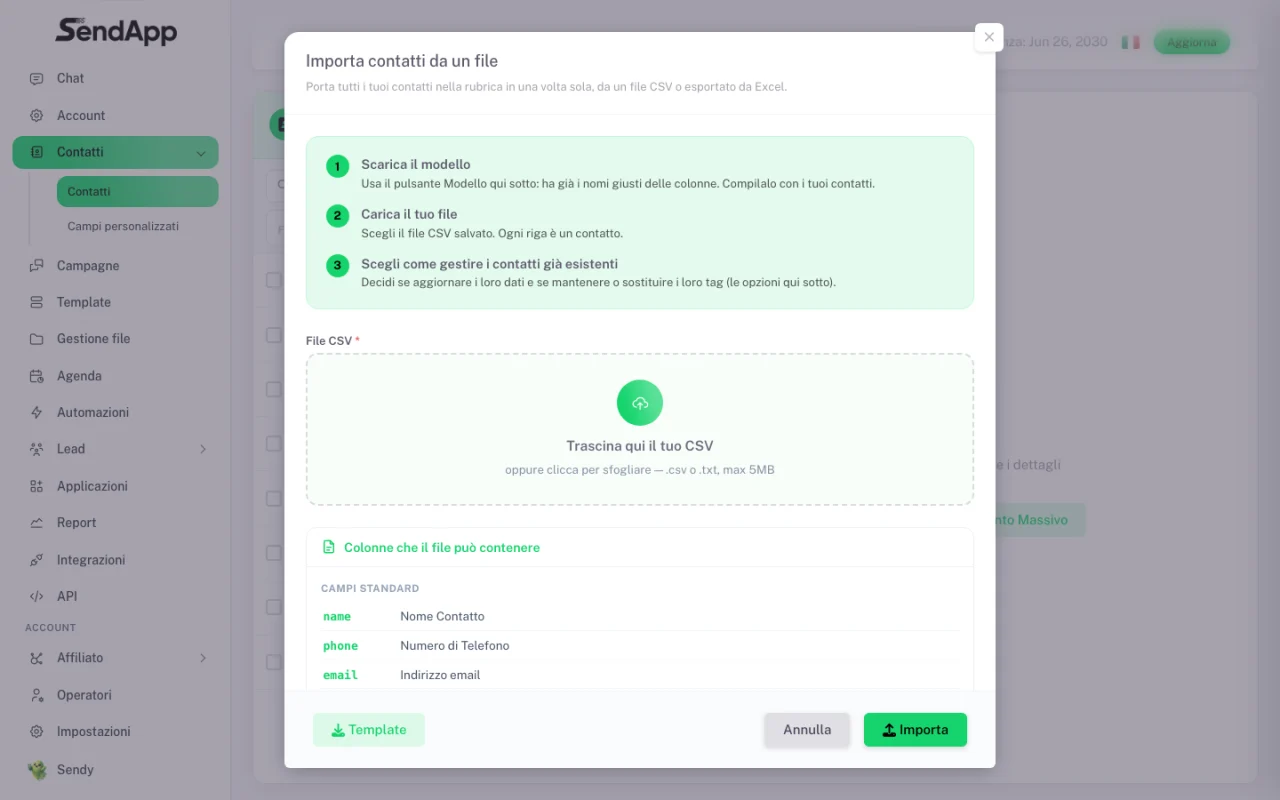
Download the Template (or prepare your file)
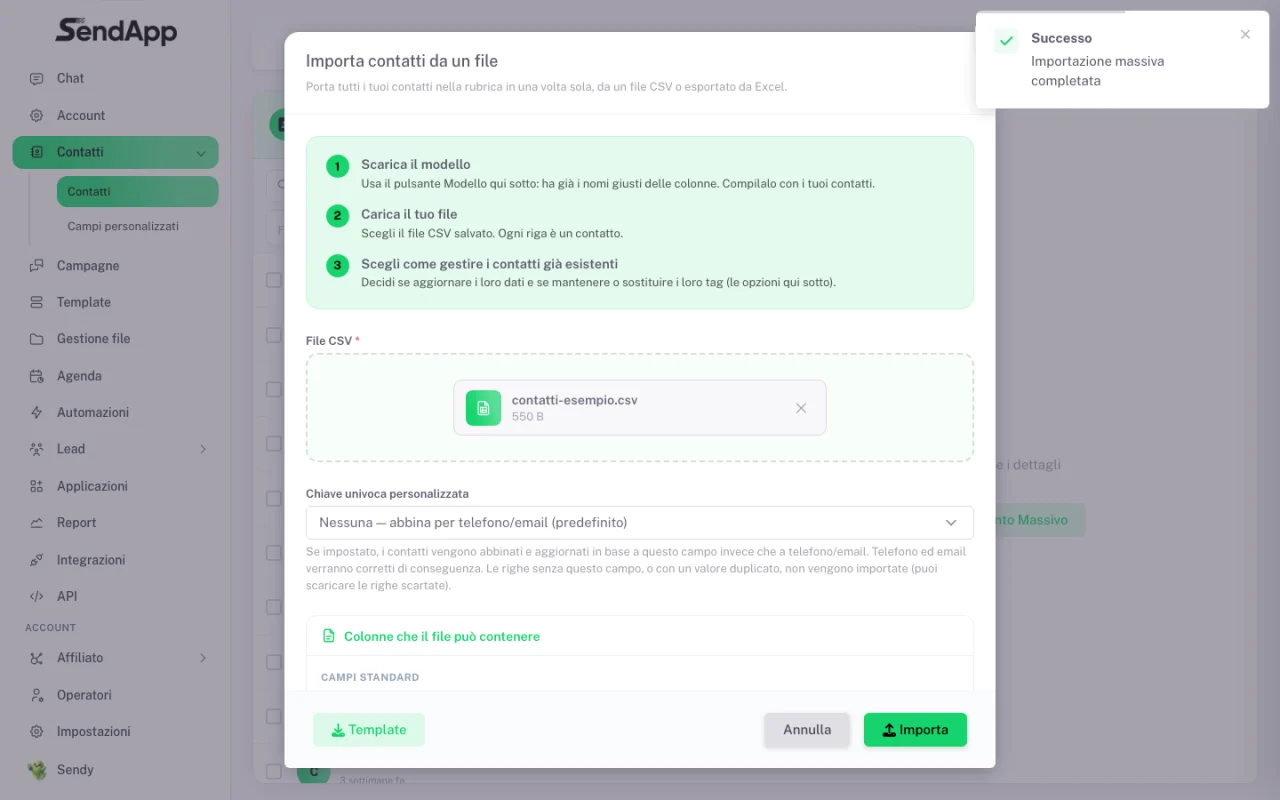
The “Import contacts from a file” window opens, with a 3-step mini-guide. Click “Template” at the bottom to download the model that already has the right columns, fill it and save it. The upload accepts .csv or .txt files up to 5MB.
- 3
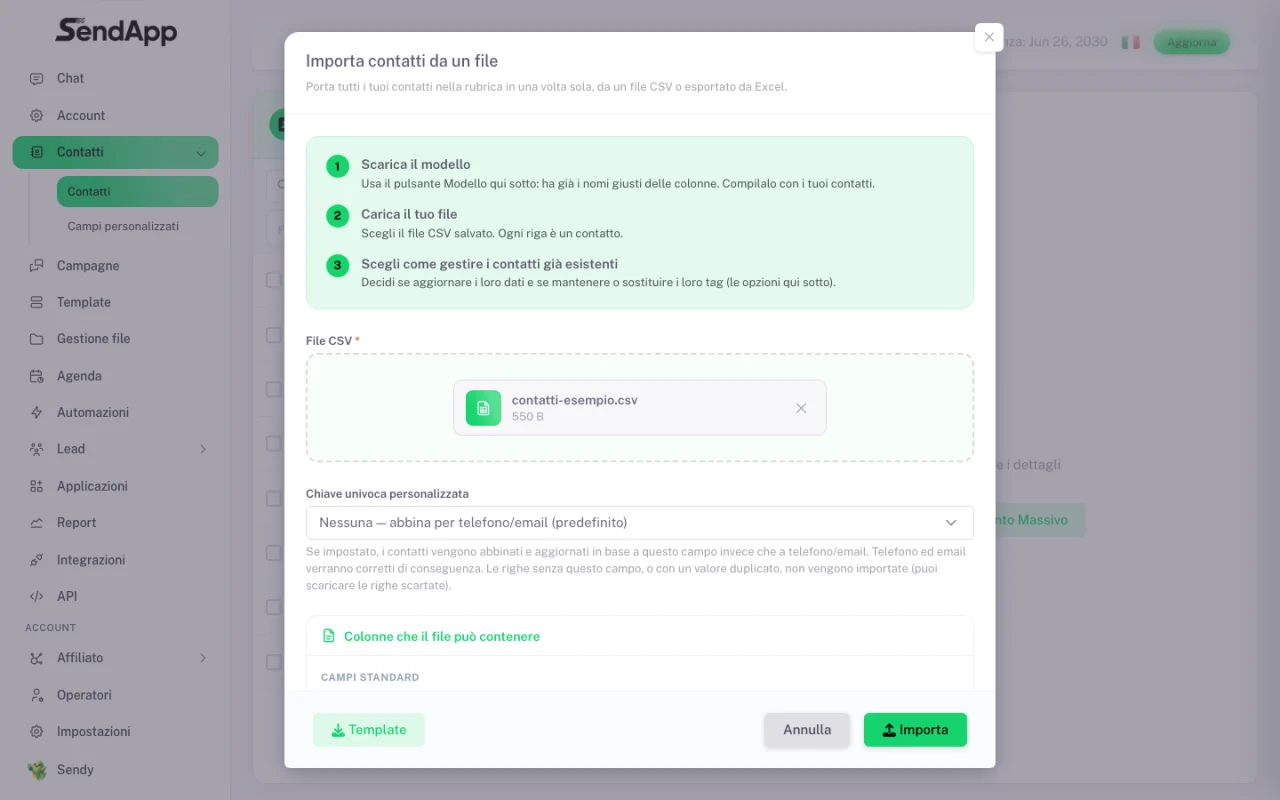
Upload the file and set the options
Drag the file into the window. Optionally set a “Custom unique key” to match contacts by one of your fields instead of phone/email (rows without that value, or duplicates, are skipped — you can download them). Also choose how to handle existing contacts: update their data and keep or replace their tags.
- 4
Click “Import”
In a few seconds you get the “Bulk import completed” confirmation.
- 5
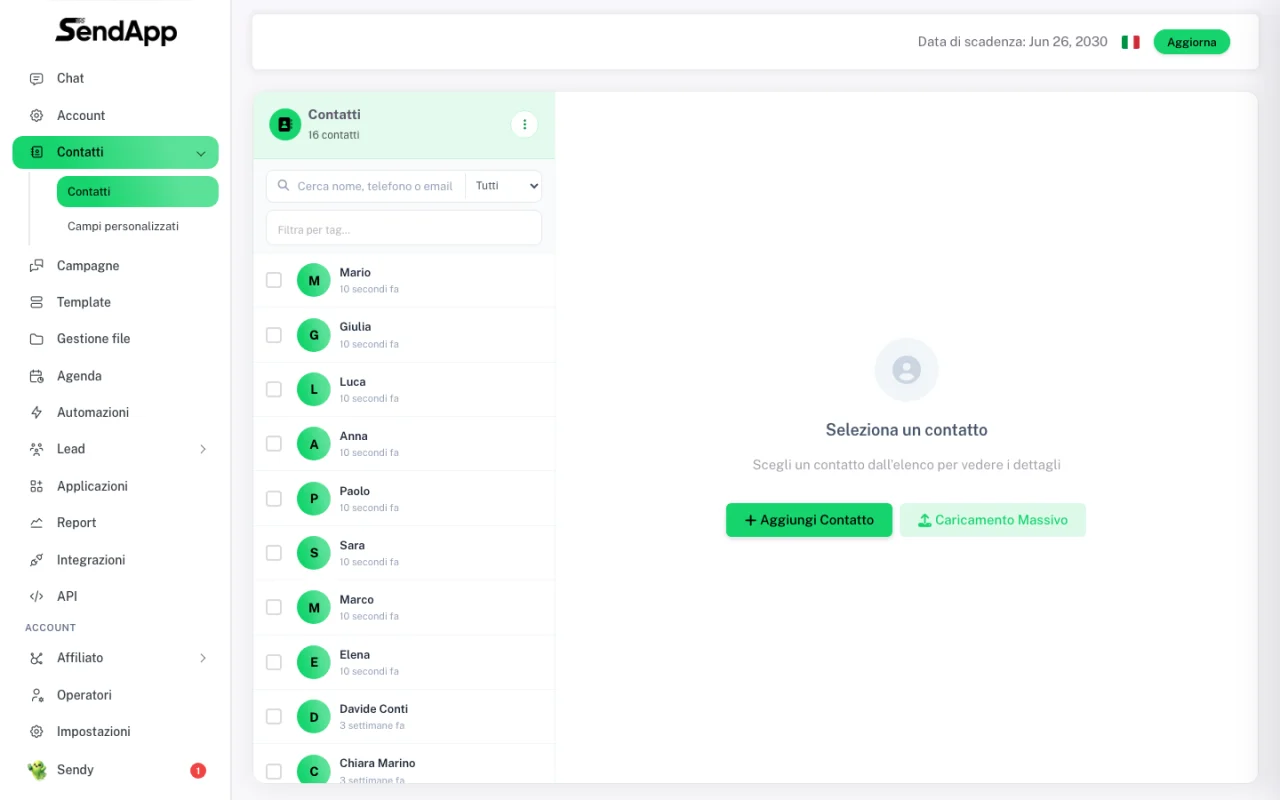
Contacts in the address book
The new contacts are in the address book, ready for campaigns. Duplicates on the same number are merged, not recreated.
Importing with Sendy (the AI assistant)
Instead of doing it all by hand, you can ask Sendy, the AI assistant at the top right: “Import my contacts from a CSV”. Sendy is smart and imports correctly even if the columns are in a different order or swapped: it’s very handy when you export contacts from an external tool that uses its own headers. One limit: fields other than name, phone, email and tags are only picked up if you’ve already set up the matching Custom fields (see below).
Custom fields (for the extra data)
Want to import columns beyond name, phone, email and tags (e.g. City, Company, Birthday)? Create the matching fields FIRST under Contacts → Custom fields: if the field doesn’t exist, that column isn’t imported. Once created, you use them to personalize messages — e.g. a “City” column lets you write “Offer valid only in {{city}}” with the right city for each contact.
After the import: tags, segments and campaigns
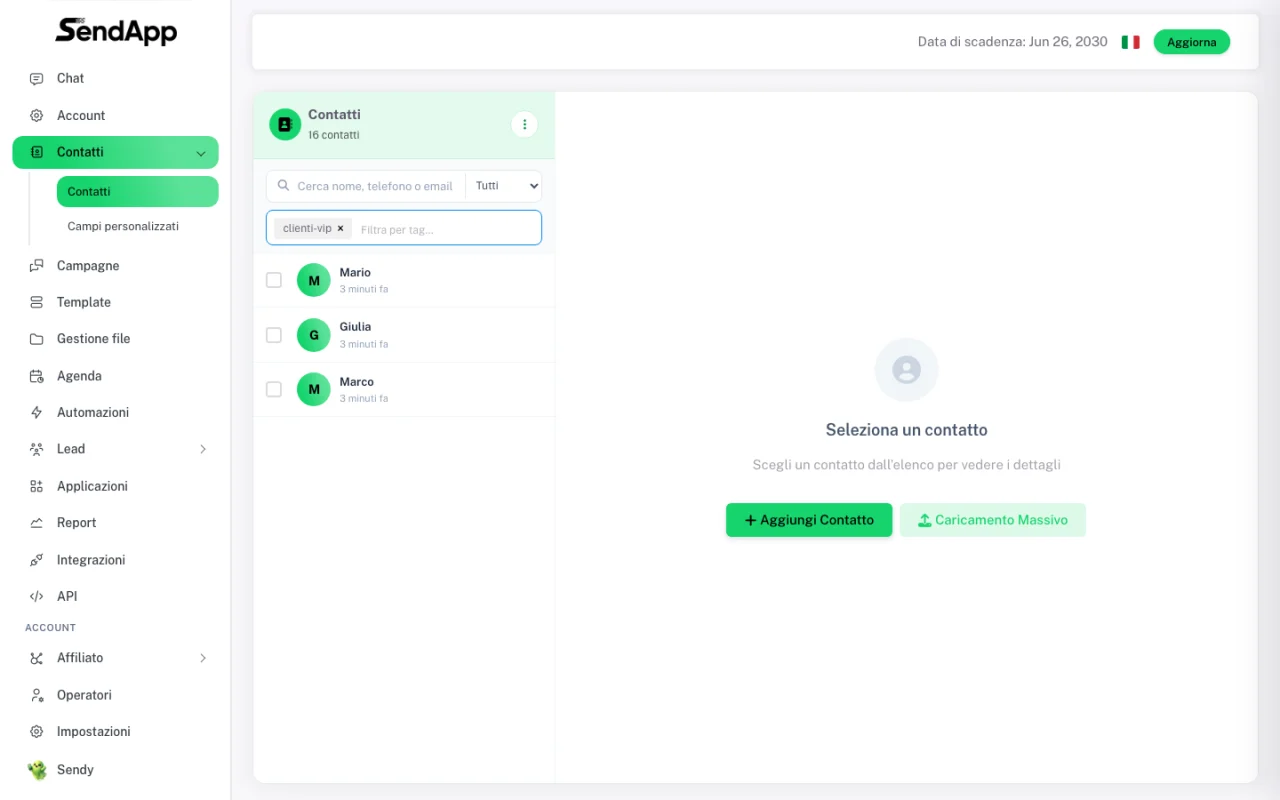
The file’s labels (the tags column) become tags in the address book. Filter contacts by tag right in the Contacts section to check everything went well and to send the right promo to the right group. Then you can create a campaign targeting that tag: see the Create a campaign guide. To organize tags and segments there’s also the Contacts and tags guide.
Common mistakes and fixes
- Numbers without an international prefix
- The number must be in international format, with the prefix and the + sign (e.g. +393331234567). Without it, it may not be valid for sending on WhatsApp.
- Strange characters in names (à, è, é…)
- It’s a file-encoding issue: re-save the CSV as UTF-8 from your tool or Excel (“Save as → CSV UTF-8”).
- An extra column isn’t imported
- Columns other than name, phone, email and tags are imported only if you first created the matching Custom field under Contacts → Custom fields.
- Duplicate rows
- Contacts with the same number are merged, not recreated. If you still find duplicates in the address book, use the “Clean Duplicates” button at the top of the Contacts page.
Ready to put it into practice?
Open SendApp and follow the steps in this guide. Need help? Support is one message away.