Guide/SendApp Agent/Campaigns
Creating a WhatsApp campaign
Campaigns let you send the same message to many people at once — promotions, news, announcements. In SendApp Agent you create a campaign in a few steps, carefully choose the segment, and read the results: delivered, read, replies.
Updated on September 24, 2026 · 8 min read
Before you start
- WhatsApp connected through Meta’s official API (or the SMS or Email channel)
- Contacts in the address book with tags
- For WhatsApp campaigns: a Meta-approved template
WhatsApp campaigns go out through Meta’s official API with approved templates: verified number, delivered and read receipts, no dependency on a phone session. Only send to contacts who have consented to receive your messages.
Create the campaign step by step
- 1
Open Campaigns and click “New Campaign”
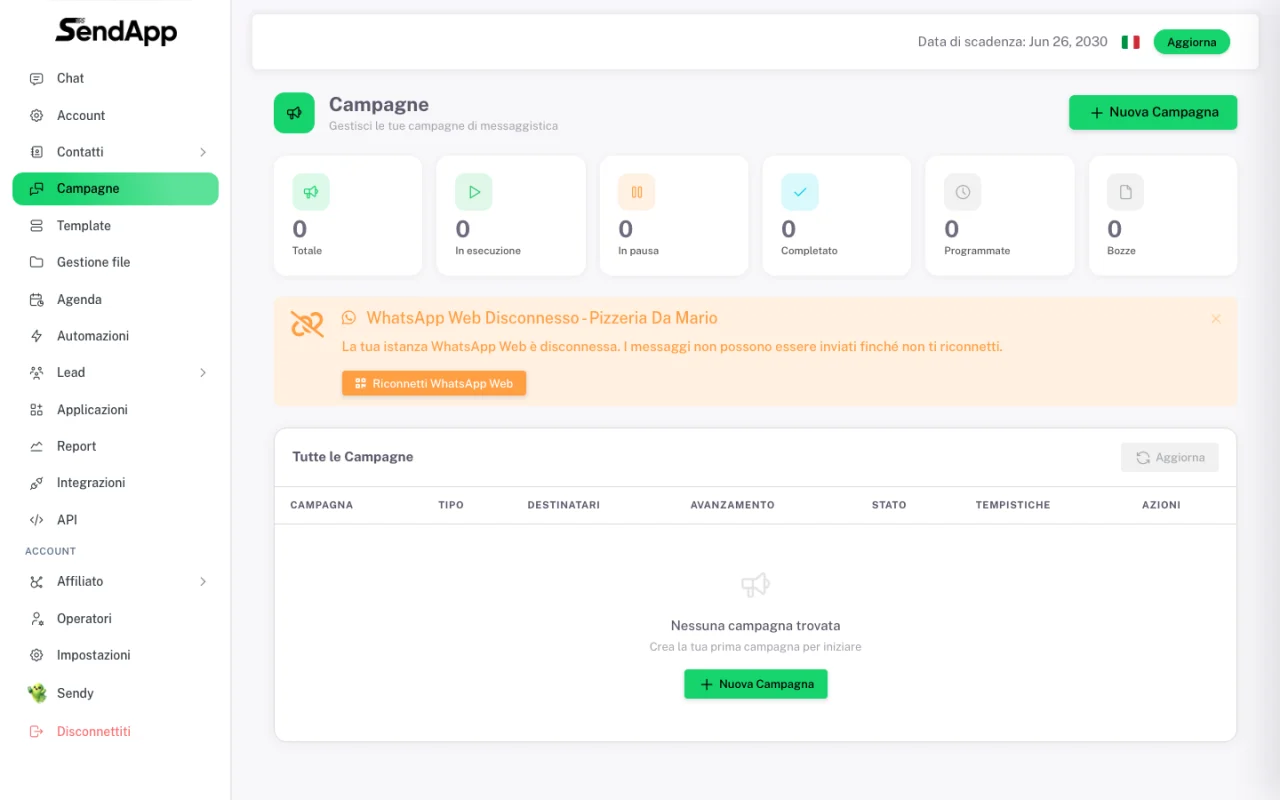
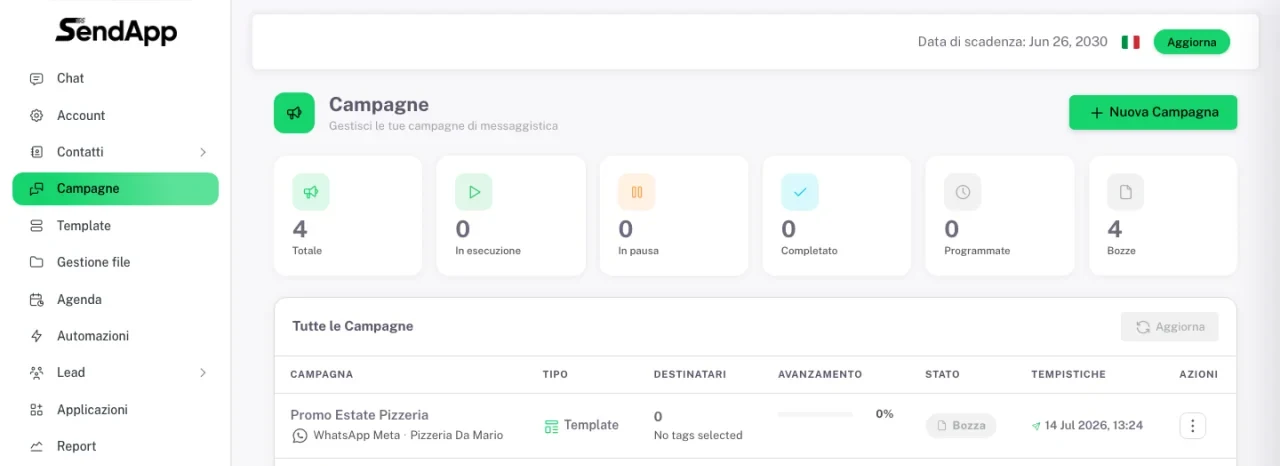
From the menu go to Campaigns: the dashboard shows the status of them all (running, scheduled, completed, drafts). Click “New Campaign”.
- 2
Give it a name and choose the channel
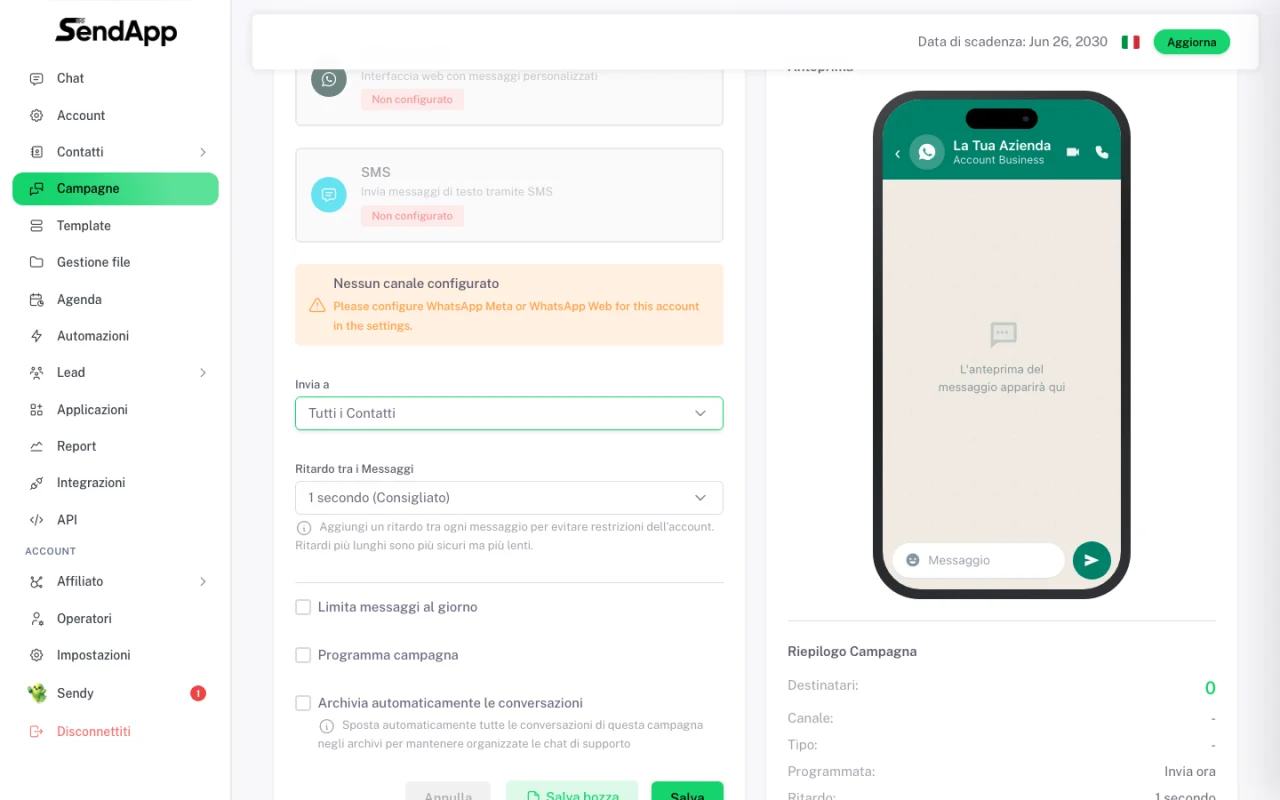
Name the campaign, choose the Account and the channel: WhatsApp (Meta’s official API, with approved templates), SMS or Email. On the right the phone preview updates in real time.
- 3
Choose the recipients
Decide who to send to: all contacts, or only some tags.
- 4
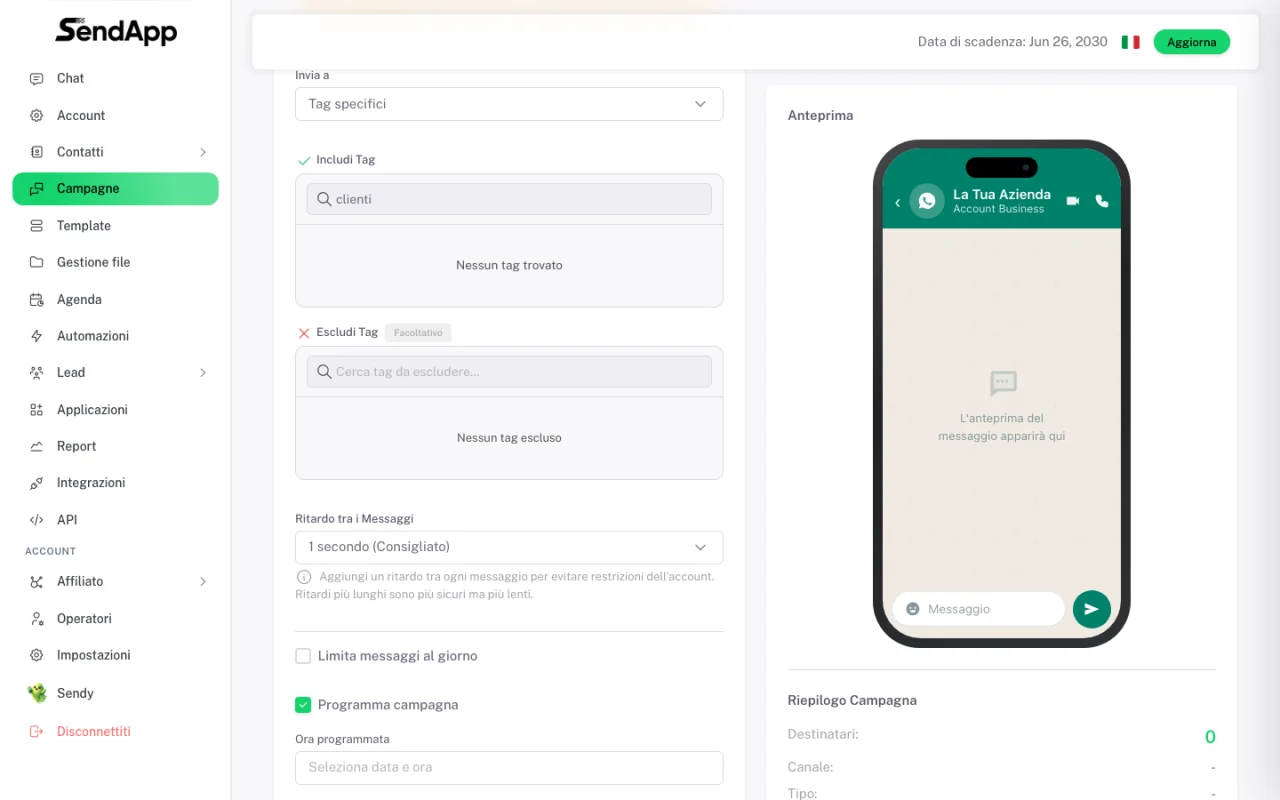
Include (and exclude) the right tags
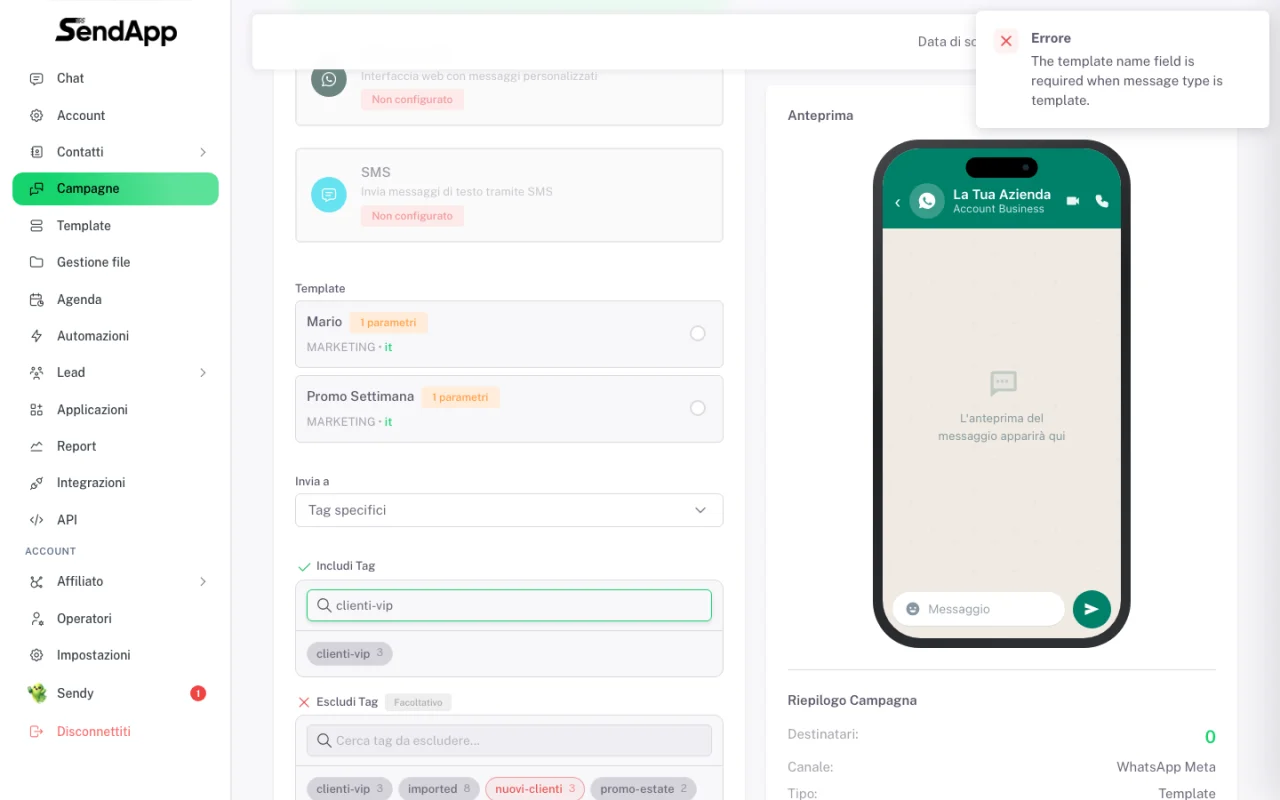
With “Specific tags” you include the right groups (e.g. vip-customers) and, if you want, exclude who shouldn’t get the message (e.g. those who already bought).
- 5
Schedule the send (optional)
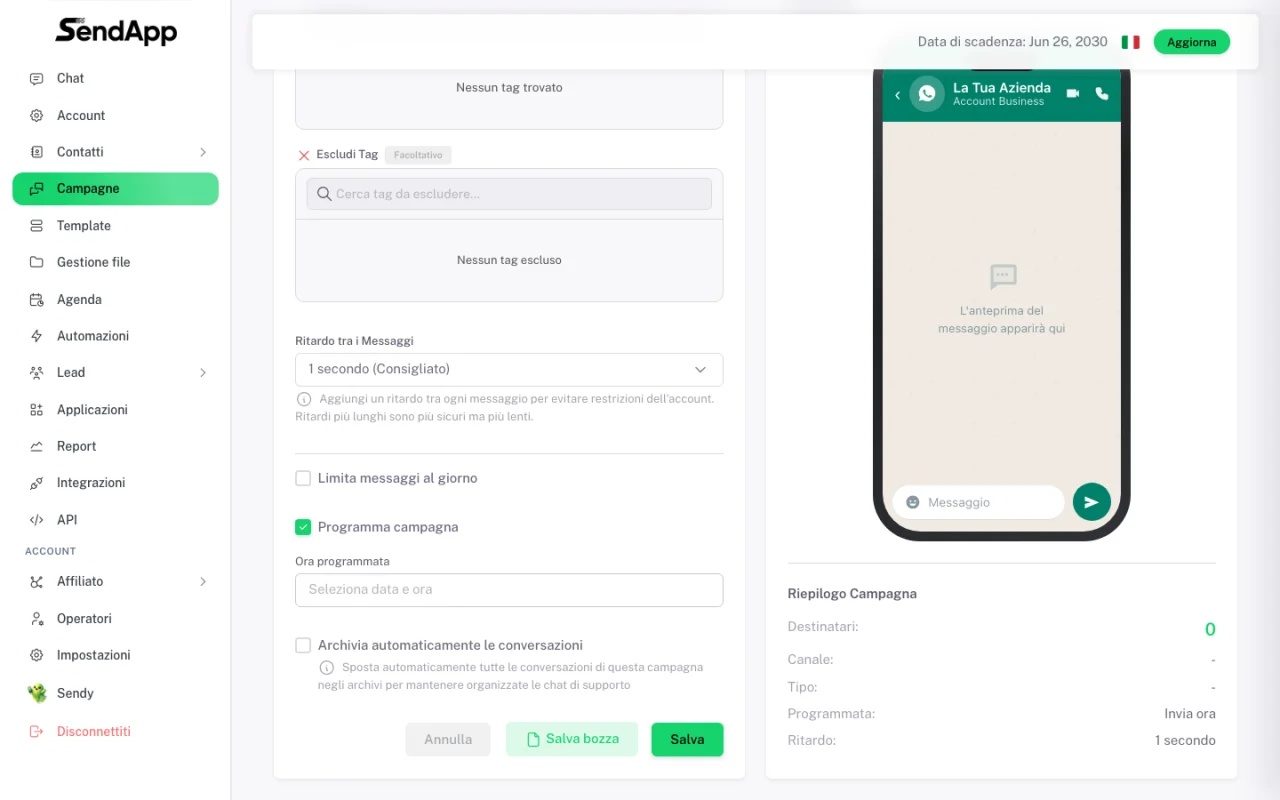
Tick “Schedule campaign” to pick date and time — perfect for weekend promos prepared on Thursday.
- 6
Set the delay and the daily limit
The delay between messages (1 to 30 seconds) spreads the send over time instead of sending everything at the same instant. Here you also find the daily message limit, especially useful on a new number.
- 7
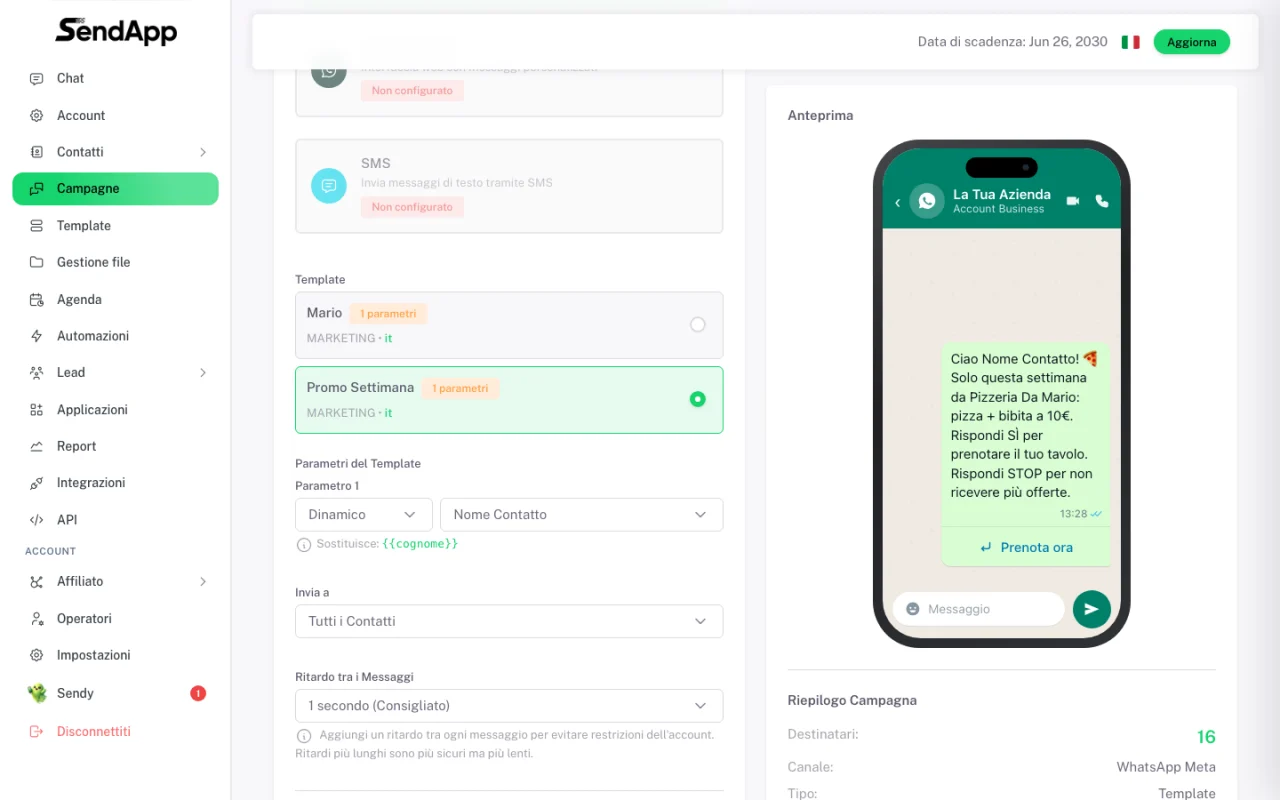
Choose the template and compose the message
With WhatsApp Meta you pick the Meta-approved template: the message appears in the phone preview with buttons and variables. Below, each parameter maps to a contact field (e.g. Name).
- 8
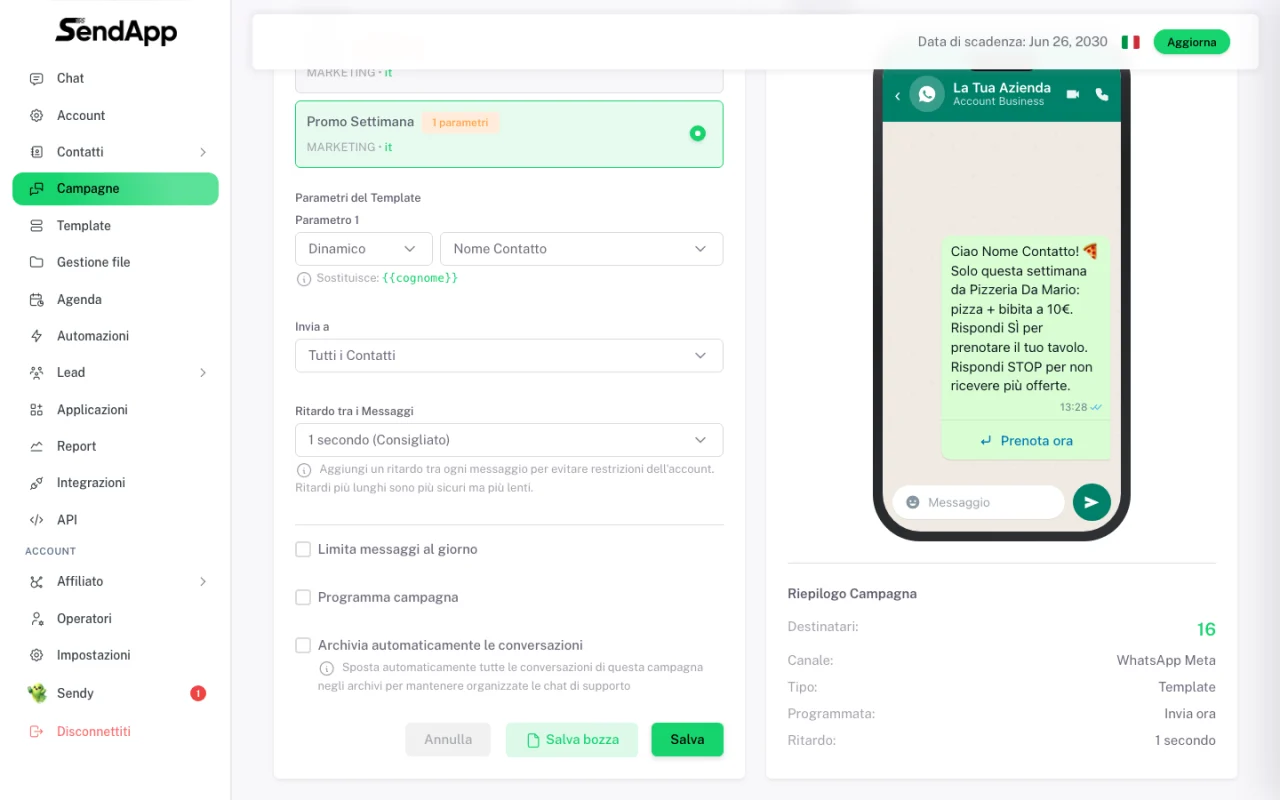
Check the summary and save
Review the summary on the right (recipients, channel, type, scheduling) and click “Save” to start — or “Save draft” to finish later.
- 9
The campaign is in the dashboard
The campaign appears in the list with its status (draft, scheduled, running…): from here you manage it and follow its results.
Golden tip: run your first campaign on a small tag (10-20 trusted contacts) to test the message and template. If it works, you widen the audience safely.
Why WhatsApp campaigns use templates
A campaign messages your contacts first, and on Meta’s official API that is only possible with approved templates (marketing, utility or authentication): that’s why, when you choose WhatsApp at step 2, you select a template at step 7. In chats, instead, you reply freely within 24 hours of the customer’s last message. You create templates in SendApp and submit them to Meta for approval. If your number isn’t connected yet, start here: how to connect WhatsApp with the official API. For contacts you’d rather reach outside WhatsApp, the campaign can go out via SMS or Email.
Delay, limits and number quality
The delay between one message and the next (step 6) spreads the sends over time, and the daily limit keeps volumes under control. With the official API, sending limits are set by Meta: they’re low until the business is verified and grow with verification and with the number’s quality, which drops if many recipients block or report the messages. On new numbers SendApp staggers the sends automatically and pauses the campaign if the number’s quality worsens.
- On a new number start with low volumes and grow gradually day by day.
- Respect the daily message limit set in the campaign.
- Send at sensible times for your audience (avoid night and intrusive hours).
Tips for a message that converts
- Personalize
- Use the template variables (e.g. {{name}}) so the message feels written on purpose: tags and fields come from your address book (see Importing contacts).
- One clear CTA
- A single call to action, easy to follow (e.g. “Reply YES” or a “Book now” button). More choices = fewer replies.
- Short and direct
- Two or three lines max: no walls of text. The message is built with an approved template (see Creating a template).
- Segment
- Send only to the relevant segment: relevant messages = fewer opt-outs, fewer reports, a safer number.
Reading the reports
Once the campaign is live you see the numbers in real time: sent, delivered, read, replies and failed. From here you understand what worked and you can resend only to the failed ones.
- Sent / Delivered
- How many messages went out and how many arrived. A big gap signals invalid numbers or delivery problems.
- Read
- How many opened the message. It’s the main interest indicator.
- Replies
- Who replied: the warmest contacts to focus your follow-up on.
- Failed
- Messages not delivered. You can resend only to these without messaging everyone again.
Common mistakes
- Template stuck on one check
- Often the payment method is missing on the official number: templates aren’t delivered. Add a card in Business Manager.
- Many failures
- Numbers without a prefix or invalid. Clean the address book and re-import with the correct prefixes.
- Low read rate
- Segment too broad or message not relevant. Narrow the target and personalize.
Ready to put it into practice?
Open SendApp and follow the steps in this guide. Need help? Support is one message away.